
![]()
[ Read my product review disclaimer here.]
This is Part 3 of my Synology 1522+ workgroup server review, which was loaned to me for a couple of weeks by the folks at Synology.
This review has the following parts:
A desktop server is used for sharing data within a local network. For absolute speed, nothing beats storage directly connected to your computer. But nothing is better at sharing than a server. The Synology DS-1522+ is an excellent choice for any small workgroup.
Fully Mac & Windows compatible, with vast configuration options, the DS-1522+ server delivers the maximum data transfer speeds your network will support. While speeds depend upon a number of factors discussed in this review, the capability of the server will not be a limitation.
In addition to a solid operating system to run the device, Synology provides a wealth of server-based applications to extend what the server can do. While not part of this review, I regularly use Hyper-Backup, Universal Search (which extends Spotlight into the server), VPN server, File Station and a few others.
Servers, like computers, can sometimes drive you nuts. They are complex devices. But, if you want to know whether I would recommend Synology, the answer is: Yes, absolutely.
Manufacturer: Synology
Product: DS-1522+ server
Website: https://www.synology.com/en-us/products/DS1522+
Warranty: Minimum of 3 years
Price: Varies based upon configuration
A server is a shared storage device. If you are the only person who needs to access it, a locally-attached RAID or SSD will be less expensive, easier to install and far faster than a server.
But, if you need to share files among a team all connected on the same network, or run server-based applications, a local server provides faster performance, greater security and more flexibility than sharing hard drives or accessing the Cloud.
The Cloud is the preferred choice when you need a low initial cost, have no IT help to support a local network and don’t need the security a local server can provide. However, the Cloud will have the slowest performance and the highest cost over time.
Wire speed is defined as the fastest speed data can transfer across a network. This speed limit is determined by network hardware. Actual speeds will be somewhat slower.
Because a server is a shared device, its speed is dependent upon a number of factors, including the number of users accessing the device and the types of files transferred.
If everyone is creating Word, Excel or database documents, network performance is not a big issue because the files are small. But, as file sizes and the number of users increase, server speed becomes critical.
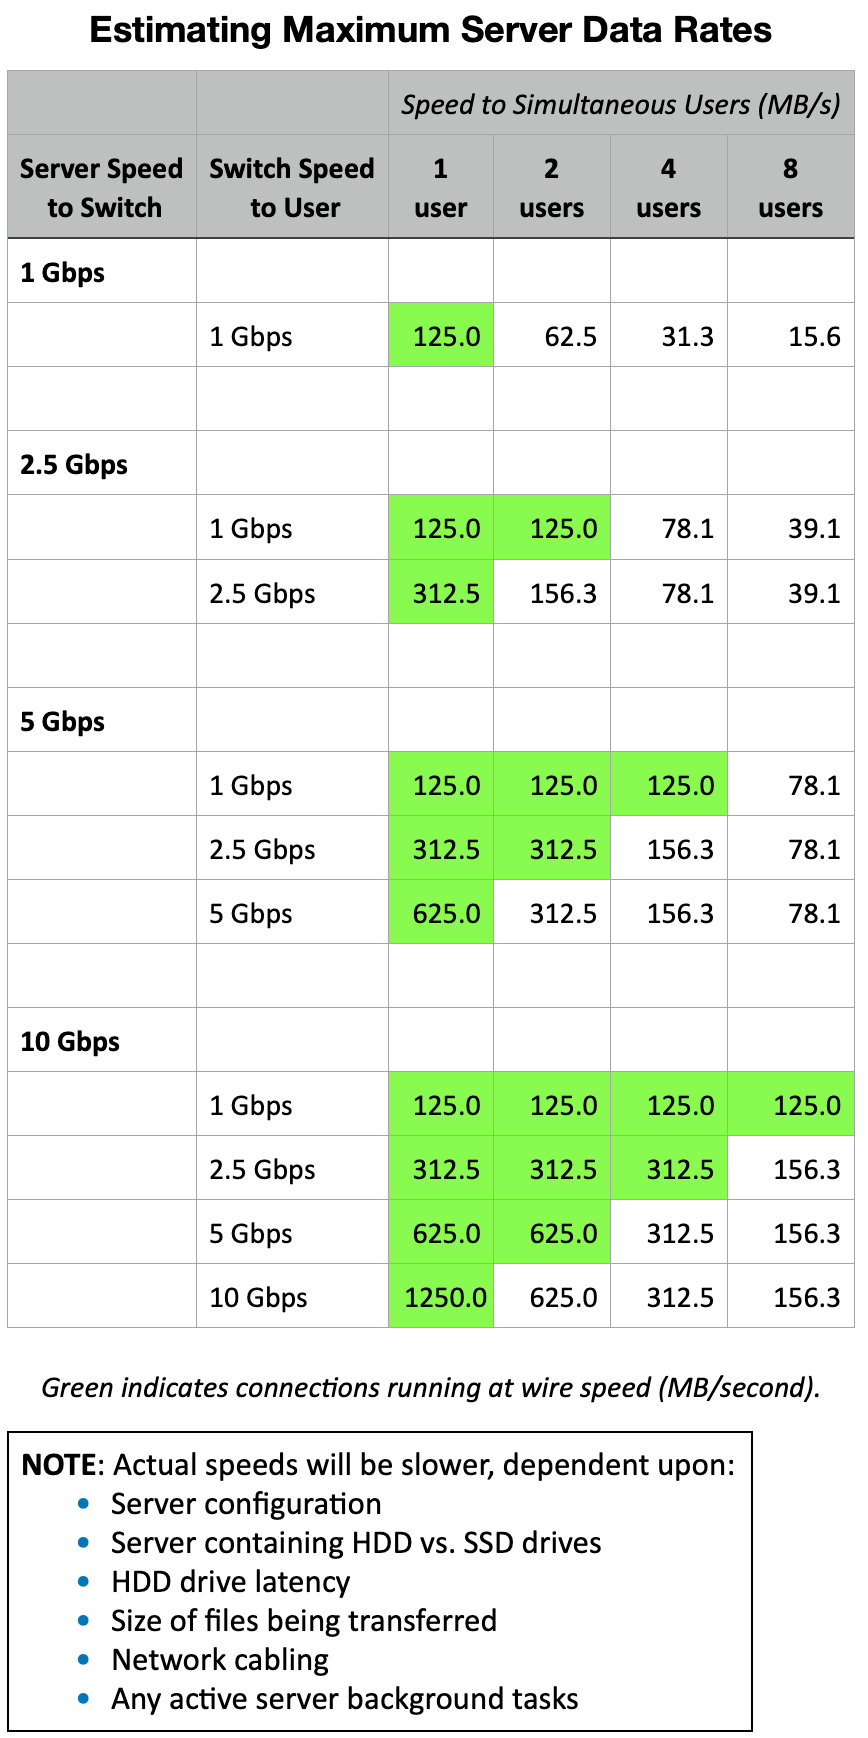
This table indicates the maximum data transfer speed (“wire speed”) based on the connection speed between the server, the switch and the end user. Green boxes indicate connections capable of supporting wire speed transfers. As you can see, it makes sense to connect the server to the switch at a faster speed than the switch connects to individual users.
NOTE: Servers using HDDs (hard disks) will have greater storage capacity, but slower performance than SSD-based servers due to the time required to move the hard drive heads from one location to another.
It is also important to compare the required transfer speed of the codecs you plan to edit to make sure your server can support them. In many cases, editing proxies from a server may yield greater performance by reducing the bandwidth load.
DSM (Disk Station Manager) is the software that controls all aspects of the server, from I/O to file handling to server-based applications. In my last review, we connected the hardware pieces of the server. Now, we need to get them to work together. This involves installing and configuring the latest version of the Synology DSM operating system, enabling the network connection, then creating shared folders.
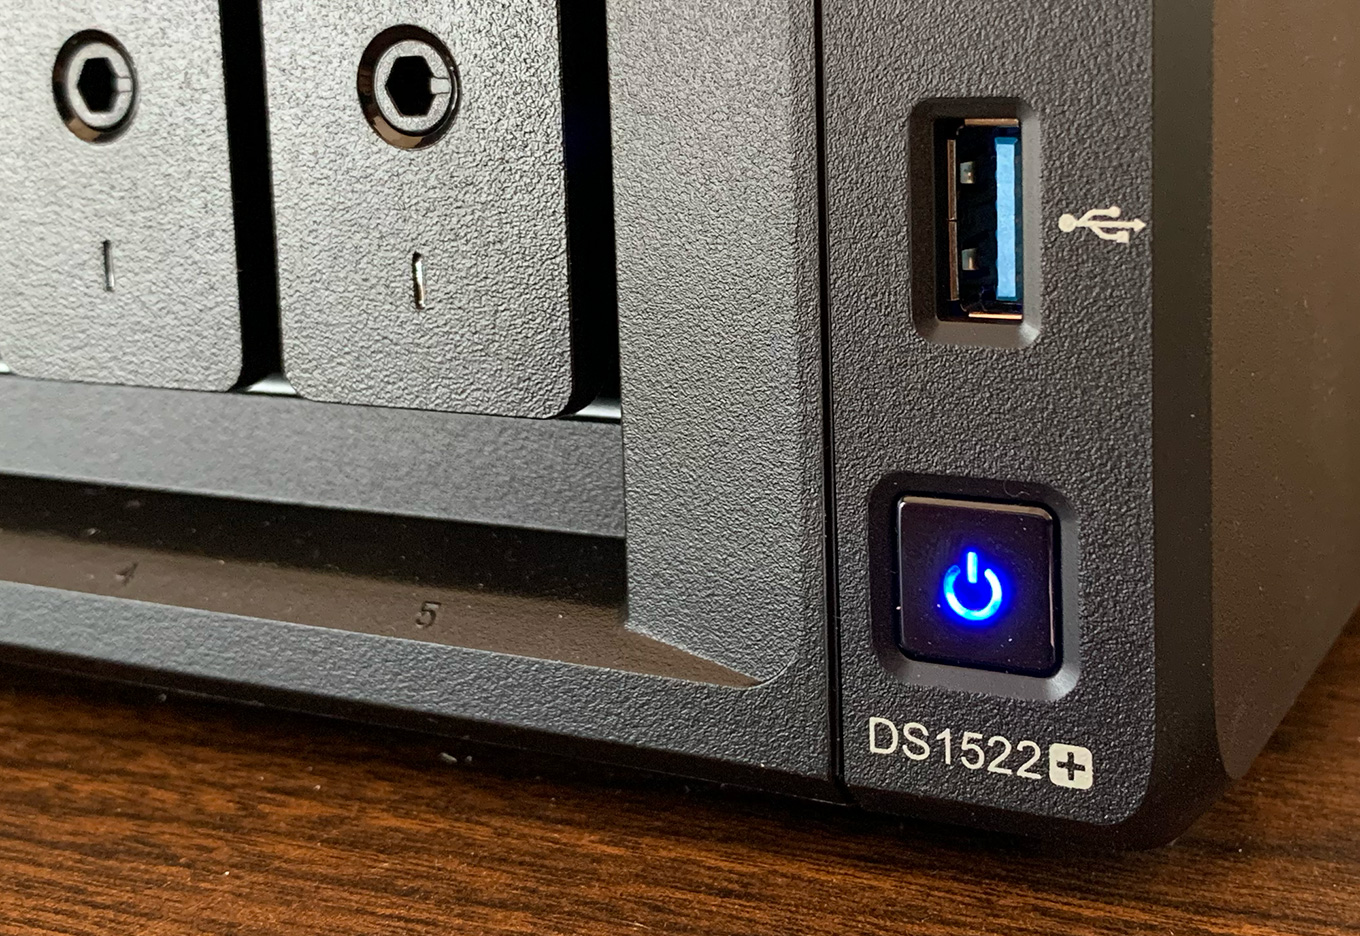
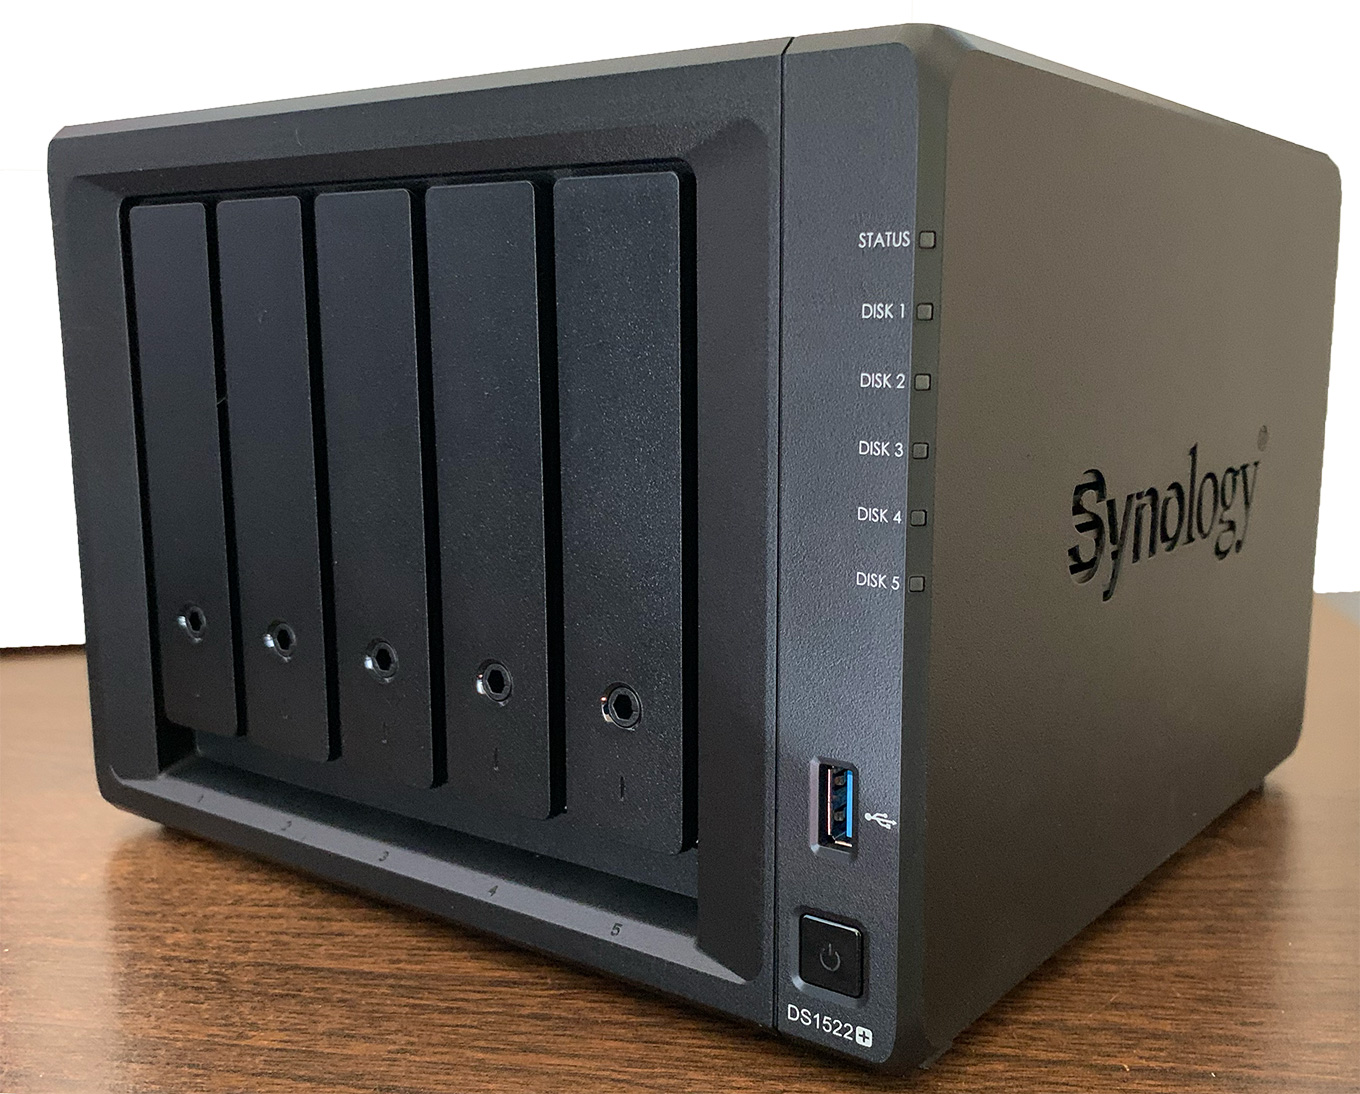
Push the power button in the low-right corner of the front to turn the unit on. Compared to my older server, this unit runs a LOT quieter! (Press and hold the power button to turn the unit off.)
NOTE: My old server makes a ton of noise. I have the new server sitting on my desk and I can barely hear it. The bigger fans running more slowly make a significant difference.
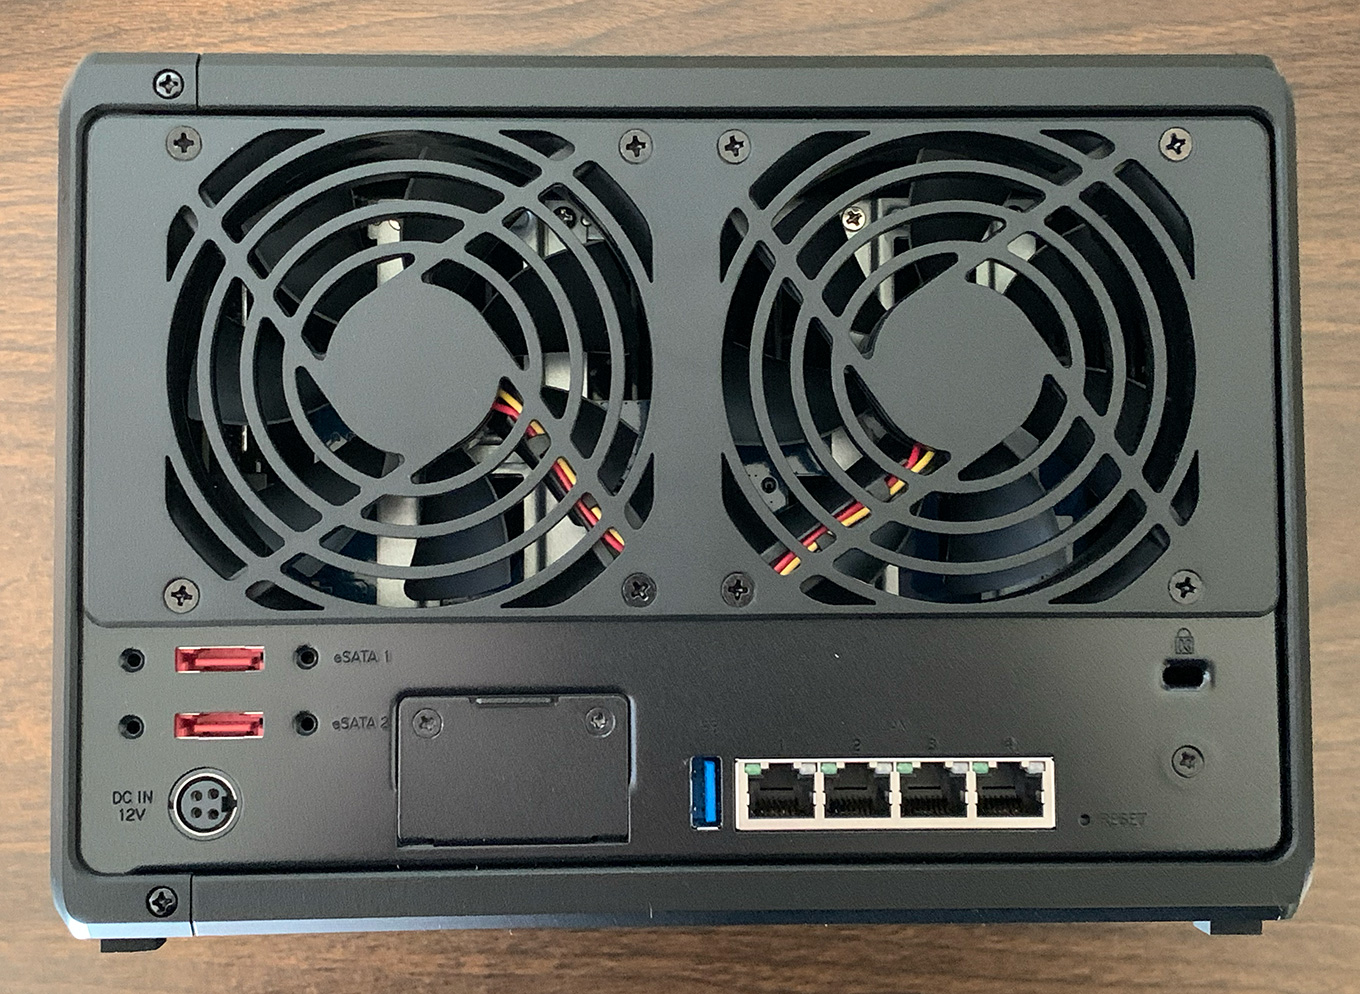
Synology provides a simple utility to locate the new server on the network. Ah… first problem. The 10GbE port doesn’t work. I can’t connect. Harumpf…
When a server port is connected to an active switch, green or orange blinking lights appear. The 10GbE does not blink. I move the cable to a working 1GbE port and try again. The lights blink.
NOTE: Synology support told me that the 10GbE port won’t work until the system is fully configured. Good to know.
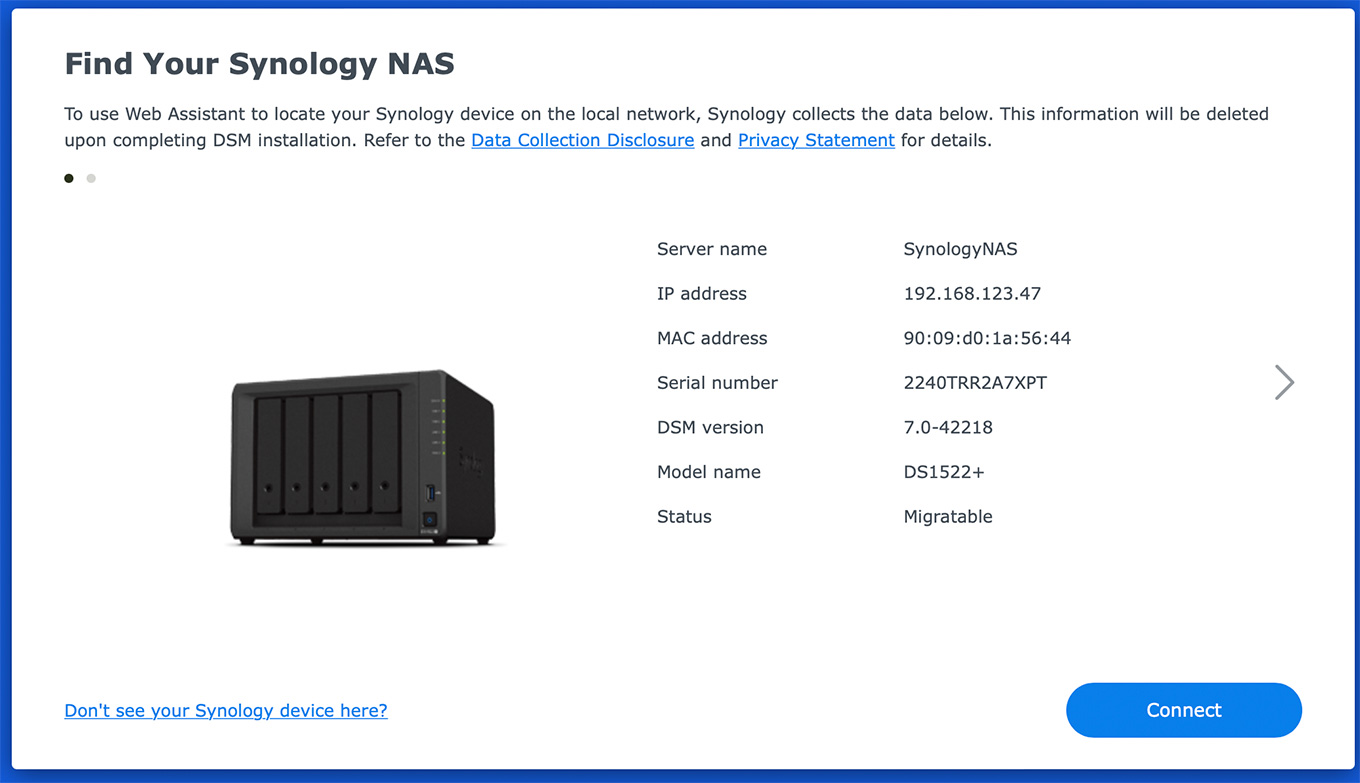
With an Ethernet cable plugged into a 1GbE port my MacBook found the server. We are back in operation!
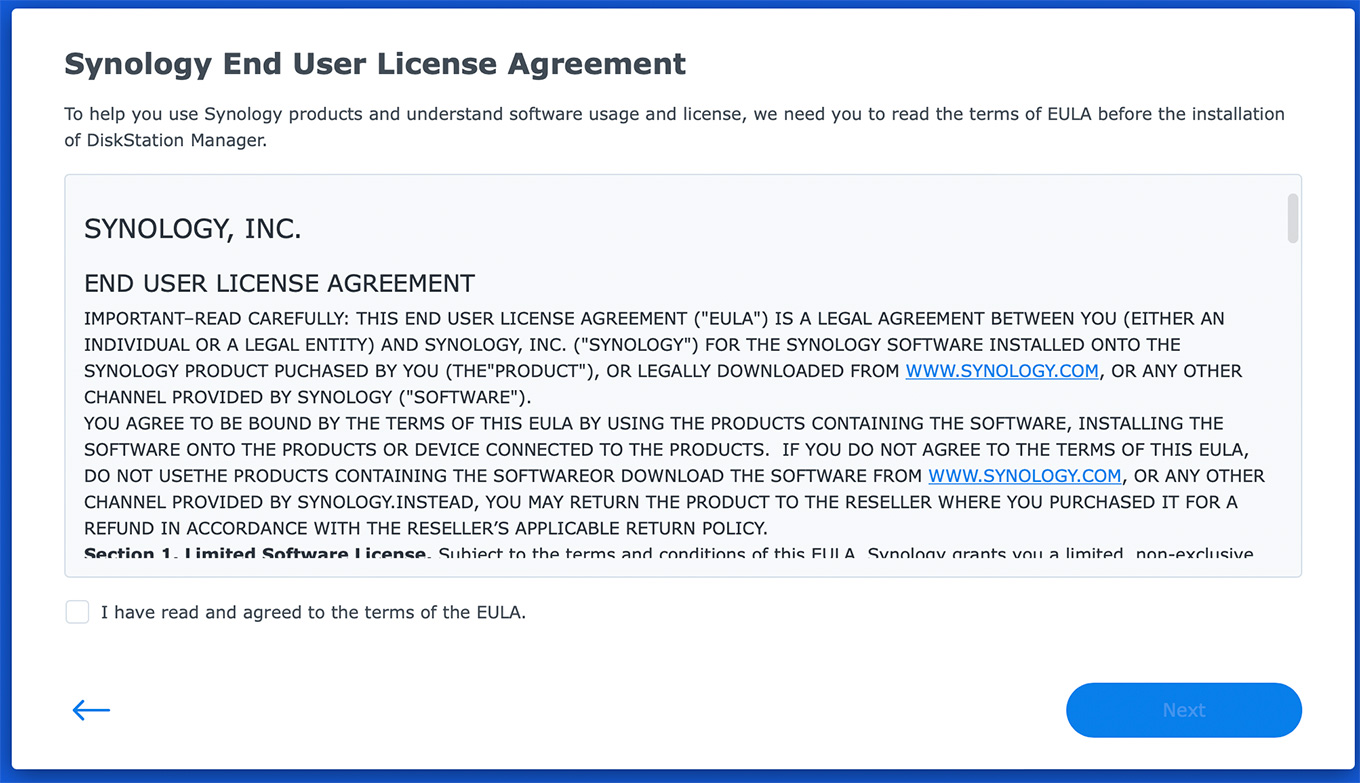
Synology displays its End User License Agreement.
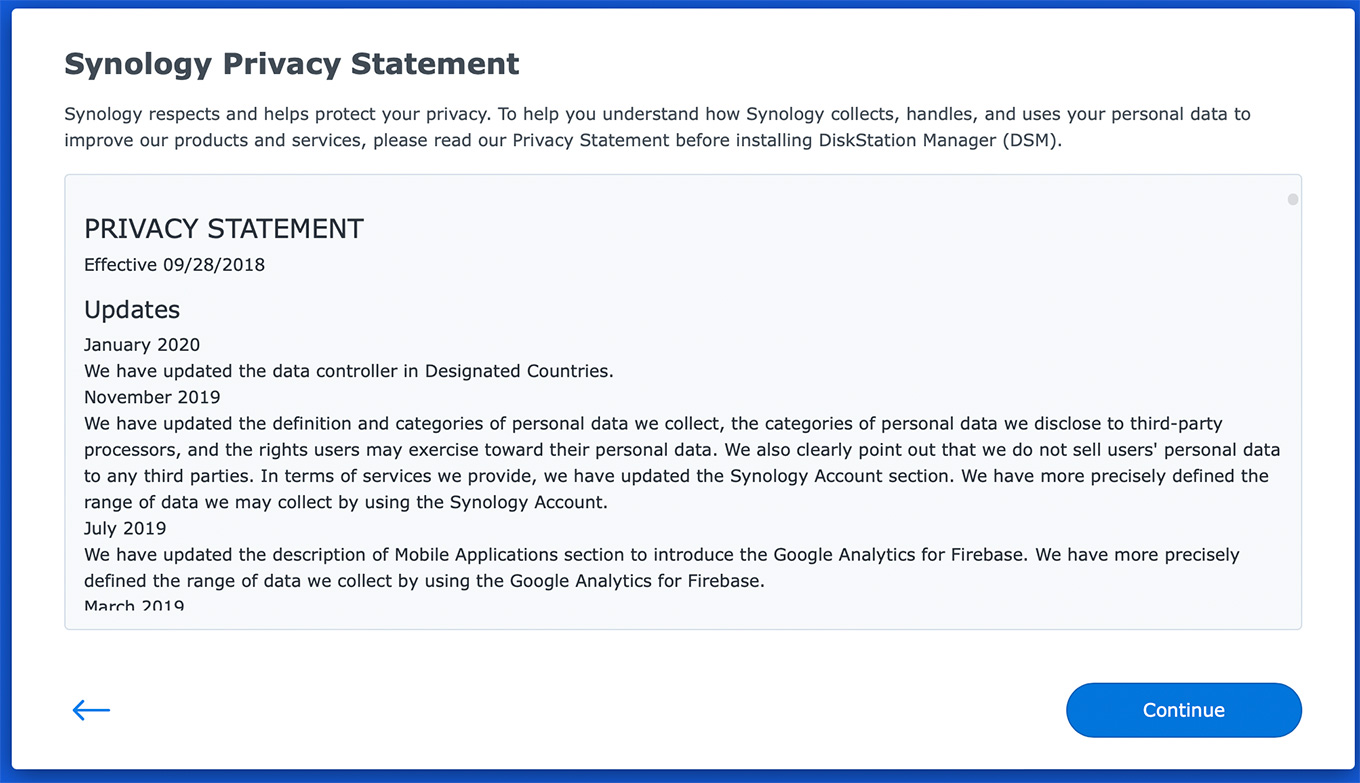
And its privacy policy.

Ooops, another roadblock. Because Synology only sent me four drives – and the server holds five – I used one of my older backup server drives to fill the final slot.
Because it reads server metadata on that hard drive, Synology thinks I want to migrate all the data and settings from my existing server to this new system. Which I do NOT want to do! Worse, there’s no way to avoid migration. I’m stuck, again.
NOTE: Synology support told me to remove the drive that I used in my other RAID. Finish the configuration, then insert the new drive before defining the storage pool. Done. We are working again.
On another note, if you have an older server, you can buy an empty new server to take advantage of its features, then transfer those existing drives from the old server to the new. This is called a “hard drive migration.” The Synology website has details on what’s involved.
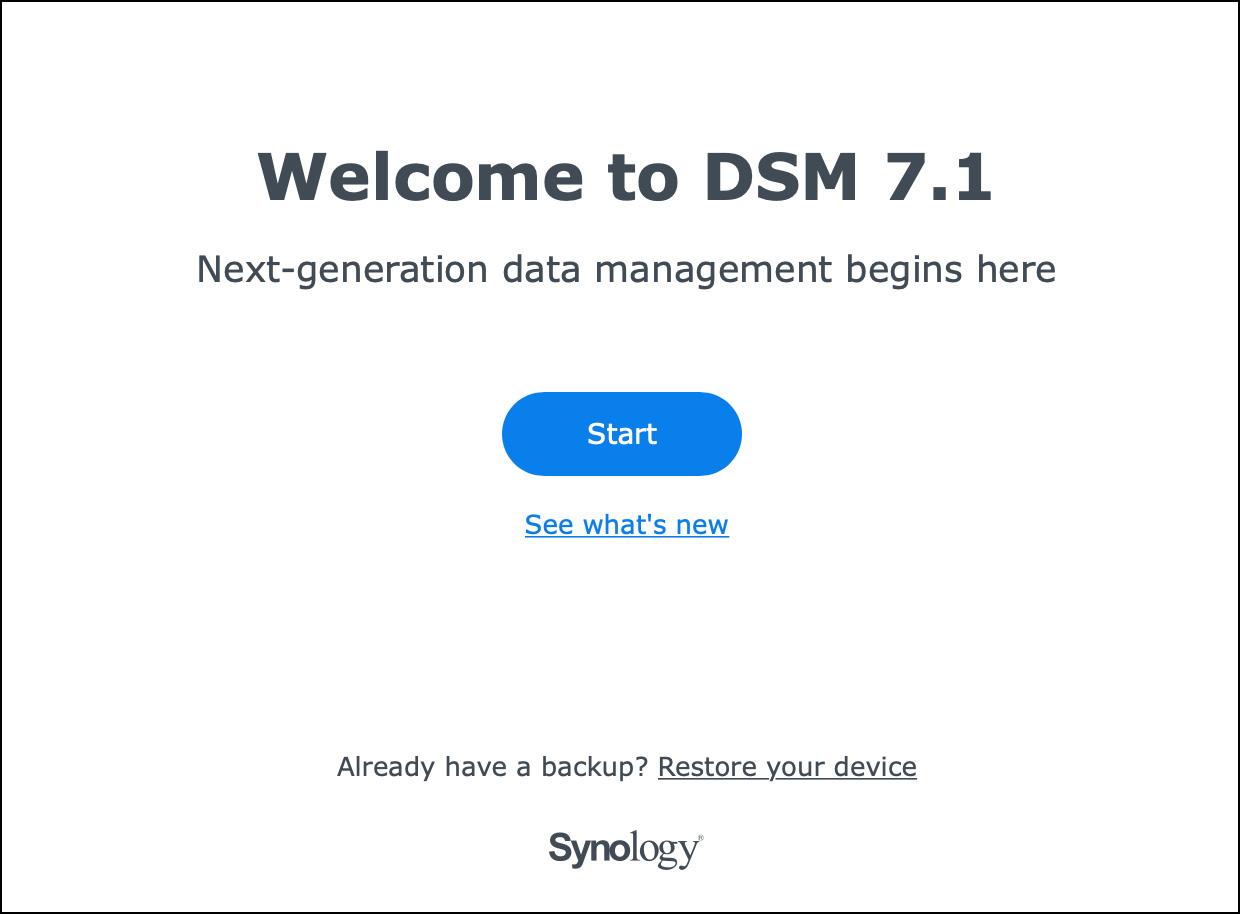
Yay! Found it and ready to install the operating system. Click Install.
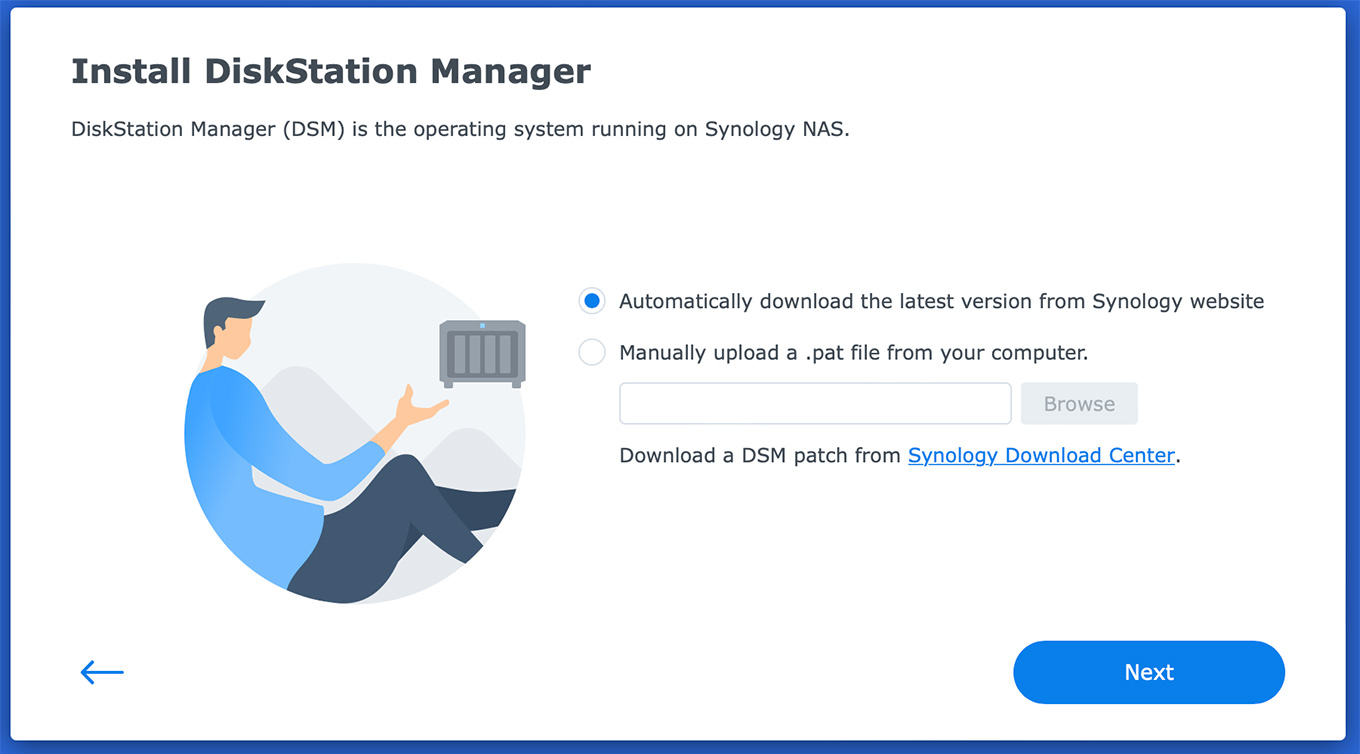
Download the latest version of DSM (the Synology operating system).
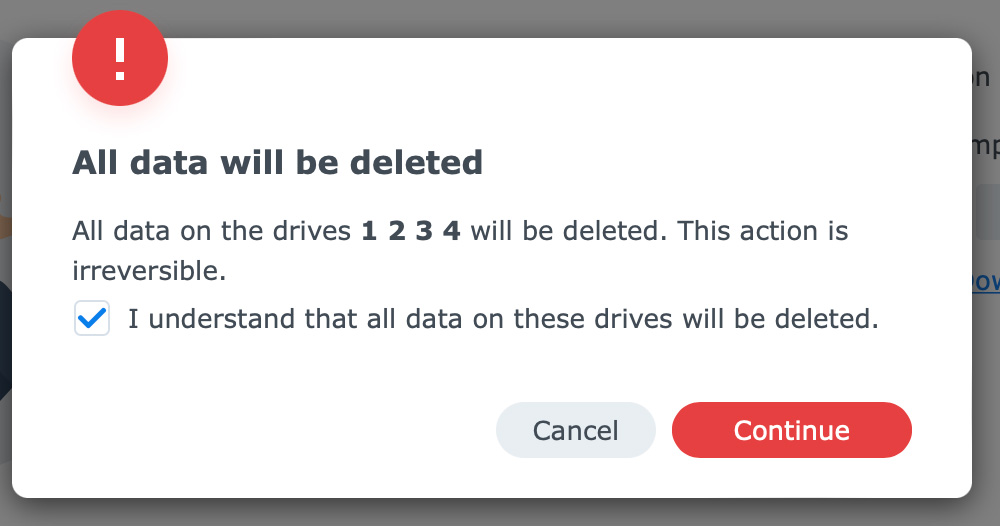
Acknowledge that this installation will erase all drives. Since they are new, this is not a problem. My existing drive will be erased, which is fine.
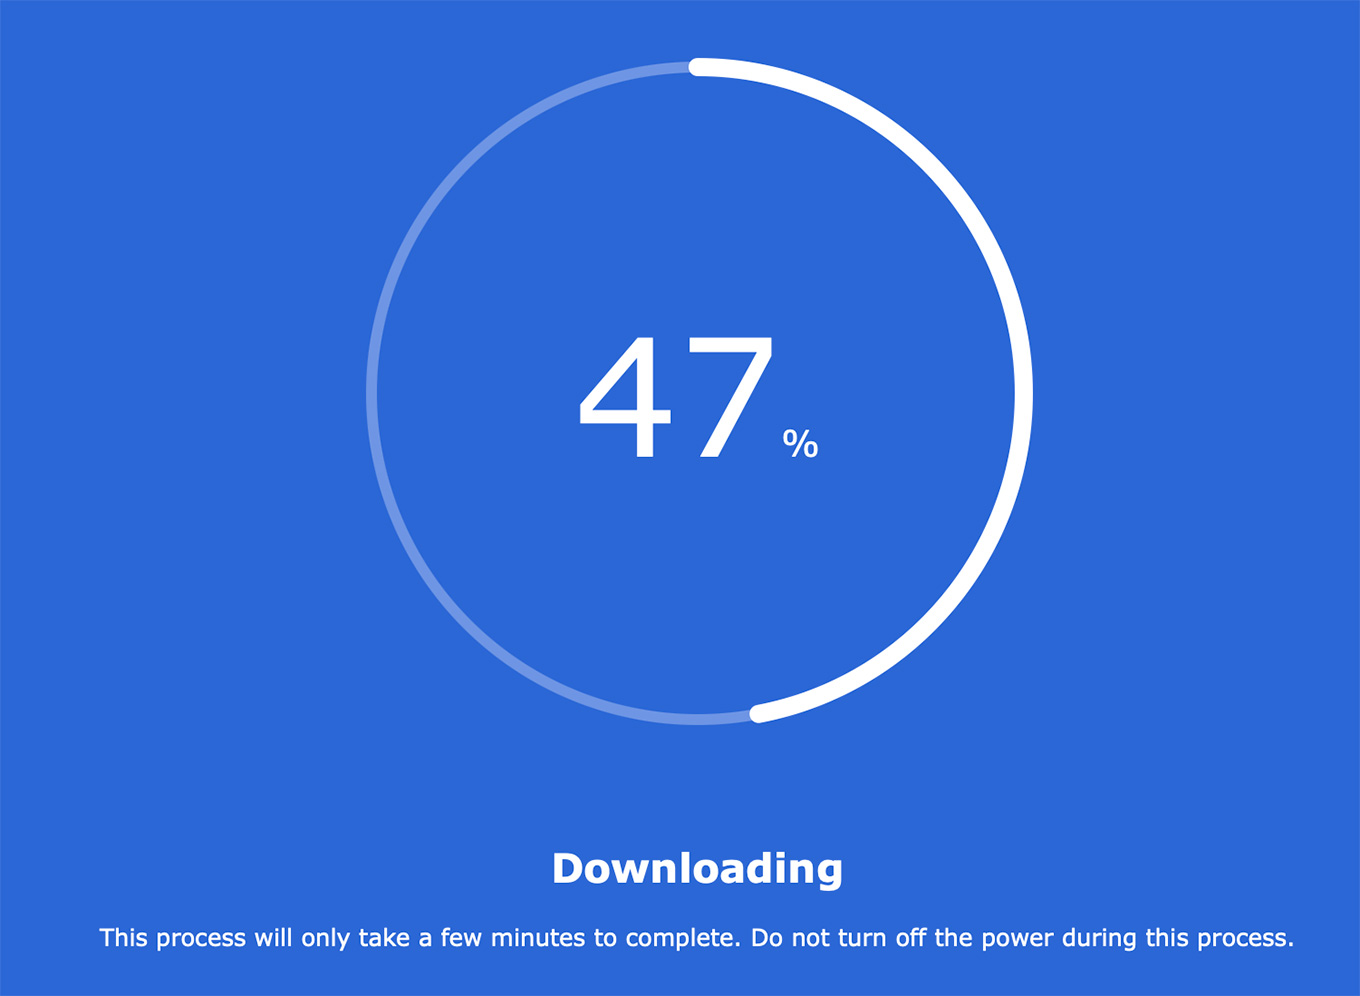
The system tracks the download…
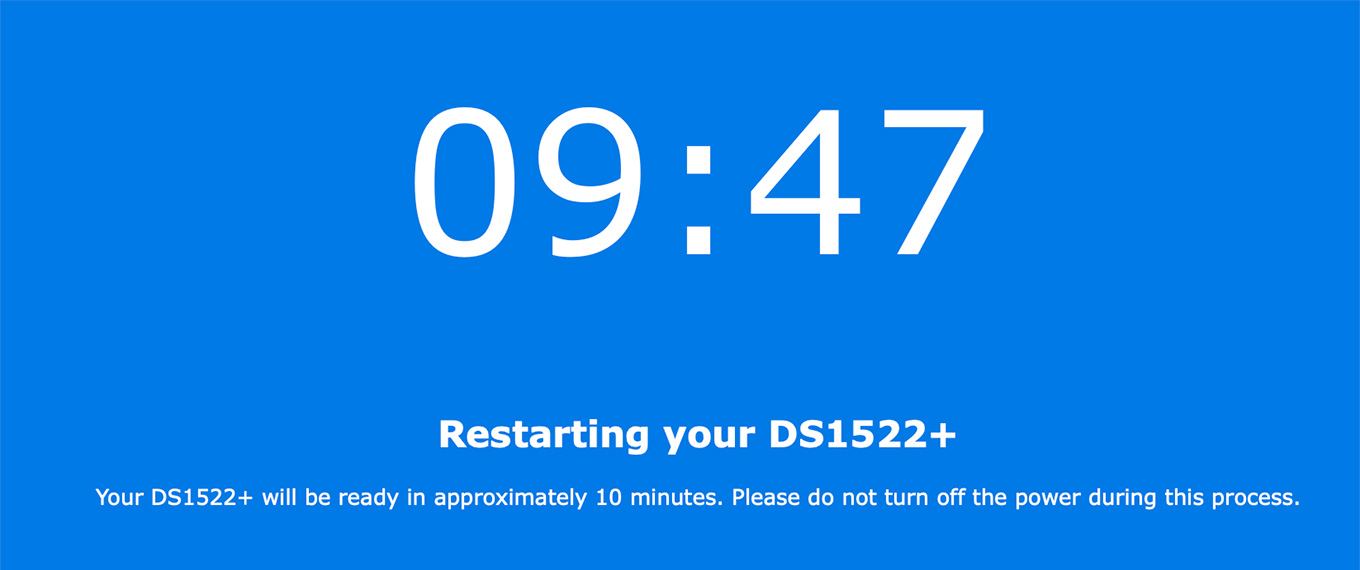
Then counts down to a finished configuration. The screen said it would take about ten minutes. It actually took five.
To begin the configuration, click Start, give the server a name, then create an Admin account and password.
IMPORTANT: WRITE THESE DOWN! If you forget them, you can’t manage the server. (Of course, I forgot to write these down. More time wasted. Sheesh…!)
To see what’s new with the latest version of the software, click “What’s New.” Otherwise, click Download now.
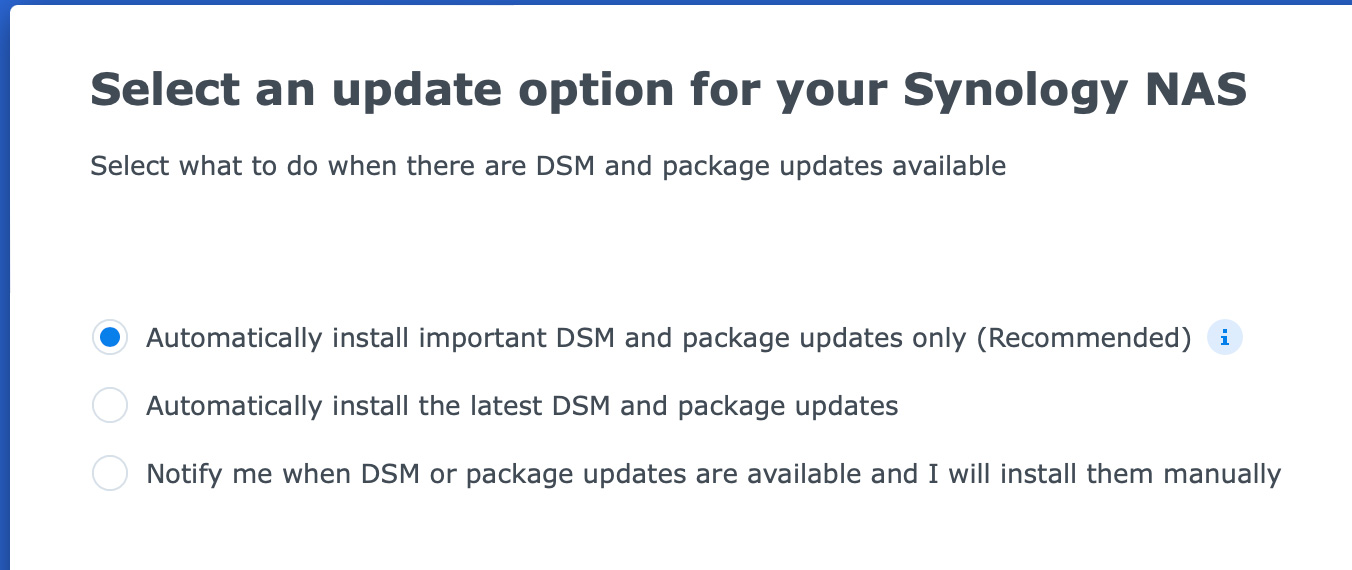
You can determine whether the server will update automatically. Synology recommends a middle-ground, which is what I use.
NOTE: Unlike my Mac, I enabled automatic updates on my current Synology server years ago and have not had any problems in doing so.
It then asks you to create a Synology account. This is a good idea because in order to contact Synology support, you need to have an account. Support is via email sent from the Synology website. In general, they respond within 24 hours. Often much sooner.
You can then enable Quick Connect, which allows you to connect to your server from anywhere on the web. I disable this for security reasons, because all my server access is from inside the local network.
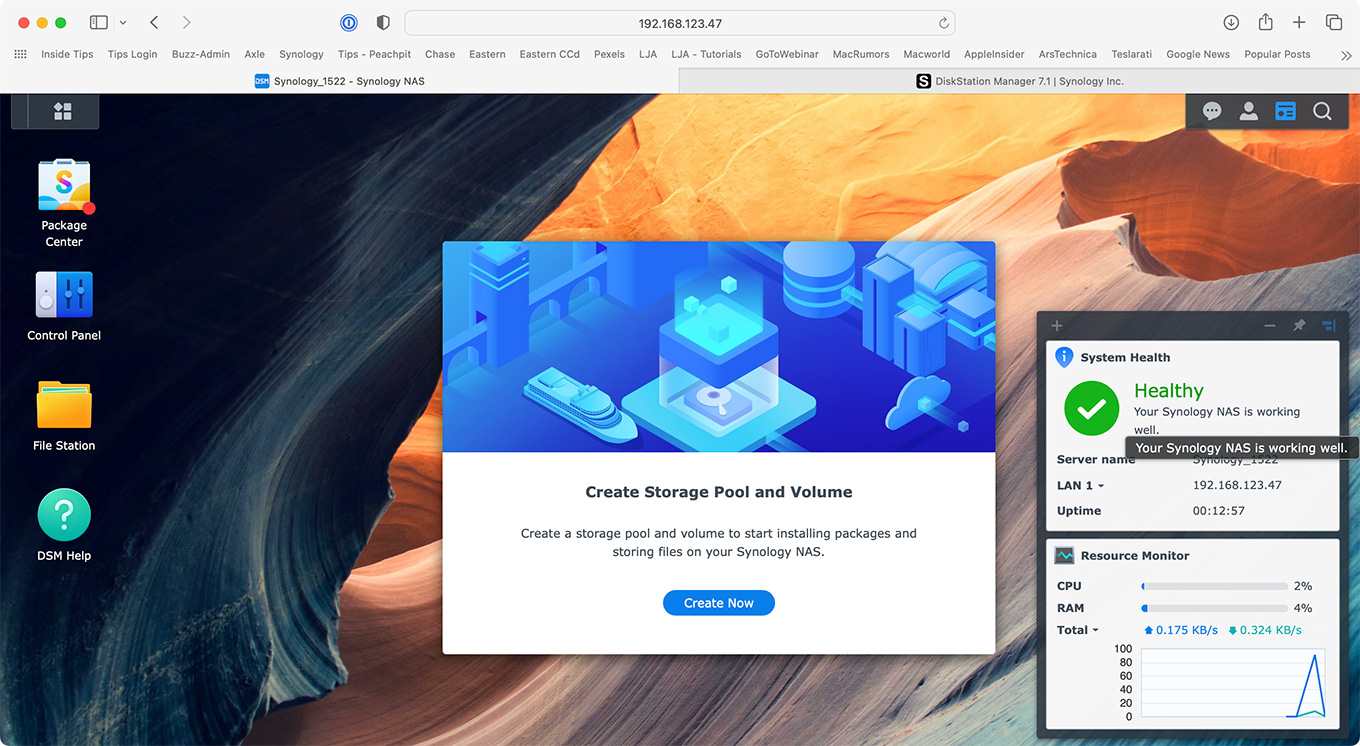
The Synology desktop now appears on your Browser. All server controls are accessed from a browser, which allows server administration from anywhere on the network.
While the server is functioning, we need to create a place to store data. The Storage Pool is the total capacity of the physical hard disks. The Volume is a scalable “partition” that holds data. A Storage Pool can hold multiple volumes.
NOTE: At this point, I re-inserted my previously used drive so that it would be included in the storage pool.
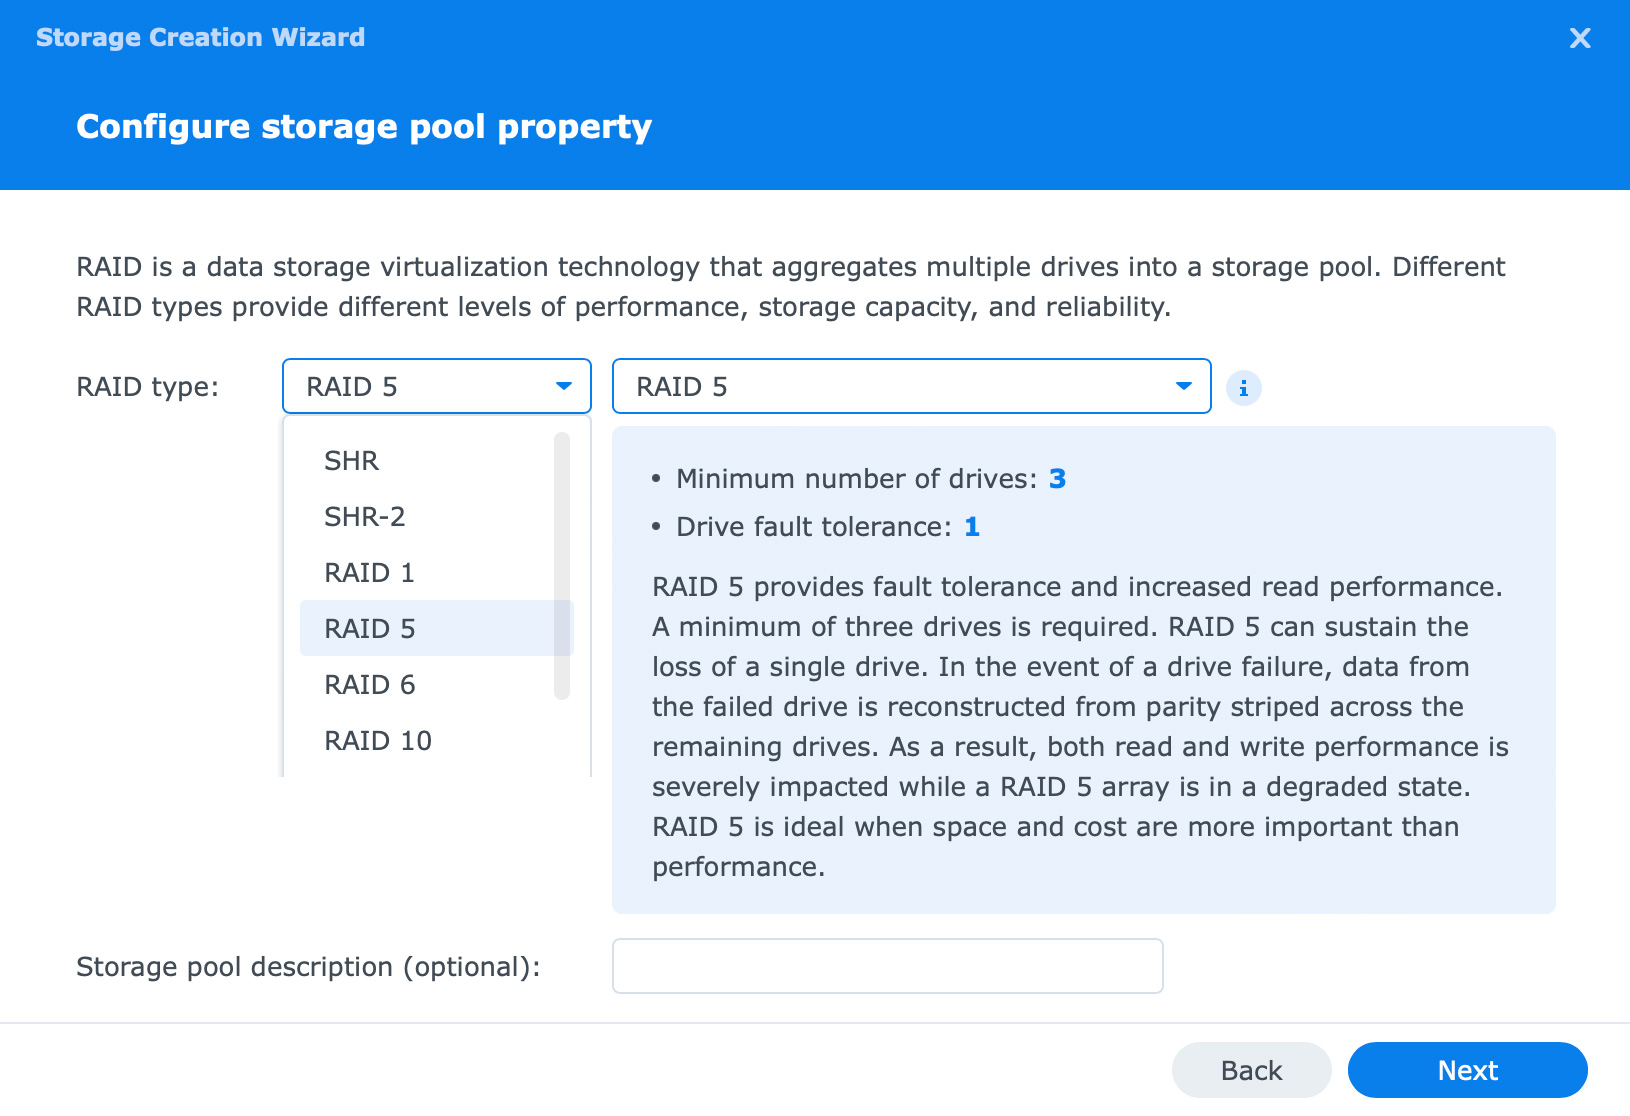
This step determines how you want the RAID structured. Since I want maximum performance with maximum capacity PLUS the security of knowing my data is safe if one drive dies, I chose RAID Level 5. (If you have an all-SSD RAID, choose RAID 4.)
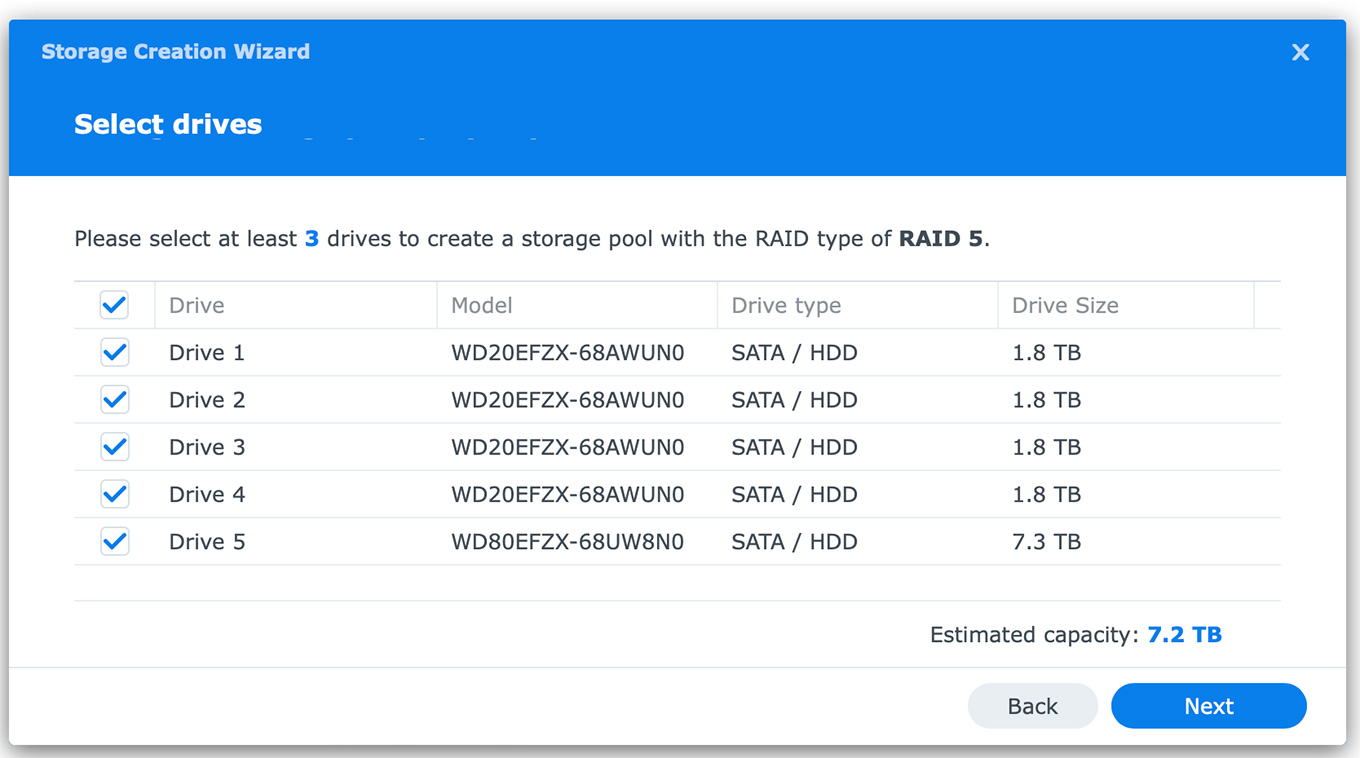
Next, I specified which drives get included in the pool. While you can create a variety of configurations, I generally format all the drives into one storage pool. The drives are labeled as 2 TB, but format as 1.8 TB. This is a marketing vs. engineering issue. Marketing defines drive capacity as 1 TB = 1000 GB. However, the binary nature of computers defines capacity as 1 TB = 1024 GB. Engineering wins.
NOTE: Although the drive I added holds 8 TB, only 2 TB will be available for the new RAID because the formatted capacity of each drive can’t exceed the capacity of the smallest drive in the RAID.
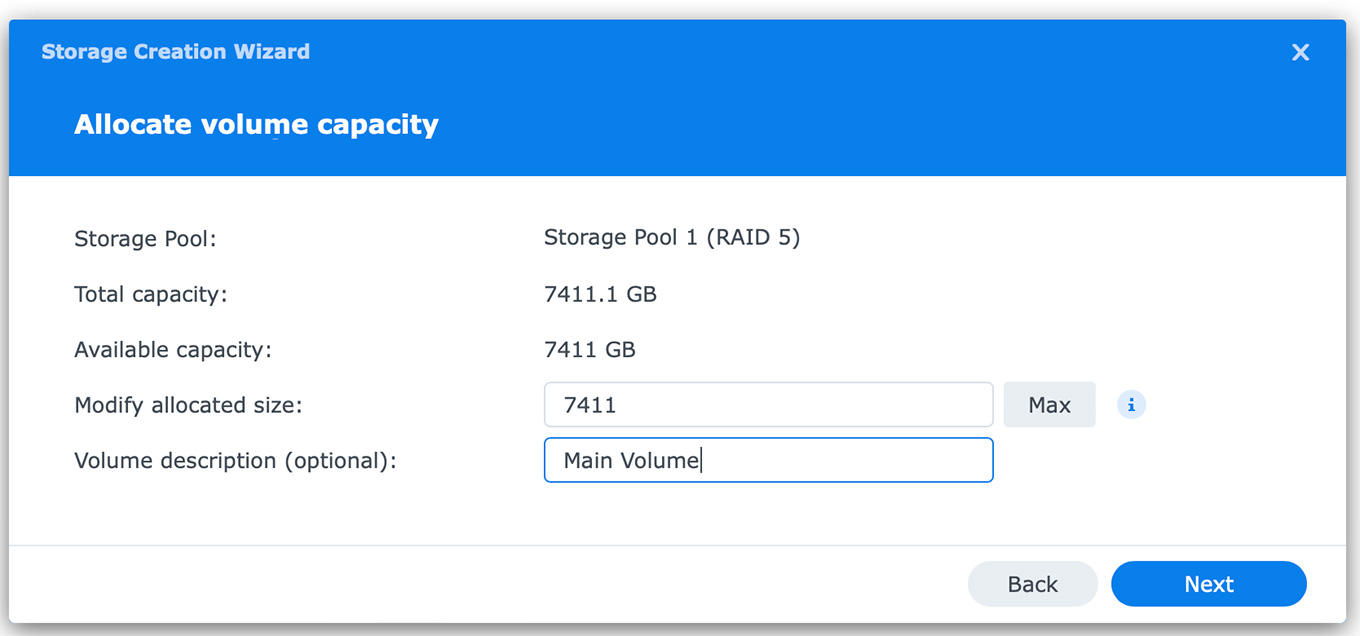
Next, specify the size of the Storage Pool. I prefer creating a single Storage Pool that includes all possible storage space, then divide it into one or more volumes (“partitions”) containing multiple shared folders. (More on this shortly.)
NOTE: For servers with more drives, you can create multiple storage pools and multiple volumes to meet security or segmentation needs. For smaller desktop servers, I prefer one Storage Pool and one Volume. The big bandwidth limitation is not how the hard drives are configured but the speed of the connection between the server and the switch.
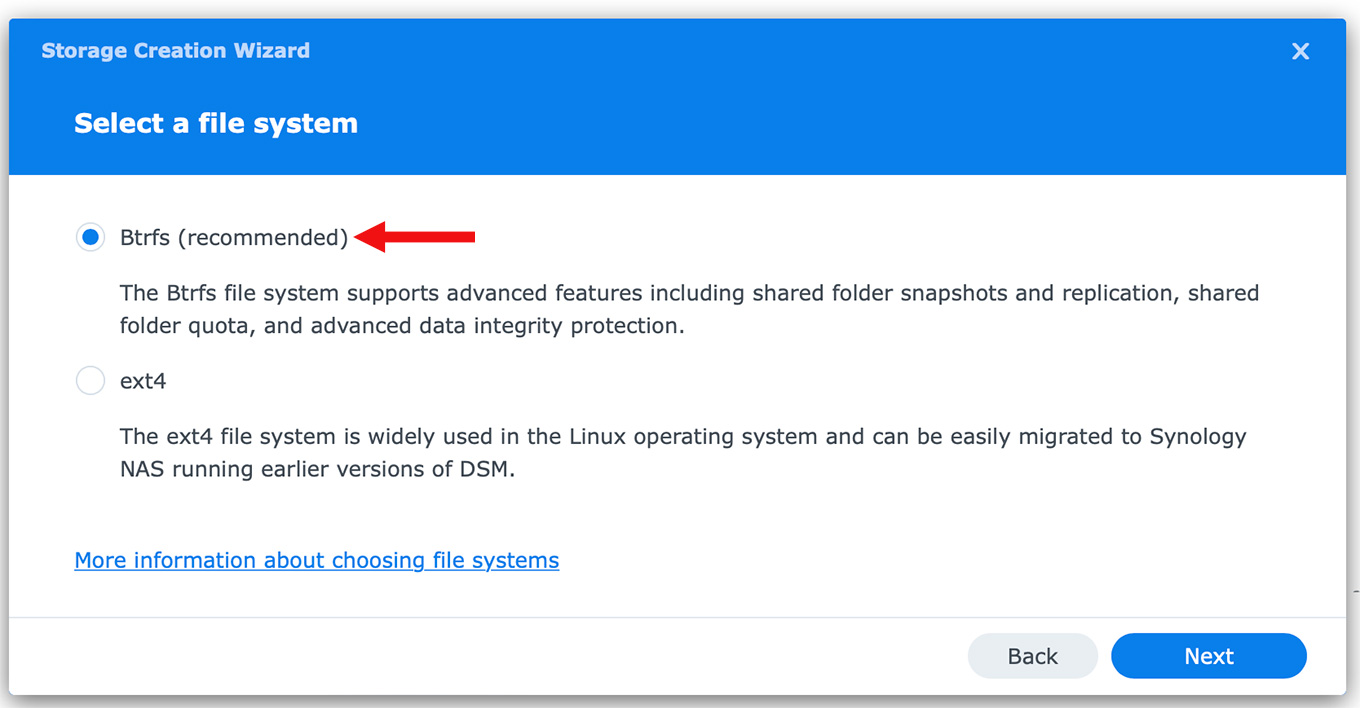
Here’s the step I screwed up on my first server. Use the Btrfs file system for best results. (I used ext4, which is an older format and not as flexible.)
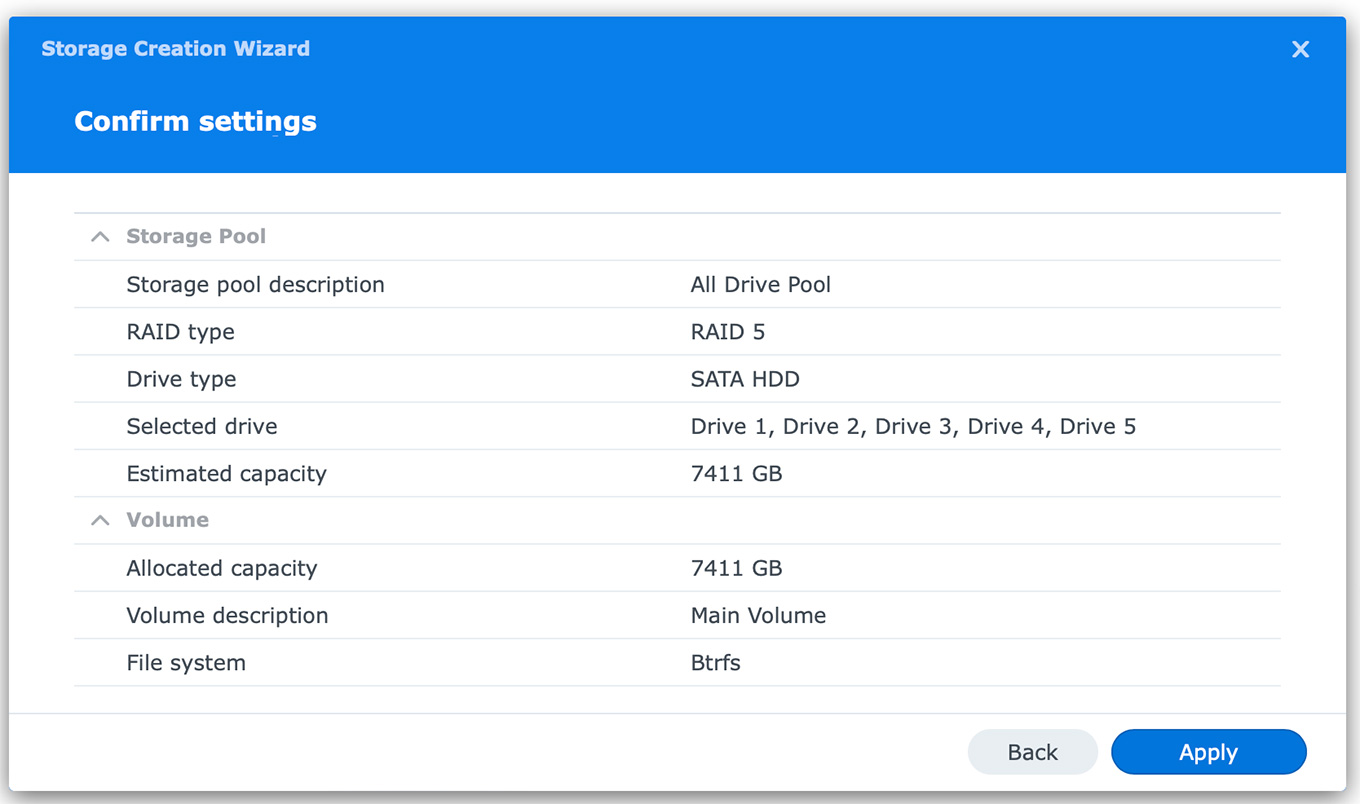
Synology displays the result of all your choices, then, when you click Apply, it goes off and creates the storage foundation of your server.
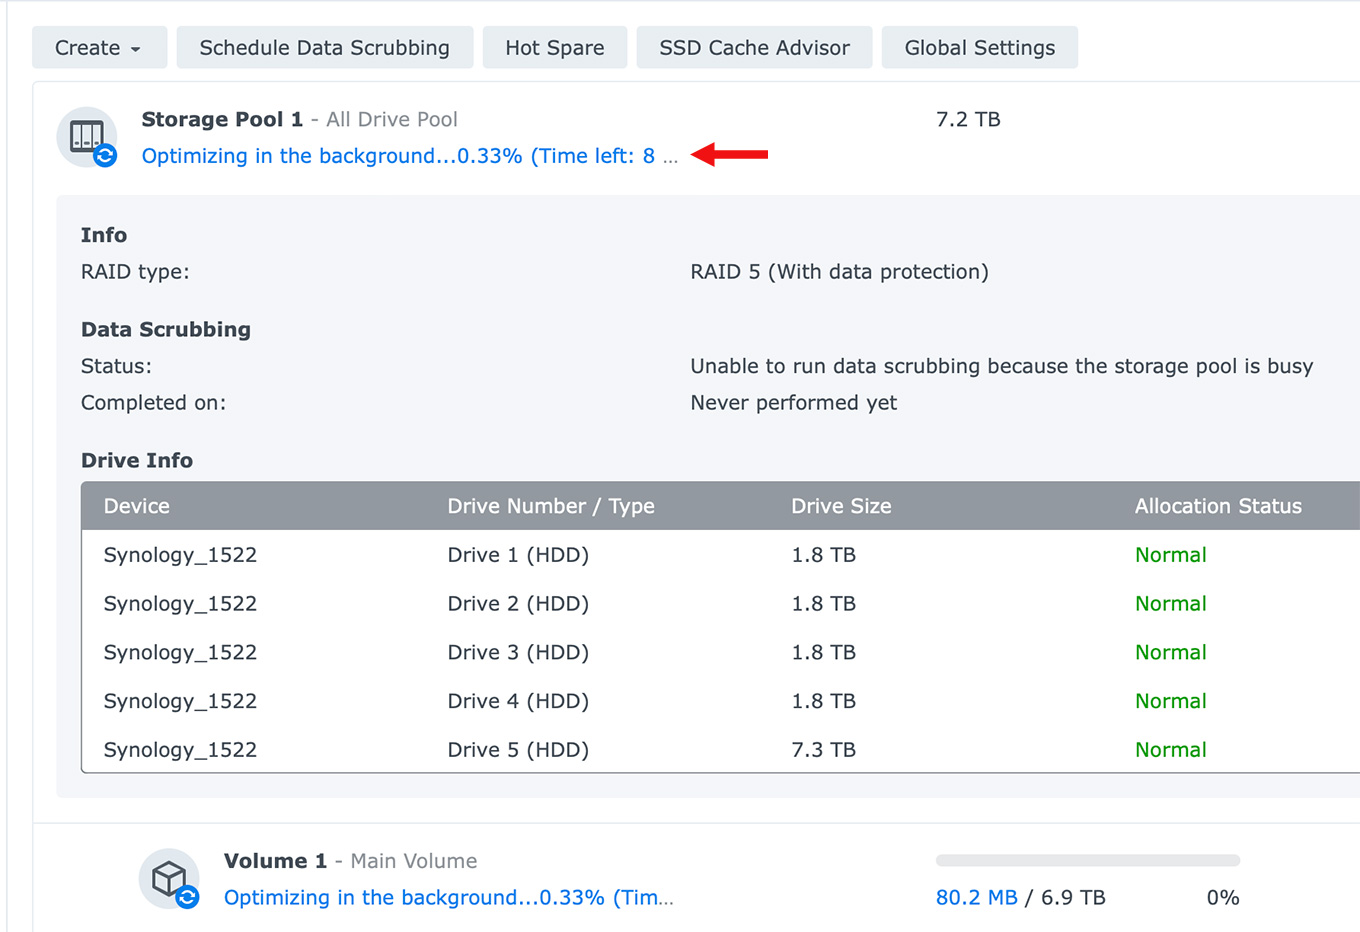
In order to use a RAID, all the drives must be optimized. This tells the system where things can be stored and it can take a long time, depending upon the total storage capacity in your server.
NOTE: Optimizing a 10 TB RAID took 8 hours. My office server holds 80 TB. Optimizing that took about five days.
Fortunately, Synology runs this optimization process in the background so you can get right to work. However, you won’t get full performance until the optimization is complete. You can, however, create shared folders and get ready to use this system while optimization is ongoing in the background.
NOTE: Synology has a wide variety of online help you can refer to during installation in case you get stuck. I’ve also found their support staff very helpful.
A “shared folder” is a folder on the server which you can mount on your desktop. It acts like a locally-attached hard disk. There is no limit to the number of shared folders you can create or mount.
NOTE: On my office server, I created ten shared folders. Each shared folder can contain hundreds of additional folders and tens of thousands of files. Different folders are accessed by different folks; for example, finance, production, marketing, entire office, and so on.
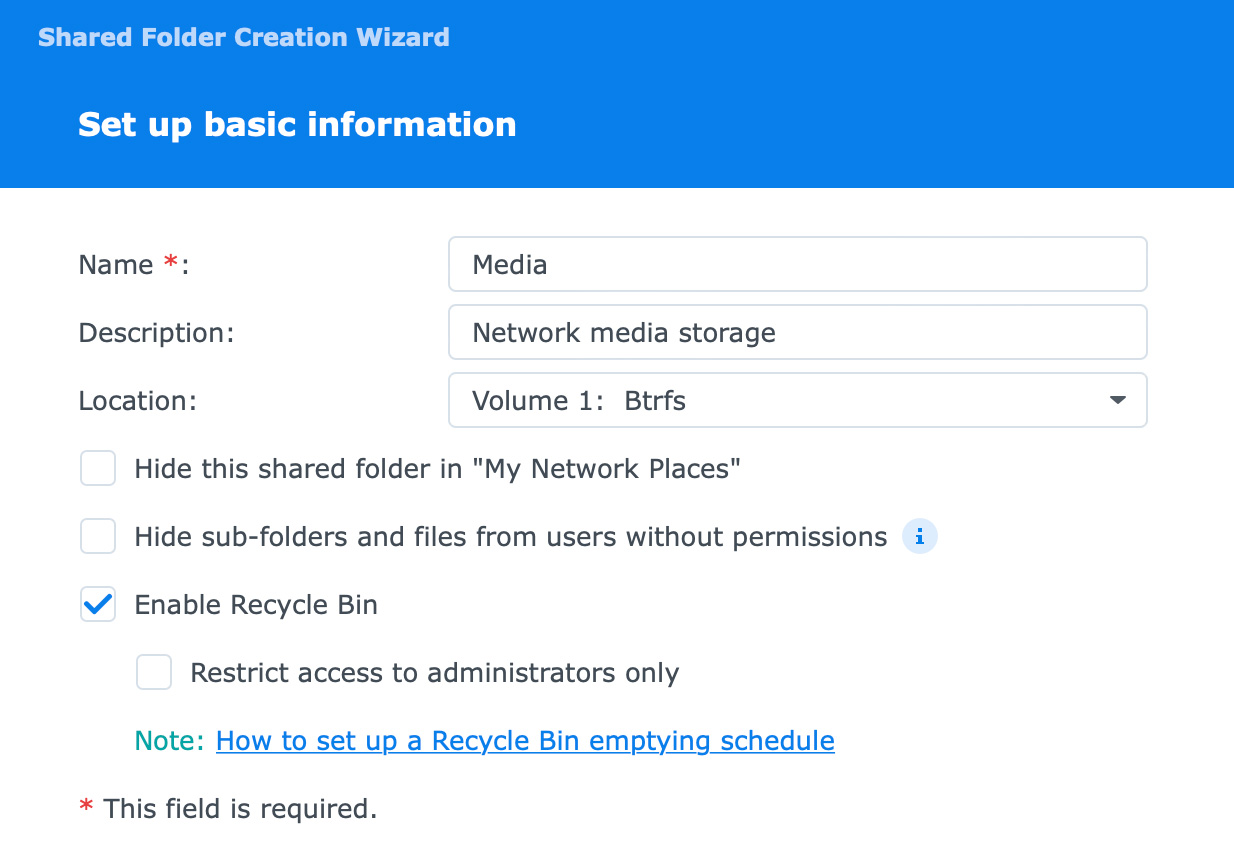
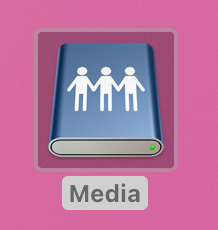
Next, I created a shared folder – Media – though you can create more. Remember, a shared folder is mounted to your desktop as though it was a hard drive. Inside a shared folder you create more folders and copy thousands and thousands of files, just like any other storage.
NOTE: You can encrypt a shared folder, but that will slow down performance. I don’t use it.

To make sure files transfer safely, I enable data checksums, though this also slightly slows performance. However, I don’t use file compression, again, because it slows things down and media files are generally compressed anyway.
NOTE: Synology only recommends using file compression for “cold” (lesser used) data.
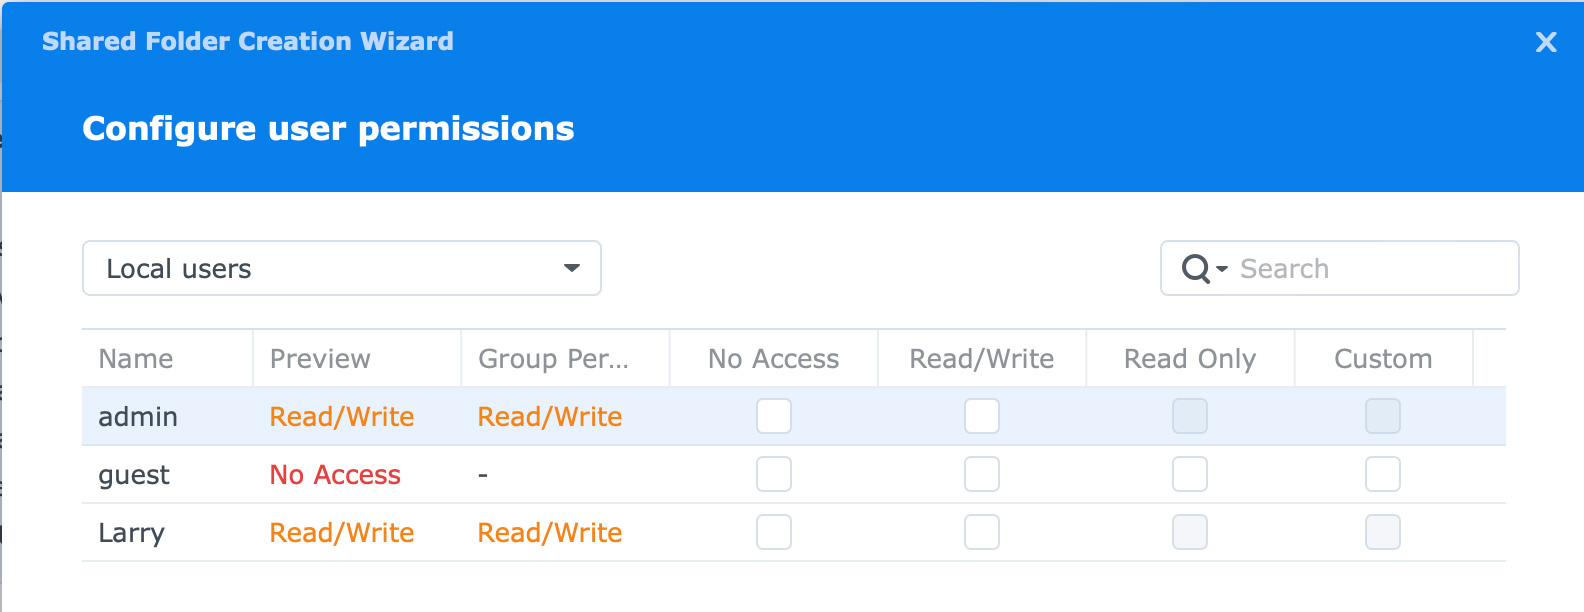
Next, the Local User list appears. This is where you can determine who has access to each shared folder, and what kind of access they have.
I generally have two admins, then as many regular users as I need. Users can be added, modified or removed at any time. There is no limit to the number of users that can access a server. Passwords can be changed at any time, as well.
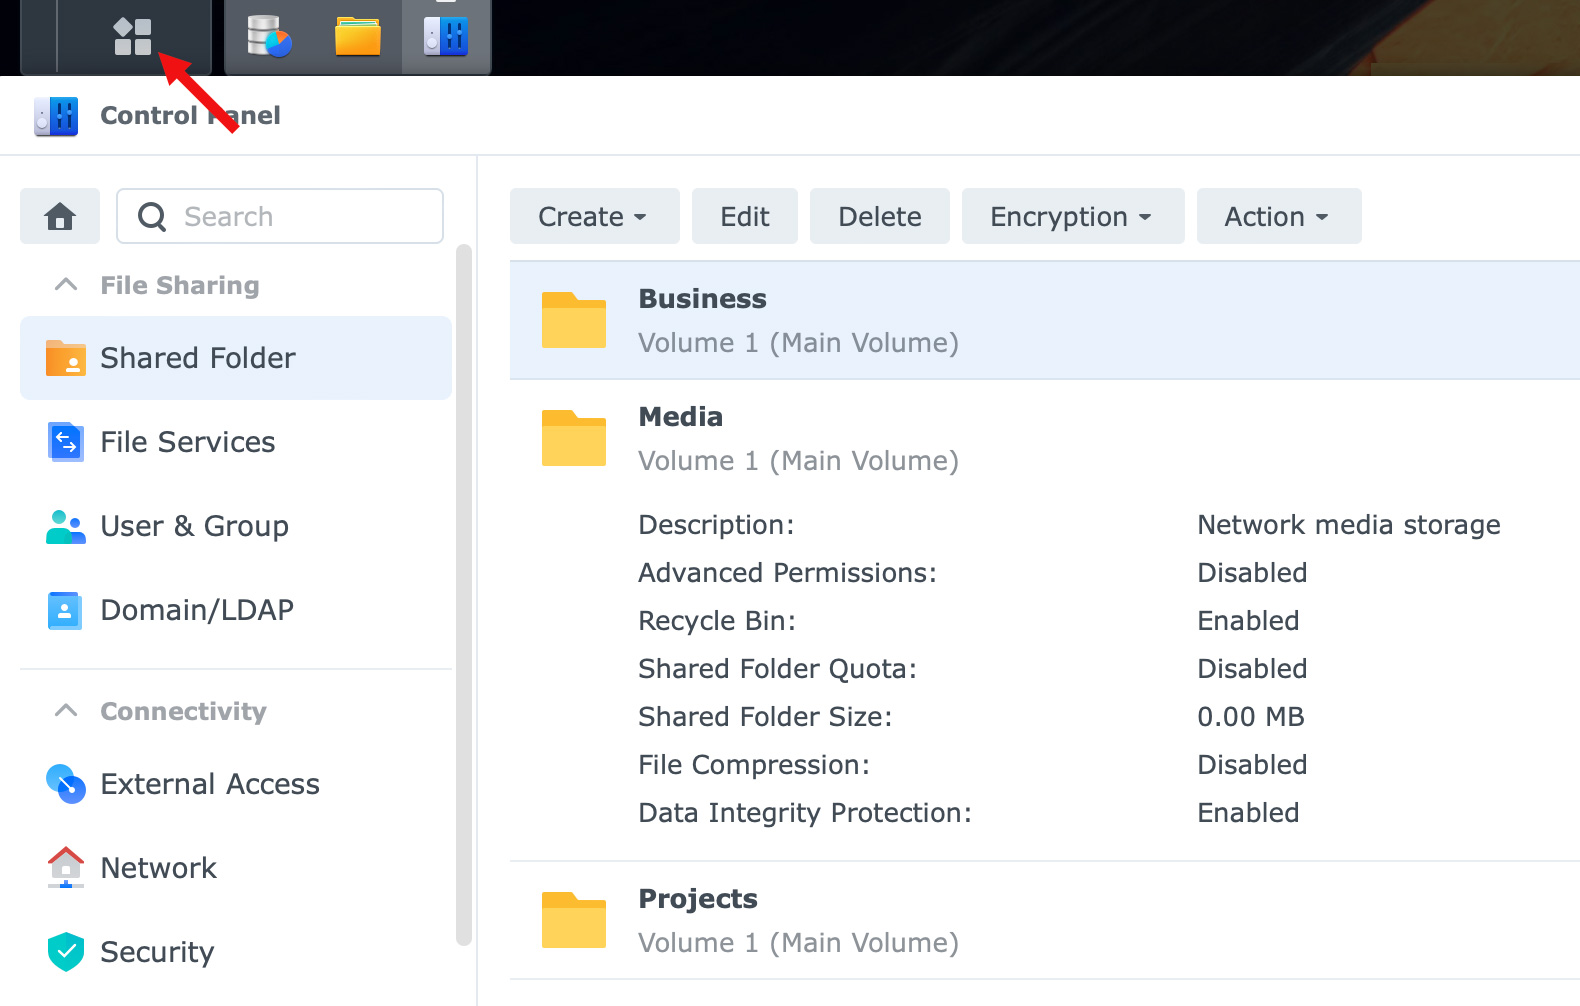
Using the Control Panel, accessed from the icon indicated by the red arrow, I created two more shared folders: Projects and Business. You are welcome to use your own names and create as many shared folders as you want.
NOTE: A Shared Folder is a “master container.” You put files into it from your local computer.
There are lots, and lots … and LOTS … of configuration settings! Most of which require an advanced degree in networkology to understand. The good news is that most of the default settings work fine.
We have only three more steps left:
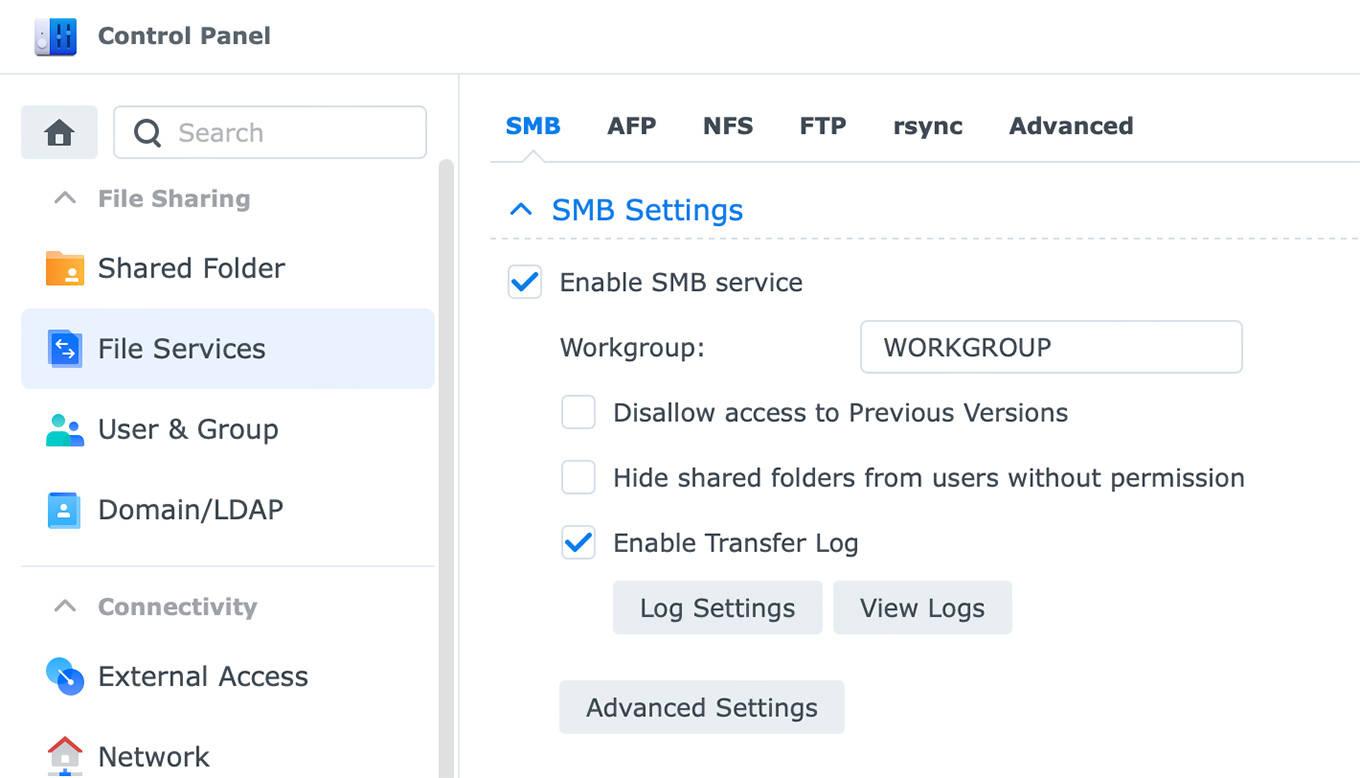
In Control Panel > File Services, remember that’s that icon in the top left corner of the interface, make sure SMB is enabled. This is the best choice for Macs running recent versions of macOS. Older Mac systems require AFP to be enabled. Windows systems require enabling NFS.
NOTE: If you don’t have any Windows systems accessing the server, scroll down to the bottom of this window and turn off WS-Discovery.
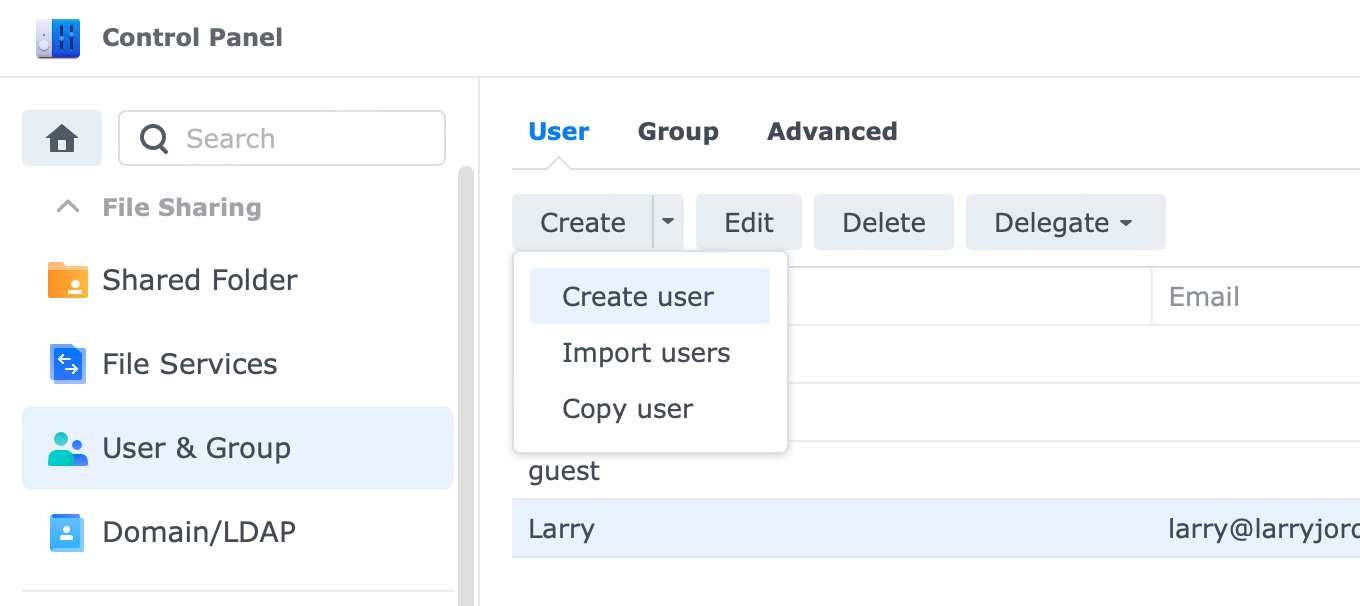
Next, go to Control Panel > User & Group and click the Create button to add as many users as you need.

You’ll need to assign passwords to each – which they can change later – determine which groups they are in, and other settings; most of which I leave at the default.
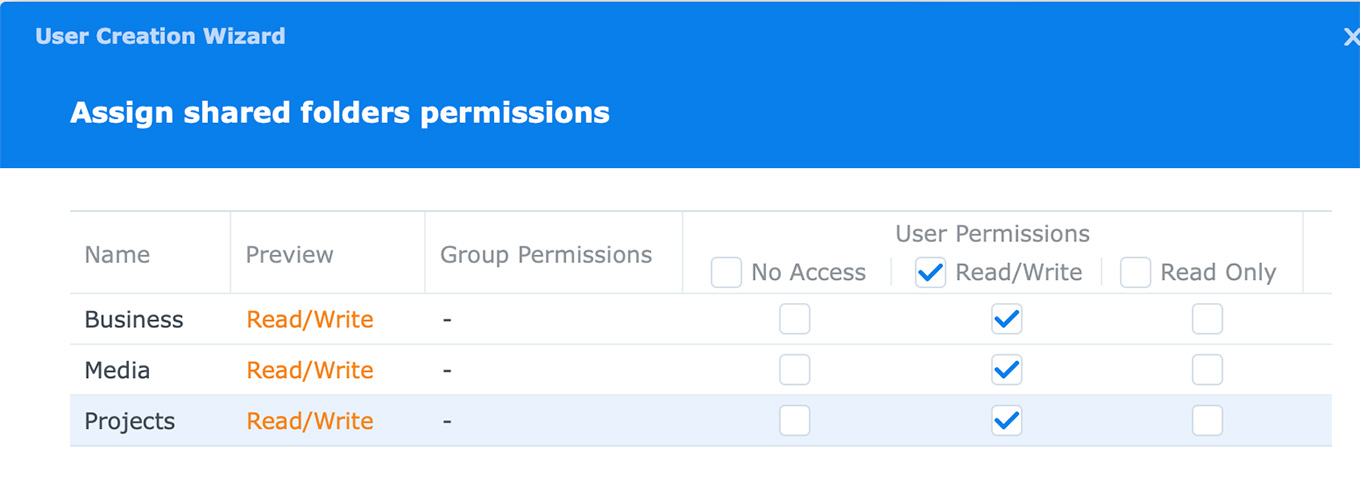
You also specify which Shared Folders they can access and other settings. Almost never does everyone on the network have access to the same folders. This allows editors to access media, while office staff accesses office files stored in a separate Shared Folder.
Splitting shared folders between different users doesn’t improve performance, a user is a user, regardless of which shared folder they are accessing. What this DOES do, however, is improve security within the network. People can’t get their hands on company finances, for example, if they don’t have access to the shared folder that holds the files.
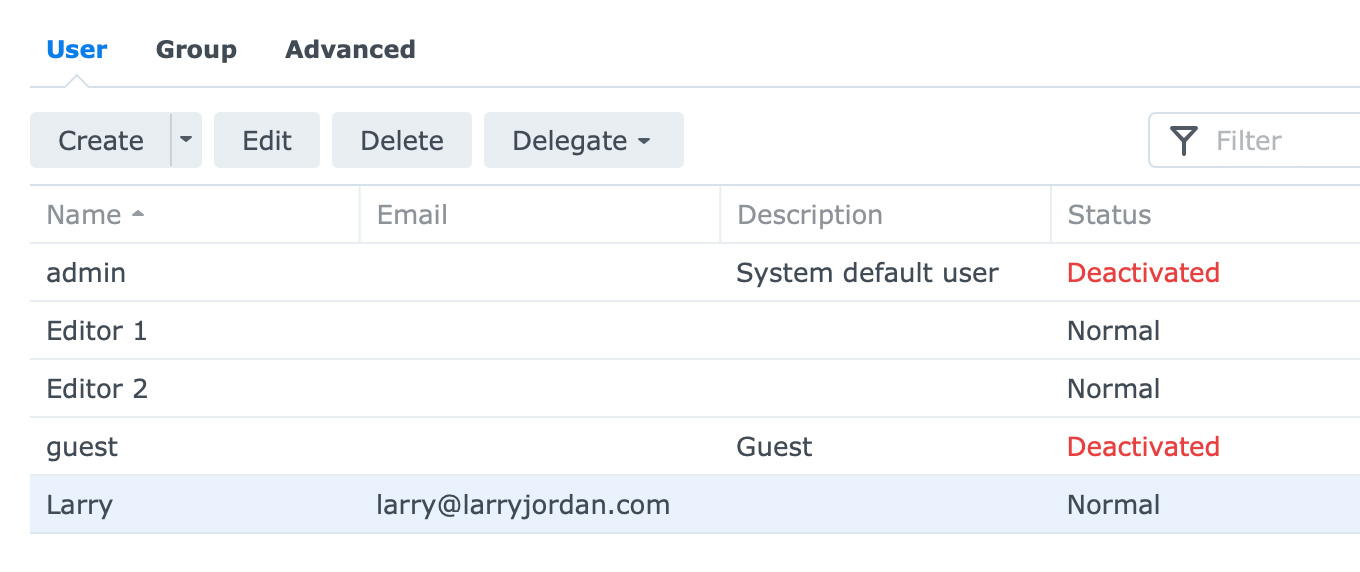
Here’s a summary of my test users.
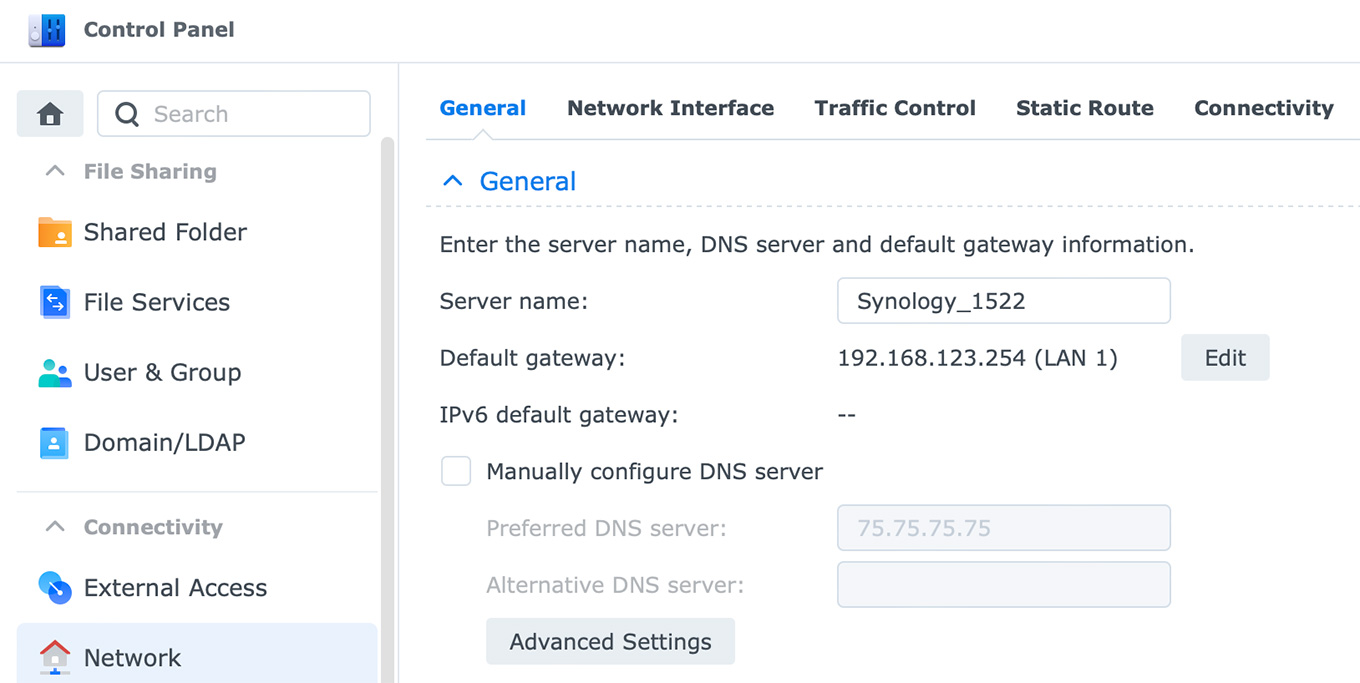
Finally, Control Panel > Network > General should show the IP address of the router providing Internet access to your network. If not, enter its IP address in the Default Gateway. Assuming your network is working currently, other addresses should populate automatically.
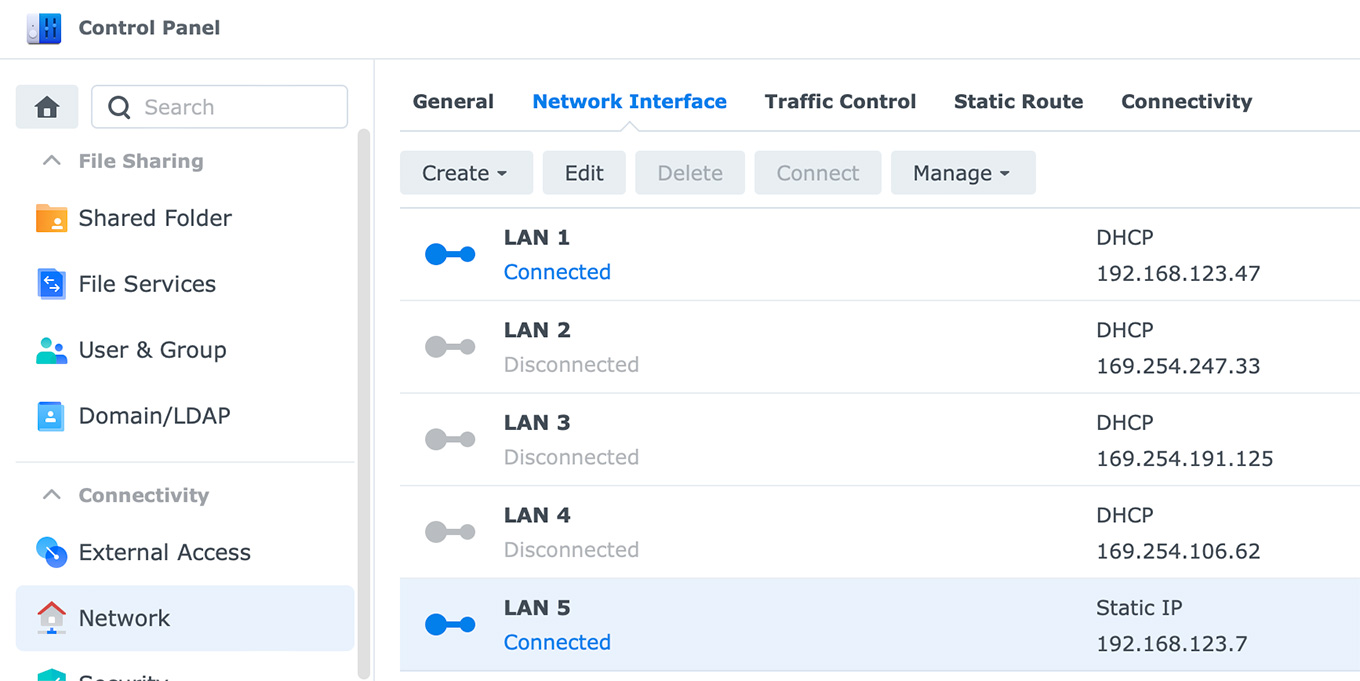
Network > Network Interface is where you enable the 10GbE connector; it will be listed as LAN 5.
NOTE: The IP address for the 1GbE port (LAN 1) is different from the 10GbE port (LAN 5). During my tests, I was accessing both ports depending upon what server speeds I wanted to test. While I generally recommend only using one connection to the server, this is not required.
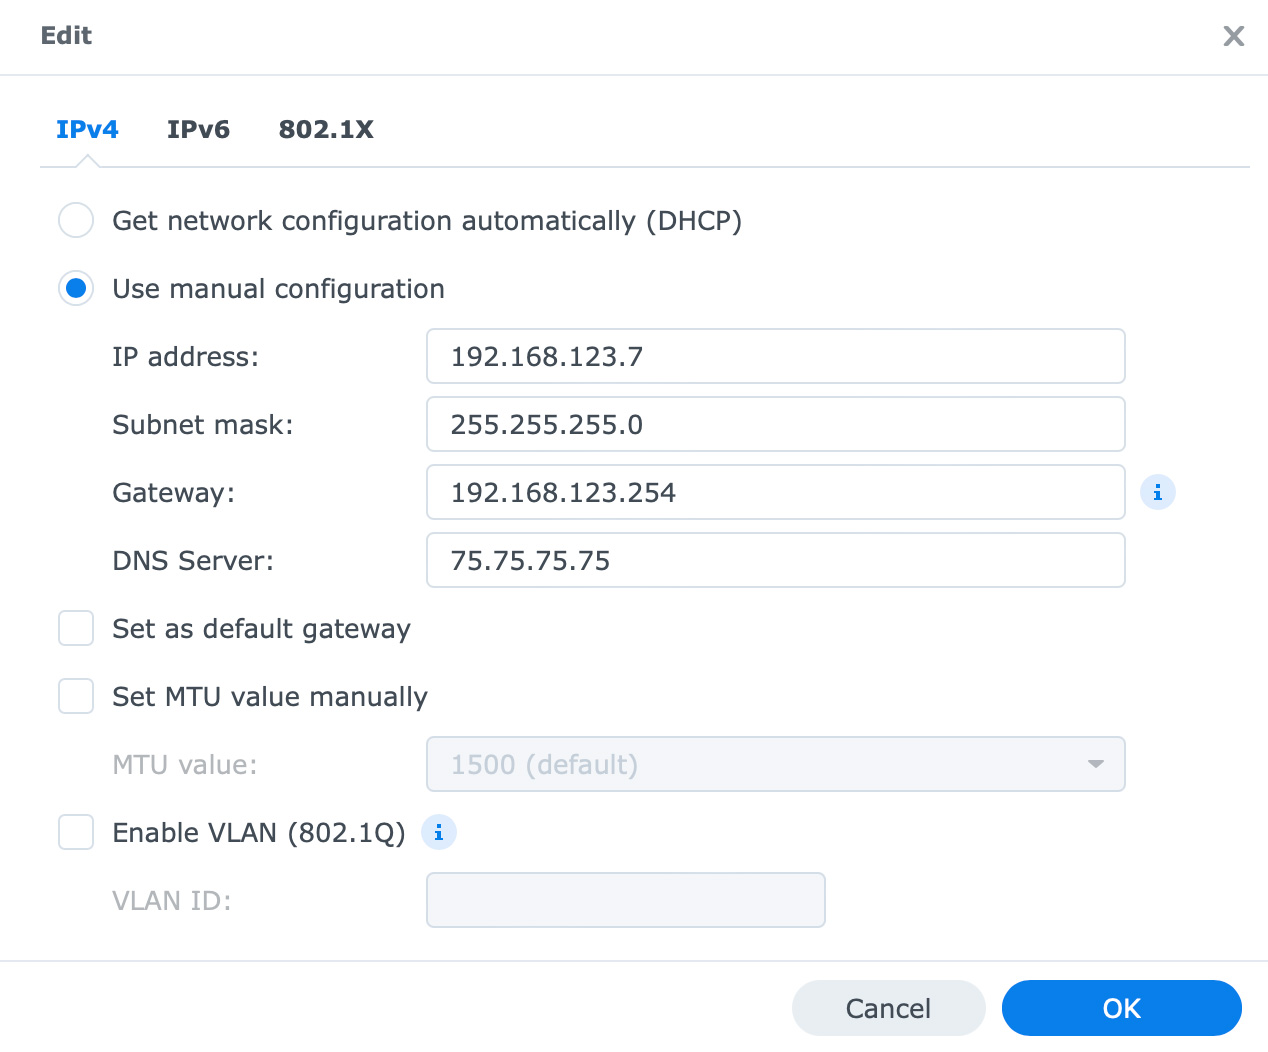
Select the interface, LAN 5 in my example, and click Edit. While the router will generally assign an IP address to the port automatically, it is a good idea to convert it into a manual IP address. That way, when the server is restarted, it won’t grab just any address, it will always return to the same address, making the server easier to find on the network.
IMPORTANT: Write down the IP address of the server. When you disconnect a cable, you break the connection to the server. To reconnect, type the IP address into your web browser. You’ll also need to enter your admin user name and password, which is why you wrote them down several steps ago.
Once the 10GbE port is working you can disconnect any other cables. While not necessary, this prevents accidentally accessing the server via a lower-speed port. All ports have their own IP address.
NOTE: Yes, virtually all Synology servers support link aggregation, which is another way to get more speed out of the server connection. While less expensive than the 10GbE port (because you don’t need to buy anything additional), the 10GbE port is much faster. I recommend using it.
Whew. The server is configured and ready for use. However, I’ll let optimization continue overnight and come back in the morning to show how to mount server volumes and start doing some speed tests.
NOTE: The actual optimization only took about eight hours. Duration depends upon total storage pool capacity.
SERVER OPERATION AND SPEED TESTS

A server volume needs to be mounted to the desktop of your computer in order to use it. To do this, in the Finder, choose Go > Connect to Server.
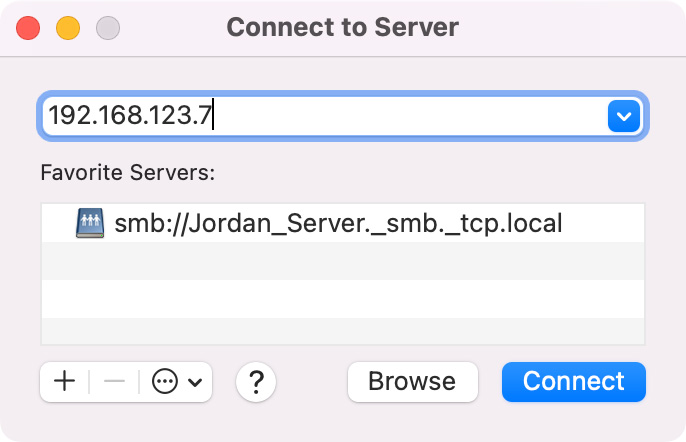
Enter the IP address of the server in the top line. You can also save this address as a favorite, as I’ve done on the lower line.
Within a few seconds, the server volume appears on the desktop, ready to use just like any other storage.

(Click to see larger image.)
Now the fun starts. Let’s see how fast the DS 1522+ delivers data!
I measured network speed using Blackmagic Disk Speed Test by averaging results from three separate tests. Disk Speed Test is optimized for transferring large files, which allows the network to run at its fastest for the test. I used two computers, a MacBook Pro and a Mac mini, each connected at two different speeds (1GbE and 2.5GbE). I tested using two different server ports; one running at 1GbE and the other at 10GbE.
NOTE: The column to focus on is the center one, in bold. While the maximum speed of a 1GbE port is 125 MB/second, speeds between 100 – 110 MB/second are closer to the real world. (Writing tends to be faster than reading.)
As expected, when only one computer accesses the switch, speeds are near wire speed. When two computers, or more, access the switch, performance slows when they share a 1GbE server-to-switch connection, but improves when the server is connected to the switch via 10GbE, even if the individual computers use a 1GbE connection.
In other words, network performance improves when you connect the server using a faster connection than that used by individual computers. The performance benefits of this technique are worth the extra cost.
The tests also show that when one computer is connected via 2.5GbE, transfer speeds to that computer more than double, even when a second computer is also running at wire speed. I found this faster server connection also helps significantly when exporting projects or compressing media files.
NOTE: It is worth noting that Activity Monitor showed transfer speeds 15-20% faster than Blackmagic Disk Speed Test. Activity Monitor is not always accurate.
There is one more important caveat to speed: transferring smaller files. Transferring lots of small files is far slower than transferring one large file. In general, transferring lots of small files slows data rates 50-75%. (Learn more about this in the Questions section, below.)
(Click to see a larger image.)
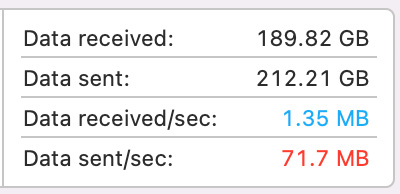
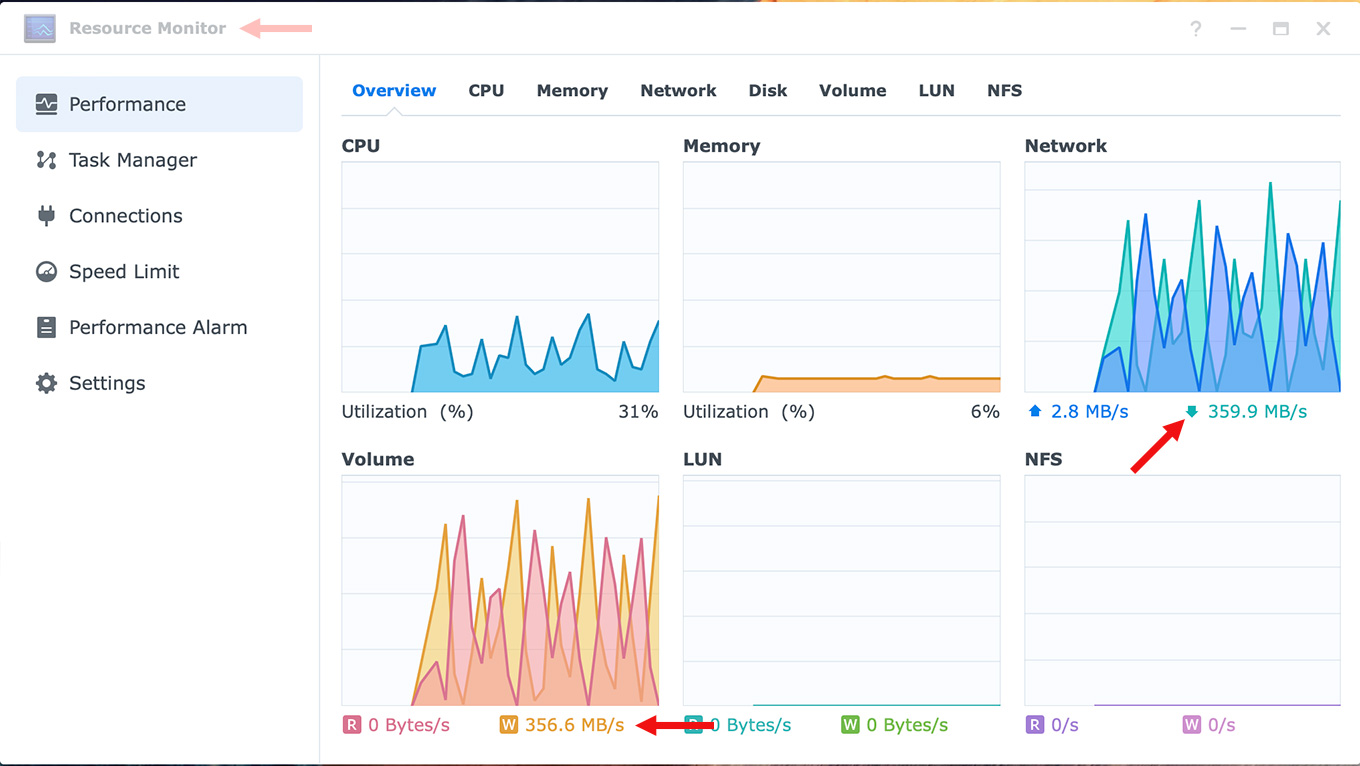
Log back into the server via your browser. (Remember, you use a browser to monitor or control the server.) A very cool feature of DSM is the Resource Monitor, accessed from the same icon you used to open the Control Panel.
The screen shot above was taken in the middle of these speed tests. The Network panel shows data read and write speeds where the server is currently reading 2.8 MB/second and writing 359.9 MB/second, yet the CPU easily handling it using than 10% of RAM. There’s plenty of headroom to support more connections, users or data. You don’t need to max out the hardware options to get great results from a desktop server.
NOTE: For small workgroups, Synology support tells me that 8 GB of RAM (the default) is fine. Any extra RAM is used for cacheing.
As expected, these tests prove that actual transfer speeds vary based upon the number of users, the size of the files being transferred, the number of the files being transferred, and the connection speeds between the server, switch and computer.
When I first began this review, I asked readers to email me their questions about servers. I then forwarded selections of these to Synology support for answers.
Question: I’m trying to get my head around what constitutes reasonable performance for a server. For example, when I transfer a large file to my Synology 1517+, I’ll see performance close to wire speed (125 MB/s for a 1GbE connection.) However, when I transfer a folder of 50 TIFF images, ranging from 10 – 20 MB each, transfer speeds fall to 12-15 MB/second. This is with one person connected to the server.
Synology: This is actually a common phenomenon. Basically, a file is composed of two parts: the actual data that composes the file, and the metadata that describes the file’s attributes: where it is in the directory tree, the file name, permissions, and where to find the file’s contents on the disk. The problem is that the metadata is in a different location on the disk than the actual file contents, so when you upload lots of smaller files, the NAS has to go back and forth between writing to the part of the disk with metadata, and writing to the part of the disk with the file.
In practical terms, this means that when you upload a single large file to the NAS, it writes the file metadata to, say… sectors 15 & 16, then just writes the file’s contents to sectors 100,000-250,000. In comparison, when you upload a bunch of smaller files to the NAS, it has to make a write to sector 15 & 16, then sector 100,000-101,000, then 17 & 18, then 101,000-102,000, then 19 & 20, then 103,000-104,000, and so on and so forth. With traditional spinning HDDs, needing to skip back and forth like this absolutely shreds performance, causing transfer speeds to drop like you’re seeing.
Question: When buying a server for a small workgroup focused on video editing, what determines how much RAM we should select?
Synology: There are no requirements and only a small number of use cases (such as virtualization) have RAM requirements. Any unused RAM gets automatically used for caching so it is suggested to upgrade the RAM as far as possible within your budget.
Question: When buying a server for a small workgroup focused on video editing, what determines which CPU we should select?
Synology: Mostly this depends on if you’re using 10GbE or SSDs. If you’re using HDDs then as long as you buy a Plus Series or better that’s good for business usage. If you have a lot of users (hundreds to thousands) is when you’d specifically go to the XS series or better. If you use 10GbE and HDDs then you can use anything 10GbE capable as the CPUs in those can keep up with that workload. If you use SSDs then the CPU can become a bottleneck in some use cases and that’s when you’d use the XS series. Truthfully, you don’t need to know much about this unless you’re a reseller doing consulting for your customers, a product inquiry can be put in and we have a variety of questions that helps to narrow things down to a specific use case and make a recommendation and that’s a completely free service.
Question: Synology makes many different servers, does rack-mount or desktop make a difference in performance?
Synology: The form factor does not determine performance but the product class does. You can see in this link that the Plus Series for example has both RS and DS NAS. It’s only the most high-end NAS that are only rack-mounted as they’re solely for business use.
LARRY’S NOTE: RS indicate rack-mounted servers, while DS are desktop servers.
Question: Can the server be setup to reboot after a power failure? If so, is there a way for it to then auto-connect to clients?
Synology: Yes. This is an option in the Control Panel. Read this tech note.
I would also suggest using an uninterruptible power supply to minimize power outage events. We have a compatibility list here.
Question: When should an SSD accelerator card be used?
Synology: I assume you mean SSD caching? You can do caching with 2.5″ SSDs in the drive bays, in M.2 bays on the NAS that have them, or buying an M.2 slot add-on card for a compatible NAS like you mentioned. SSD caching does not provide a general performance boost and is meant to improve random access speeds.
Here are the use cases.
Question: Does Synology make servers which are all-SSD based? (If so, which ones?)
Synology: You can use SSDs in all of our NAS. The NAS specifically intended for SSDs are the FS series.
There are no typical use cases – we’ve seen people use them for all of the things you’ve mentioned as well as virtual machine storage. Anything that benefits from either 1) high IOPS/random access speed or 2) fast sequential transfers. SSDs are great performers because they can excel at both of these use cases at the same time whereas HDDs aren’t great at either, but handle sequential transfers better than random ones, which is why we have the SSD caching option to increase random I/O for HDDs but it’s still not as good as using SSDs on their own.
Question: If a server volume is configured for Mac Time Machine backup, can that volume be mounted automatically so that the Mac sees it and Time Machine will then back up to it reliably? (I have yet to get this to work consistently.)
Synology: On Synology NAS products you access data at the shared folder level, not the volume level, and we have a Time Machine guide to follow.
If you run into problems then we have a troubleshooting guide.
If it’s still not working after that feel free to contact our support team. I will note that historically Time Machine has worked better on a wired connection than a wireless connection so it’s likely the support team will have you test to see if you get better results wired if you’re not using a wired connection already.
LARRY’S NOTE: I have struggled for years to get time machine backup to work reliably on my Synology server. Even the latest version of DSM it is problematic.
Question: What server software maintenance does Synology recommend and how often should it be performed?
Synology: Everyone’s use case is different so there’s no recommended maintenance or otherwise we’d just turn it on by default. My personal recommendation for business use is turning on data scrubbing and be aware of the variety of options it gives you – it reduces performance while it runs so you can set a schedule and block out certain times.
Question: What setup guides to system configuration does Synology provide, specifically for small workgroups using the server for media.
Synology: We have a large variety of tutorials (including video tutorials) along with help pages for all of our apps and DSM menus here: https://kb.synology.com
DSM Help is also included directly on the NAS itself and that has the help pages for the apps and DSM. It also offers some basic walkthroughs for setting up things like setting up shared folders and accessing them through Windows Explorer and Finder.
Synology makes excellent servers and backs them with responsive and knowledgeable tech support. Servers are designed for sharing data within a workgroup and Synology provides a wealth of additional software tools to extend the basic operations of a server.
When deciding what to purchase, don’t worry about the CPU it uses or buying more RAM. Synology’s default hardware choices are fine. Be sure to buy hard drives, or SSDs, that are designed for servers. They make a difference in longevity. Concentrate on getting as much storage capacity as you need, then add an 10GbE port if your switch supports that speed. It is worth the extra cost.
Nothing replaces directly-connected storage for speed. But nothing is better at sharing than a server. The Synology DS-1522+ is an excellent choice for any small network.