
 [ Disclosure: I purchased both these scanners for my own use. Updated March 17. 2024, with better information on dust removal technology.]
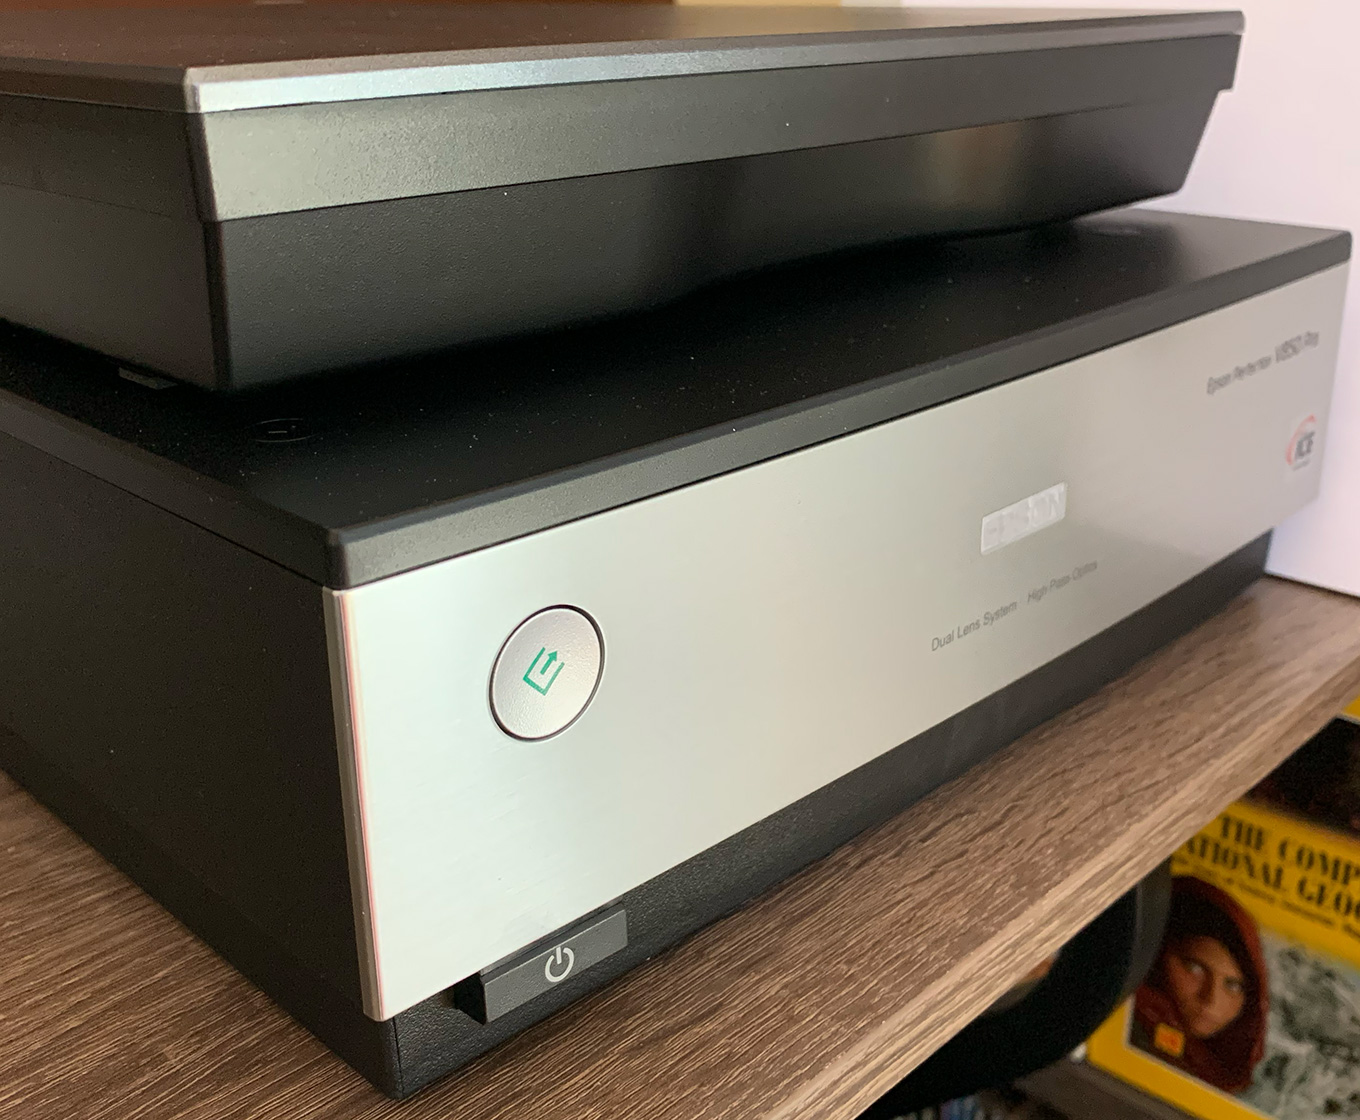
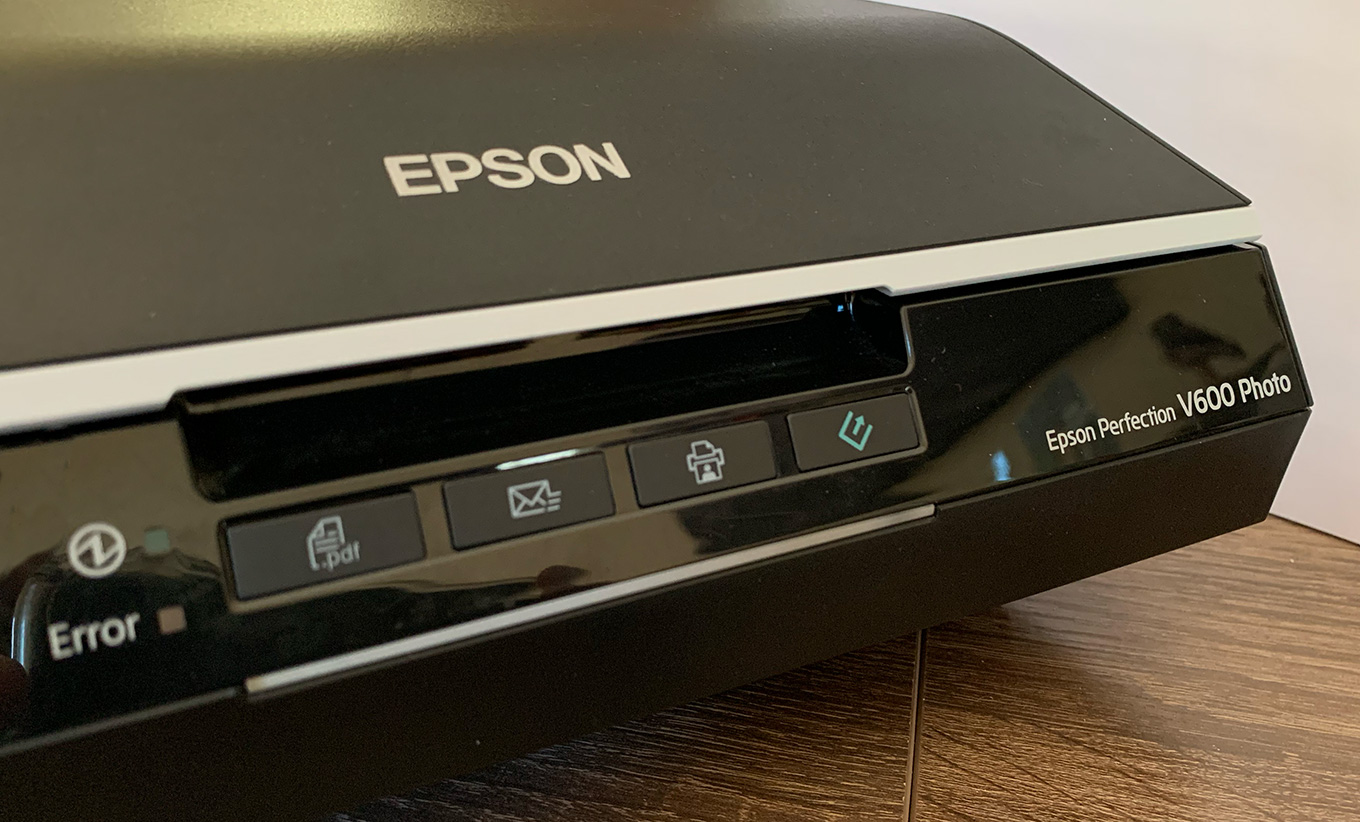
I am a long-time fan of the Epson Perfection V600 Photo scanner (V600). I’ve owned and used one for many years and it has provided highly reliable, high-quality scans. It has never failed in years of use.
Recently, though, I inherited hundreds, perhaps even thousands of historical slides that need to be digitized. After researching a scanner that would allow me to scan more slides faster but with precise image control at high-quality, I selected the Epson Perfection V850 Pro (V850).
Why? Because the V850 has all the resolution I need, saves into uncompressed formats like TIFF and PNG, has the image controls I need for high-quality scans from 35mm slides, and can scan up to 12 slides at the same time in a batch.
Both Epson scanners are very similar, but there are clear reasons to choose one over the other, depending upon your needs.
EXECUTIVE SUMMARY

Epson Perfection V600 Photo
In one line, if all you need is to scan documents and photos, the V600 is the scanner of choice. If you need to scan transparencies as well as photos, or need better dust and scratch control, the V850 is the better choice.
Epson makes excellent scanners which live in the sweet spot of providing high-quality, high-resolution professional-grade scans without breaking the bank. Both systems, depending upon the scanning software you use, can scan up to 6400 dpi and save into PDF, PNG, TIFF, and JPEG. Epson scanners are popular (which means lots of third-party support), reliable and high quality.
NOTE: Both scanners offer interpolation for higher-resolutions. However, interpolation is like scaling a video image beyond 100%; all you are creating is fatter pixels, not better quality.
Scanners are one half of a two-part system: To make the most of your scanner, you also need high-quality scanning software. Both scanners come with Epson Scan 2, Epson’s scanning software. The latest version of Epson Scan 2 has problems running on M1 Macs. I’m disappointed in it. Epson seems to be taking the software in the wrong direction. Better scanning software is LaserSoft Imaging’s SilverFast SE Plus 9, which I cover in a separate review. (Read it here.)

Epson Perfection V850 Pro
Both scanners scan photos, 35mm slides, 35mm negatives and medium format film. Both have optical resolutions up to 6400 dpi (which you will never need). Both scanners work at 48 bit depth for color and 16 bit depth for black and white. Both scan images up to 8.5 x 11.7 inches. The V600 has an optical density of 3.5 Dmax, while the V850 has an optical density of 4.0 Dmax. (Dmax only applies when scanning slides, the higher the Dmax, the greater the image detail in shadow and highlight areas.)
Both can remove dust and scratches, though the V850 does a much better job. As well, dust removal works best with slides, rather than prints. Both scanners are excellent at scanning documents as well as photos.
NOTE: Though, truthfully, if you are just scanning documents, one of Fujitsu’s SnapScan family of scanners is probably a better choice.
If all you need is to scan photos and occasional slides, the V600 is an excellent choice. If you need the highest quality slide and film scans, along with great photo scans, the V850 is a better choice. The V850 is also marginally faster than the V600.
Manufacturer: Epson
Website: Epson Perfection V600 Photo scanner
Website: Epson Perfection V850 Pro scanner
V600 retail price: $249.99 (US)
V850 retail price: $1,149.00 (US)
GET STARTED
Both scanners include all the hardware you need to get started: scanner, power brick, plastic trays for holding transperencies, and Epson scanning software. However, the V850 (shown above) is also bundled with SilverFast. I’m not sure whether this software is included in the V600.
Connecting these is no different from any other computer hardware: plug it in and turn it on.
Installing the Epson Scan 2 software is also relatively straightforward and doesn’t take long. However, please read the manual. Don’t connect the scanner until after the software is installed.
SCANNING PHOTOS
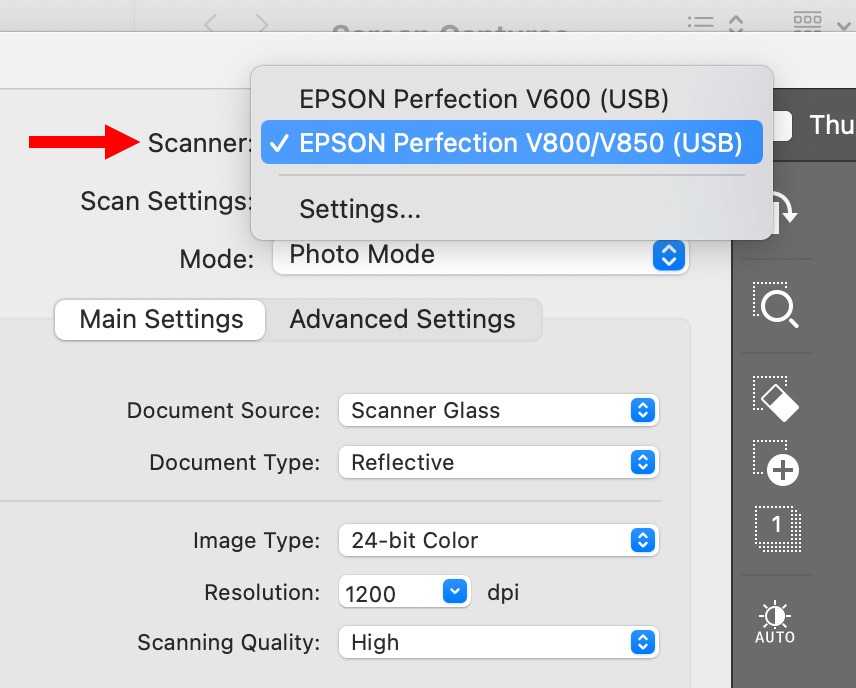
From a spec point of view, the two scanners are essentially identical. Epson Scan 2 supports connecting and scanning from multiple scanners on the same computer, though only one scanner can be active at a time.
So, as a test, I used the Epson Scan 2 software to scan the same images on both scanners. Images can be scanned into TIFF, PNG, PDF or JPEG. I generally prefer TIFF, but PNG is uncompressed as well.
NOTE: I am not a fan of creating a high-quality image scan and mastering it as a JPEG.
For this review, I scanned two 4×6 color prints and one color slide at a variety of resolutions and color bit depth on both scanners, then compared them.
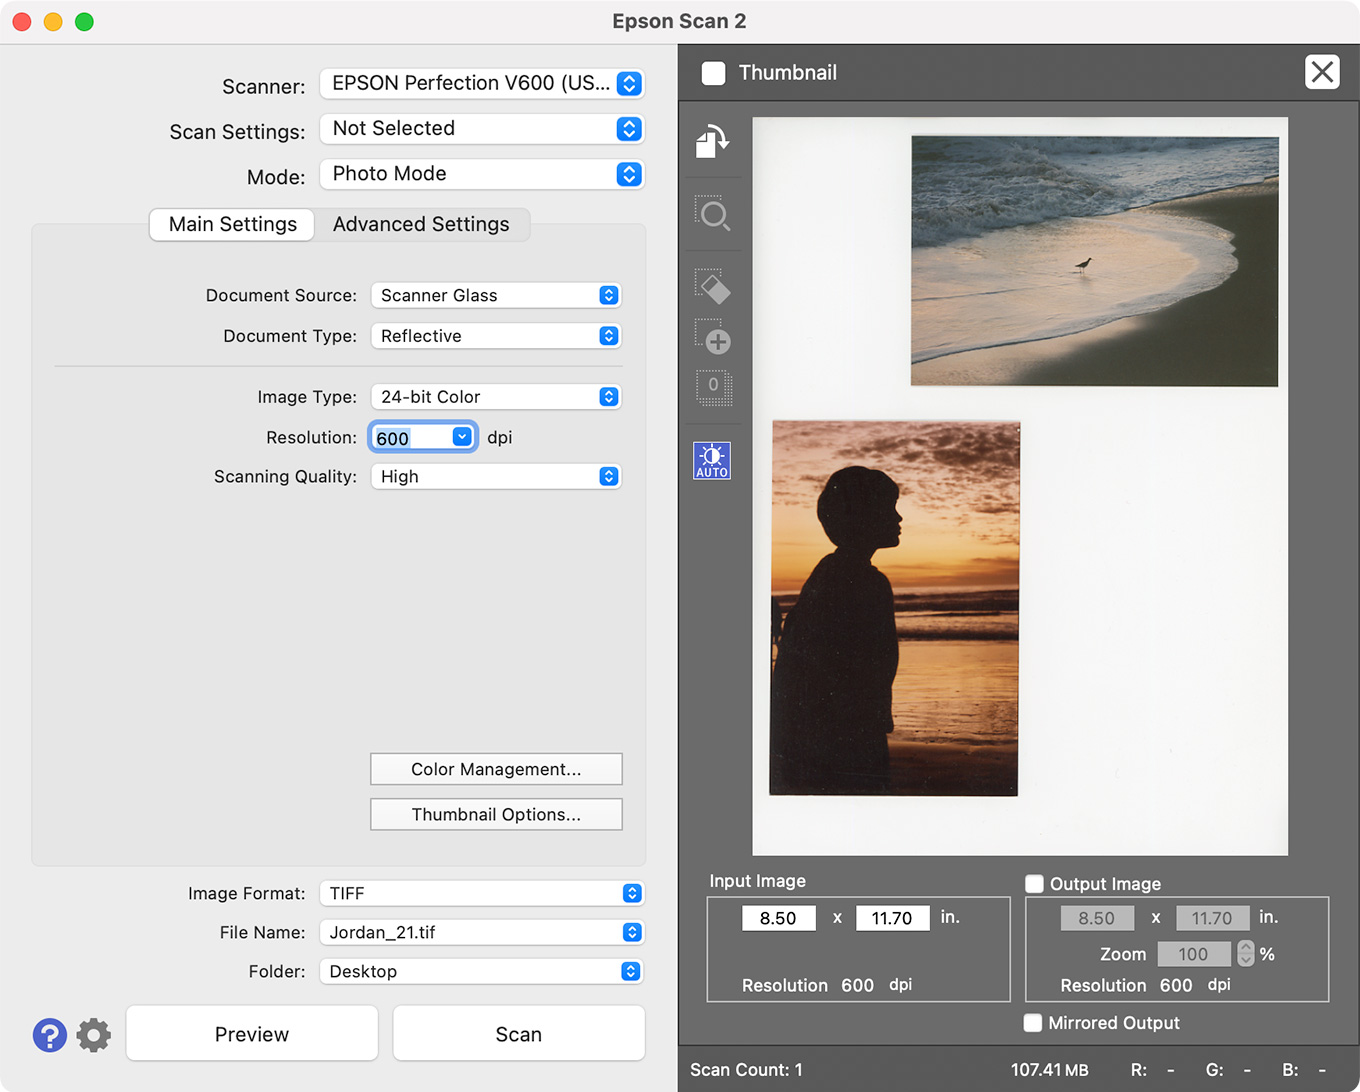
This is the Epson Scan 2 interface, showing my two sample photos, which contain a wide range of gray scale and lots of color.
When I first wrote this article, I adjusted the Histogram of each image before scanning to get the best image possible. Epson Scan 2 provides Histogram, Curves and Color Balance adjustments. Then I realized that it would be better to use the default settings from the software for each scanner. Using the defaults gives a better idea of the results a new user would get.
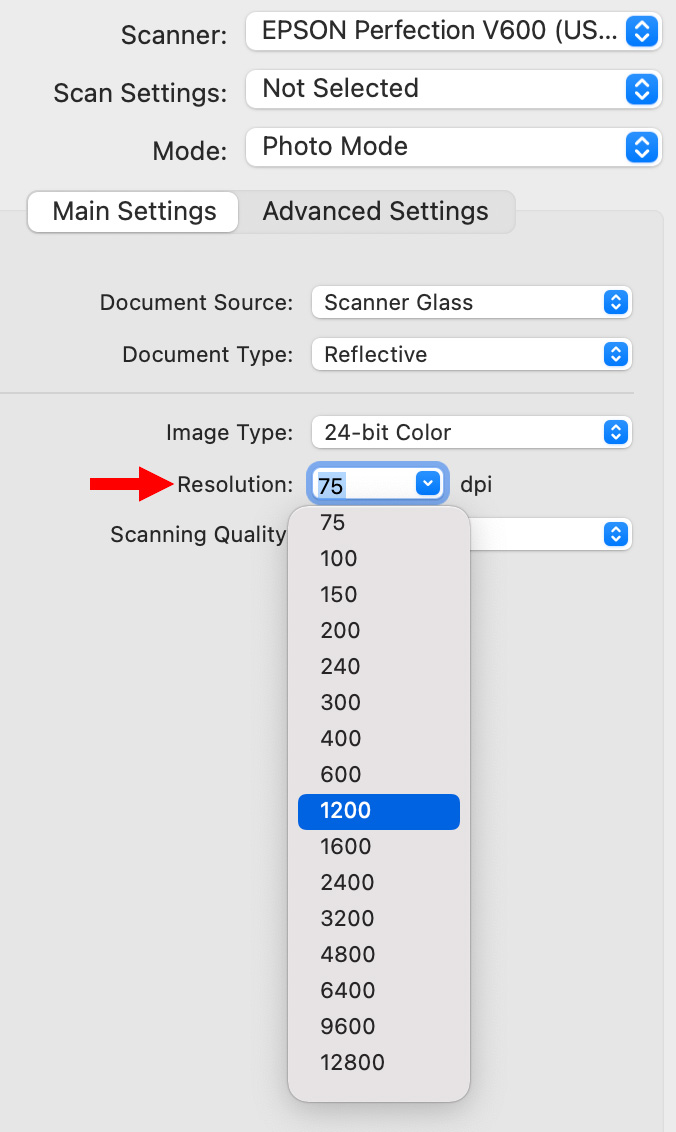
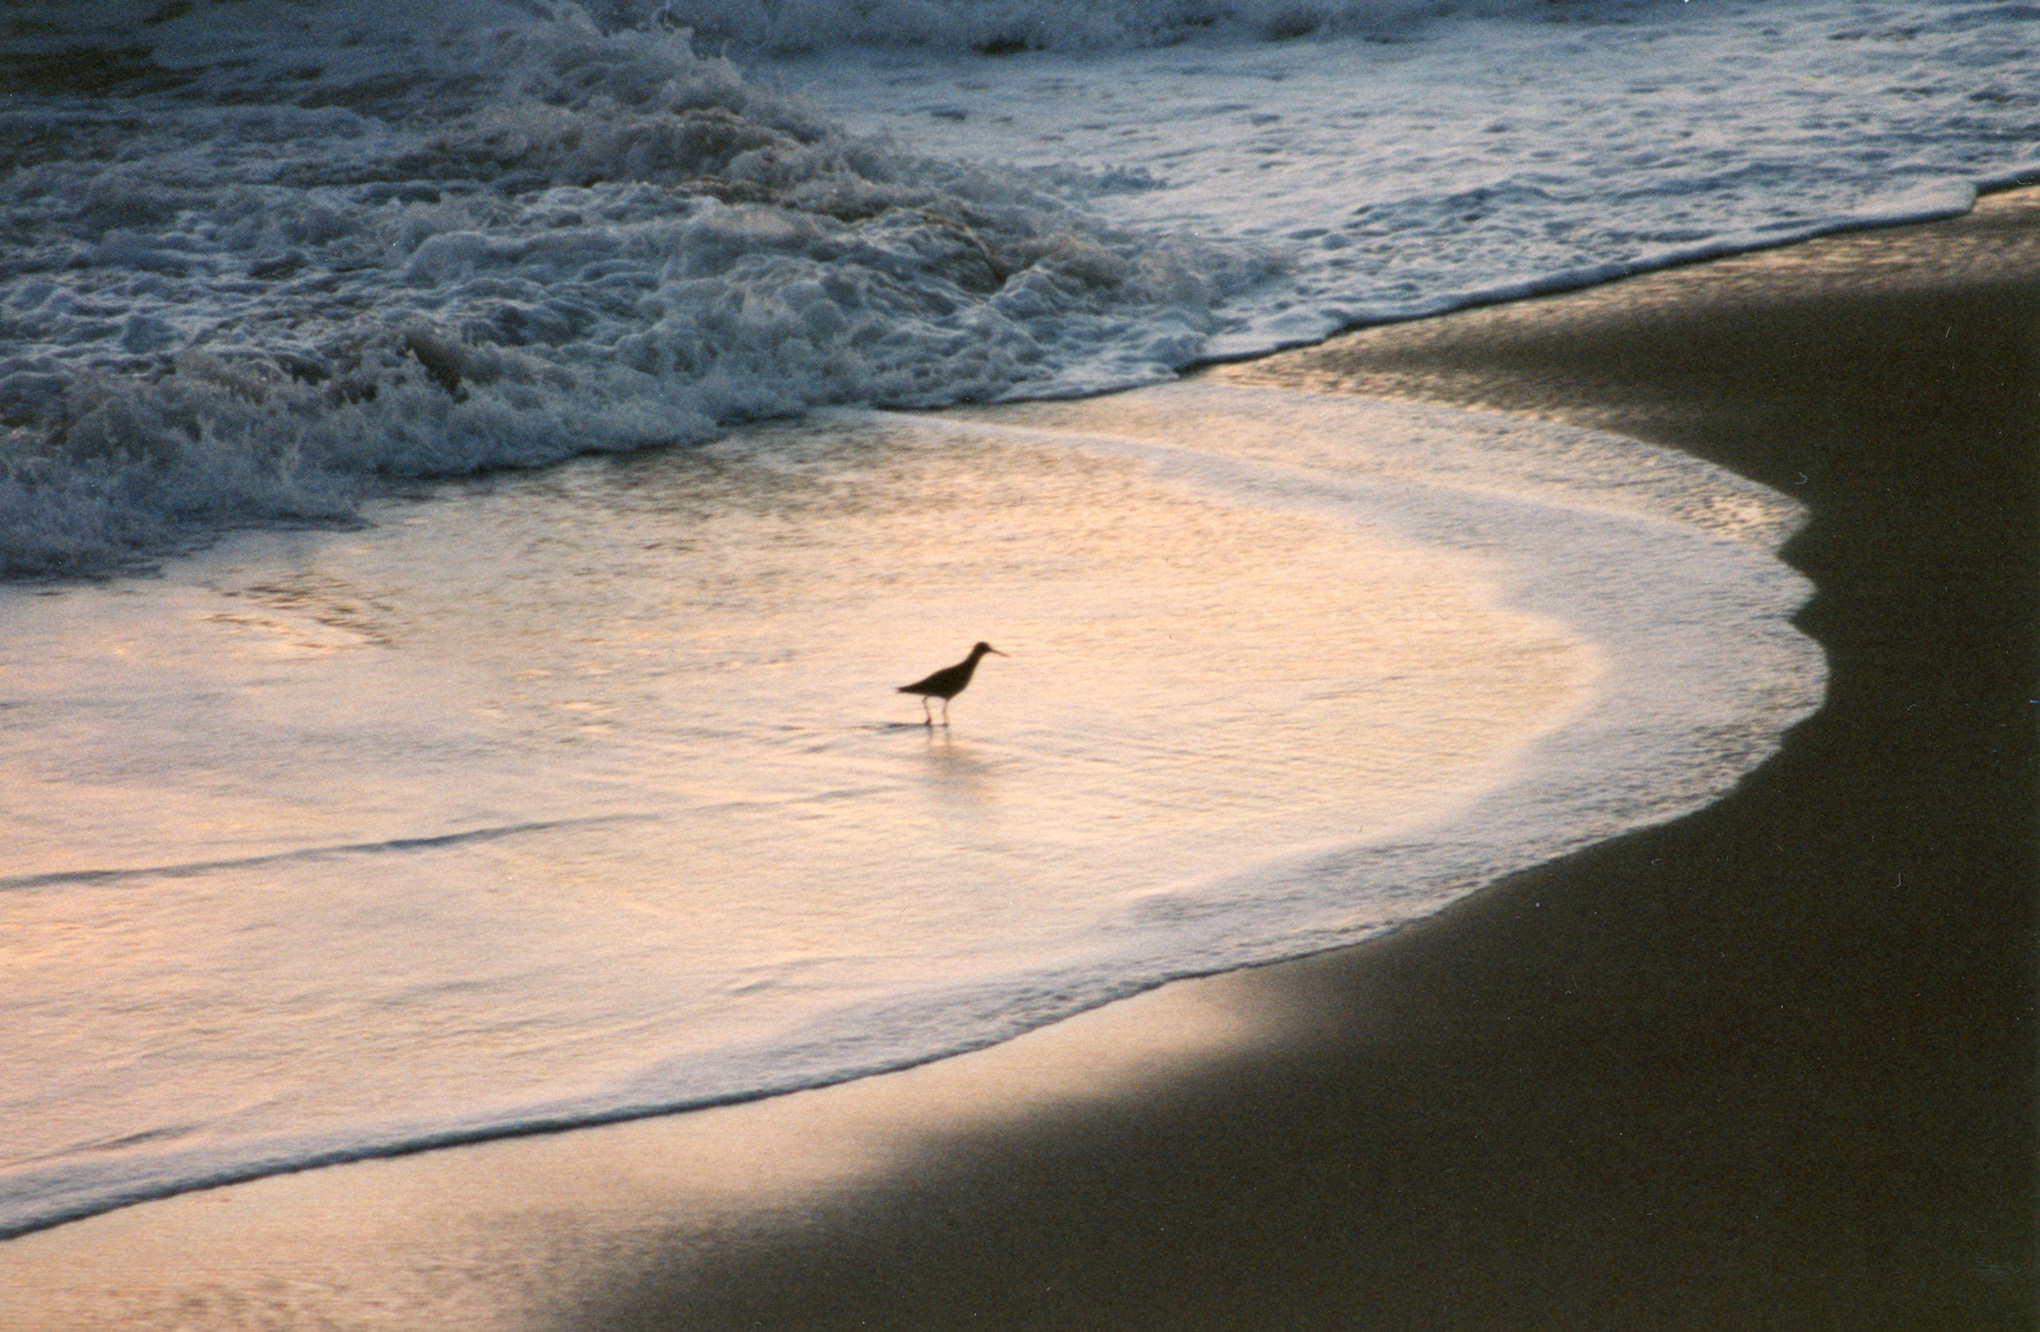
NOTE: The following images were all scanned at 6K which created an image too big to post to the web. I then moved them into Photoshop and scaled them to 2K JPEGs so they could be posted. I did not make any adjustments to the image in Photoshop other than scaling. The scan settings were 600 dpi, 24-bit color, TIFF, with dust removal turned on for both scanners.
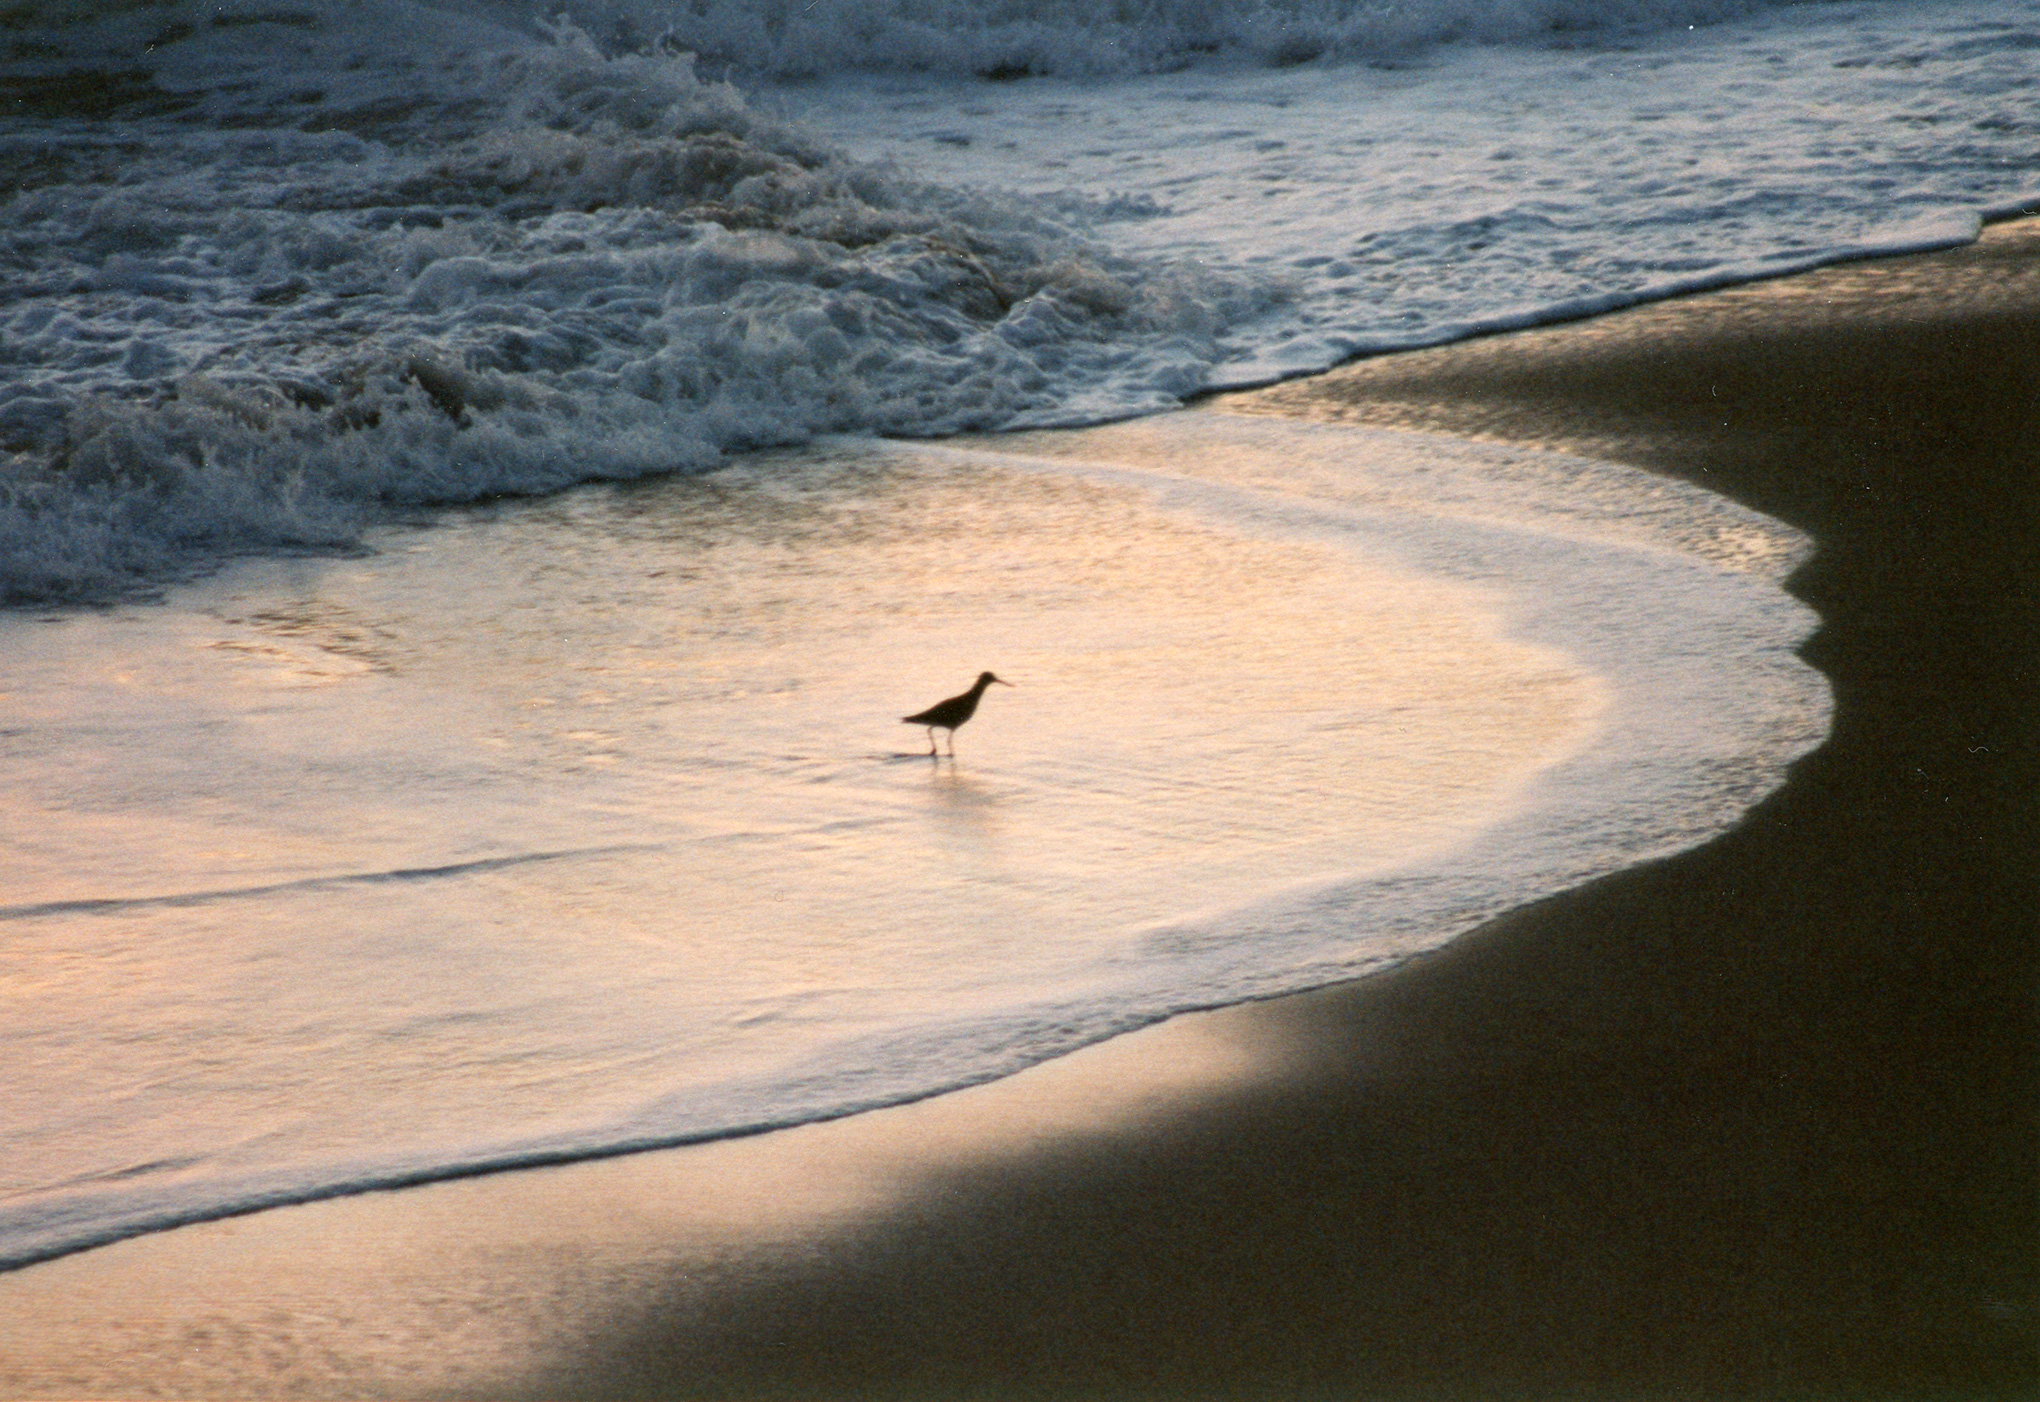
(Click to see larger image – or drag to your desktop.)
The V600 image is on top, the V850 on the bottom. Even with dust removal turned on, the V600 didn’t remove many speckles. However, from a scanning point of view, both images are very similar in quality.

(Click to see larger image – or drag to your desktop.)
Again the V600 image is on top and, again, notice the significant amount of dust the V600 did not remove using its default setting.
Based on multiple tests, the two scanners create very similar scans at their default settings, though the V850 does a better job of dust removal. However, remember, image quality is a combination of both hardware and software; and the software was the same in both cases.
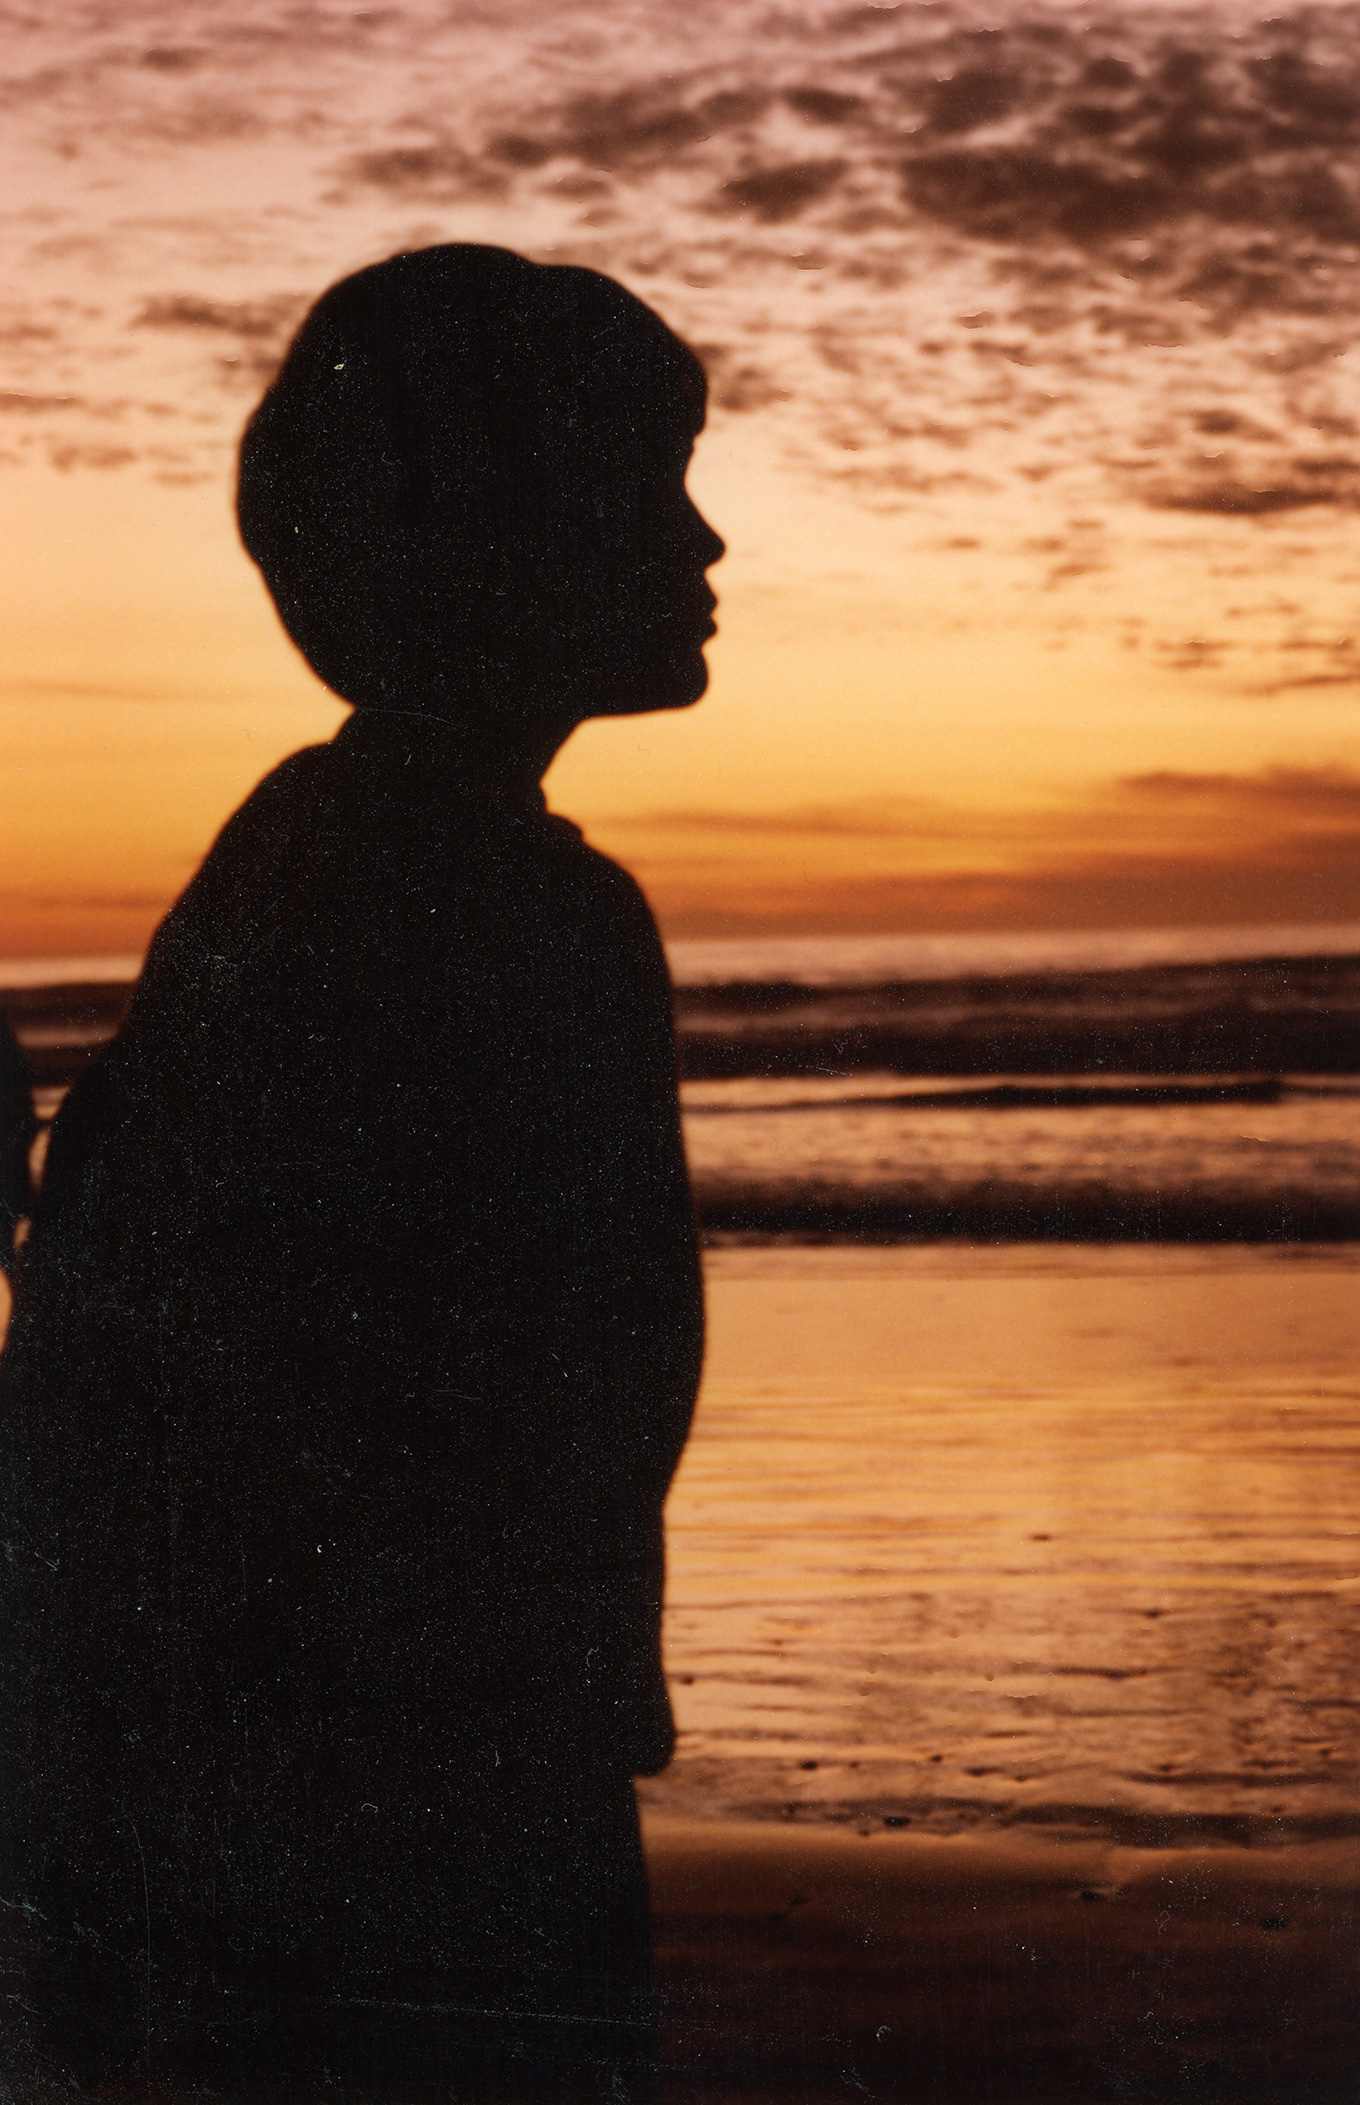
NOTE: As you can see in this second example, if the focus isn’t perfect in the print, it will look worse in a high-resolution scan. It is amazing to me how many really bad photos I’ve taken in my life.
I scanned both images as a batch and timed the total scan duration. Here are the timing and file size results for the V600:
Here are the timing and file size results for the V850:
When the two resolutions (1200 & 600 dpi) were loaded into Photoshop, they looked virtually identical when scaled to the same size. At actual size, both images looked blurry because the print didn’t have enough detail to support 1200 dpi scanning.
NOTE: The same resolution yielded the same file sizes on both scanners. This is what I expected. What I didn’t expect was that changing color bit depth did not change scan times, though it did change file size.
When working with printed photos, as opposed to transparencies, there is no reason to scan at more than 600 dpi or 24-bit color. Much though I would love to endlessly enlarge photos of family and friends, the resolution and color detail in the print itself just isn’t there.
NOTE: While there is no difference in scanning speed when adjusting color bit depth, there is a significant difference in scanning speed when adjusting resolution (dpi).
SLIDE SCANNING

The V600 can scan up to 4 slides at a time. However, while the plastic slide holder holds the slides, it does not do so very securely. They can be easily bumped out of position. (The open strips to the left are for holding film negatives.)
NOTE: Slides should be loaded into the scanner so they look correct (left / right and up / down) when you look down on them on the scanner bed.
The slide holders for the V850 are more carefully thought out. The plastic guides feel a bit heavier (though you need to be careful as they can still break), and they hold the slides in place with little clips.
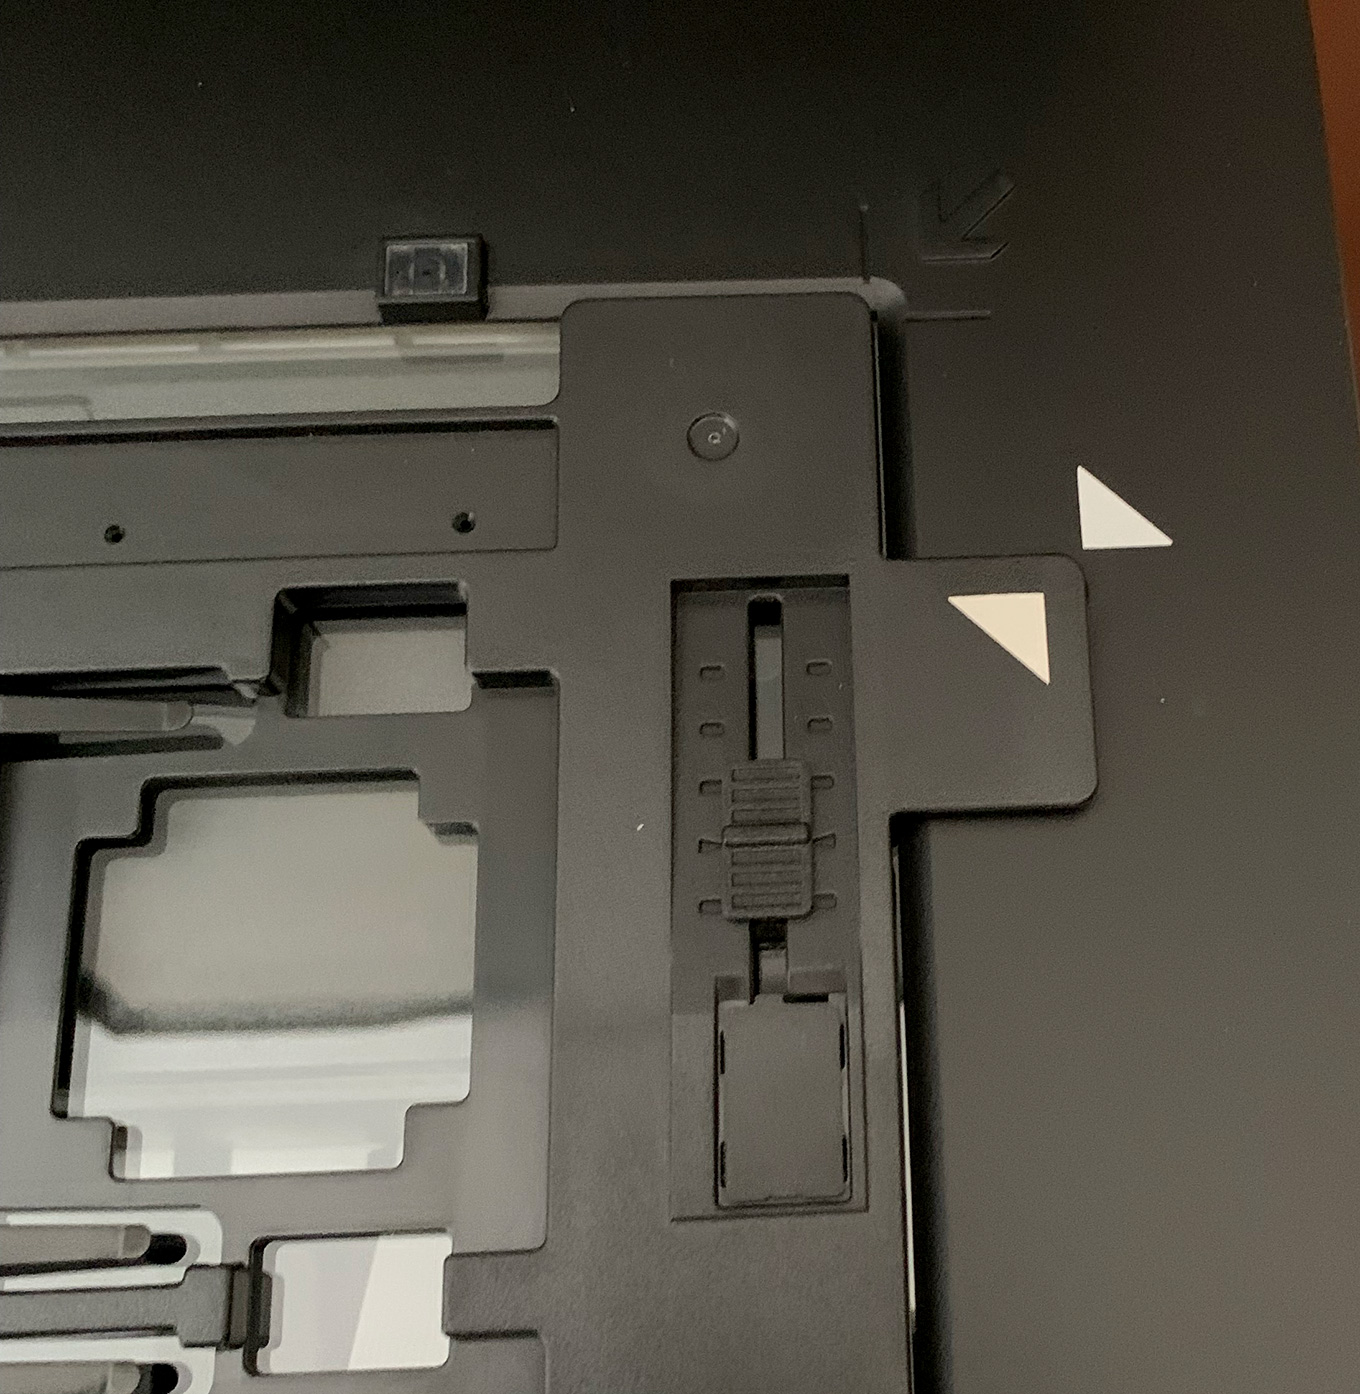
The guides themselves slip into pins on the side of the scanner which assures that the position of the slides won’t change as you close the cover. I like both these features a lot.
(Click to see a larger version of each slide. Please do so to better see dust and sharpness.)
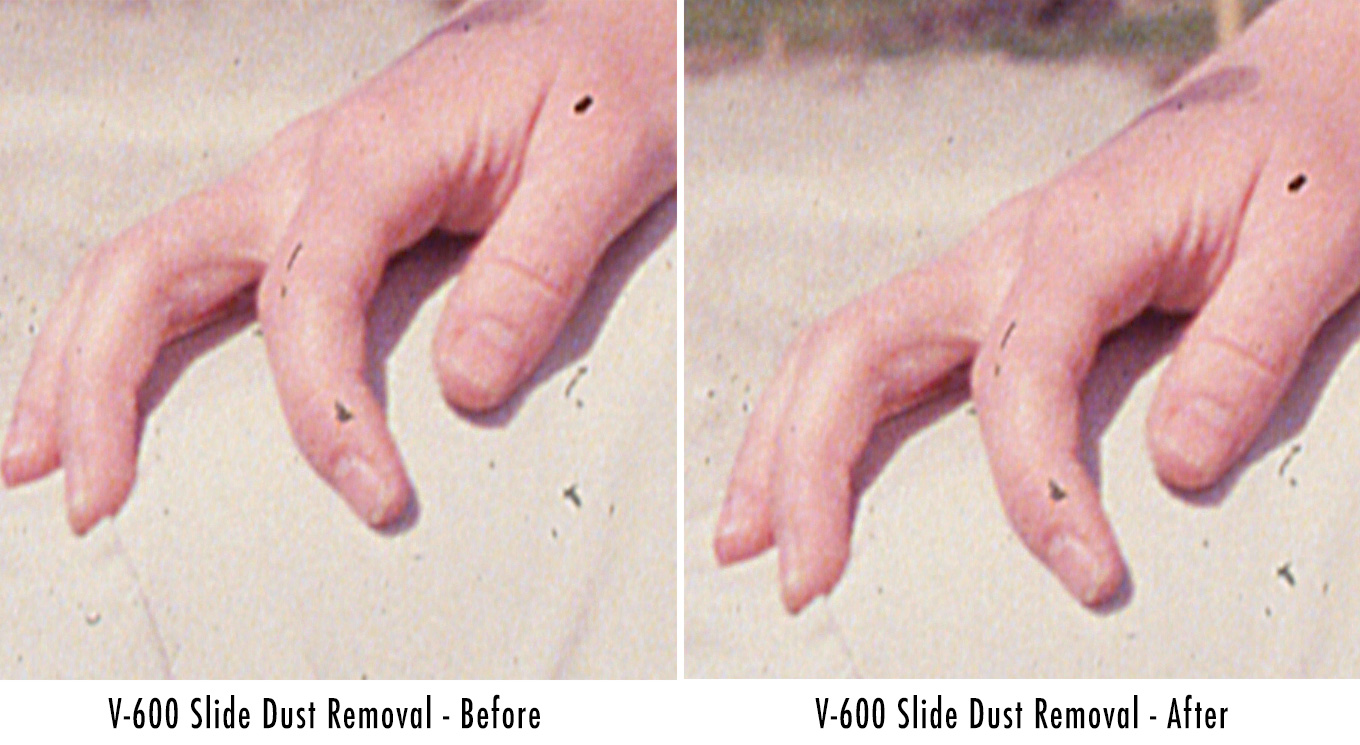
The top image is scanned from a 35mm slide by the V600 at 4800 dpi (scaled to 2040 x 1378) with dust removal turned ON. The bottom image was scanned by the V850 at 4800 dpi (scaled to 2040 x 1378) with Digital ICE dust removal turned on. The bottom image is MUCH better! Essentially slide dust removal is not properly enabled on the V600.
NOTE: The Digital ICE dust removal technology makes a big difference, though it does slightly soften the image. Both scanner tests used the default ICE settings.
Here are the file size and timing results for the V600 scanning the image at 4800 dpi, 24-bit color. (Note: I think the key reason these times are so close is that Epson Scan 2 software does not properly implement the infra-red scan required for dust removal.)
The V850 scanned the sample 35mm slide at 4800 DPI, 24-bit color:
I mentioned there is a big difference in dust removal between the two scanners. Let’s compare the two, again, using Epson Scan 2.

Although it took longer to scan each slide, the quality difference using Digital ICE dust removal on the V850 is significant and worth waiting for. There was only a slight loss of detail when ICE was turned on, as these close-ups show (image shown at 100% size, scanned at 1200 dpi.)
UPDATE: The big difference here, I learned later, was in the default settings for dust removal. Tweaking the settings for the V-600 will improve dust removal in slides. Dust removal for prints is MUCH less robust due to the infra-red technology used in both scanners. And, dust removal doesn’t work at all for B&W slides or negatives.
ADDITIONAL THOUGHTS
Both scanners connect via USB 2, which is more than fast enough to support the data coming from a scanner. If you have a Mac with only USB 4 ports, you’ll need a USB adapter, which costs about $20 for a set of two.
Epson Scan 2 really does not like running on M1 Macs. It continually lost connections with both scanners. This forced multiple restarts of both the scanners and software.
UPDATE: This review was written when M-series Macs were new. I haven’t tested Epson Scan 2 software since, as I use LaserSoft Imaging’s SilverFast SE Plus 9, exclusively.
Though I’ve used Epson Scan for many years, the latest version is really difficult to use. Epson keeps trying to streamline the software. This effort is misdirected. While everyone likes automation to speed their work, if we wanted fast and cheap, we would not spend the money for an Epson scanner. As pros working with pro tools, we need easy access to image enhancement tools like the histogram, the ability to set and load presets and Curve and Histogram screens that don’t keep disappearing.
For example, after a preview scan, Epson Scan 2 sets the histogram levels such that both shadow and highlight detail are lost; this means that the Histogram needs manual re-setting for each slide before scanning. Also, tools like the Histogram are hidden multiple menus deep and there’s no way to save setting presets to speed scanning similar slides.
SUMMARY
Epson’s Scan 2 software is OK, but should be avoided if you are running on an M1 Mac. Instead, I highly recommend Lasersoft’s SilverFast 9 SE plus scanning software (the version just above the free version). It provides much better control over the scanner with higher-quality results.
If you are only scanning documents and printed photographs, the Epson Perfection V600 Photo scanner is an excellent choice. It creates scans that are the equal of the V850 for 1/4 the price and at roughly the same speed.
If you are scanning a few slides occasionally, the V600 is still a good choice, but only if you use LaserSoft’s SilverFast SE plus scanning software.
If you are scanning documents, photos, slides, negatives, or transparencies, the quality of the Epson Perfection V850 Pro is unsurpassed, especially when you want to remove dust and other blemishes without degrading image quality. And it is slightly faster than the V600.
I’m very happy with the Epson Perfection V850 scanner because I have so many slides to scan. But the V600 is an excellent choice for those on a budget. And, in all cases, I’m using SilverFast 9 as my software.
NOTE: Here’s my review of SilverFast SE Plus 9 software, from LaserSoft Imaging.
42 Responses to Review: Epson Perfection V600 vs. V850 Photo Scanners
← Older Comments-
 Siva says:
January 22, 2024 at 1:14 am
-
 Larry Jordan says:
January 22, 2024 at 4:29 am
-
 Richard George says:
January 22, 2024 at 8:19 am
-
 Larry says:
January 22, 2024 at 8:44 am
-
 Jim napier says:
February 2, 2024 at 5:25 am
-
 Larry says:
February 2, 2024 at 6:24 am
-
 Abhijit says:
August 7, 2024 at 10:31 am
-
 Larry says:
August 7, 2024 at 10:43 am
-
 Neal Andrews says:
September 9, 2024 at 10:31 pm
-
 Larry Jordan says:
September 10, 2024 at 3:51 am
-
 John says:
September 10, 2024 at 9:19 am
-
 Larry says:
September 10, 2024 at 11:08 am
-
 John says:
September 11, 2024 at 7:06 pm
-
 Larry says:
September 12, 2024 at 3:55 am
-
 Alvin says:
October 19, 2024 at 1:00 pm
-
 Larry says:
October 19, 2024 at 1:10 pm
-
 Alvin says:
October 19, 2024 at 1:01 pm
-
 Larry says:
October 19, 2024 at 1:11 pm
-
 Howard Silver says:
October 21, 2024 at 8:59 am
-
 Larry says:
October 21, 2024 at 9:24 am
← Older CommentsThank you Larry. I have recently bought a windows 11 desktop. Does this have the driver and software for it?
Siva:
I’m Mac-based, so I don’t know for sure.
But I can’t imagine that Epson would not support Windows.
Larry
Thanks for the review!
I have a new Mac Studio M2 Max with a Studio Display that I am just now trying to get set up (including de-activating software on my old Mac Pro Darth Vader flower pot).
There are two USB-A ports in the back. Will I need the adapter you mentioned?
It would be nice to connect a scanner via ethernet, by the way.
Richard:
Smile… but it’s a CUTE flower pot.
Both scanners connect via USB-A, so you won’t need an adapter. As for an Ethernet scanner, you can accomplish that with some multi-purpose printers, but I am dubious about their image quality.
Larry
Thanks for the review.
My question is regarding software and the Epson V600 / V850. How much does the software play into the performance of the scanner, for dust removal, resolution, etc? I have an M1 Mac and Silverfast was painful and crashed repeatedly when I briefly owned a Plustek 8200. I am running on a budget, but also need the highest quality scans for my prints. Also, any thoughts on the epson wet mount?
thanks-
Jim
Jim:
Thanks for writing. Software is critical to the operation of any scanner. A scanner, by itself, is simply an expensive doorstop. In reading Silverfish’s website: “Native Apple Silicone support depends on the availability of drivers provided by the scanner manufacturer. For scanners that already have native drivers, native mode is automatically used by SilverFast 9. For scanners without native support, the Intel driver is used.” (link)
I’m currently using Silverfast using an Intel system with Epson scanners. I haven’t upgraded my scanning computer yet.
The software provided by Epson is pretty good, though the interface is clunky. The native Epson software also provides a variety of scanning resolutions and dust removal and doesn’t require the purchase of additional software. Epson scanners are widely used and widely supported by scanning software.
Keep in mind that “highest-quality” is relative. You can’t make a 2×3 snapshot look like an 8×10 negative. You can only scan the quality that’s in the image. For me, that means scanning prints at 400 dpi and 35 mm slides at 1800 dpi. I had three 2×2 negatives, which I could scan at 2400 dpi. You can scan at higher resolution, but you won’t get more out of your image.
Larry
I’ve an Epson V550 that I had purchased used. My 35 mm color negative scan settings have been image type: 48-bit color, resolution: 3200 dpi, scanning quality: high, that produces TIFF files around 75 MB. I don’t use ICE, or any other correction as I’ve found that only slows the scans down. Recently, I got a roll scanned at a pro lab, and the files are around 37 MB each, but the quality is phenomenal. Of course, they used a $$$ Noritsu.
Reading up online, it seems the V550/V600 maxes out around 1600 dpi, so, apparently I’ve been wasting time and storage space. That said, most people seem to recommend using the highest bit depth available on the scanner, which for Epson, is 48-bit, and differs from your settings. I’m going to try 2400 dpi with 48-bit for my next roll. It is also recommended to use Silverfast or VueScan to get better results than Epson s/w (I use Epson s/w).
Abhijit:
According to the Epson website, the V5500 has a hardware resolution of 6400 dpi. However, for most slides, that’s greater than the resolution of the slide itself. Unless the slide is a perfectly focused and exposed Kodachrome, I tend to scan at 1800 dpi, max 2400. Cutting your scan resolution in half will reduce your file size 75%.
Yes, ICE takes longer, but the results, when properly configured are amazing if you are dealing with dirty or dusty slides. Yes, you should use the highest bit depth – though, again, unless your slides are phenomenal, 24 bit depth will be fine.
I’m also a big fan of SilverFast. Far more control than Epson, but it has a learning curve.
Larry
Thanks for a brilliant review.
When you said “…dust removal doesn’t work at all for B&W slides or negatives”, was this referring to both scanners, or just the V600?
I’m shooting 120 film, both colour and B&W.
Neal:
Infra-red, the light source used to find dust and other image surface imperfections does not work with black-and-white images due to the dyes used in the image. So, this means both scanners won’t remove dust from black-and-white images.
Larry
Hi Larry,
Love the review thank you so much!
I had posted to an online photo group for feedback and it seems that the V6 hundred gets a lot of favorable praise.
I’ve got an enormous amount of color prints and color negatives to scan and I get the sense that the 600 is fine for my needs for the color prints, I didn’t come away with your recommendation for scanning color negatives other than one common at the end that seem to lean f Toward the 850
Can you talk a bit more about how you feel the 600 is for scanning 35 mm negatives?
Also, I feel like I’ve seen a lot of very negative comments about silver fast software, I’m better behind a camera than I am with software just how difficult is the learning curve for silver fast?
Thanks so much,
John
John:
Smile… it depends. If your slides are perfectly exposed and focused (i.e. shot by someone who knows how to shoot slides) you’ll get richer colors on the 850 due to its improved handling of shadow detail and exposure range due to a slightly higher Dmax. The 850 also scans slides 12 at a time vs. 4 and scans them faster.
The two scanners are equal when it comes to scanning prints (because prints have less exposure range than negatives or slides), roughly the same speed on prints. And both use the same dust removal software.
The negative comments on SilverFast are from people who don’t know how to use it, or how to read a histogram, or how to improve image quality. I use it every week and find it outstanding. But there’s a learning curve.
Larry
Larry
Thanks for the quick response.
I was hoping you might be able to expand on if there is a noticeable difference or advantage/disadvantage when it comes to scanning 35 mm negatives
Cheers
John
John:
As I wrote earlier, if the slides are well-focused, well-exposed with a wide range of gray-scale values, yes, you can see a difference. Do a Google search for “Dmax” to learn more about what these differences are. The image improvement will be even more noticeable in larger sized negatives and slides.
Larry
Do you have more examples of photo print scan comparisons?
Alvin:
All my examples are in this article. What are you curious about?
Larry
Would you say that the V600 is sufficient to scan photo prints professionally for clients? (prints, not film)
Alvin:
Prints? Yes. As with all scans, the higher quality the photo the better the scan. Generally, the best resolution you’ll get from a print is 400 dpi.
Larry
Don’t mean to rain on the parade but I’ve been using a scanning service, ScanCafe, that I think is better than d-y-i. Images are $.23 when they have 60% off-sales which they have several times a year. (more for TIFF or Uncompressed). Have scanned thousands of b&w and color negatives, slides and prints with them.
Black and white negatives are challenging for ICE but they ScanCafe has proprietary cleaning software for b&w. They also do a minute per image hand-cleaning digital images. I’d rather clean 20 or 30 images out of 500 after they do their work than do scanning 500 images.
They also do film and video transfers but the codecs they use are not professional.
Howard:
Not raining at all. Not everyone has interest or budget to buy a scanner. It is good to know about ScanCafe.
Larry