Use Polarized Light to Capture More Detail in Old Photos
 Guest post: This tutorial was written by Jim Nowak in response to my article on adjusting scan settings to improve the capture of old photos. The results of this technique are amazing. Thanks, Jim!
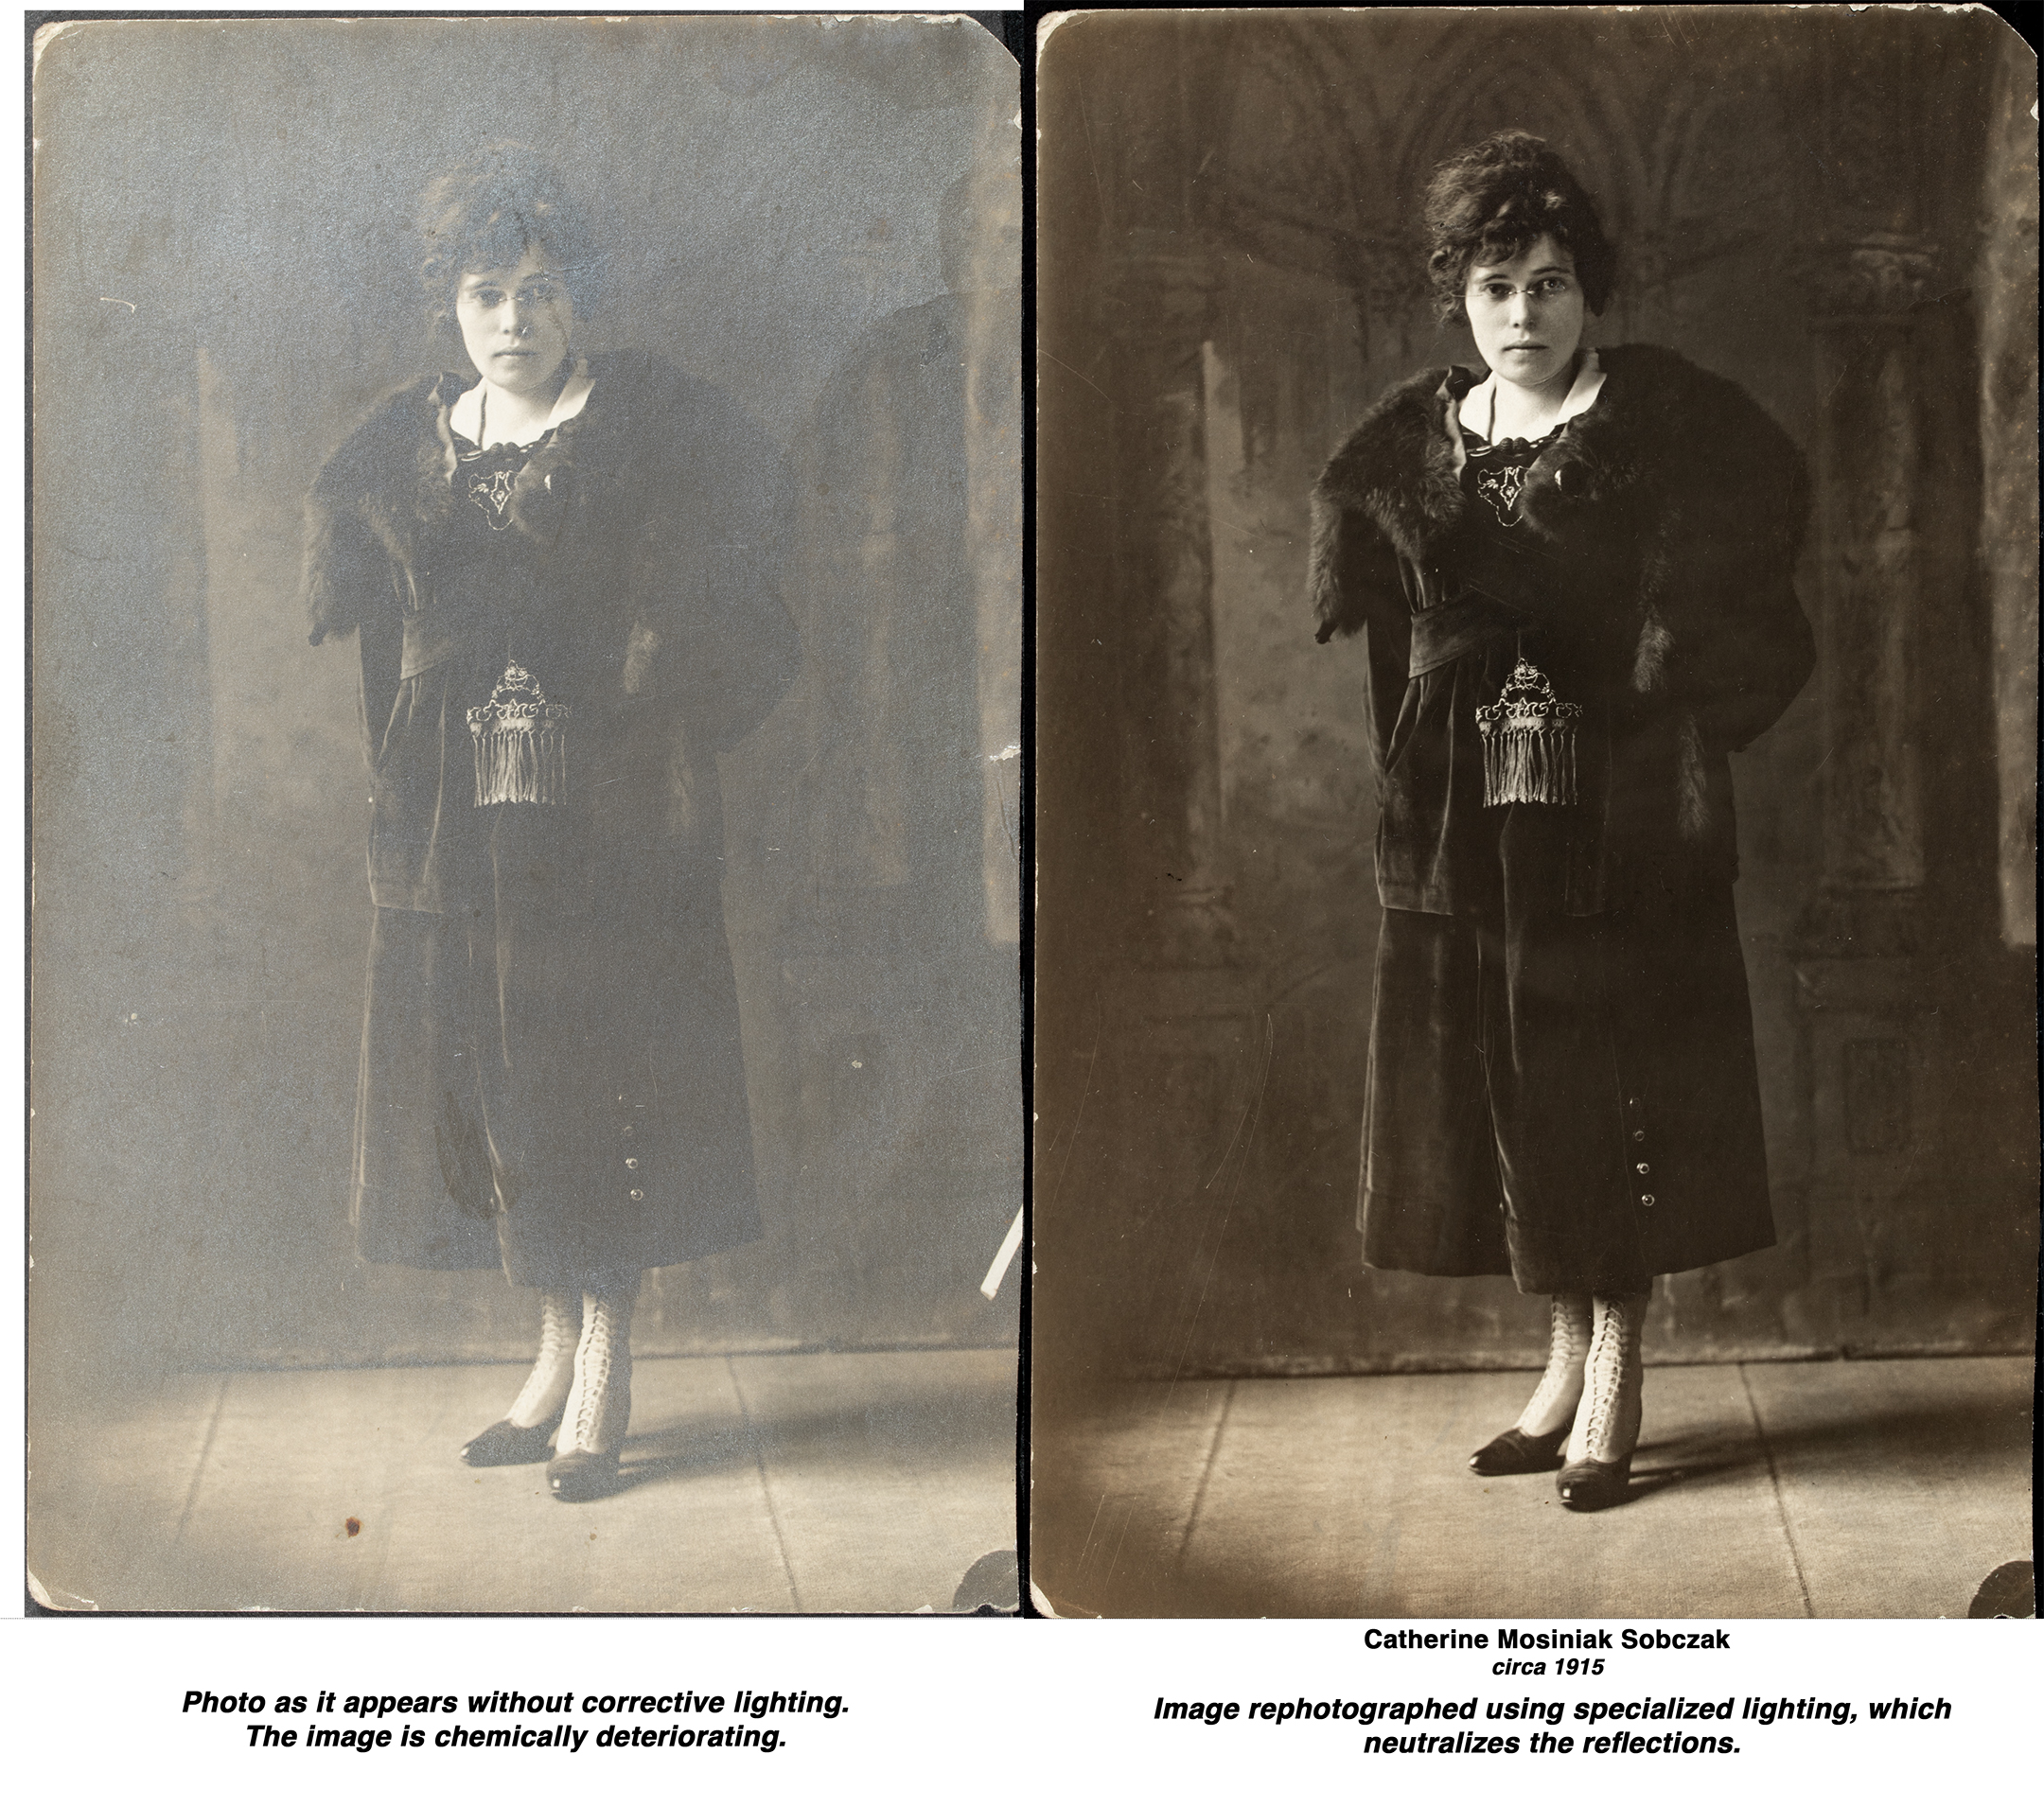
When an old photograph gets a silvery sheen on its surface, it is on a one-way trip to oblivion. Flat-bed scanning won’t eliminate the silvering effect. You really can’t restore a silvered photograph, but you can rephotograph and recover the image. The secret is using polarized light.
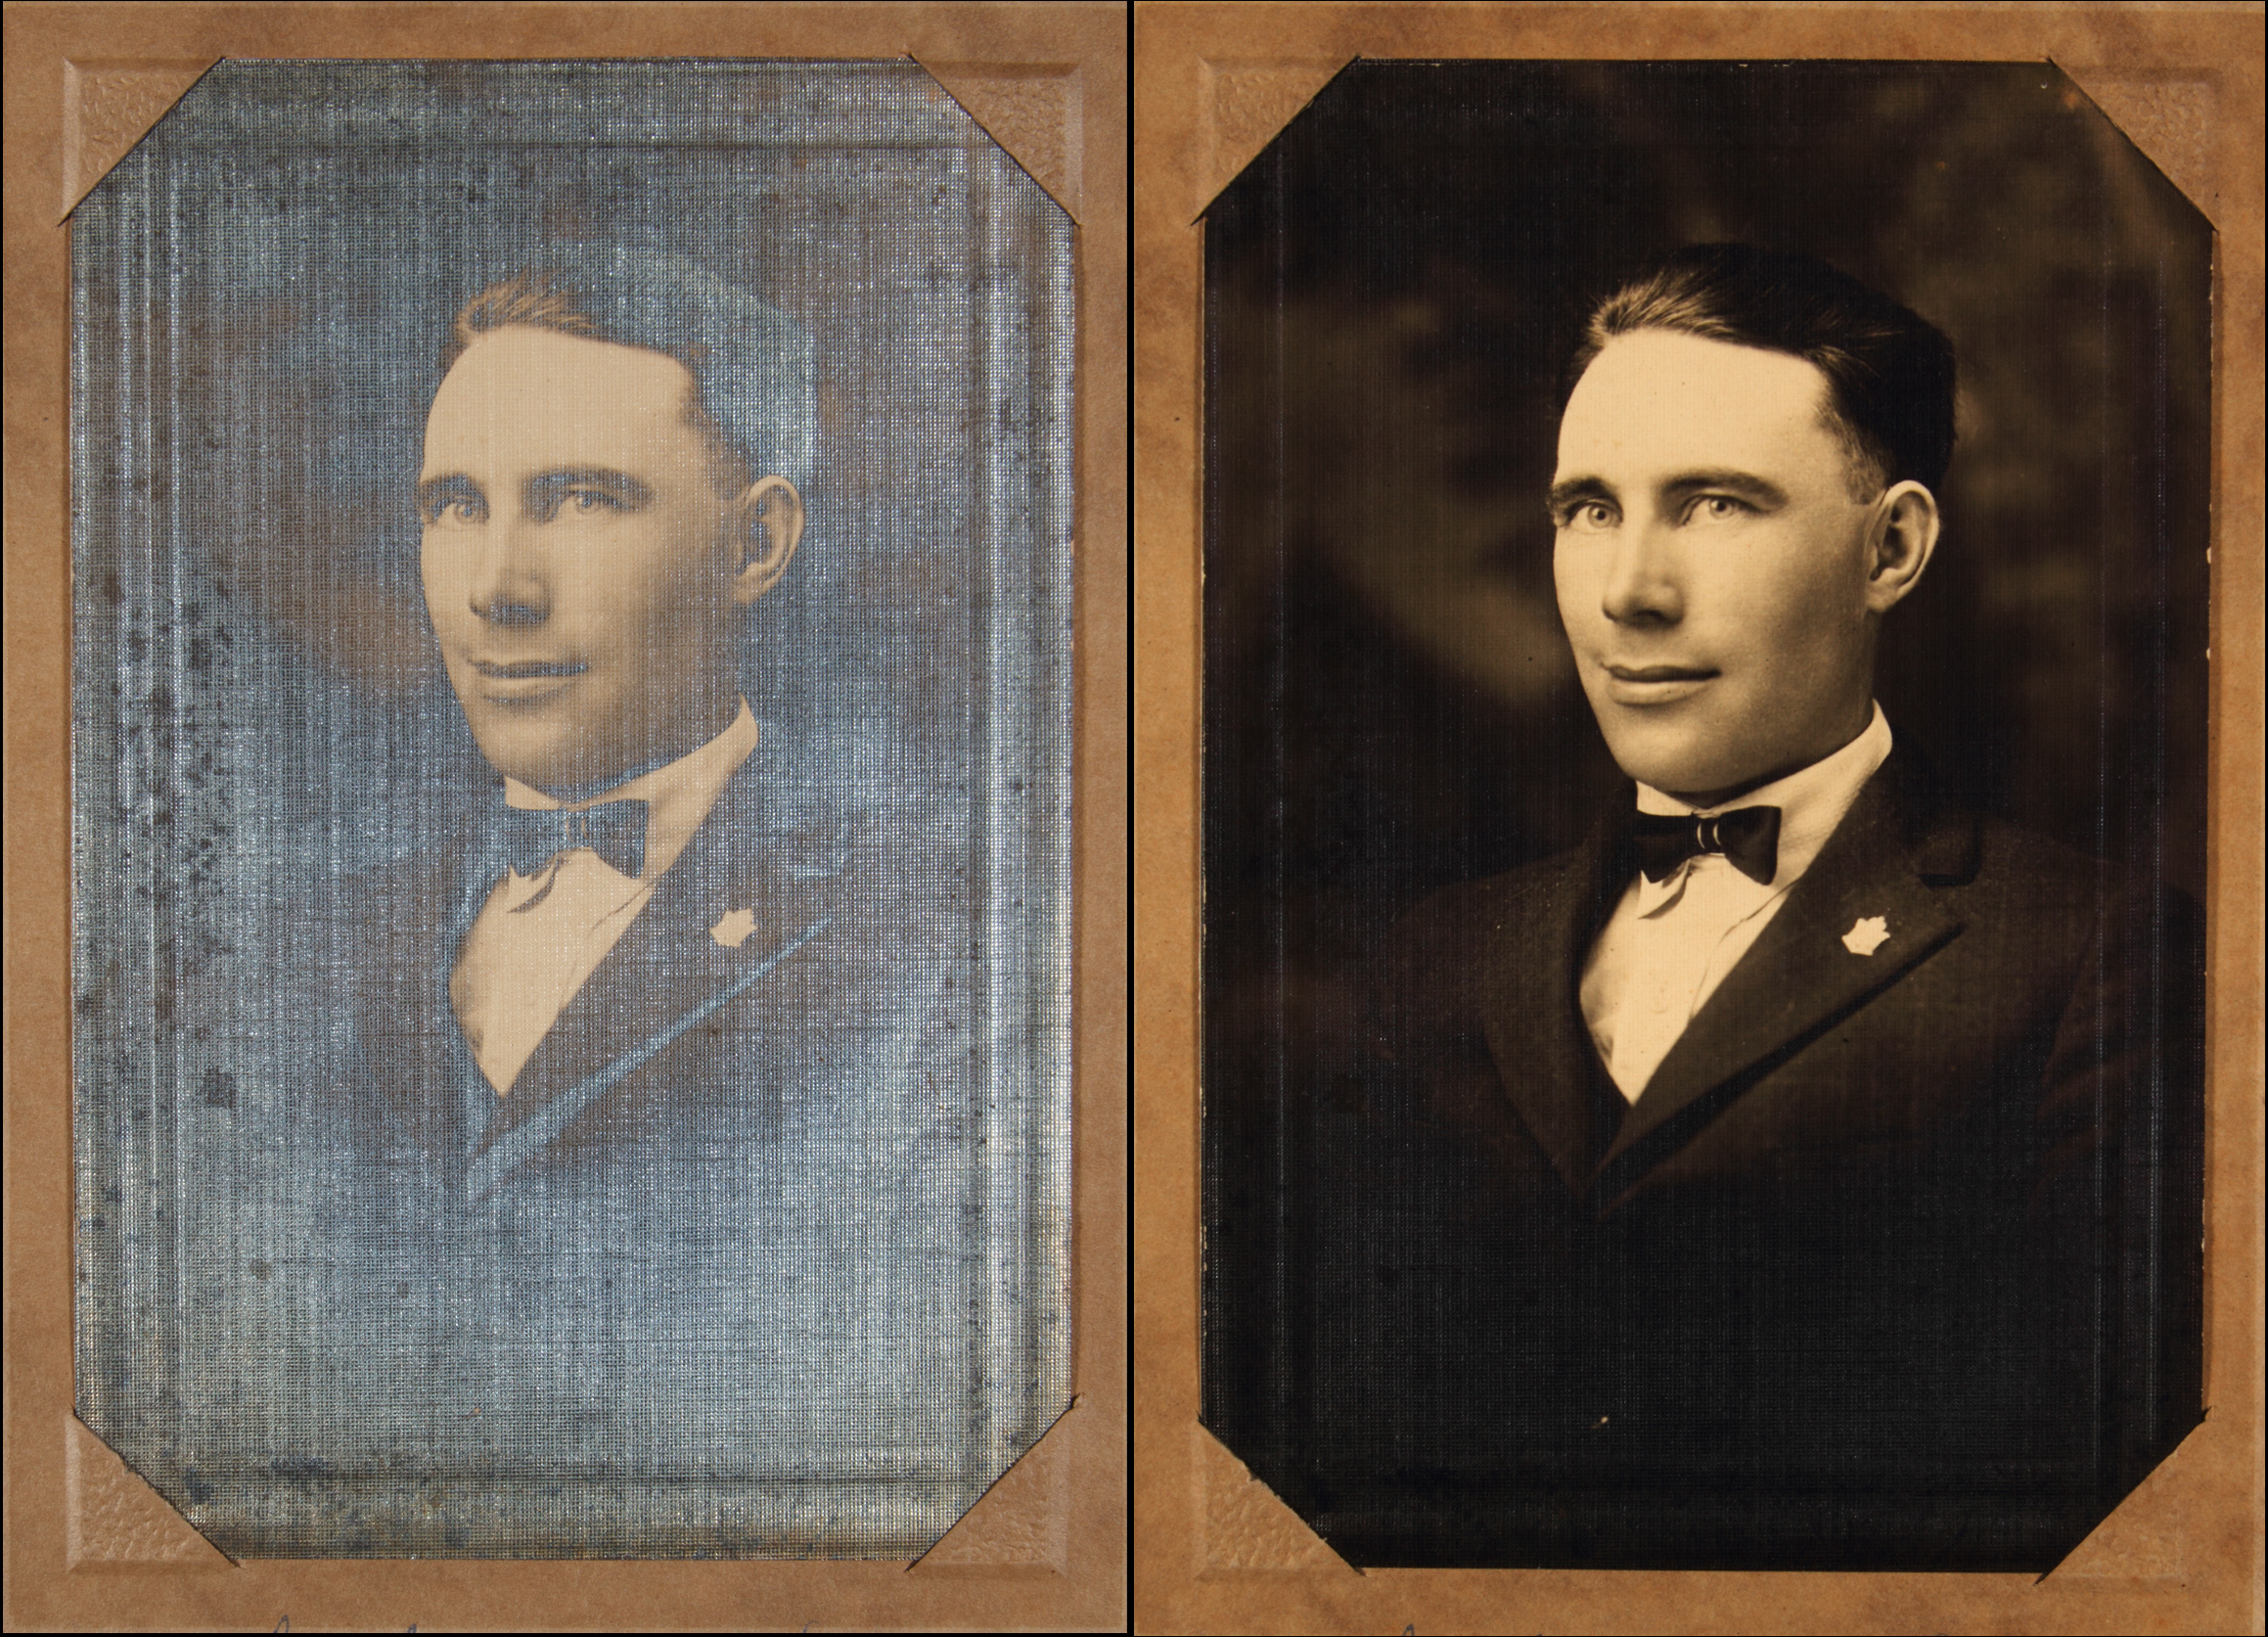
Subject: William Cornell. Click to see larger image.
SUPPLIES
- Camera: DSLR or mirrorless still camera with macro lens recommended. Smartphone is another option. A tripod is also recommended for whatever camera you choose.
- Rotating polarizing filter to fit your camera’s lens.
- Two identical lights on light stands. I use strobes but steady light should be fine.
- Two sheets of polarized gel sheets, each large enough to cover the light-emitting surface of your lighting instruments. (Available through well-stocked photo-video equipment suppliers.)
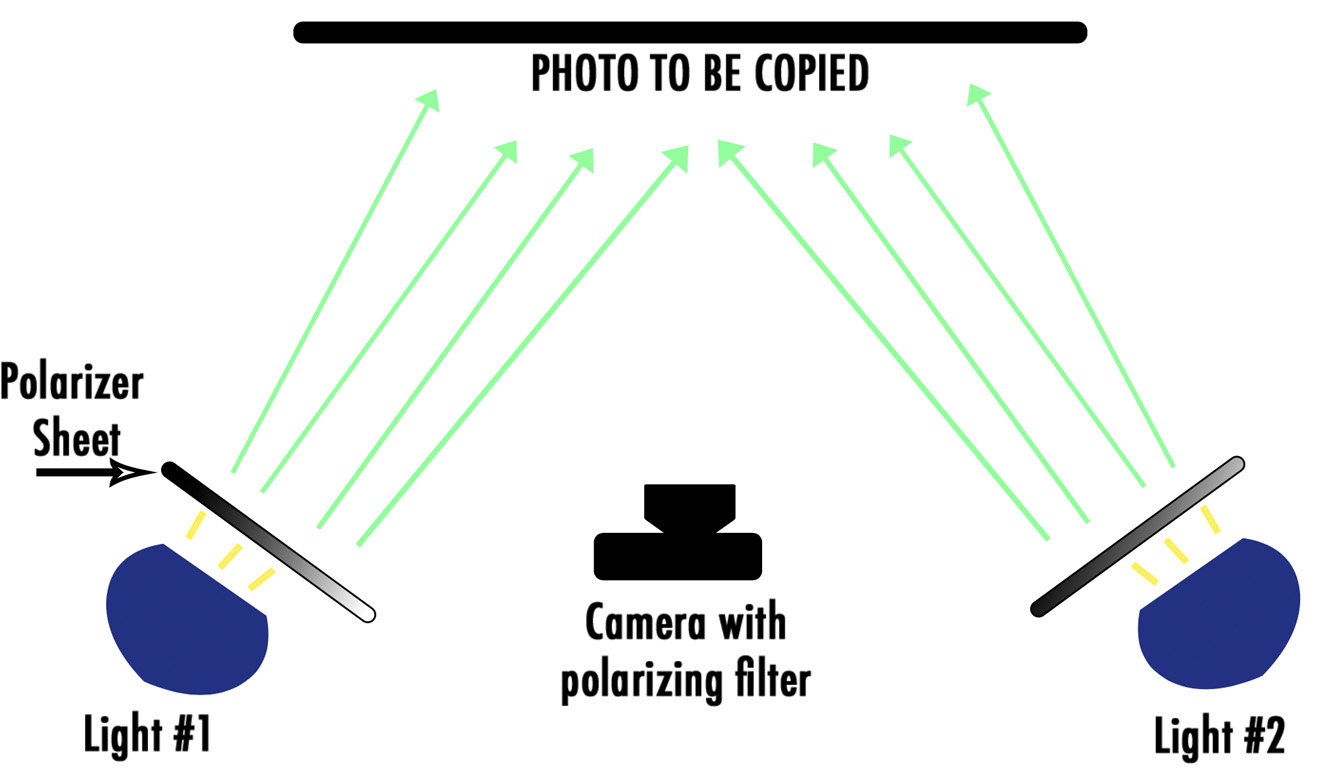
SETUP
- Place your original photo on a stable surface. I like to stand mine up vertically, placed against a black piece of cardboard.
- Place your camera on a tripod directly in front of the photo so the photo image fills the camera’s frame. Try to keep the camera square to the photo so you don’t distort the final image.
- Place your two lights so they are each roughly at a 45 degree angle to the camera-to-photo axis. Make sure the light levels from both are at the same intensity.
- Turn on your lights and make sure the photo is evenly lit. Turn off any ambient lights and cover any widows that cast light on your photo. These unpolarized light sources may cause reflections.
- Now – it’s time to orient your polarizer sheets or this technique won’t work. Place your two polarizer sheets so one is on top of the other. Look through both at a light source. If you can see the light source, (as if you are looking through sunglasses,) the sheets are properly oriented. If the sheets are opaque, rotate ONE of the sheets 90 degrees and you should be able to see through them both. Keep them properly oriented, place and secure one sheet over each of your lights.
- Put the polarizing filter on your camera’s lens. Rotate the polarizing filter and you will see the silvering disappear. Adjust the polarizing filter to the best effect and take a picture.
Click to see larger image.
Even slightly silvered photos will often benefit from copying with polarized light. I usually gather a stack of images and run a photo-recovery assembly line.
Next step is Adobe PhotoShop and Larry’s excellent photo recovery advice. Good luck!
Bookmark the
permalink.
2,000 Video Training Titles
- Apple Final Cut Pro
- Adobe Premiere Pro
- DaVinci Resolve
Edit smarter with Larry Jordan. Available in our store.
Subscribe to Larry's FREE weekly "Edit Smarter" newsletter and
save 10%
on your first store purchase.
Read the latest Media Industry News, curated by Larry Jordan
Media News


One Response to Use Polarized Light to Capture More Detail in Old Photos
Excellent tip, Larry. Thanks