
 Of all filmmakers, I respect documentarians the most. In spite of the fact that there is almost no money in it, they will spend years researching and creating a film on a subject no one else has ever heard about. Then, when the rest of us watch it, we say: “That was amazing! Why didn’t I know about that?”
In almost all cases, the key to any doc is restoring old photographs and films.
Caveat: Nothing you can do to an old photo will make it look like it was shot on a high-end iPhone. Your job is not to make it look “perfect.” Your job is to make it look as good as you can so you can use it to tell your story. I never worry about minor imperfections in a photo that’s 150 years old.
I was thinking about this recently as I continued my long-standing hobby of digitizing and restoring old photographs. (I don’t restore old films because I don’t have the gear.)
In this article, I want to show you what I did and the results I got.
NOTE: Restoring an old photo reminds me of a quote first attributed to Leonardo DaVinci and repeated by many artists and filmmakers since: “A work of art is never finished, merely abandoned.” You can retouch an old photo forever.
GEAR
I’m using an M4 Pro Mac mini, with an Epson Perfection v850 Pro Photo Scanner and LaserSoft Imaging SilverFast SE Plus scanning software. While I consider LaserSoft an essential scanning tool, these techniques don’t require a high-end computer. I prefer Epson scanners, though any high-quality photo scanner will work. LaserSoft supports hundreds of photo scanners.
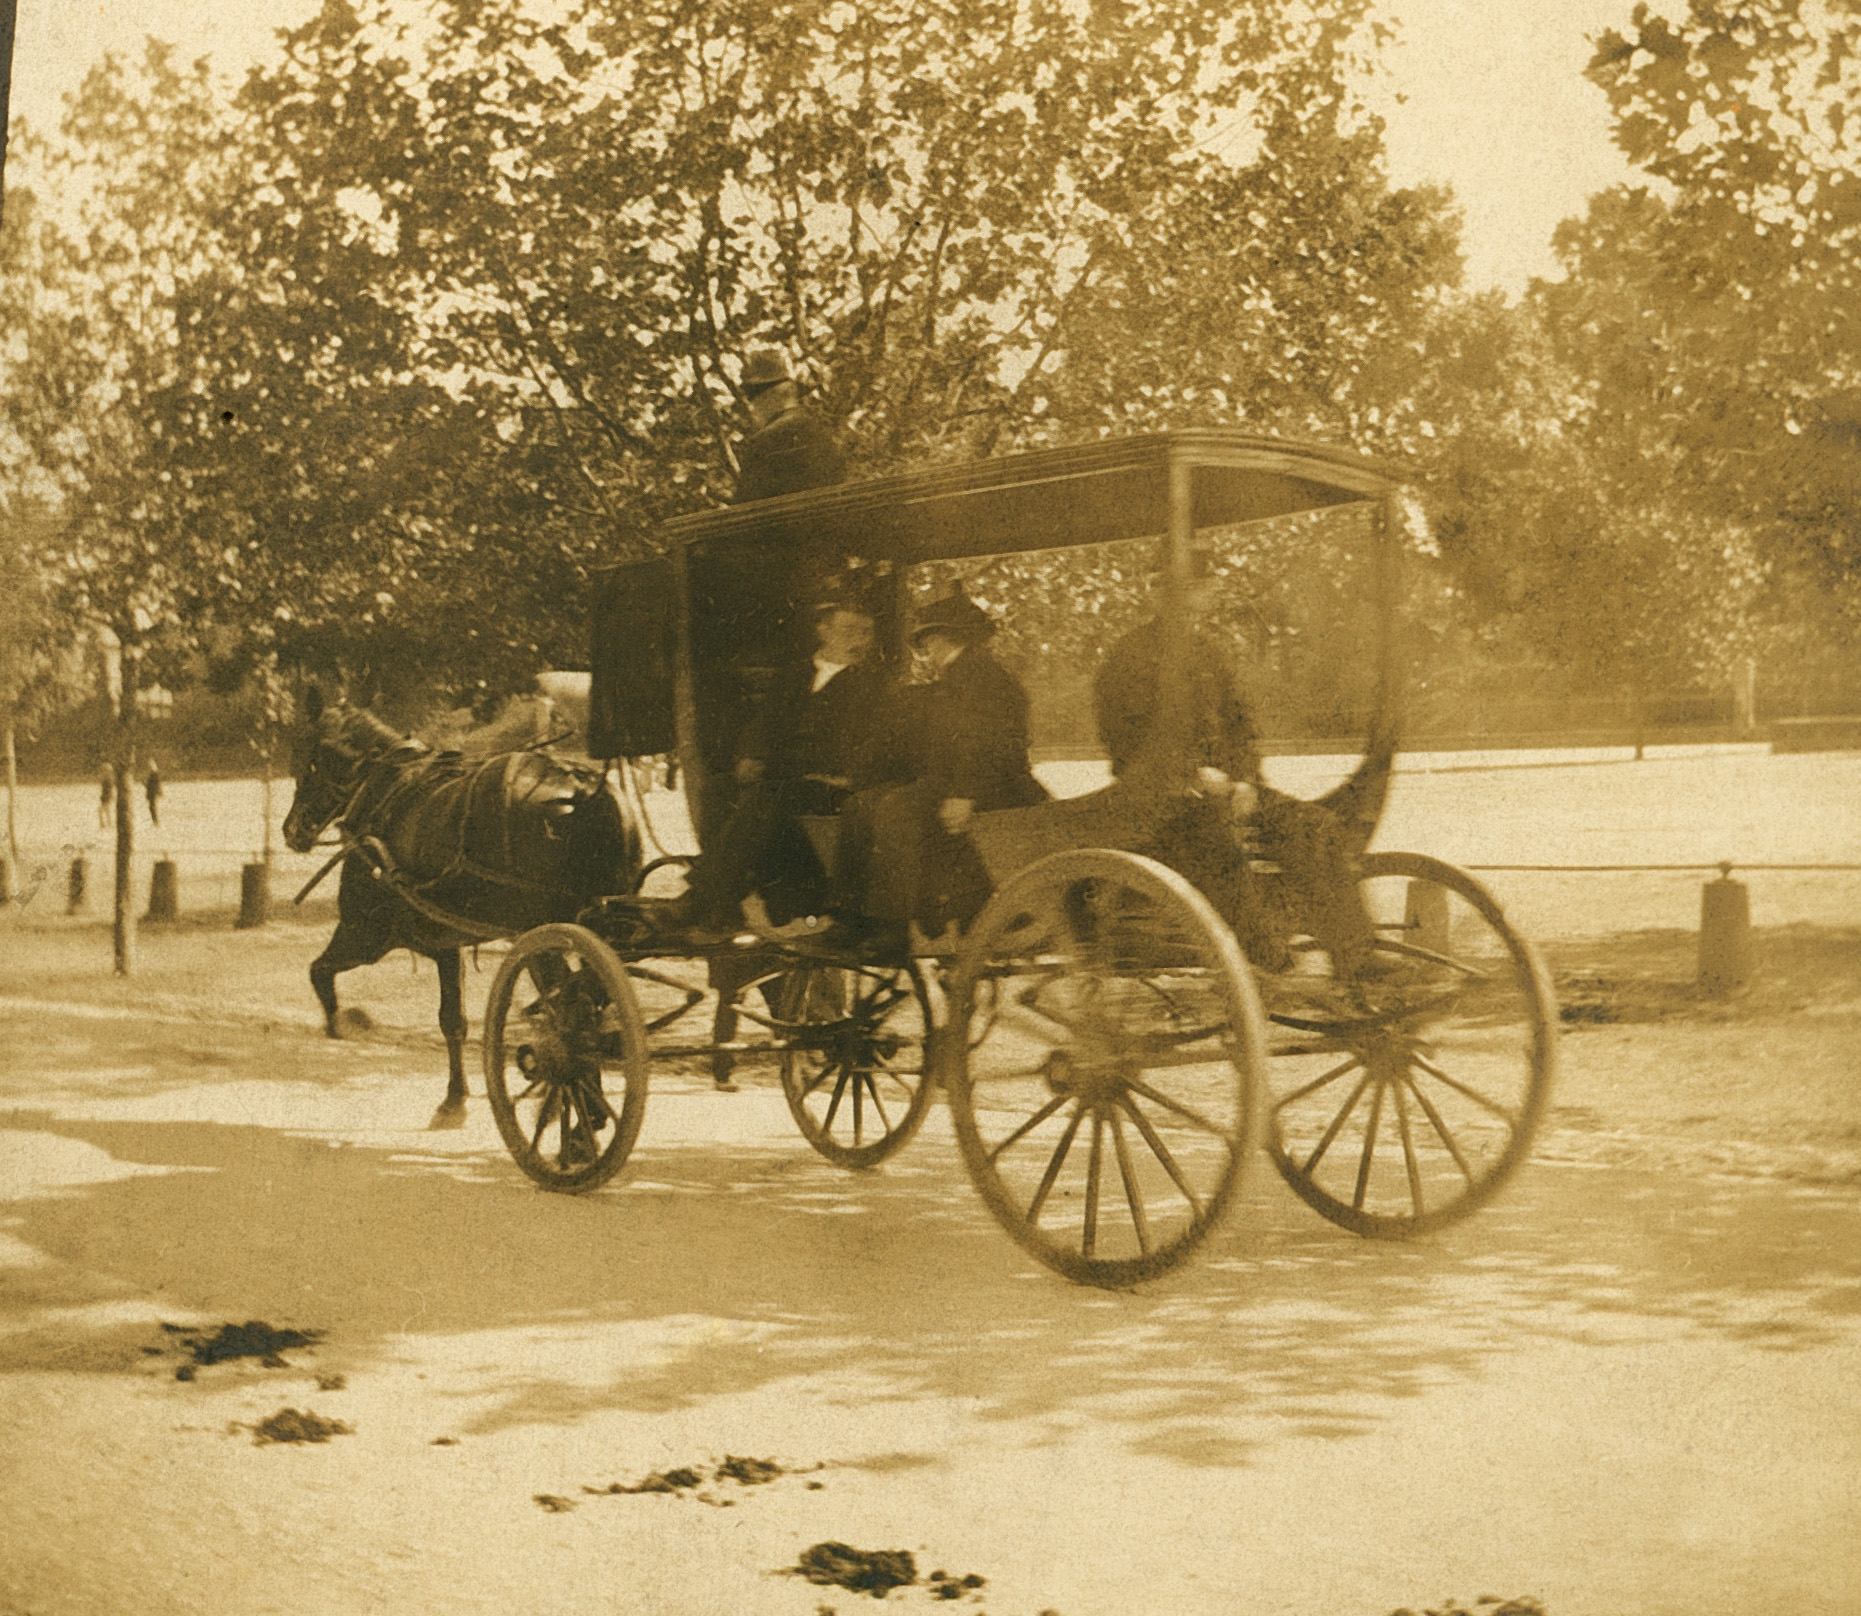
BRINGING A HEARSE TO LIFE
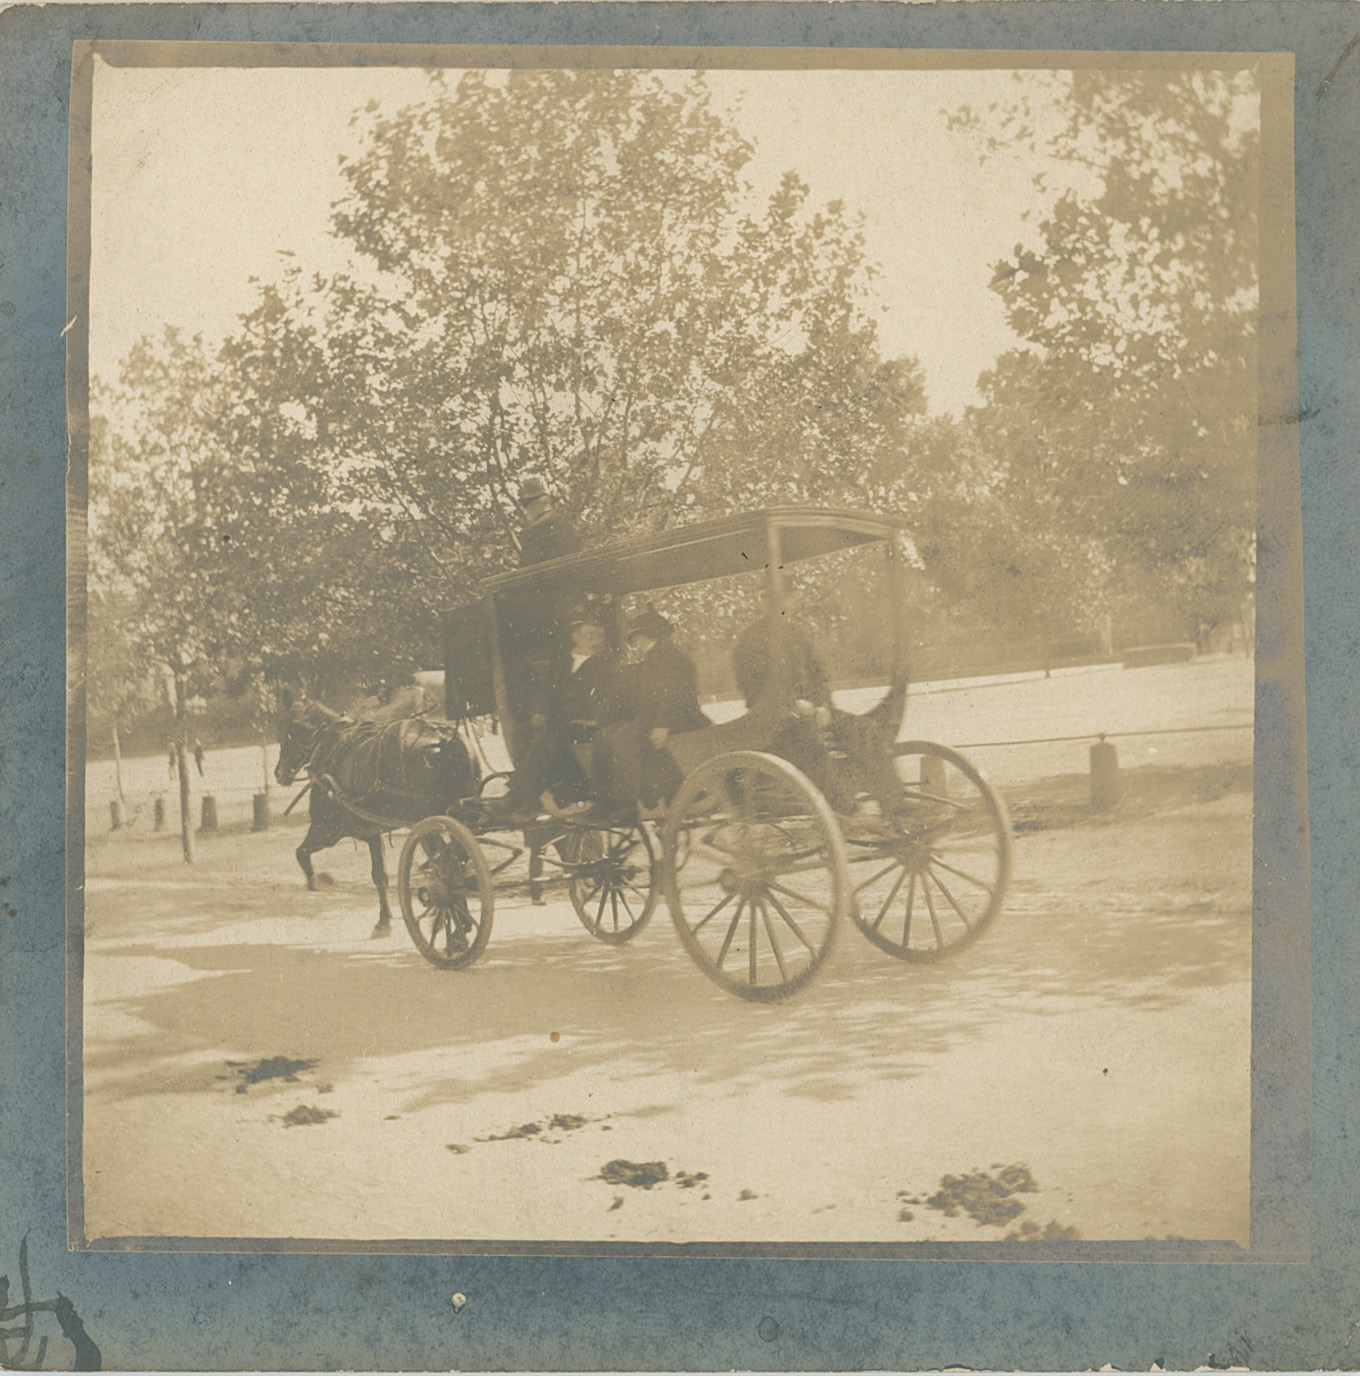
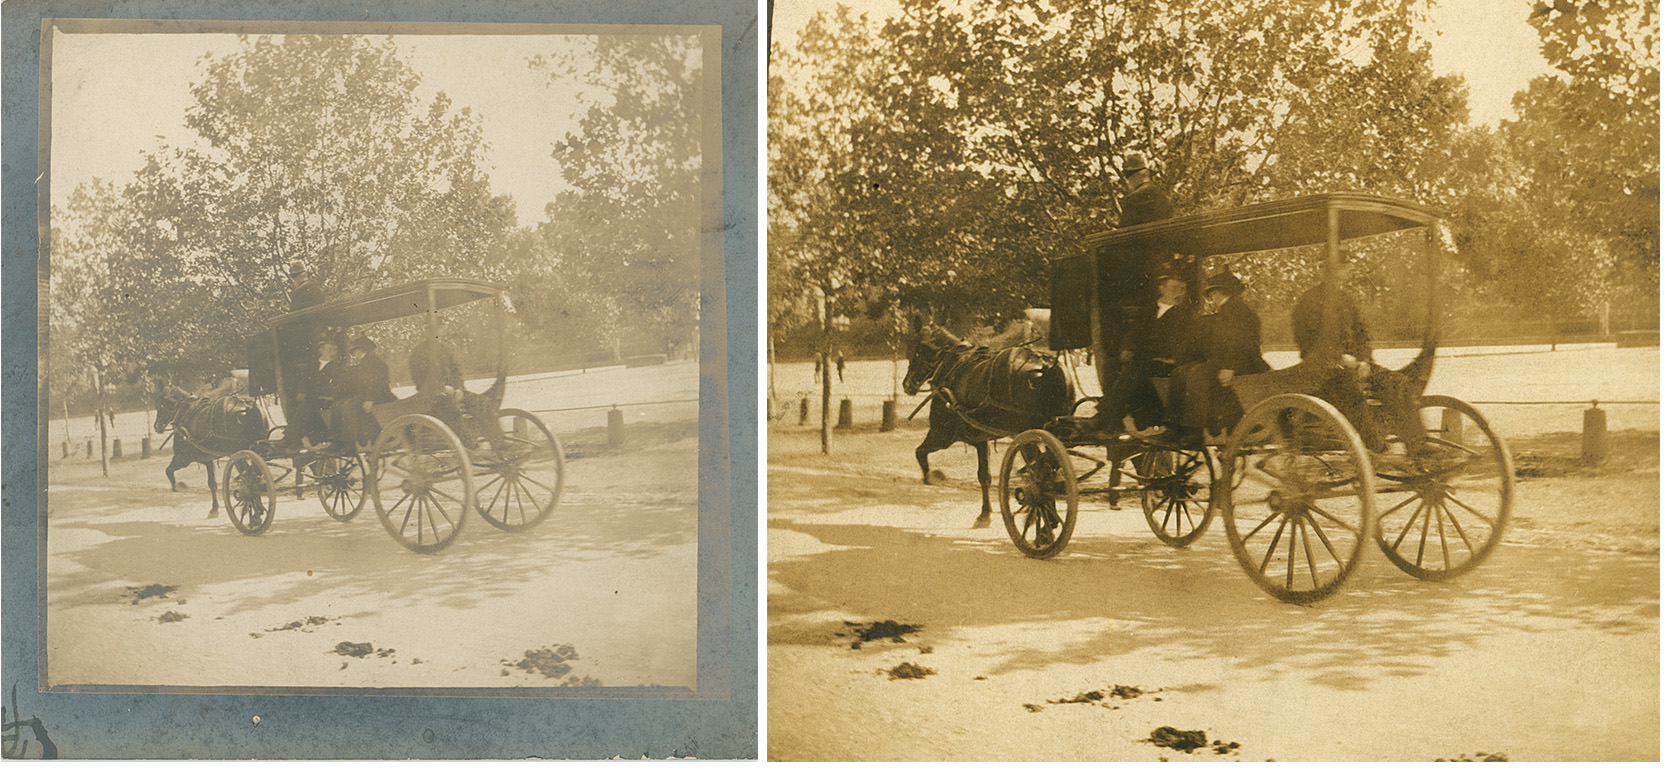
This is a 1901 horse-drawn hearse somewhere in New York. While we could just take a photo of it with a camera, then tweak in our NLE, we will get far superior results by getting the best scan possible, then making minor tweaks – mostly color adjustments – in the edit.
NOTE: It is far easier to pull details out of washed out or under-exposed images, than images that are over-exposed. Once that highlight detail is gone, nothing can get it back. But a good scanner with a high DMAX value, can pull details out of shadows that look like impenetrable mud.
Click to see larger image.
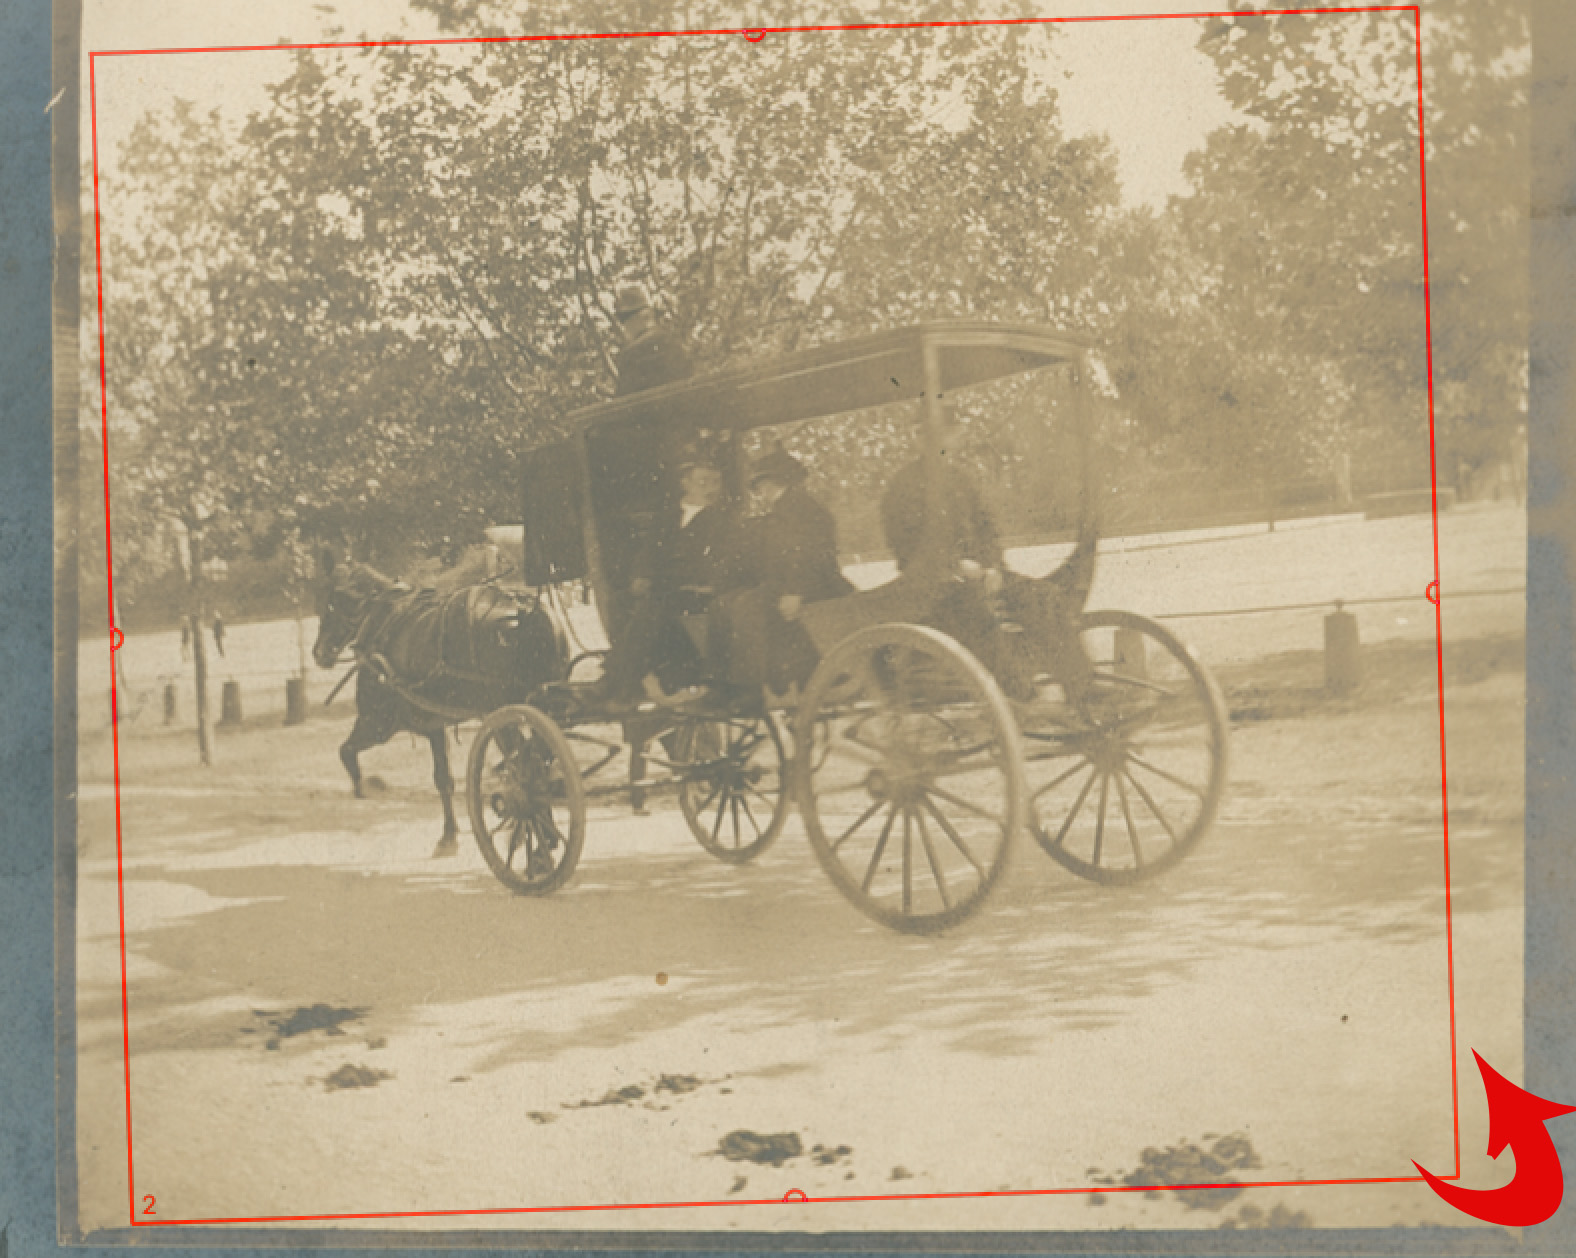
To start, I adjust framing (the red box) to crop the image and, more importantly, rotate it by aligning it using the vertical roof supports on the carriage. Rotating before scanning yields cleaner edges than rotating in an NLE after scanning.
While we could convert this to black-and-white, I’m going to scan in color. The sepia tone adds a sense of history that a pure black-and-white image doesn’t have. However, old B&W images will appear sharper than old color images.
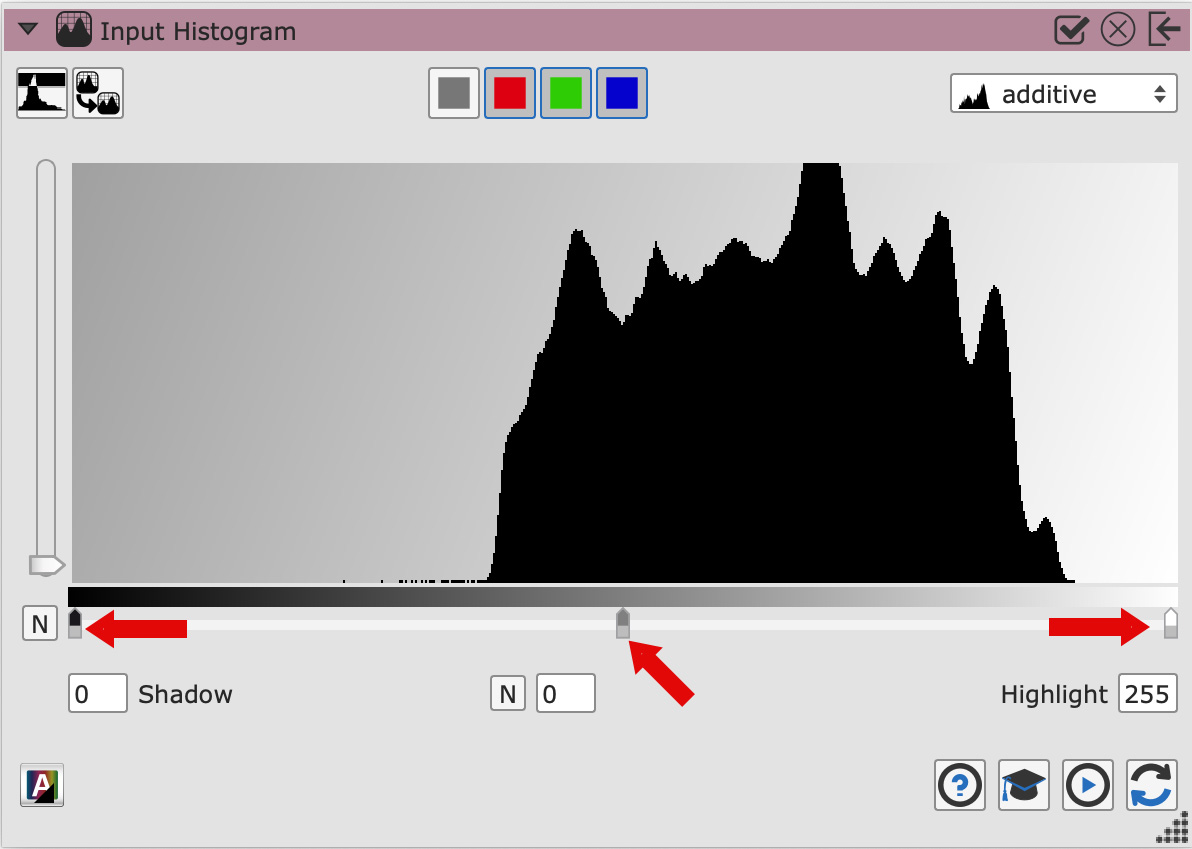
The biggest control we have in scanning is adjusting gray scale values using the Histogram. The left slider controls shadows, the middle slider controls mid-tones and the right slider controls highlights. Pixels outside the left and right sliders are “crushed,” means that all texture detail in those pixels is lost.
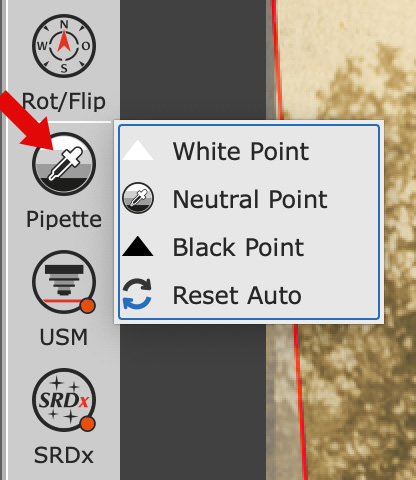
NOTE: While I try to get colors as close as possible, I leave final color adjustments to the NLE to make sure all shots look good together. Most of the time, I just remove color casts in the scan using the Pipette tool, selecting the Neutral Point option, then clicking something that’s supposed to be gray.
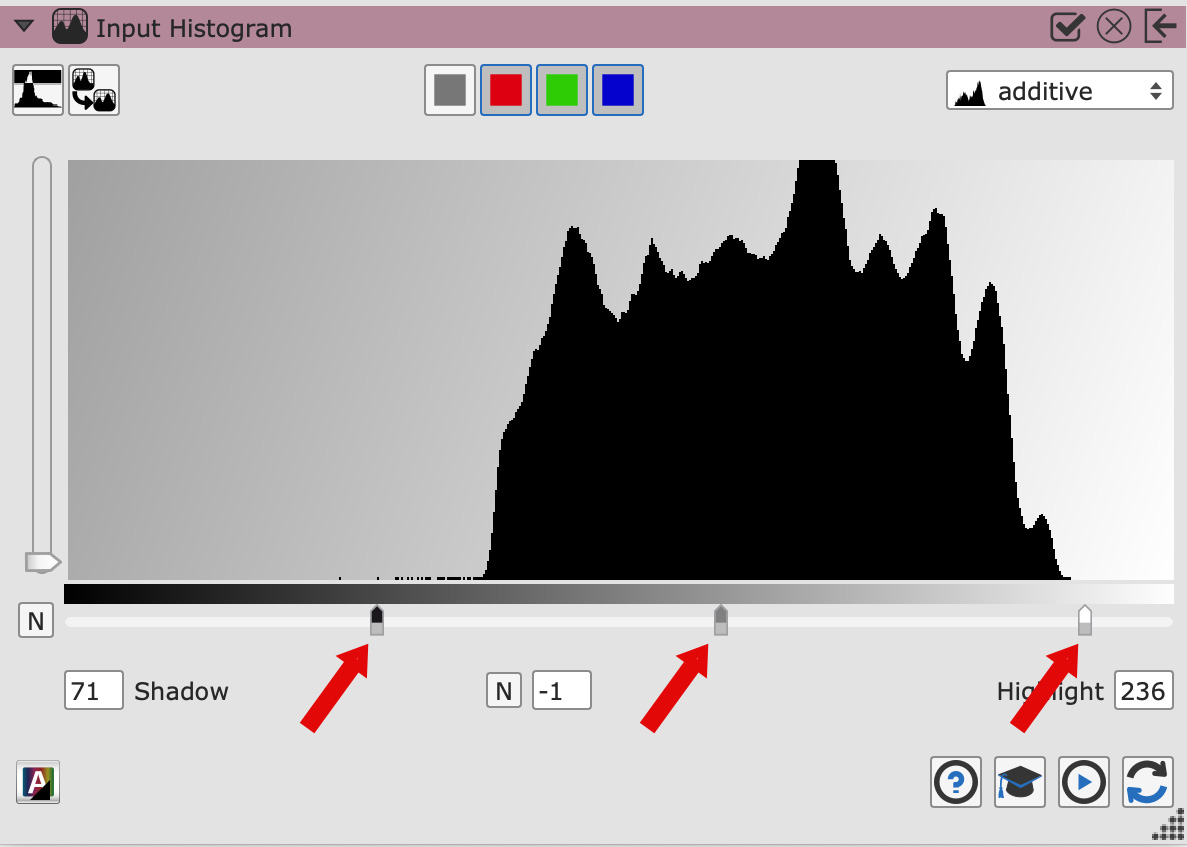
The Histogram shows the distribution of grayscale values in an image with darker shades on the left and lighter shades on the right. In this example, the “hump” shows that all grayscale values are clustered around mid-tone gray. This is a classic example of a washed out image.
Drag the highlight slider (right) closer to the hump. But, unless you want highlights to blow out – and there are cases where you do – don’t drag it under the hump itself.
Do the same with the shadows slider. Drag it until it just touches the edge of darkest pixels. Again, you can drag further, but you’ll be crushing blacks. With both these settings, experience has taught me not to try to drag them too close to the edges of the hump. I get better results when there is some distance.
Finally, drag the middle slider – which adjusts mid-tone gray – until the image looks good.
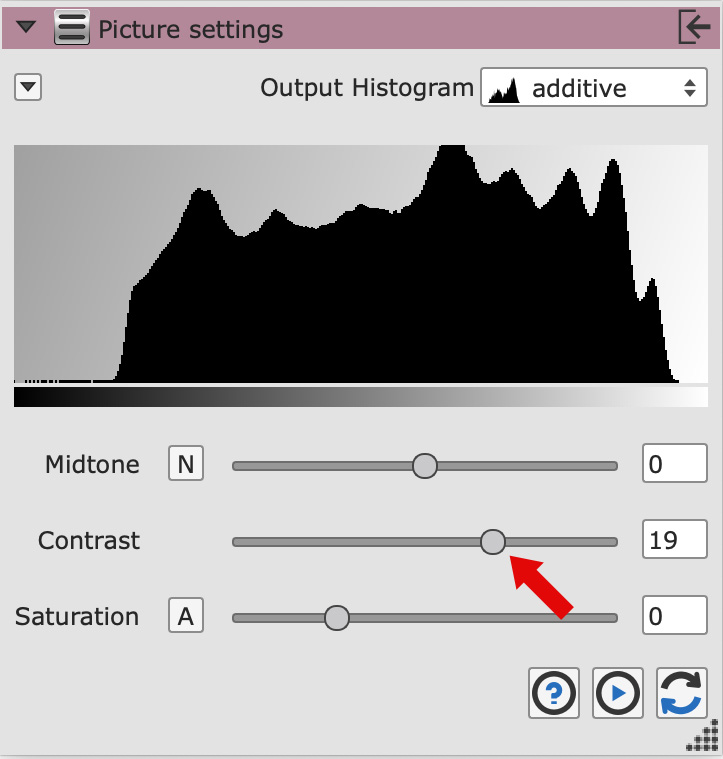
Here’s the secret sauce. In the Picture Settings menu, adjust Contrast to stretch the mid-tones. This significantly improves images which are all washed out by expanding mid-tones.
NOTE: Doing this for a well-exposed photo mostly looks awful, but not for an oldie-but-goodie.
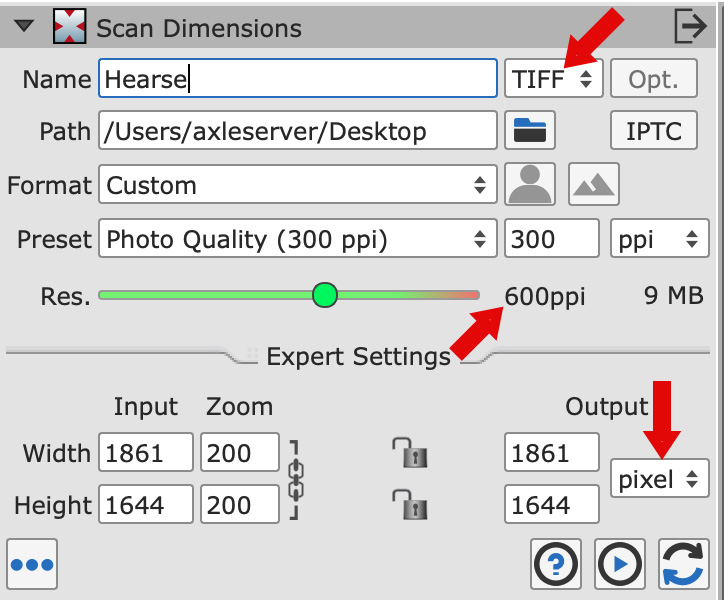
Finally, select your scan settings:
Click to see larger image.
Here’s the before and after. Note how the image is straightened, and we can see more detail.
NOTE: We worry, justifiably, about air pollution today. But, look at those horse droppings. The past did not smell as sweet as some romance novels make it seem.
We can now open this image into Photoshop or other image editing tool to get rid of dust and clean up the image further.
NOTE: Here’s a short video that explains how. And here’s a detailed webinar on “Image Editing & Repair Using Adobe Photoshop.”
You can also use AI tools to improve image quality. However, when photos are old and grainy, I’ve found that AI often yields very cartoonish results with excessive artifacts; especially covering faces with “plastic skin.” I created examples of all these images for this article using Topaz Labs Photo AI, but none of the results were better than these scans.
STICKS AND STONES
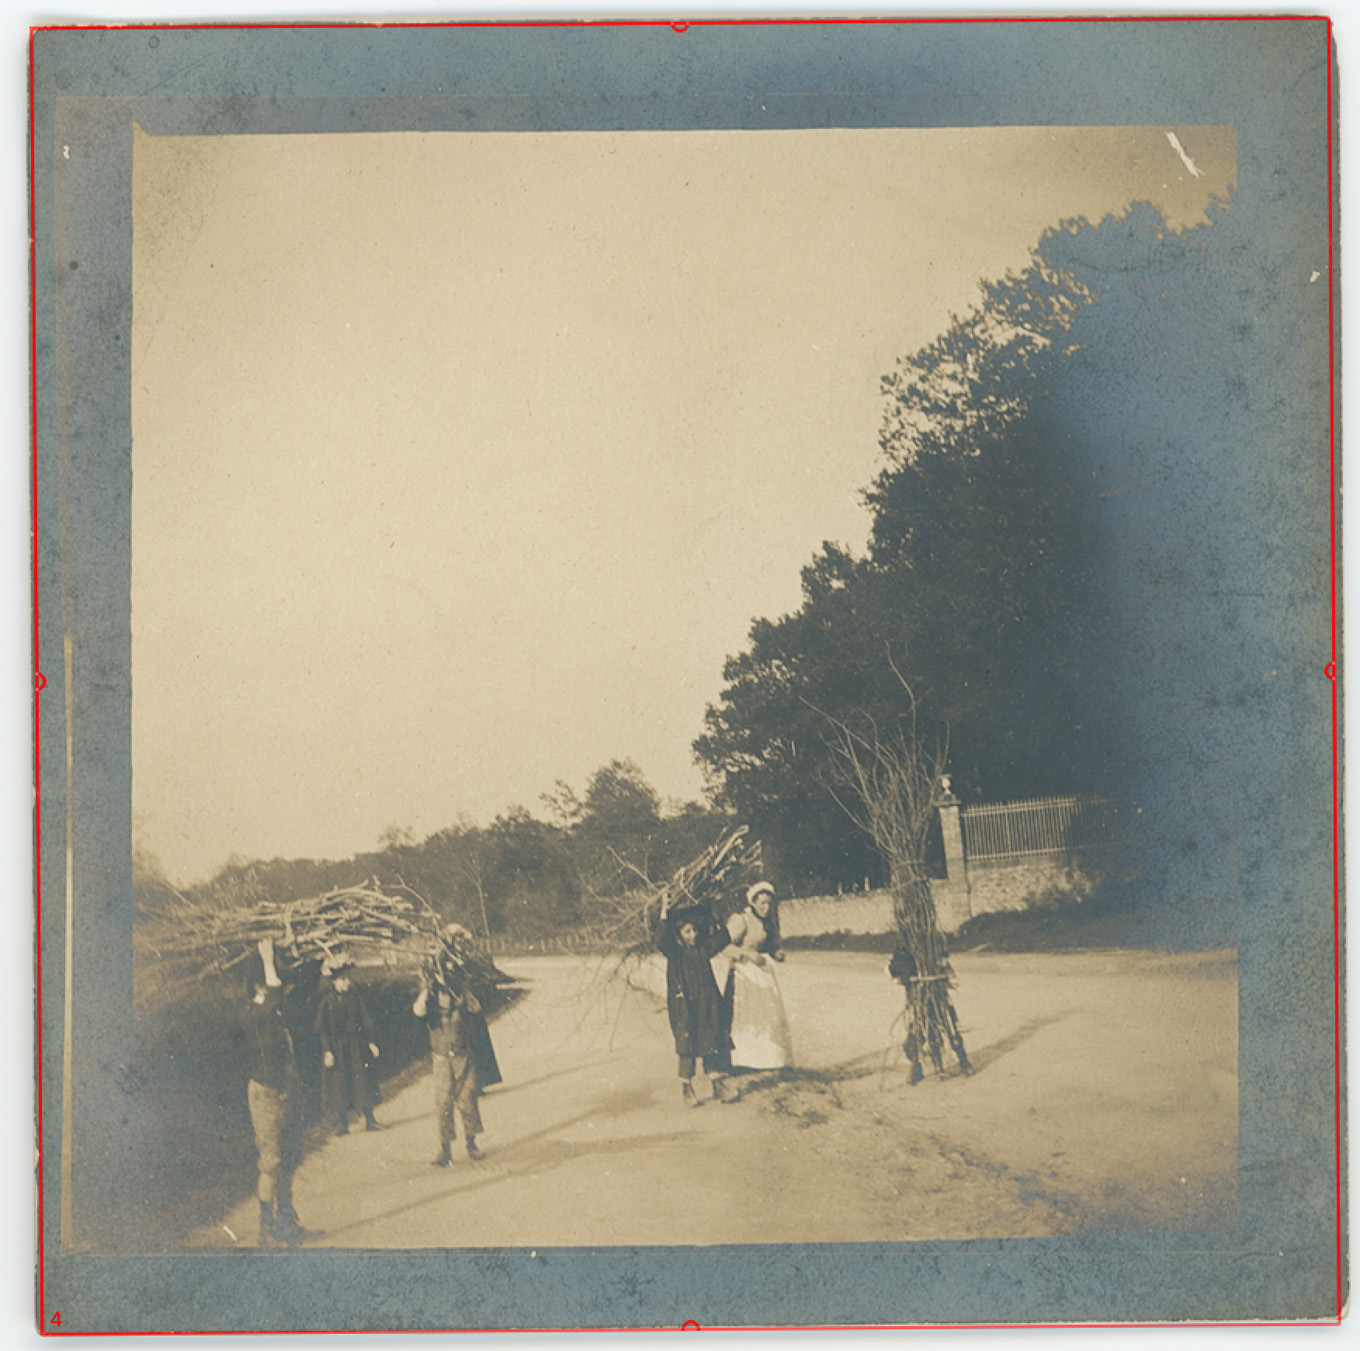
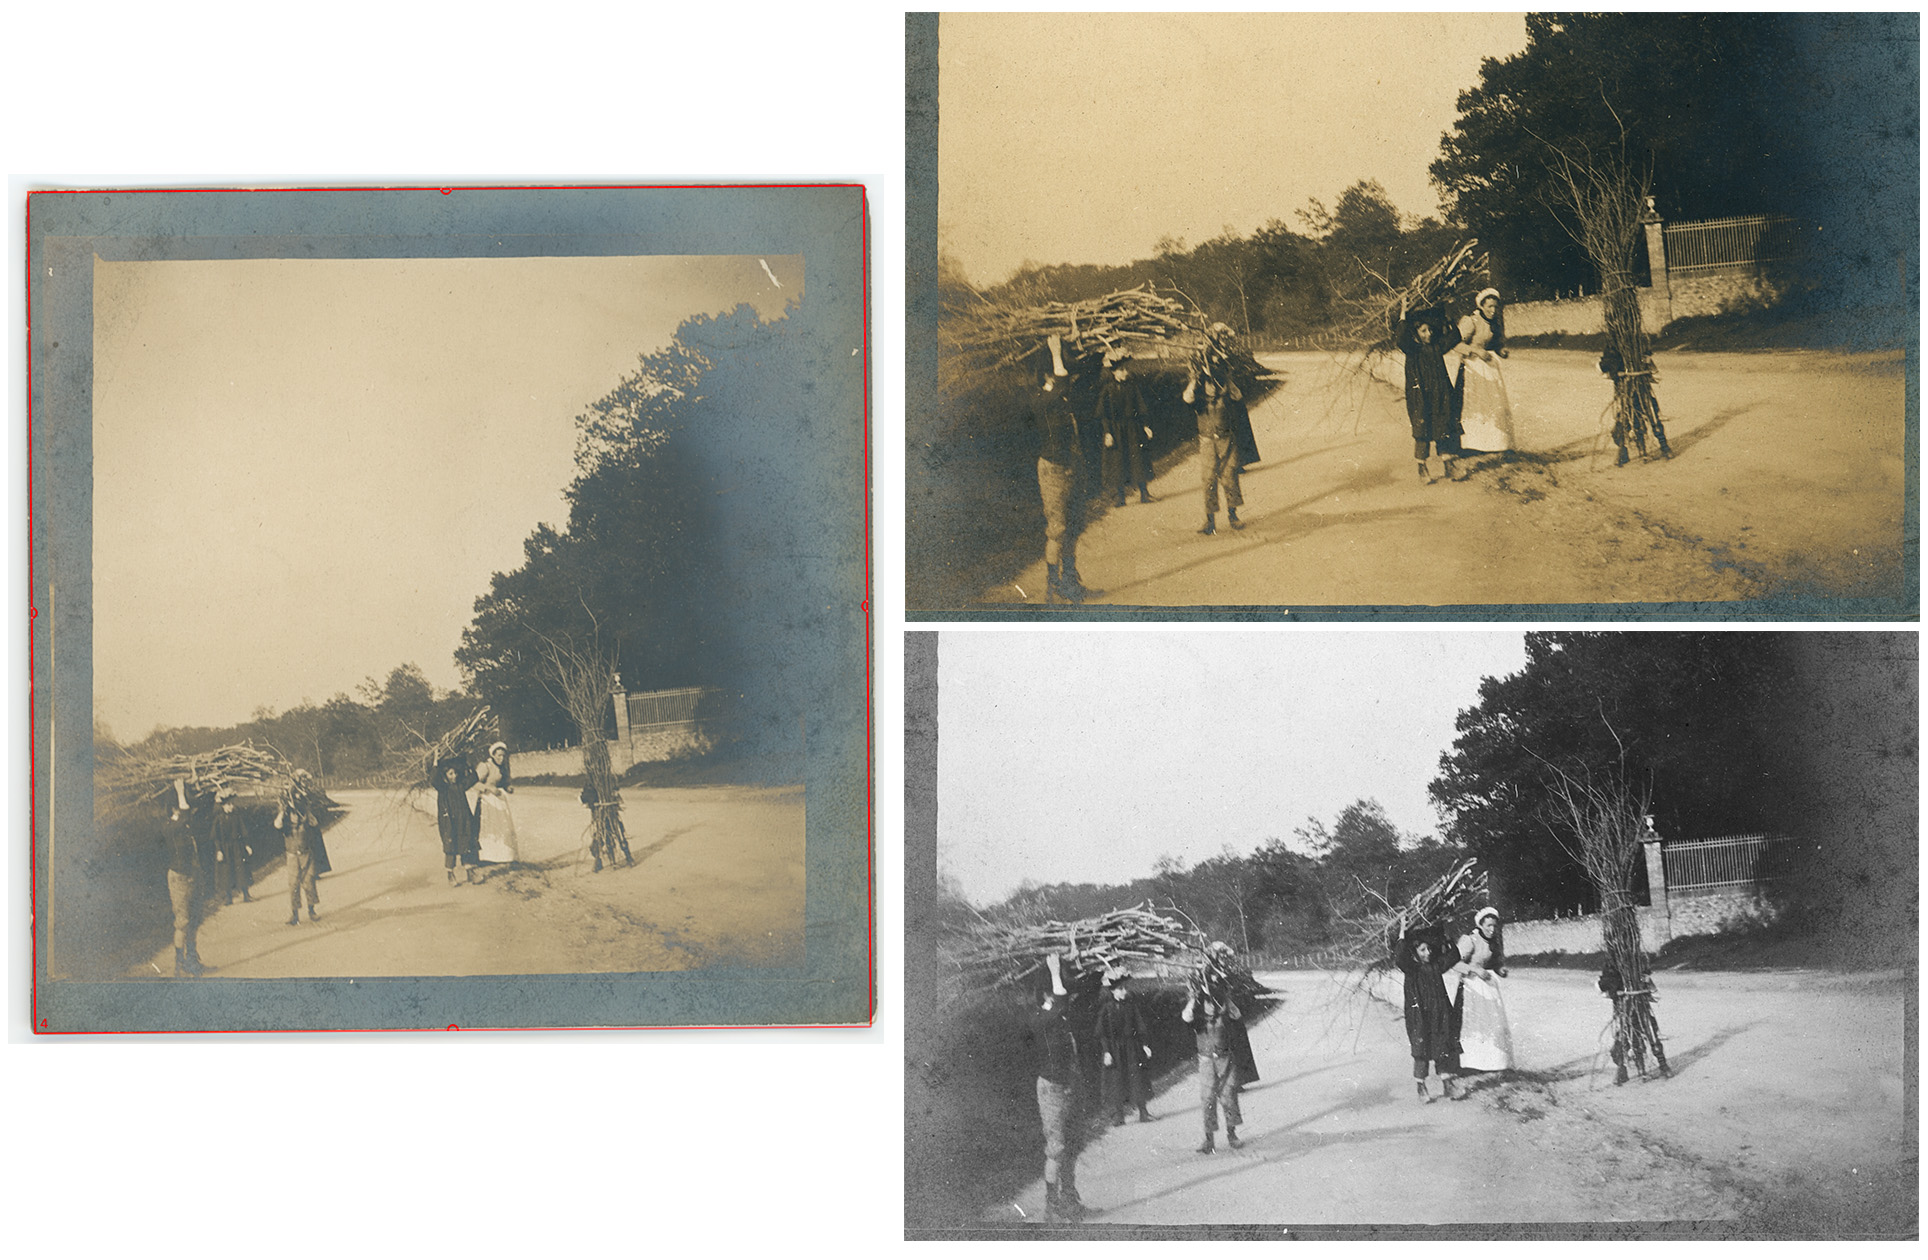
In this 1895 photos, children are gathering sticks and small branches for cooking stoves near Limoges, France.
Click to see larger image.
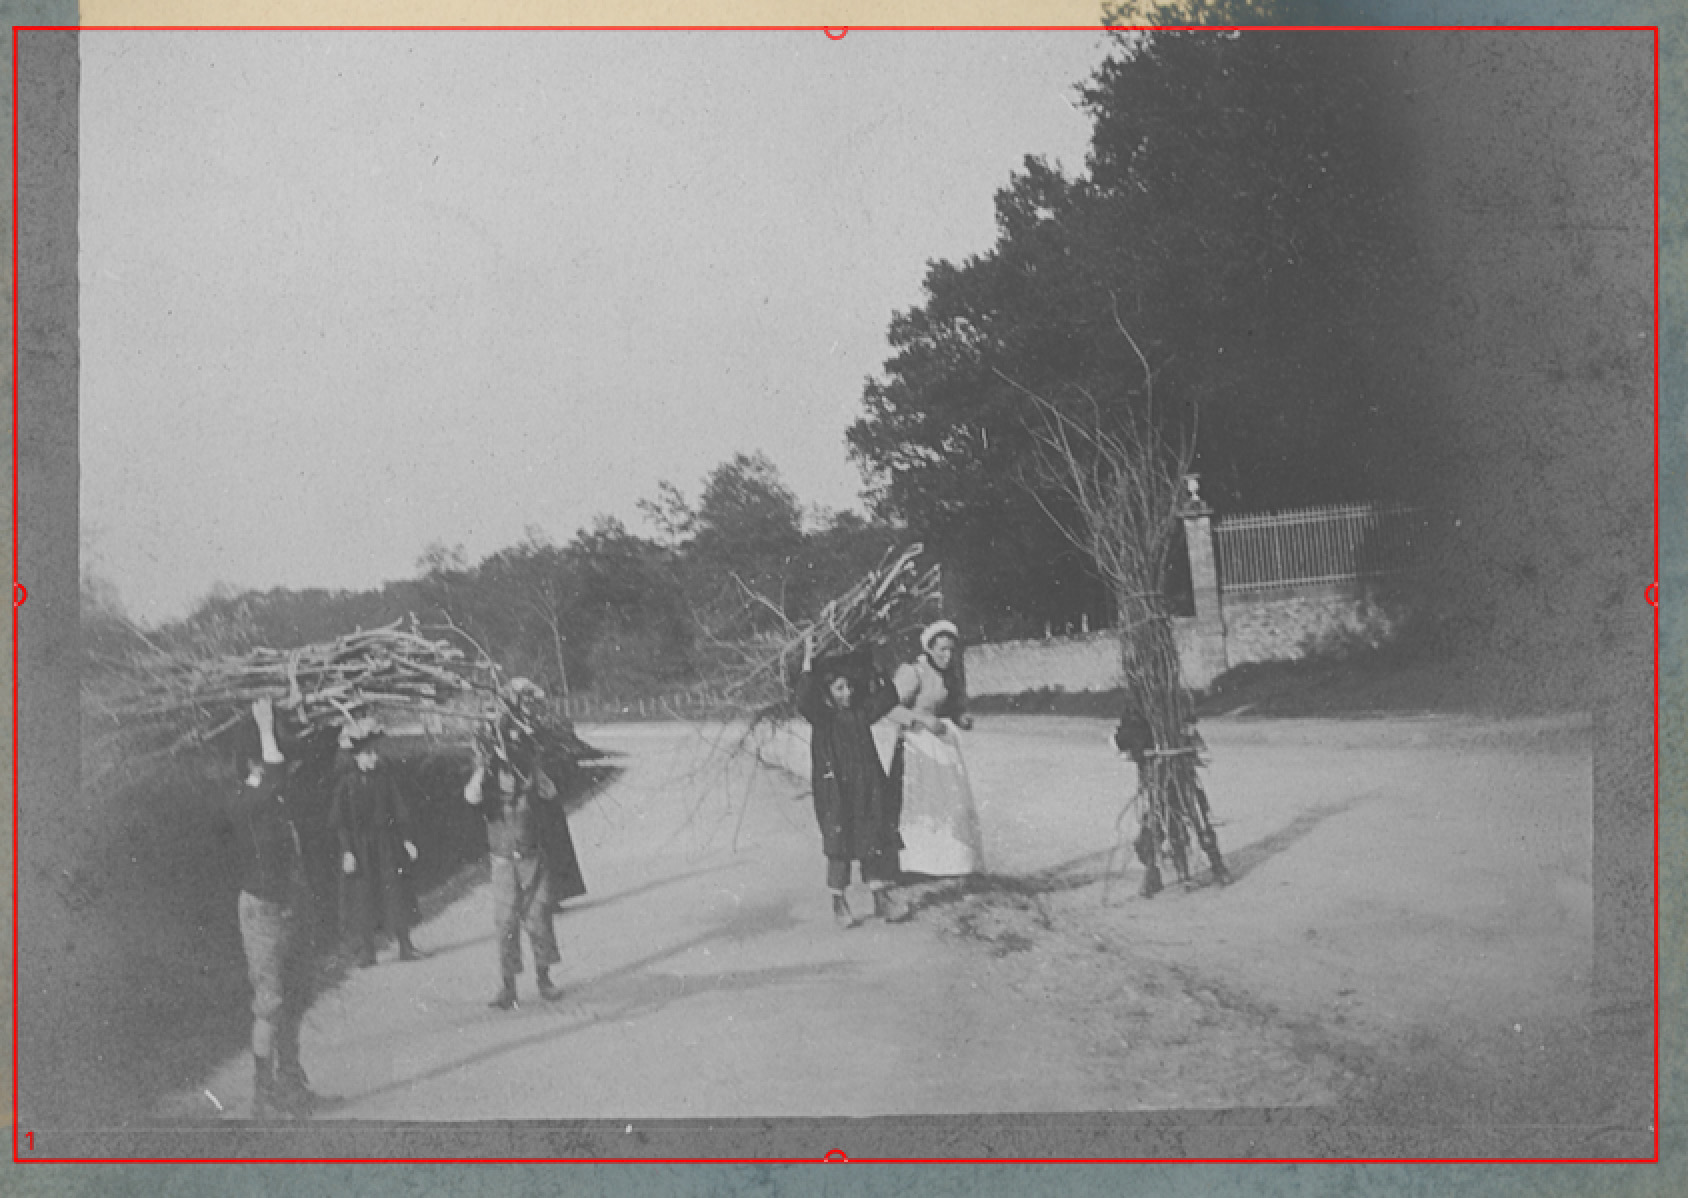
While we could leave this in color, switching to black-and-white provides more image detail and apparent sharpness.
Click to see larger image.
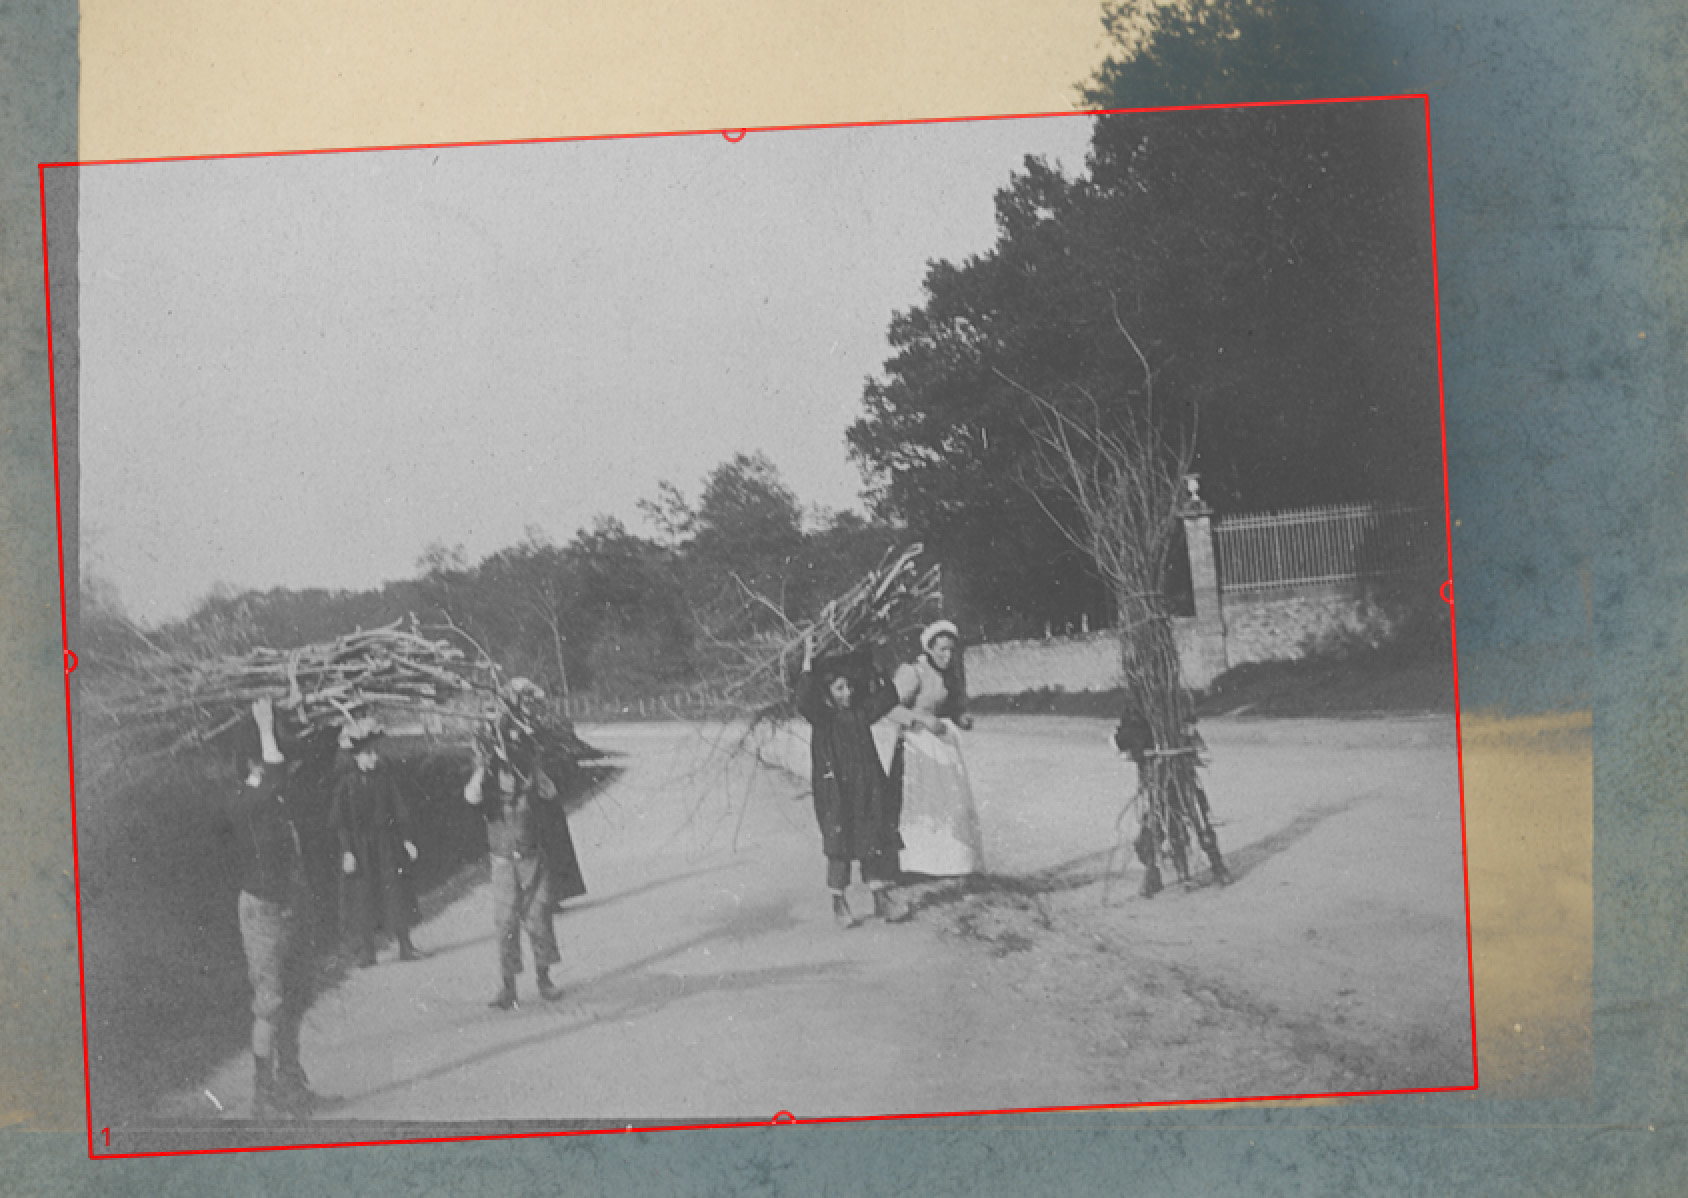
Like many handheld photos of the time which were shot angled, I’m rotating the scan area to straighten the photo.
Click to see larger image.
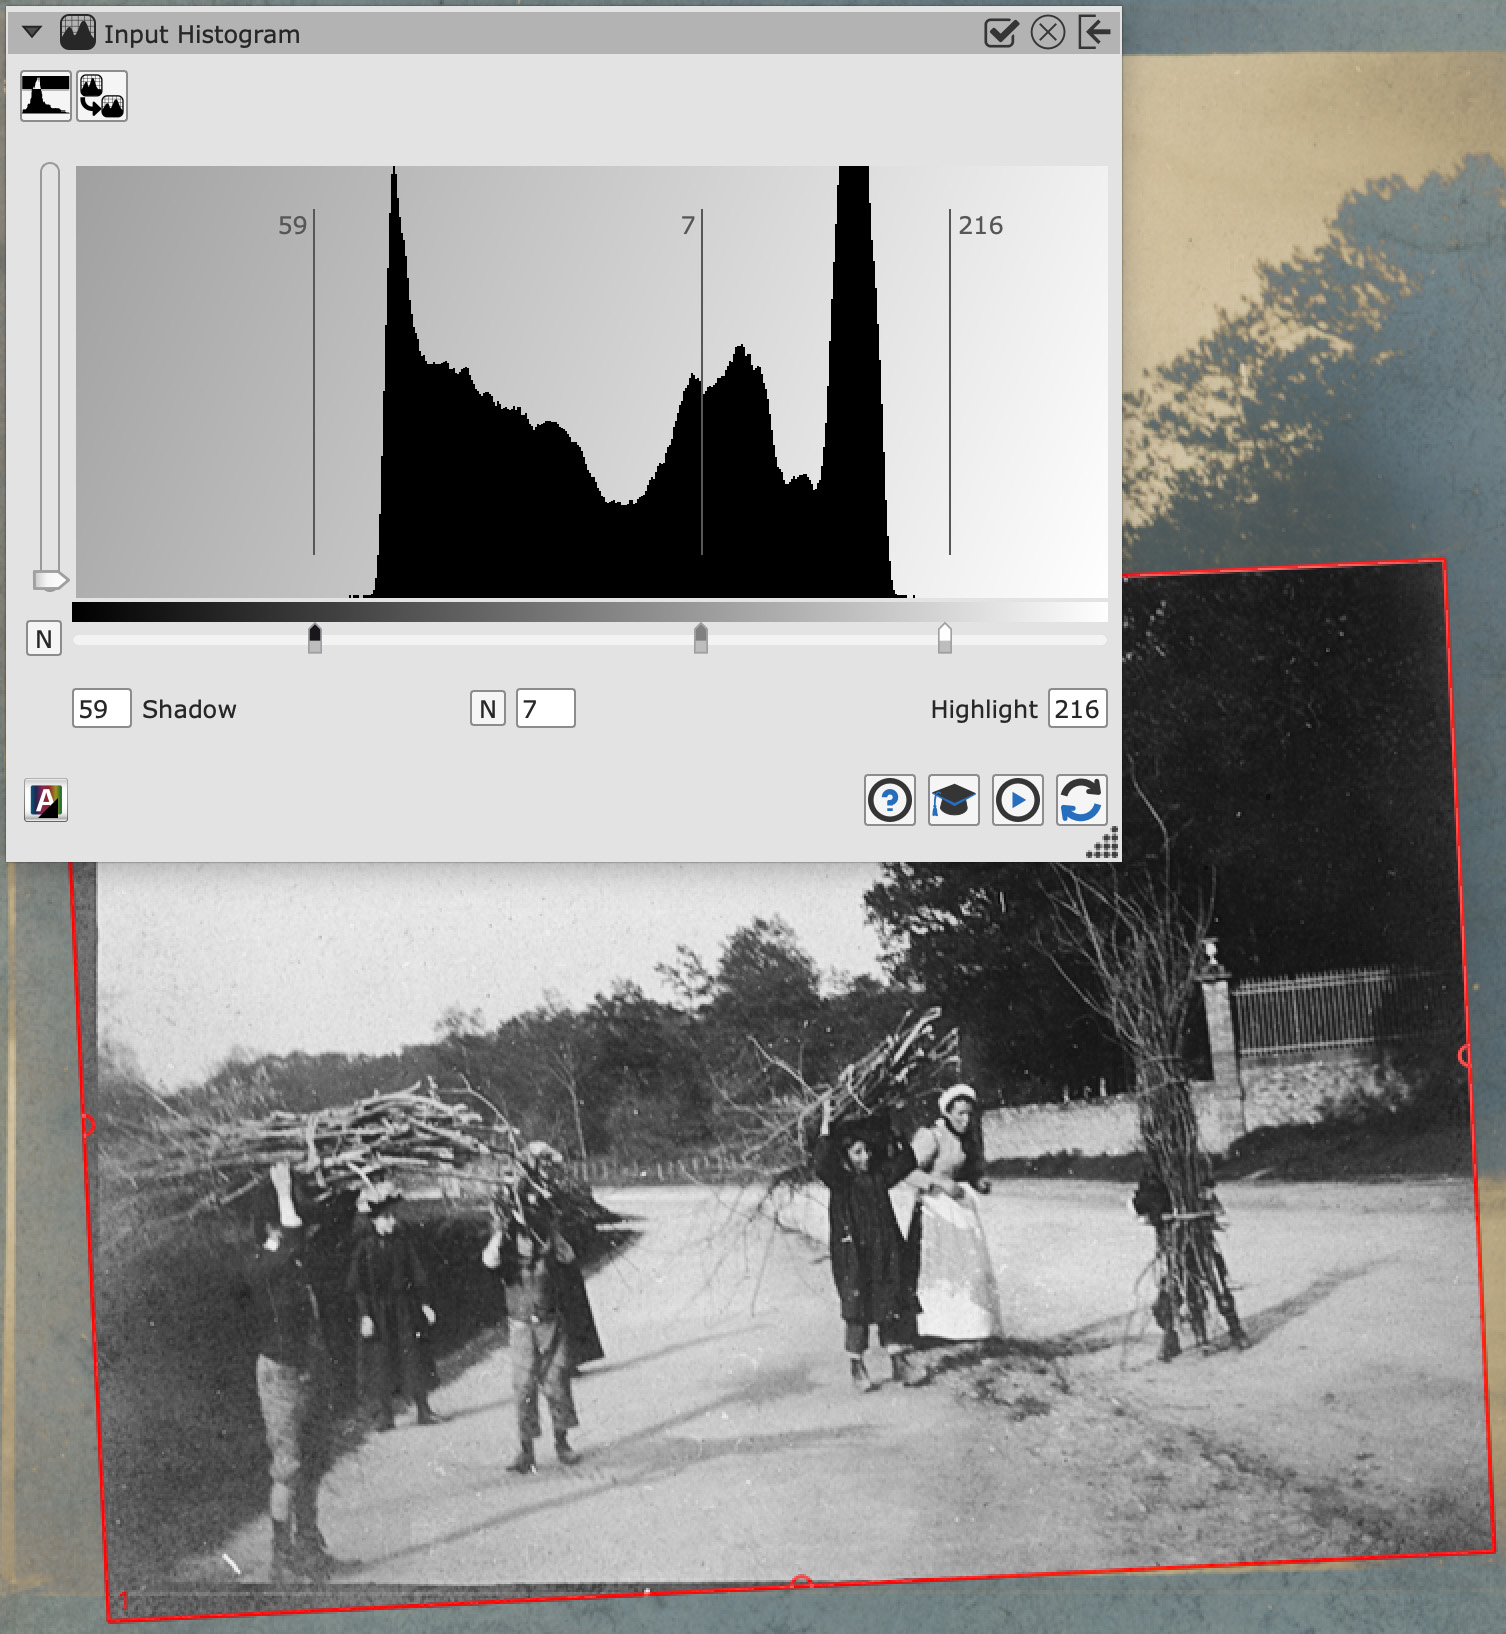
Here are my histogram settings, plus I opened Contrast about 38%.
Again, scanning at 600 DPI, this creates in image which is 1848 x 1342 pixels. To get it to fit into a 1920 x 1080 video frame, I’ll lose some of the sky and place it against a black background to fill out the left and right sides.
Notice that we can now see expressions on the middle children’s faces. (I’ll use the clone tool in Photoshop to hide the edges of the frame at the bottom and left sides.)
Click to see larger image.
BLUE MONDAY
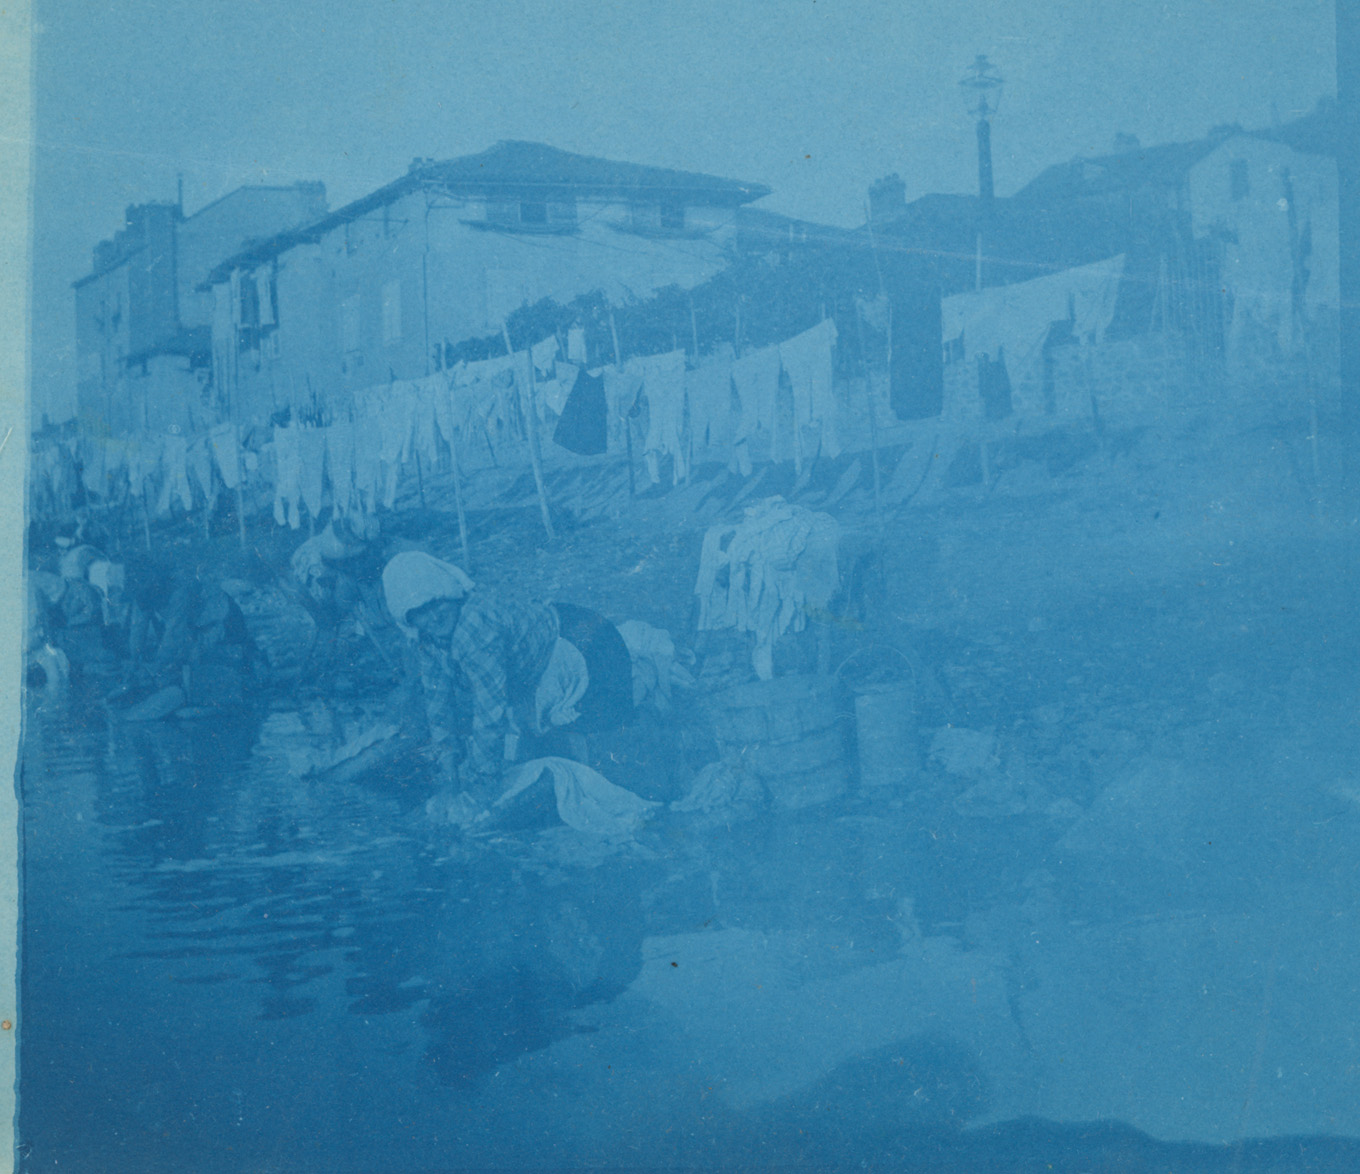
Doing laundry is never fun. But, Holy Smokes, kneeling at the river bank and pounding clothes against a stone will ruin a back!
Click to see larger image.
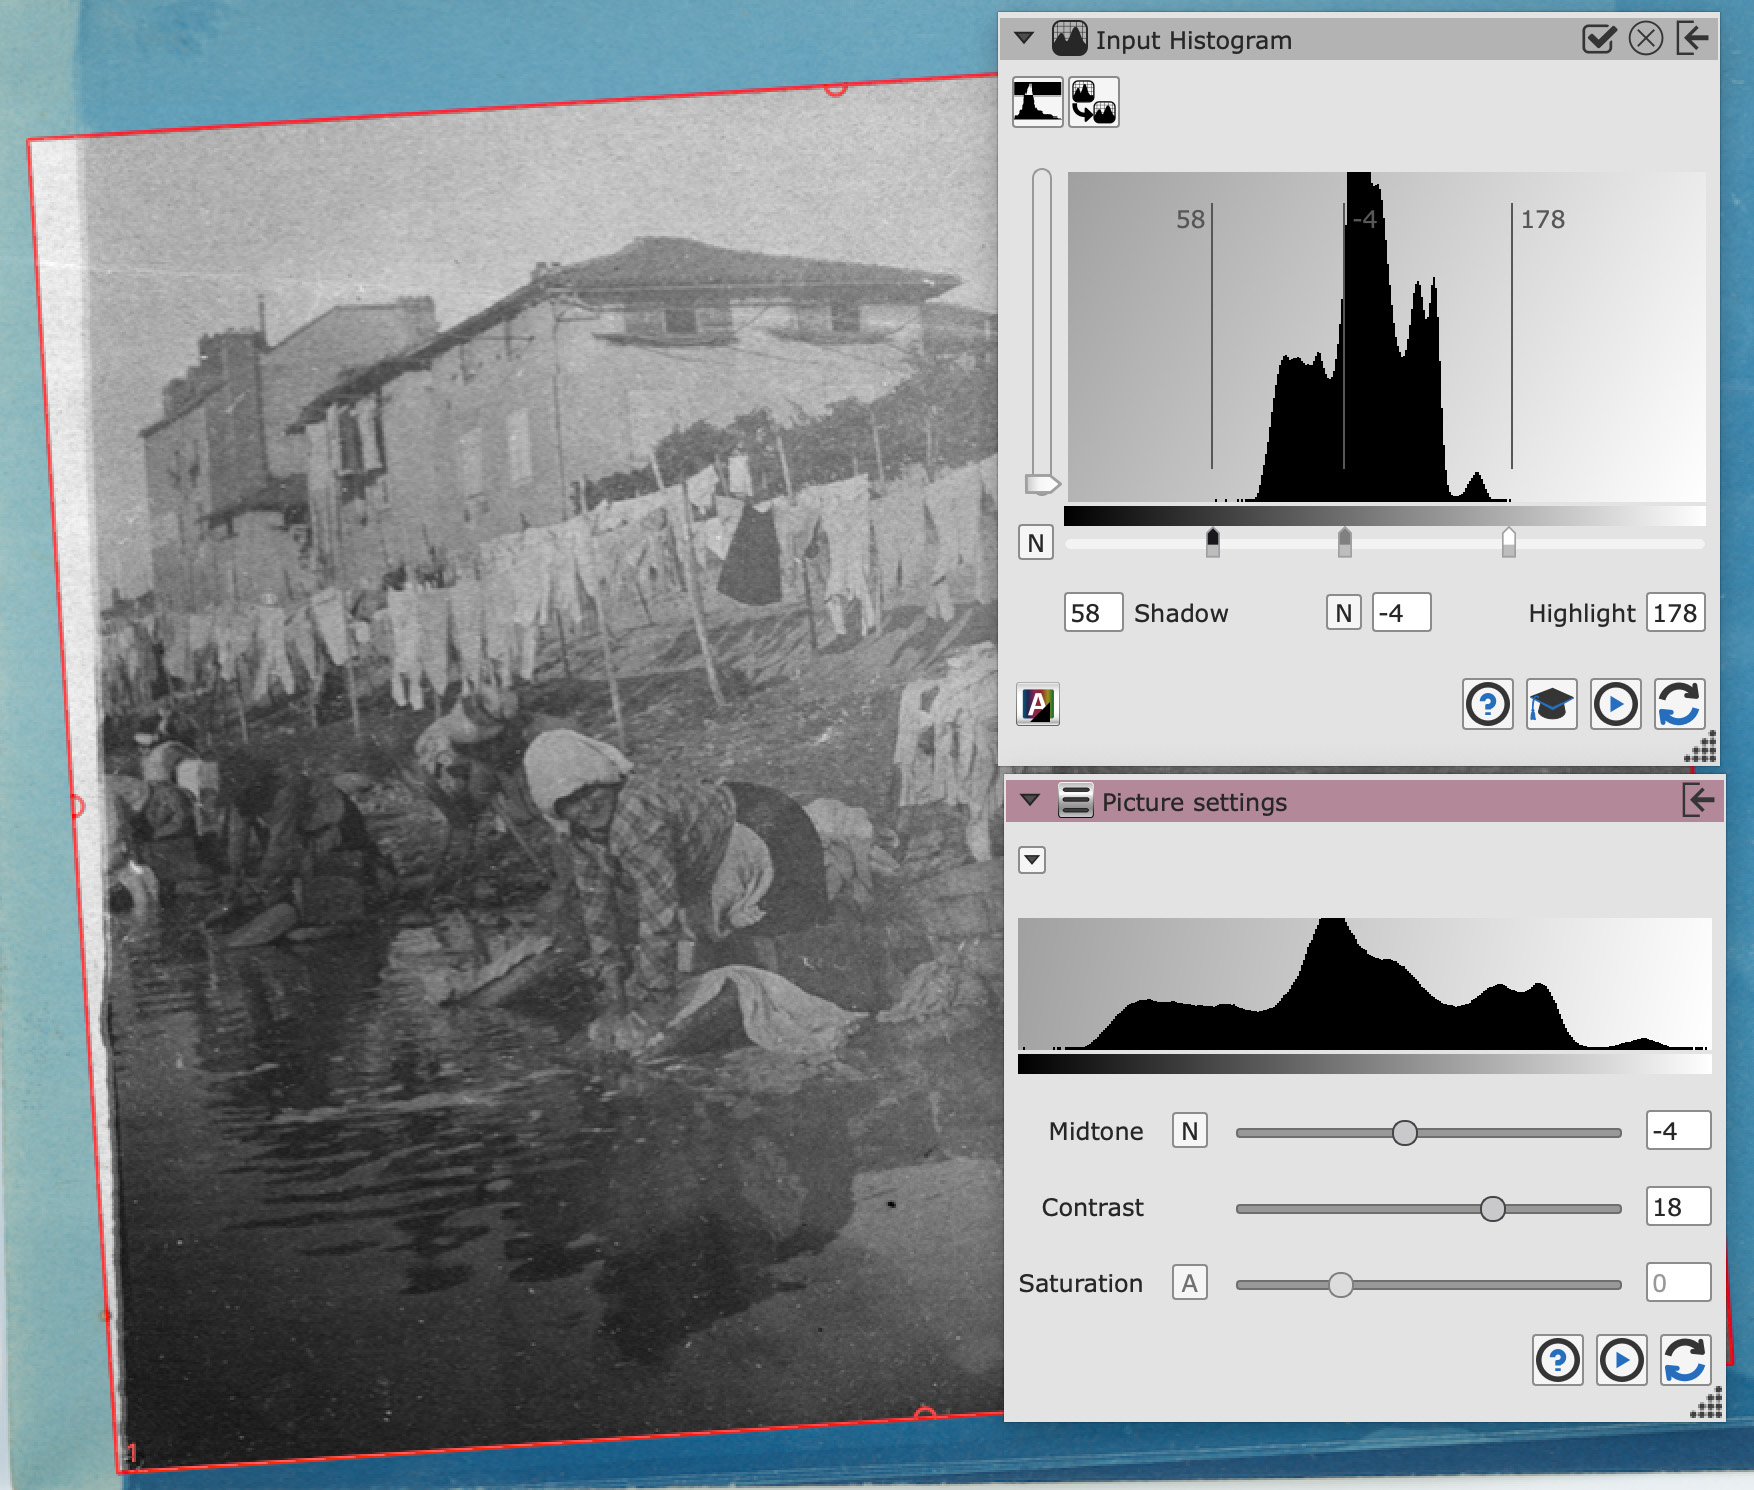
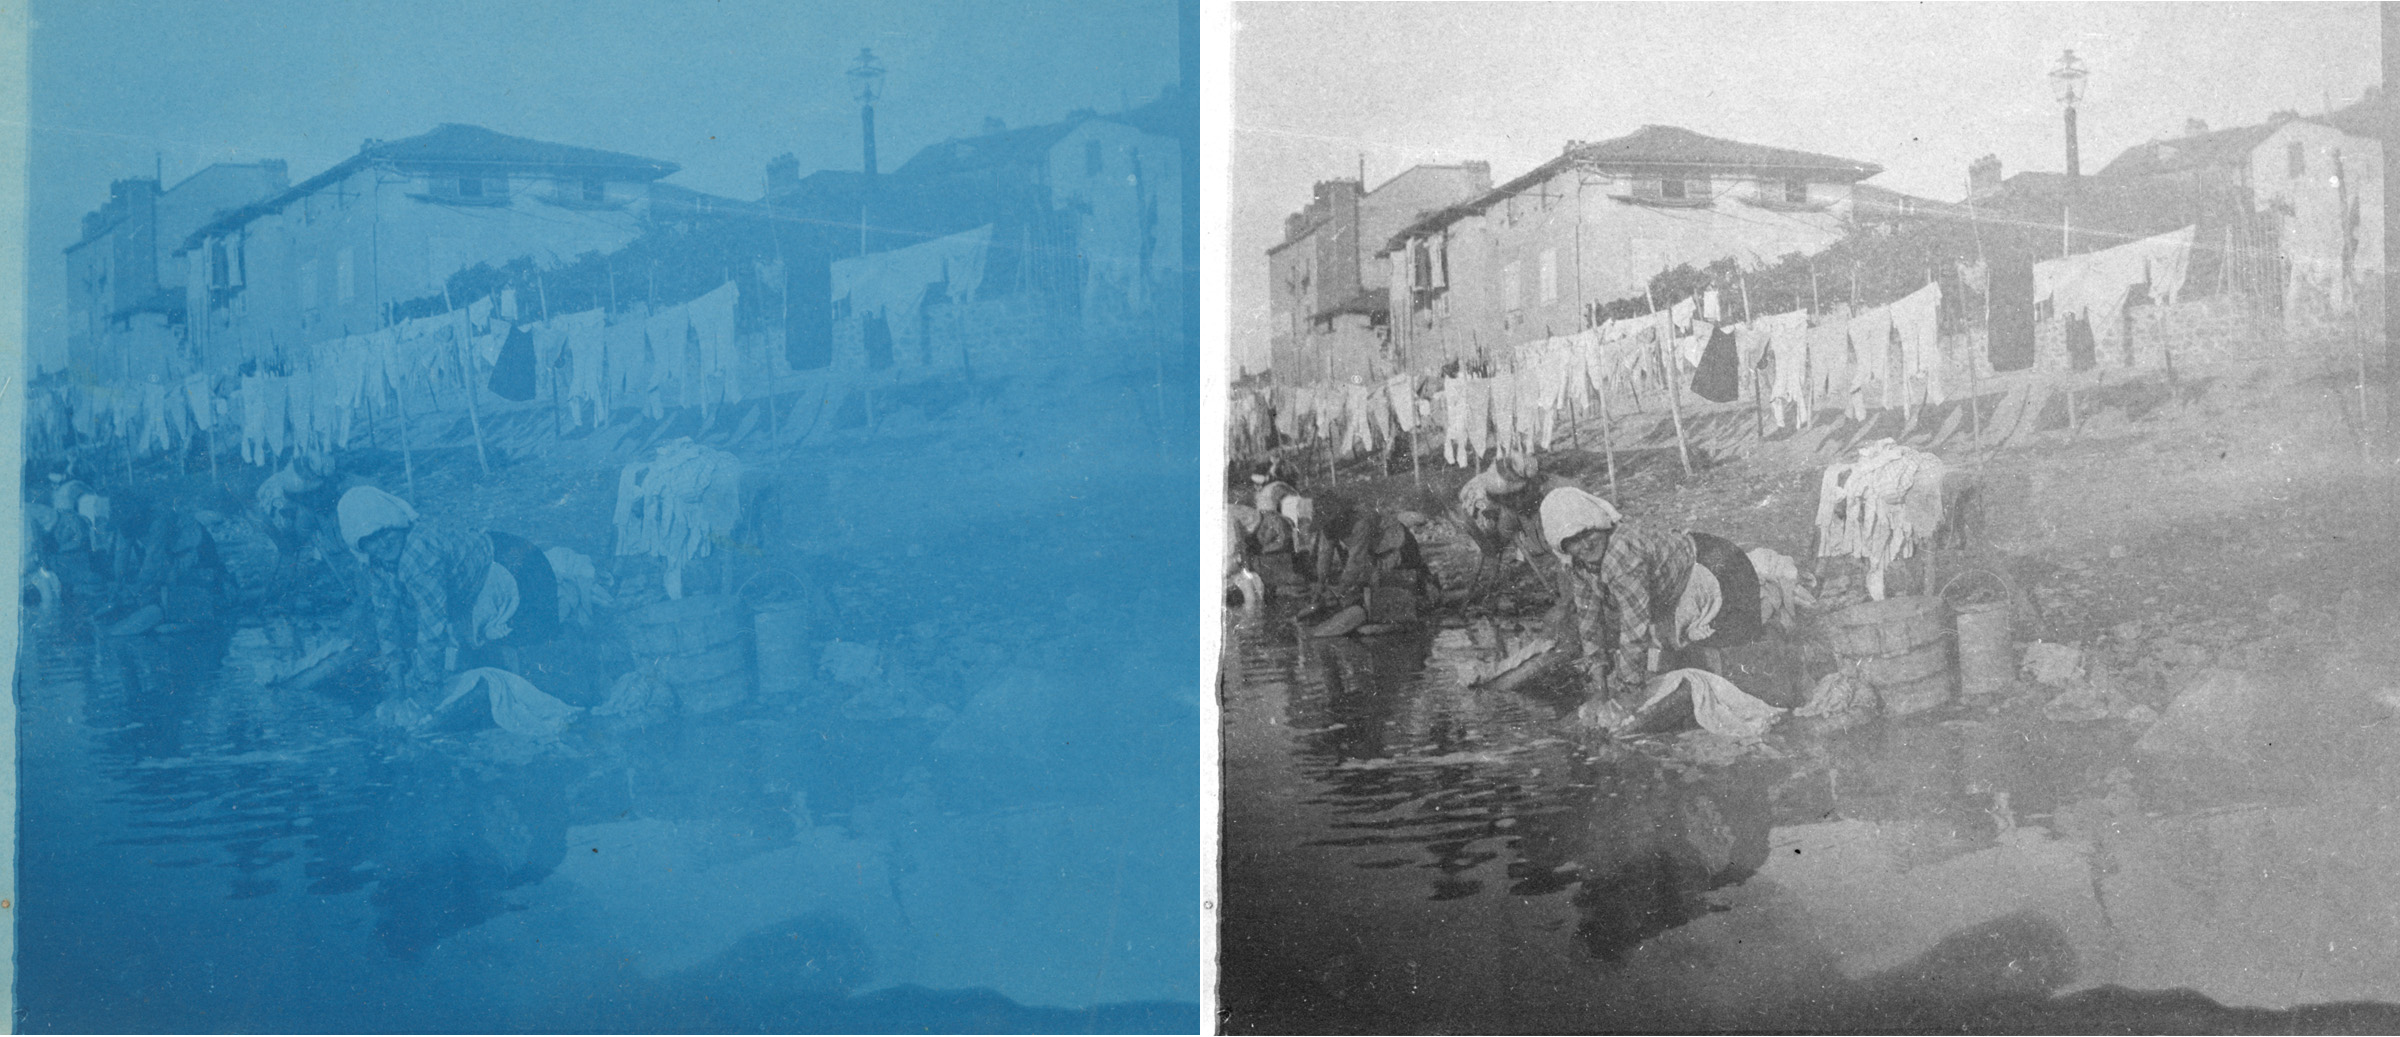
Because everything is blue, we need to convert this to black-and-white, rotate the image to get lines running vertical, then dial in Histogram and Contrast settings.
Here’s the final version.
Click to see larger image.
SUMMARY
Using these settings, we are able to capture all the image detail in shadows, mids, and highlights even from badly washed out images. Then, we can further improve the image in our NLE by lightly crushing shadows or blowing out highlights. Still, always scan to capture all the details, because once they are lost, we can’t get that image detail back.
EXTRA CREDIT
Click to see larger image.
As an experiment, I spent ten minutes in Photoshop cleaning the image; mostly to remove more objectionable dust, damage and artifacts. Here’s the result. Note, that we see all four men in the carriage (one is on top). Plus, two children playing in the park on the left. And, it seems like the man on the right may be sitting on the casket.
And, whoa!, the smell from that roadway must have been stunning.

5 Responses to Restoring History with Better Scans
Once an old photo deteriorates and the image starts silvering, there is little hope of preserving the original. Flatbed scanners are very useful but sometimes rephotographing using polarized light will reveal astonishing images. “Sticks and Stones” is a perfect candidate. WIth polarized light, it’s like lifting a veil off of the image. I will be glad to share some of my before and after images to illustrate the effects of polarized light.
Jim:
I would be fascinated to see this!!
Even better, I’d be grateful if you would write up a short tutorial on how you do it that I could share with my readers.
Larry
I can do that. Let me send you one of my examples. Where should I send it? You can also send your email address to me at my address below.
I look forward to your examples.
Nick – Larry has the images and tutorial. He will likely publish upon his return.