
![]() [ Update – Aug. 14, 2023. I revised my comments in the first option to clarify how large libraries affect RAM, performance and organization. I also clarified my recommendation on how to organize large projects.]
[ Update – Aug. 14, 2023. I revised my comments in the first option to clarify how large libraries affect RAM, performance and organization. I also clarified my recommendation on how to organize large projects.]
Luis emailed an interesting question:
My documentary has 14 scenes, each one is a separate library of FCP X with a file size that varies between 200 GB and 600 GB. I have a copy in two external disk, each one holding 4TB. The issue is: what is the way to deliver the whole film? This will take more than 4 TB of storage for sure. Do I need a very powerful Mac?
Luis asks good questions. First, though, the size of the library does NOT indicate the size of the final export. Let’s back up a few steps and look at his questions in more detail.
NOTE: I should also mention that, for best results – especially with action – shoot, edit, and export the frame rate you need to deliver. Converting frame rates – on ANY NLE – is always fraught with potential problems.
EDITING LARGE PROJECTS
There are three ways to manage and edit large projects:
 Option 1 – Put everything in a single library. The big benefit is that this is easy. Dump everything in one place, then sort it out later.
But, there are several disadvantages: RAM allocation, performance/rendering and our brains.
All NLEs load short segments of clips being edited into RAM during playback. This is called “cacheing.” When cached, clip segments – NEVER whole clips – are decompressed and transformed into uncompressed, 16-bit RGB files. These segments take a lot of RAM.
More RAM is needed, though, to store all the library elements. These also get loaded into RAM when you open the library. The larger the library, the more RAM required just to hold these elements. At some point, for larger projects, there isn’t enough RAM to hold everything, so portions get swapped to and from disk, which slows everything down. Not just rendering, but playback, displaying thumbnails, or other editing tasks.
NOTE: Also, if your project is one very long timeline, render times take longer because you are rendering every unrendered or changed clip in the project whether it is part of the current section you are working on or not.
The third disadvantage is that, while FCP can handle thousands of clips, our brains generally can’t. The timeline for a long project becomes so complex, with timeline icons becoming so tiny, that it is impossible to get a sense of both the big picture and the small details.
Still, this everything-in-one-library approach is fine if you have a relatively “small” edit with only a few dozen clips and limited layers. For example, my weekly webinars run an hour but only have a few clips and less than ten layers. Again, the challenge is NOT the duration, but the number of elements. A ten-hour two angle multicam project is far smaller, in RAM, than a 30-second promo with hundreds of clips.
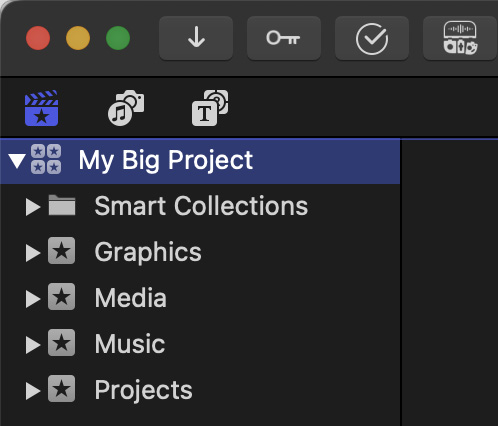
 Option 2 – Create one library and give each scene in its own project. The benefit here is that all clips, projects and supporting files are in one location, but project files are now smaller with one per scene. By putting each scene into its own project, you can easily keep an eye on the flow of the scene while quickly zooming into tweak the details.
This approach also helps with organization and speeds rendering because you are only rendering short scenes.
The downside, just like Option 1, is that libraries can get VERY large very quickly because you are storing clips, projects and render files for the entire program in one place. As Luis discovered, libraries can quickly grow to hundreds of gigabytes.
NOTE: FCP retains render files even if you aren’t using them. Why? In case you decide to use that clip – or trim a clip to reveal previously hidden media – in the future you won’t need to render it again. Get in the habit of periodically removing render files that you are not longer using. Select the library in the Library List, then choose File > Delete Generated Library Files. In the resulting dialog, just choose to delete unused render files.
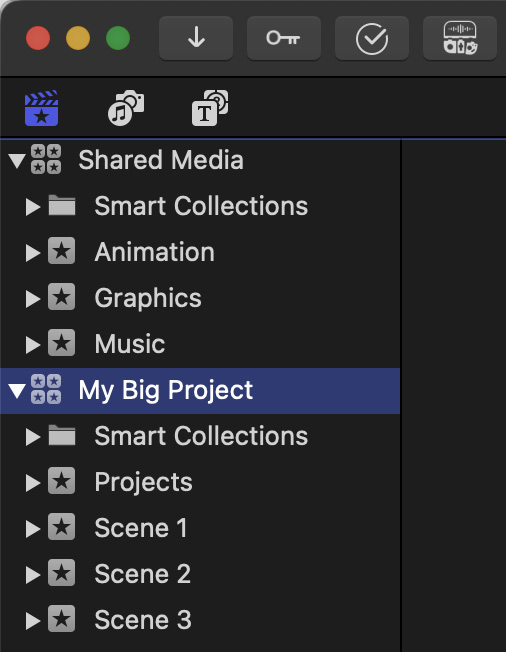
 Option 3 – Create each scene in its own library. The benefit is that each library stays relativity small using less RAM and providing much better performance. Because each scene is small, you use less RAM and system resources to edit. It is also easy to share scenes between editors. Render times are faster and overall performance is peppier. Plus, if you develop a problem with a library, you don’t risk the entire project.
To save duplicating files, create a separate library for shared elements. Then, when you edit, open both the library you want to work on and the shared elements library (red arrow). Sharing a common library allows you to organize it once, without repeating that effort for every scene.
My recommendation for choosing between Option 2 or Option 3 depends upon the number of clips you need to track and whether those clips are shared between scenes. If the same media is shared between multiple scenes, I recommend Option 2. If the media for each scene is essentially stand-alone, Option 3 is a better choice.
NOTE: In reading this the day after I wrote it, let me be more clear. I recommend you start with Option 2. Only move to Option 3 if you know at the start of the project that it will be very big, OR if you are experiencing performance slow-downs during editing. It is easy to migrate a project into its own library – here’s how – so you don’t need to commit to this multi-library approach until you need it.
In both cases, I recommend you create a separate library specifically for shared elements, such as music, graphics and animation. Because we can open more than one library at the same time in FCP, using a shared library with the library for each scene makes it easy to review and choose the elements you need for that scene.
NOTE: In terms of specs, a library in FCP can easily handle multiple thousands of clips, with timelines that run up to 12 hours.
PICK THE RIGHT CODEC
It is important to emphasize that the speed of your computer has no impact on image or audio quality. All faster performance gets you is time; you spend less time waiting on the computer. So, even for extremely large projects, you don’t need the world’s fastest computer. You just need to allow more time for exports to complete.
Before starting an export, make sure you have enough space.
GB to Store One Hour of 1080p Video
| Codec | 24 fps | 25 fps | 30 fps |
|---|---|---|---|
| ProRes 422 | 53 | 55 | 66 |
| ProRes 422 HQ | 79 | 83 | 99 |
| ProRes 4444 | 178 | 186 | 223 |
GB to Store One Hour of 4K (UHD) Video
| Codec | 24 fps | 25 fps | 30 fps |
|---|---|---|---|
| ProRes 422 | 212 | 221 | 265 |
| ProRes 422 HQ | 318 | 332 | 398 |
| ProRes 4444 | 716 | 746 | 895 |
(Source: Apple ProRes White Paper)
ProRes 422. My general recommendation is to export all projects that were shot with a camera as ProRes 422. This high-quality, 10-bit format matches the color space and accuracy of all cameras shooting Rec. 709 media. From this exported master file you can create as many different H.264 or HEVC files as you need for different distribution outlets.
ProRes 422 HQ. If you are paranoid and “just want to be safe,” export using ProRes 422 HQ. This higher-bandwidth, 10-bit file may improve the look of files shot in Log that have undergone extensive color grading. The general rule is that if you can’t see a difference between ProRes 422 and 422 HQ, there isn’t a difference.
ProRes 4444. If your project was created on the computer, for example After Effects or Cinema 4D, export as ProRes 4444. This 12-bit format precisely preserves the color space created by the computer. You can export camera-shot projects as ProRes 4444 but you won’t gain anything except creating files that are 3X larger than ProRes 422.
If you are outputting an HDR project, I’d experiment to see which looks better: ProRes 422 HQ or ProRes 4444. Pick whichever you want, the only downside to using ProRes 4444 for mastering is file size.
NOTE: Our goal here is to export a high-quality master project. From here, you can create whatever format(s) are required for distribution. Exporting other master codecs is also an option, but I don’t have file sizes for them.
EXPORTING BIG PROJECTS
Option 1. If your film is contained in one timeline, exporting is easy. Select File > Export, pick the output codec, select a storage location, then go to lunch.
Option 2. If each scene is stored in its own project, you could copy/paste all the projects into one master project. You could, but using copy/paste to transfer finished work makes me VERY nervous. Very. Instead, I recommend you export each scene as a stand-alone ProRes file.
NOTE: This also allows adding transitions between scenes – provided you add handles at the top and tail.
Then create a new library specifically to merge these files together. Add the clips into a timeline that exactly matches the codec and frame rate of your source files. If the project specs match the clip and you aren’t adding any new titles, transitions or effects, your media simply passes through without any processing or rendering.
NOTE: Final Cut only renders if the project settings don’t match the clip or if you do something in the timeline that requires new video to be calculated, such as add a title or a transition.
Option 3. If each scene is stored in its own library, export each scene, then stitch them together as described in Option 2.
Variation. If you plan to add transitions between the scenes, additional titles or anything that requires rendering, output the intermediate scene files as ProRes 4444. Then, when the final export is done to stitch the entire movie together, you are starting from a 12-bit depth color space. I’d only do this, though, if my original camera masters were of exceedingly good quality. Otherwise ProRes 422 is more than fine.
SUMMARY
There’s no “best” way to handle large projects. The choice really depends upon what feels best for you. Personally, most of my projects are stored in a single library. However, if I needed to tackle something really big, I’d probably go with Option 3.
The good news is that you have a choice. Pick the one that feels right to you. And share your thoughts in the comments.
2 Responses to Manage and Export Large Projects in Apple Final Cut Pro [u]
Excelent – thank you, Larry!
Don:
I’m glad you liked it.
Larry