
[ NOTE: When you need to get the best streaming video possible – for Mac or Windows, live or recorded – here is the gear you need, the links to find it and instructions on how to get it all to work. Technical details are at the end of this tutorial. ]
When I first started live streaming, long years ago, it was audio-only. Then, I added video using the webcam built into my iMac. But, sigh, the quality wasn’t that great and the position of the camera was, at best, awkward.
That was when I started my search for better images. (And, just for disclosure reasons, all the gear discussed here is stuff I purchased for myself.)

For a long while, I used a Logitech C922 1080p Pro Stream Webcam. It mounted easily to the back of an iMac or laptop and connected directly into a USB port. The Mac recognized it with no problems.
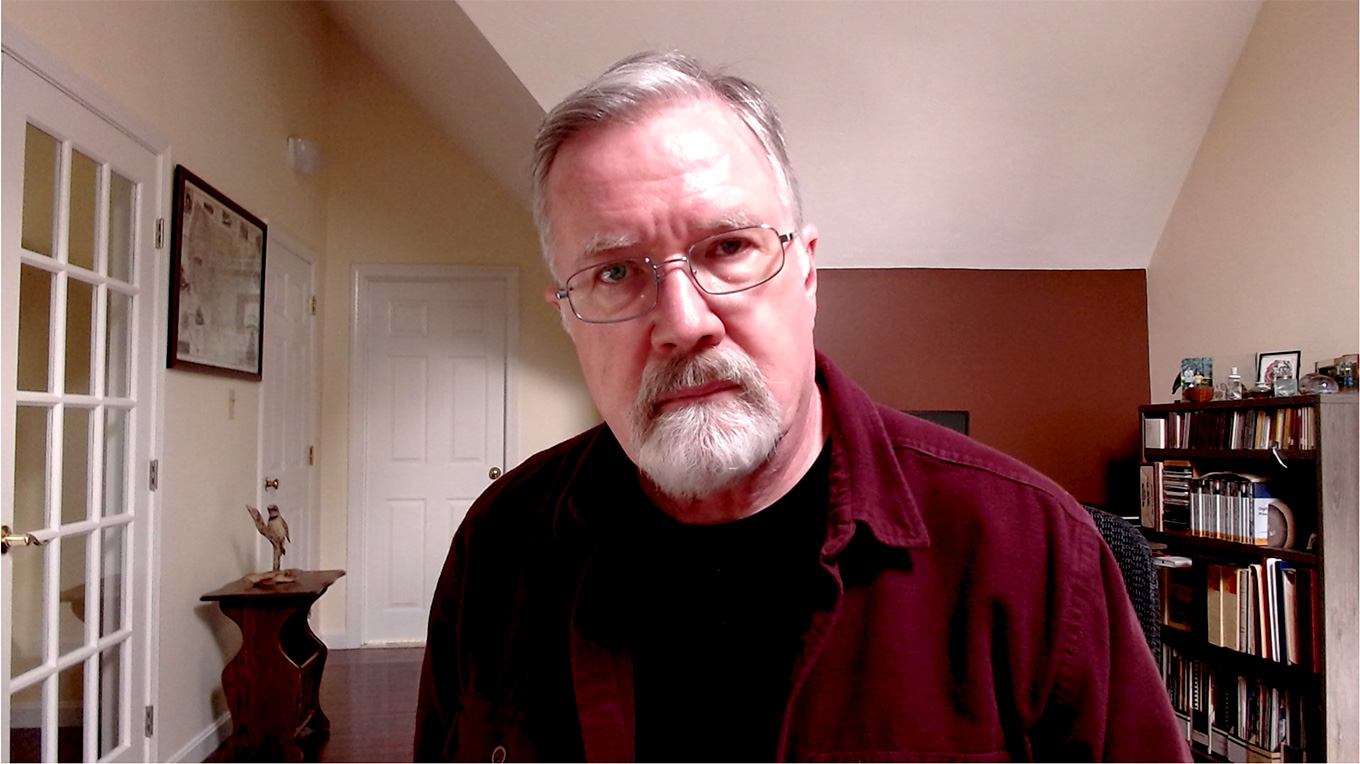
But, as you can see from the image above, the shot is too wide, the colors are too red, everything was in focus and nothing I could do would adjust and lock the exposure. The camera was ALWAYS over-exposed. Worse, the image would frequently shift focus to the background.
NOTE: Yes, Logitech provides software to control the camera, but there was no way to consistently lock exposure and the color adjustments for this camera are very primitive. I spent a lot of time in post cropping and color correcting the image.
It was better than the iMac’s camera in terms of resolution, but the image certainly wasn’t great.
A BETTER SOLUTION

A while ago, I bought a Sony a7ii DSLR camera, because I love hiking, taking still images and modifying lens angles and depth of field for the images I shoot. However, due to, ah, breaking my leg, the camera sat unused, until now. Then, last week, it struck me that it might be possible to use this camera for live video streaming.
It is. It isn’t hard – provided you have the right gear and give yourself a few hours to hook everything up and configure camera menus.
NOTE: If I had to buy this camera again, I’d probably get the Sony a7iii, which shoots 4K video. But, if you are on a budget, I really like the images this Sony a7ii creates. The stills are 12 megapixel and the video is a lovely 1080p.

What makes this all possible is an HDMI port on the camera. Or, in the case of the Sony, a micro-HDMI port. Connect a micro-HDMI to HDMI cable and the camera video will directly feed an HDMI monitor. Which is great, but I need to get this signal into the computer, not just a monitor.
NOTE: Actually any camera with an HDMI, or micro-HDMI, port will work. The Sony was what I had on hand.

Enter the Cam Link 4K from Elgato. This converts the HDMI signal from the camera into a USB data stream that the computer can process. Best of all, virtually all Mac-based video and streaming software recognizes it without any additional drivers.
NOTE: The Cam Link also works on Windows.
The Cam Link 4K supports cameras from Nikon, Canon, Sony, Panasonic, Fujifilm, GoPro and virtually every other camera that has some form of an HDMI port on it. It supports streaming software such as YouTube, Twitch, Zoom, QuickTime Player, and many others.
Once the camera is connected and feeding clean video to the HDMI port (in the case of my Sony, I needed to adjust the menus so that the HDMI port was outputting video with no menu overlays), I could stream up to 1920 x 1080 60 fps video, live, from the camera.
NOTE: For bandwidth reasons, I chose to output 1080p/30 which is then scaled by the streaming software to whatever size is needed.

And the images are lovely – the Sony’s auto-focus clearly kept my face in focus, the colors are lovely, the exposure was always perfect and the depth of field was exactly what I wanted. Also, using the zoom lens meant that I could precisely frame the shot.
Plus, by mounting it on a small tripod just off the edge of my computer at eye height, I was able to look directly at the camera, without the looming up or down angles created by cameras mounted to laptops (looking up) or desktops (looking down).
So that’s the overview. Here’s what I used to make it work.
INSIDE THE TECH
The Camera
Any camera with an HDMI output will work. I prefer DSLR cameras because of their larger sensor, plus an auto focus lens. The camera needs to run in movie or auto mode which automatically adjust focus and exposure. Most DSLRs provide this.
The link below describes how to configure a Sony a7ii camera for streaming. Adjusting the settings properly took a couple of hours of online research to get right.
NOTE: I used this camera for four and a half hours of live presentation. The sensor did not overheat. I turned it on at the beginning and promptly forgot about all the tech so I could concentrate on the presentation.
Lens

I’m using a Sony f/3.5 28-70 auto-focus zoom lens. I love the zoom part because it allows me to adjust the frame without moving the camera. I found that my shot looked the best around 35mm. Generally, 50 mm is considered “best” for portraits.
As long as the lens supports auto-focusing, you can use the lens of your choice. And, like cameras, the price range for lenses varies widely.
Lighting

I have become a big fan of Lumecube lights and tripods. (It’s the white box on its own tripod just above my monitor.) I purchased their Broadcast Lighting Kit, along with a third tripod. The image above is how it looks on my desk; yeah, it’s kinda messy, I needed to work with the space I’ve got.
The lights are daylight-balanced, controllable from 5% to 100% brightness in 5% increments, the diffusion filter on the front works really well and the tripods are extremely well-manufactured.
The batteries last 1-5 hours – depending upon the light level. I generally run the lights between 20 – 40% power, so they will easily last for a couple of hours on battery. However, for longer sessions, like my four-hour session earlier this week, I connected the light via USB to keep it fully powered all day.
Tripod
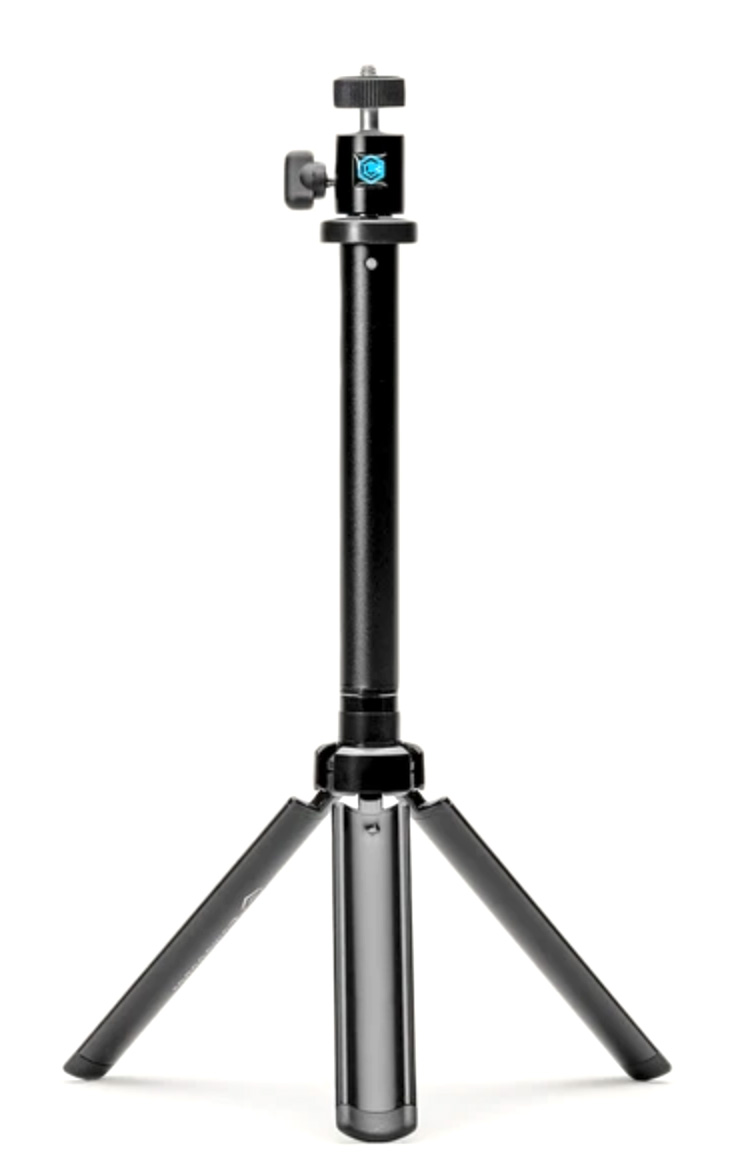
I have a really cool short tripod, precisely designed for this kind of work. Then, I lost the camera attachment plate so there was no way to attach the camera. Sigh… time for Plan B.
I grabbed my extra Lumecube tripod and attached it to the camera – it uses a standard camera mounting screw. The only problem is that the camera exceeds the weight the tripod is designed to hold. So, a little masking tape applied to the riser post and, voilá! Problem solved. (Just don’t tell the folks at Lumecube, it would break their hearts to see their lovely tripod besmirched with masking tape…)
Power

The battery in a DSLR camera won’t last very long. You’ll need a constant source of power. Here, things get tricky. The Sony a7ii camera has a micro-USB port, allowing the camera to connect directly to the computer for both power and a video feed. But, when you feed power using the USB port, the camera turns into a hard disk.
To get around this, Sony provides software – Imaging Edge Webcam software – that converts the USB feed to video, except most Mac apps don’t recognize this as a video source. Also, the frame size this software supports is smaller than 1080p. In other words, while this is an acceptable alternative, I needed a more compatible video source that supports a full 1080 frame, while still providing power to the camera.
HDMI is the answer for video, what the Gonine AC-PW20 AC Adapter Power Supply on Amazon solves the power problem. It fits inside the battery compartment, thus bypassing the USB connection, and worked perfectly for a live four-hour training.
Elgato CamLink 4K
The Cam Link 4K is the secret sauce that makes this whole system possible. It converts the high-quality HDMI output of the camera into something the computer can process. No additional drivers need to be installed.
“Coupled with Cam Link 4K, your camera appears as a webcam in all your favorite apps. Superb quality at 1080p60 or even up to 4K at 30 frames per second keeps your stream professional. Ultra-low-latency technology gets you up and running on your favorite platform in no time. And your camera has never felt more powerful.” (Elgato website)
HDMI cable
You’ll need a micro-HDMI to HDMI cable to connect the camera to the Cam Link. These are readily available. I used the Thin Micro HDMI Cable from Insignia, available at Best Buy.
USB Hub
There aren’t enough ports on my computer for all my peripherals. So, it was back to Best Buy for an inexpensive 4-port, powered, USB hub.
Software

This system doesn’t require installing any drivers, everything is plug-and-play. However, it is helpful to adjust the shot before going live. QuickTime Player makes this easy. Fire up the camera, launch QuickTime Player, then click the small downward-pointing arrow and select Cam Link 4K from the menu. The screen shot of me earlier in this article was taken from QuickTime Player.
NOTE: I process audio separately from this system, which is an article in its own right. Also, you will need to change the video source in your streaming software. That is usually done from a Settings menu.
SUMMARY
While this seems like a lot of gear, the cool thing is that once you get it set up, there’s nothing you need to turn on or adjust except the camera itself. Everything “just works.” Turn on the light, turn on the camera and get to work. I use QuickTime player to check my shot and adjust lighting before the presentation starts, but after that, the pictures are clear, solid and clean. And they are compatible just about everywhere.
When you need to use your camera elsewhere, just disconnect the HDMI and power cables. Everything else stays connected ready to use again in the future.

8 Responses to How to Use a DSLR Camera to Stream Live Video
excellent article Larry :-). Theres a ton of videos on utube etc, but its nice to see how Larry does it!
Norm:
Yup. YouTube is a source, but, sometimes, I don’t always believe their accuracy.
Thanks for the kind words.
Larry
“YouTube sources” and trust – You’re right, Larry – I always seem to trust you – YouTube…? probably trust is present much of the time but not to your level.
Totally unrelated and I’ve written about this a couple of time previously – It would be great to see you get involved in Davinci Resolve – Resolve has made serious inroads into the NLE marketplace and it would be great to go to a known trusted source… this guy named “Larry” – I can then tell others “I know a guy…”.
Hope you’re loving MA (MA… correct?) – Keep up the great work!!
Billy:
Yup. DaVinci Resolve is in my future. I keep telling myself I need to learn it.
And, yes, I’m now in MA. It is lovely this time of year.
Larry
Nice write up Larry. I did something similar a while ago and I always get compliments on my image quality. Although it’s significantly better in Zoom than in FaceTime…significantly better on the same machine.
I dug up my old Panasonic GH3 and use it as a web cam. Put a fast 1.7 25mm Lumix lens on it with a cold-shot mounted mic and aMavisLink Audio Video Capture Cards HDMI to USB 1080p recommended by Richard Taylor of FCP TV Live. I also have the Yamaha HS5 monitors which are fantastic.
Tangier:
Thanks for your comments and gear suggestions. Any camera with an HDMI output will work, as will any lens with auto-focus. The MavisLink card I haven’t heard of – thanks for the suggestion.
Larry
Excellent article, Larry. What software do you use to record your presentations? Also curious how you capture your audio – I know you mentioned its an article in its own right but I was thinking about purchasing a USB sound card for my Rode VideoMic GO as I’ve read that a TRS to TRRS adaptor may not be compatible with all laptops, desktops. Any thoughts?
Les:
I record my screen using Telestream Screenflow.
Audio is also captured by Screenflow. I use all outboard gear and connect it to the computer using a Focusrite Scarlet 2i2. I’ve used Focusrite for years and have found them reliable with high quality. A TRS plug is mono. A TRRS plug is stereo. If you have TRRS on one end and TRS on the other, you are converting stereo to mono in the cable itself. All my external signal routing is mono. Stereo is created – if needed – in the mix.
Larry