
![]() [ UPDATE Aug. 11, 2023. When I first wrote this tutorial I explained how to display the correct color space on a monitor. Except… I was wrong. I removed that section and replaced it with a link to an article that provides correct instructions.]
[ UPDATE Aug. 11, 2023. When I first wrote this tutorial I explained how to display the correct color space on a monitor. Except… I was wrong. I removed that section and replaced it with a link to an article that provides correct instructions.]
This tutorial shows three different ways to display video full-screen in Apple Final Cut Pro. The first uses a single monitor, the second uses two monitors, while the third connects two or three monitors to provide the most accurate color and image quality.
In the old days, if we wanted to monitor our video to see exactly what it would look like for color grading, we needed to buy an external video monitor. While video monitors are still necessary for HDR media, there are now computer monitors which will work very well as a grading monitor for SD and HD media.
A SIMPLE TRICK FOR SINGLE MONITORS
If all you have is the single monitor attached to your computer, you are not out of luck.
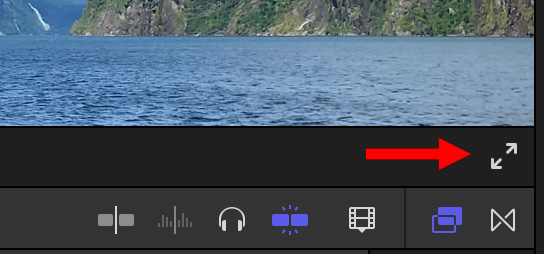
In the lower right corner of the Viewer is an icon with two arrows (see screen shot above). Click this to enlarge the Viewer to fill the frame and hide the rest of the interface.
Use keyboard shortcuts – like the J-K-L keys – for playback.
FULL-SCREEN SHORTCUT: Shift + Cmd + F.
To return to the interface, press ESC.
I have used this techniques for years and it works great.
A MOSTLY-SIMPLE TRICK FOR TWO MONITORS
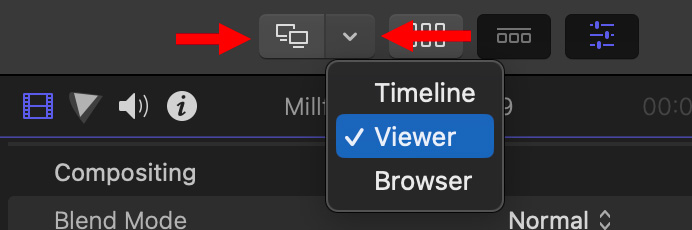
If you have two monitors, two new icons appear in the top right corner of the FCP interface.
Feel free to experiment with displaying the Timeline or Browser on the second monitor. Pick whichever screen layout works best for you.
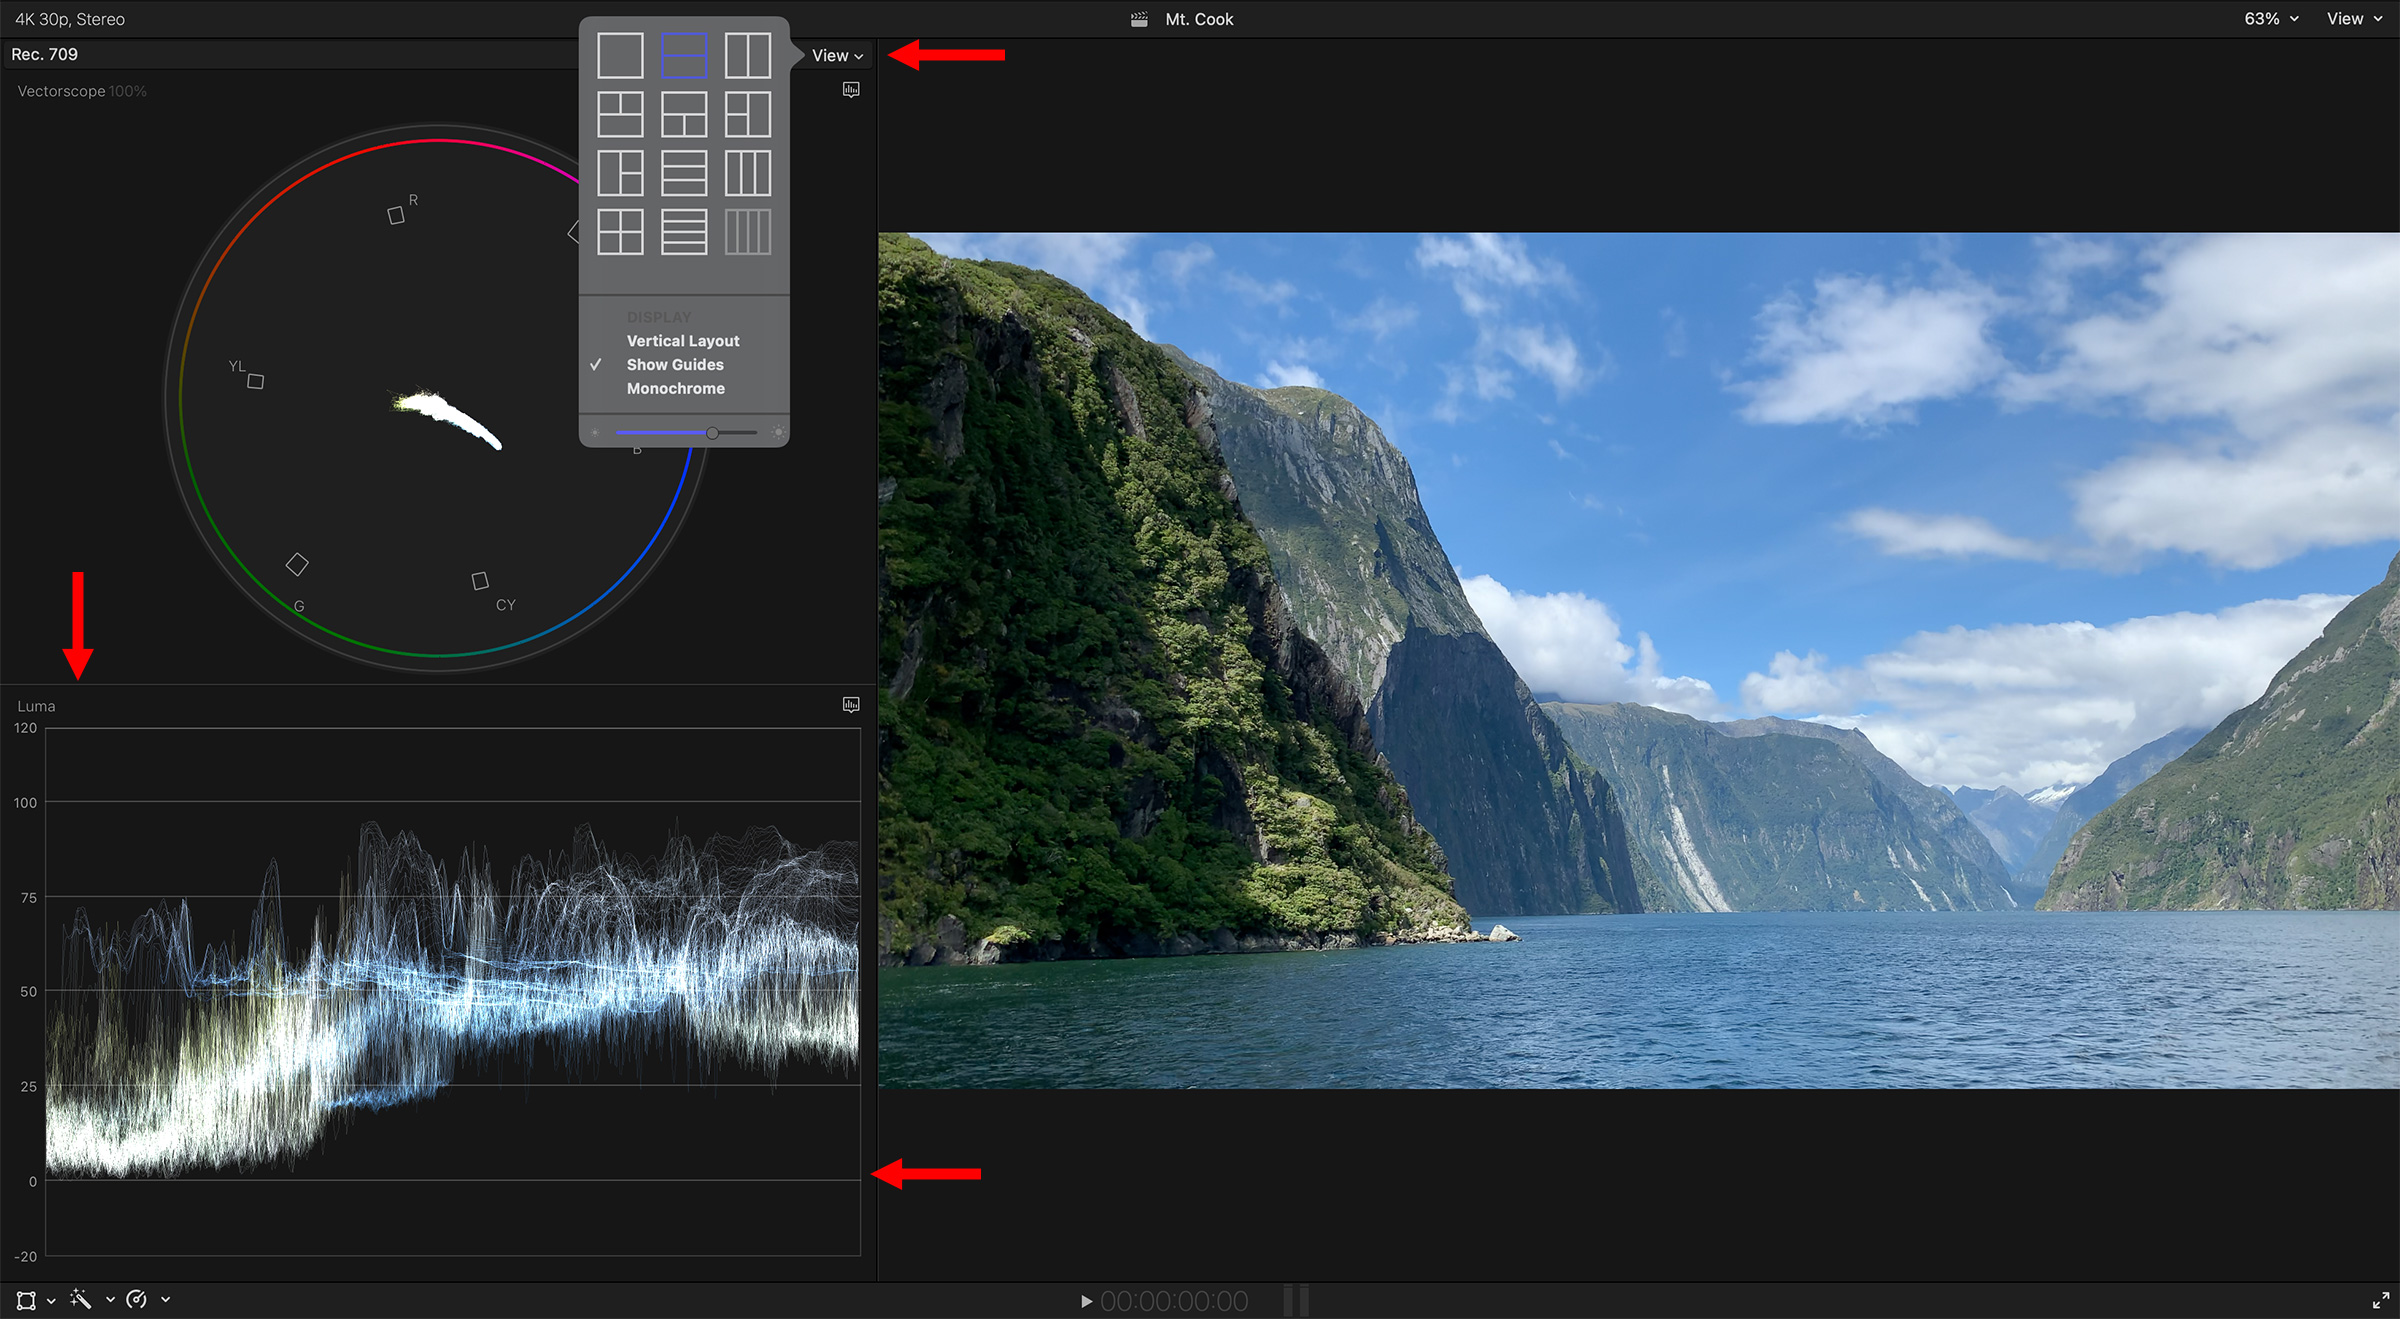
(Click to see larger image.)
NOTE: Click the View icon (top red arrow) to change the number and orientation of scopes on display. Drag one of the dividing lines (middle and bottom arrows) to change the size of the scopes.
UPDATE: HOW TO SET COLOR SPACE
Both these techniques work regardless of the resolution or color space accuracy of the monitor. But, if you need to trust the colors the monitor is showing, you need to set its color space and resolution.
Here’s how to accurately set the color space of a computer monitor.
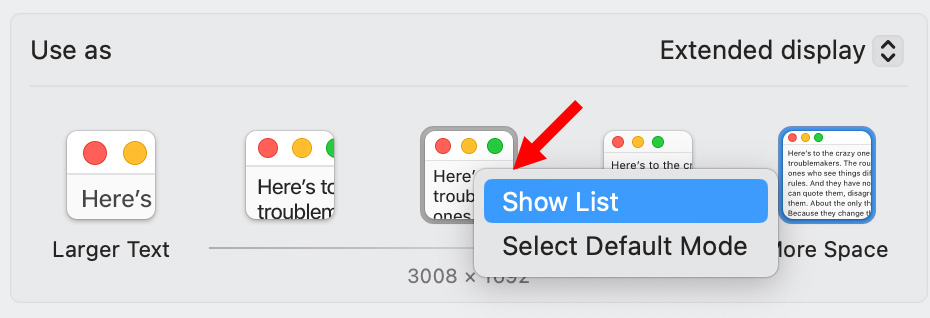
HOW TO CHANGE MONITOR RESOLUTION
To use a monitor as a “Retina Display,” you need to set the monitor resolution to 1/2 its total resolution. For example, set a 4K (3840 x 2160) monitor to 1920 x 1080.

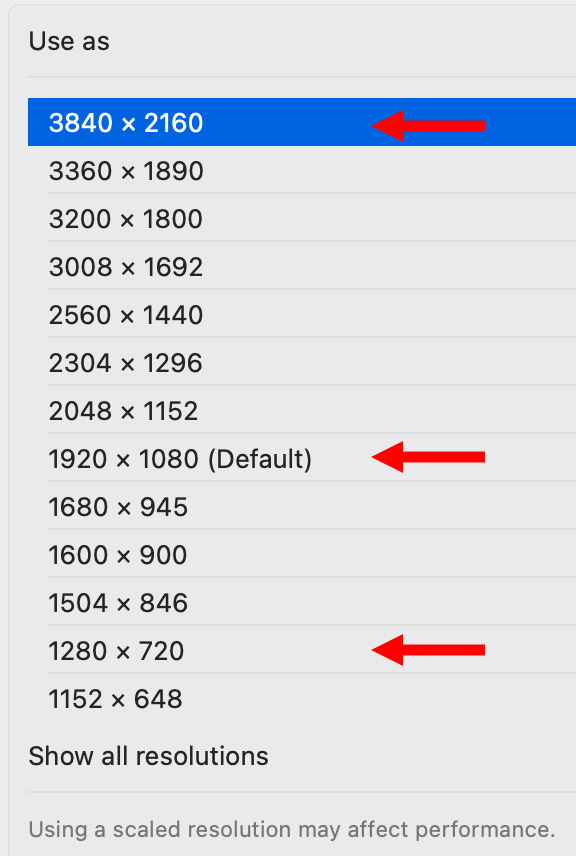
NOTE: 5K monitors would also support 4K (4096 x 2160) and 5K (5120 x 2700) resolutions.
ENABLE THE DISPLAY IN FINAL CUT
These last two steps are done inside Final Cut.
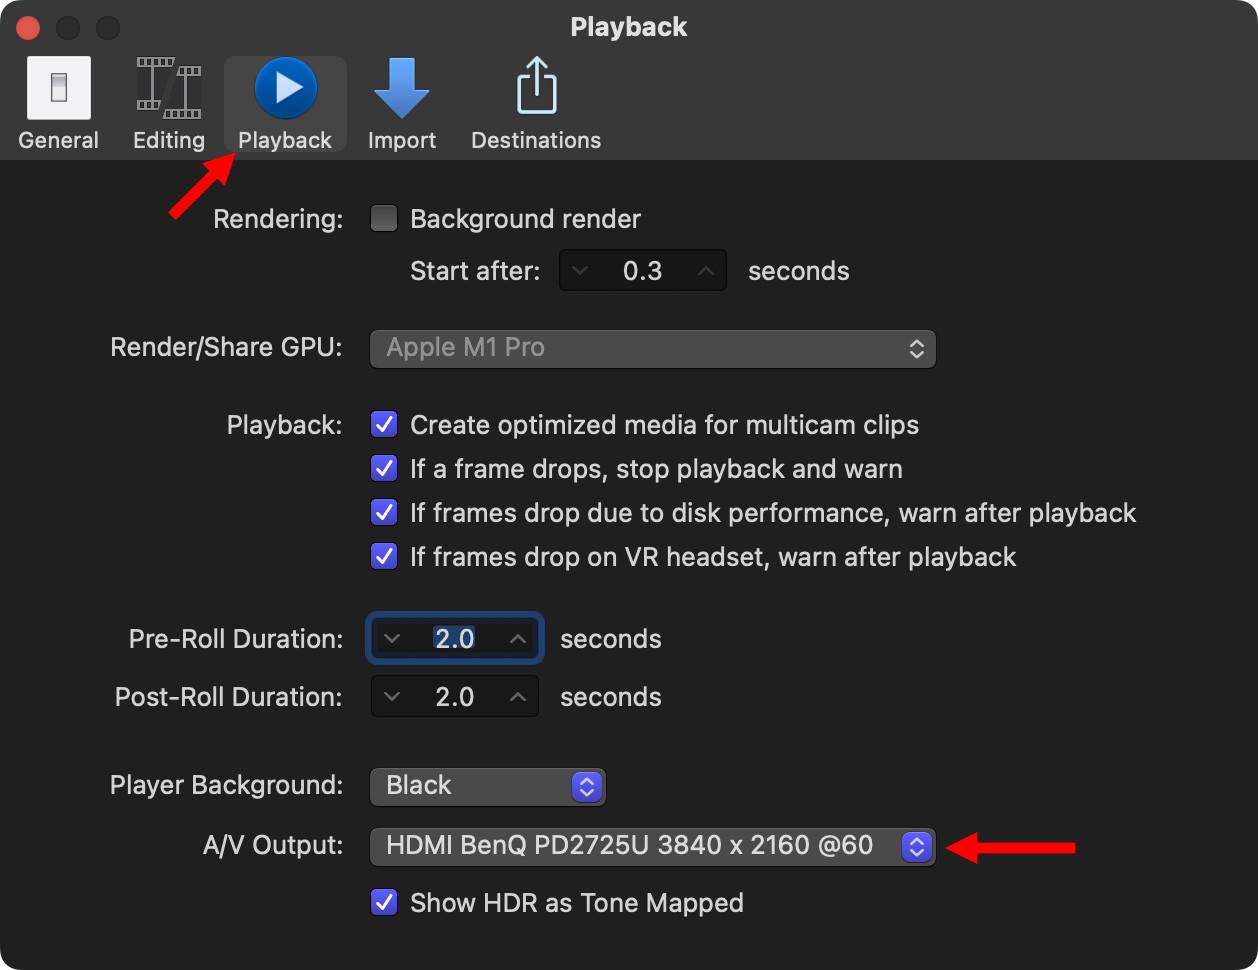
Go to Final Cut Pro > Settings > Playback and make sure the monitor appears in the A/V Output menu. If not, make sure the monitor is connected via HDMI or DisplayPort.
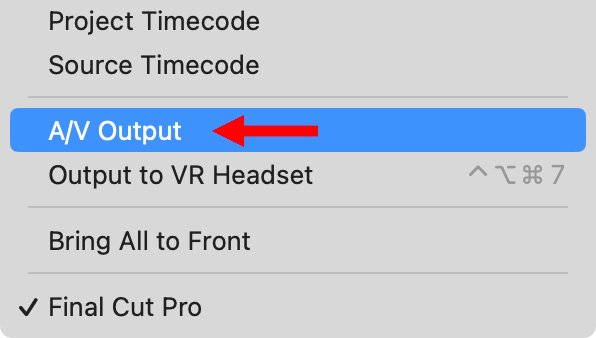
Finally, choose Window > A/V Output. When you do, the output of the Timeline will appear full screen (i.e. without video scopes) in the monitor. You’ll need to re-enable this setting each time you relaunch FCP.
NOTE: If A/V Output is gray, recheck the monitor resolution to assure that it equal to or larger than the size of your project and that it matches one of the video resolutions. Also, try changing how you connect the monitor, for example, try HDMI or DisplayPort. There are Thunderbolt to DisplayPort converter cables, which are not very expensive.
To disable the monitor display, uncheck Window > AV Output.
SUMMARY
Is using a third monitor for video proofing essential? Well… it depends.
NOTE: Keep in mind that, like all video since forever, you have no control over the color quality of the consumer’s monitor. All you can do is guarantee that “it is OK leaving here.”
The good news is that using this last monitor setup provides an accurate way to monitor color for most projects without going to a lot of additional expense.

4 Responses to How to Display High-Quality Full-screen Video in Final Cut Pro [u]
Hi Larry,
I came across this YouTube piece that advises against using an HDMI connection when making adjustment to the dynamic range of photos. Although it is aimed at photographic use, but perhaps it is worthwhile for our consideration if using stills in the video. Here’s the link …
https://youtu.be/Z_MLLONK_9w
Best regards,
Geoff.
Geoff:
This is a fascinating video – thank you for sharing. The short answer is, for best color results, connect your monitor via DisplayPort or USB-C. Based on what the video covered, it may still be possible to get the full color range using HDMI, but it might require a call to the support folks that developed your monitor to get the correct setting.
Thanks,
Larry
Thanks for the article Larry, I also purchase the BenQ PD2725 for color grading. Did you find out if I have to set color space on both Mac and the monitor?
You mention this as a NOTE:
“After writing this I realized I was unclear on whether we need to set color space on both the Mac and the monitor, just the Mac, or just the monitor. I’ve contacted a couple of monitor vendors to learn more and will update this when I have more complete information.”
Ricky:
THANKS! for asking this question. I need to update this article, because it has bad information. Here’s what you need to know:
https://larryjordan.com/articles/how-to-accurately-change-color-space-settings-on-mac-monitors/
Larry