
![]() One of the new features in Apple Final Cut Pro 10.5.3 is the ability to find missing media. This includes camera native (original), optimized or proxy files. As I was writing about finding missing media for last week’s newsletter (here’s the link), I realized I should create a more detailed tutorial on the Search Filter window.
One of the new features in Apple Final Cut Pro 10.5.3 is the ability to find missing media. This includes camera native (original), optimized or proxy files. As I was writing about finding missing media for last week’s newsletter (here’s the link), I realized I should create a more detailed tutorial on the Search Filter window.
NOTE: Expanded search is applied to whatever event, folder or library you select BEFORE opening the Search Filter window. (I’ll show you a workaround below.) You can’t search across multiple libraries.
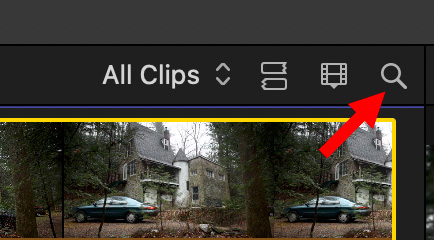
To open the Search Filter window, click the small magnifying glass in the top right corner of the Browser.
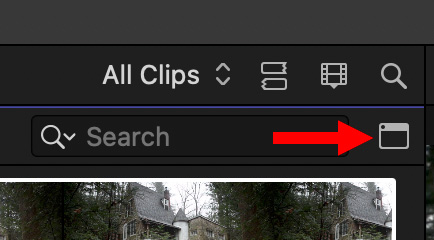
This displays the text search box, which, by default, searches for text in file names, Notes and Browser markers.
NOTE: Here’s an Inside Tip that explains these options in more detail.
However, the real power in Final Cut’s search opens when you click the small “clapperboard” icon (red arrow in the screen shot above).
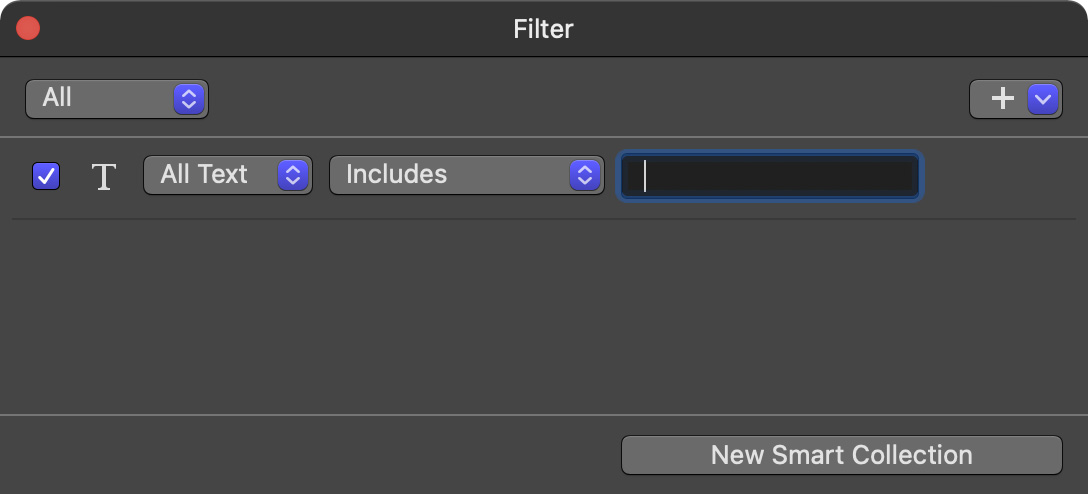
This displays the Search Filter window. By default, this is set to search on text.
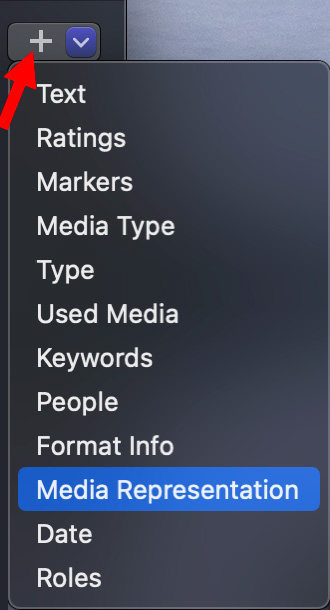
To add a search criterion, click the Plus icon on the top right side. To start, let’s search for missing camera native files. So, choose Media Representation.
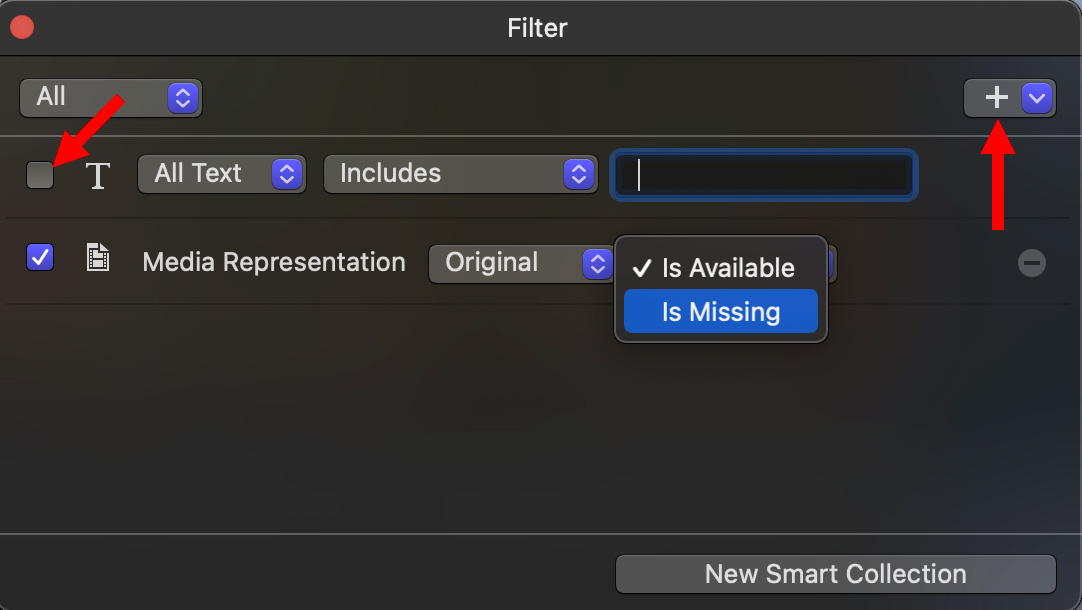
This displays the option to find all available original media.
Uncheck Text search to disable that setting. Then, switch Is Available to Is Missing.
Instantly – without clicking anything – all missing camera native media is displayed in the Browser.
MULTI-TERM SEARCHES
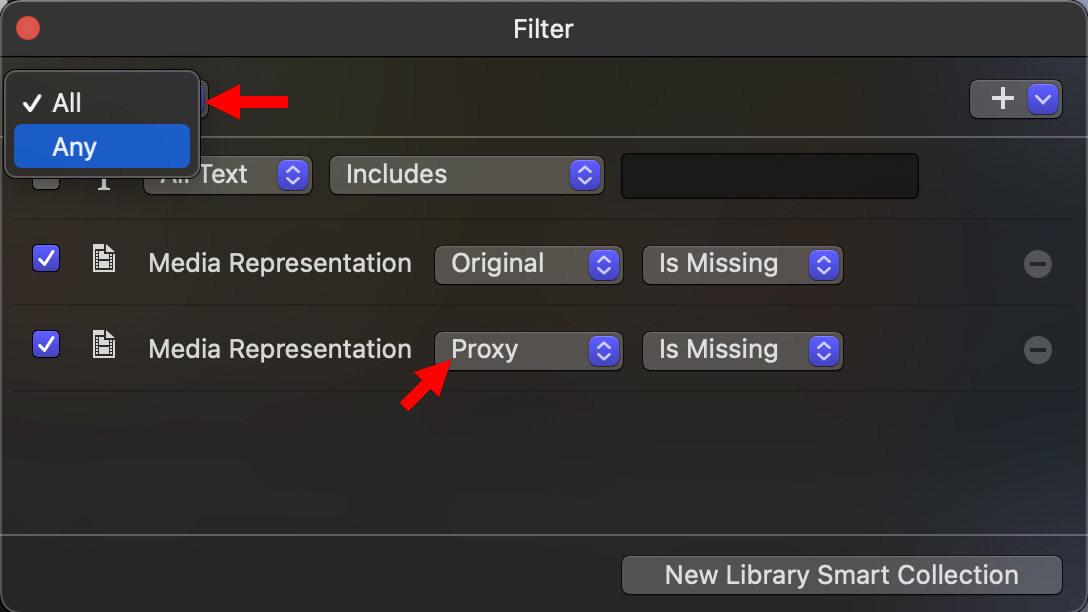
Let’s say we want to find ANY missing original or proxy media. Using the Plus icon, add two Media Representation lines:
Then, in the top left corner, set ALL to ANY.
What ANY means is that if any of the original media or proxy media is missing, it will appear in the Browser. (AND means that both the original and proxy media must be missing in order to display something in the Browser.)

NOTE: To disable, but not remove, a search line, uncheck it on the left. To remove a search line, click the Minus icon on the right. (The Text line cannot be removed, but it can be disabled.)
A MORE COMPLEX SEARCH
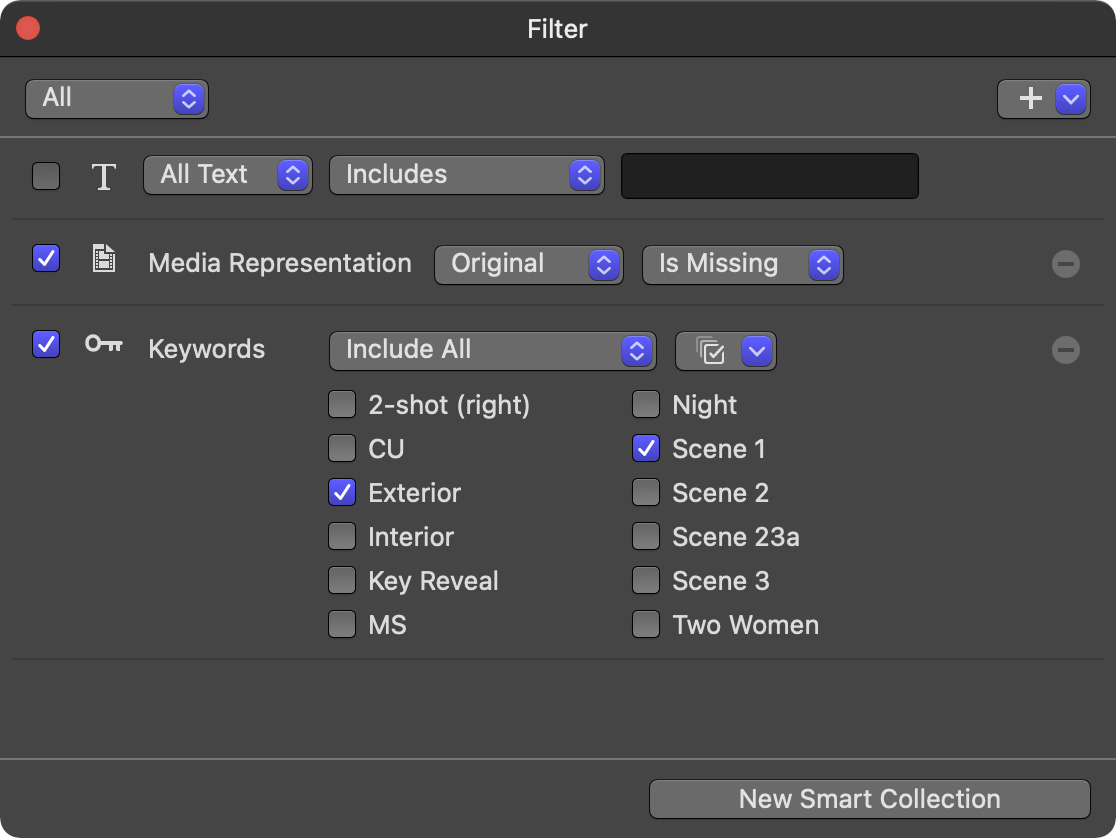
Let’s say we want to find all exterior shots for Scene 1 where optimized files are missing. To accomplish this, we will need to use keywords.
NOTE: Here’s an article on using keywords in Final Cut Pro.
Using the Plus icon, we add a line for Media Representation and a second line for Keywords. Then, check the keywords we want to search for (Exterior & Scene 1).
Finally, set the ALL / ANY menu to All. This means we want both search criteria to be true (find something) in order to display a result.

NOTE: Just as the main Search window provides a choice between ALL and ANY, Keywords provide their own options:
As you will see from your own experiments, ALL is far more restrictive than ANY.
ONE LAST EXAMPLE
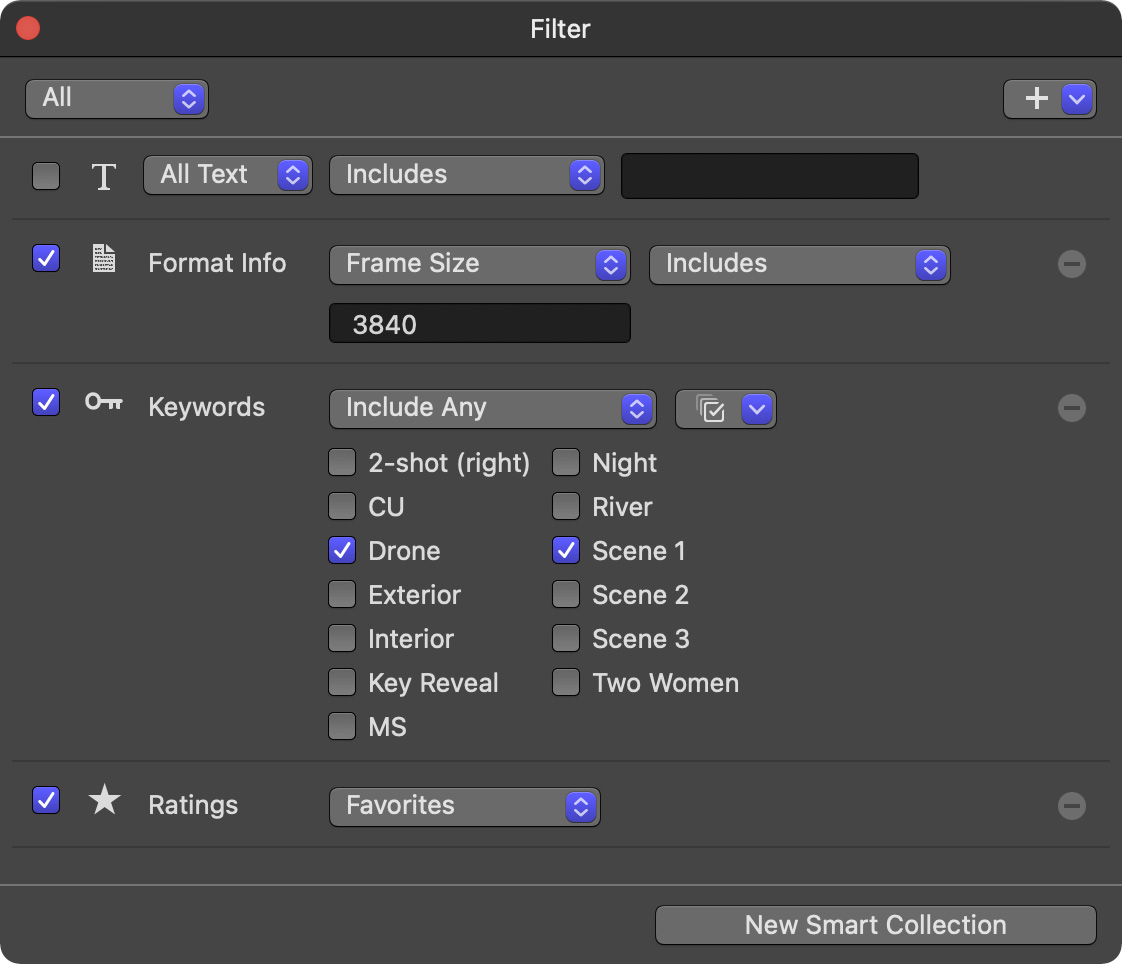
Here’s a more complex example still. Here I’m searching for a 4K drone shot for Scene 1 that I marked as a Favorite.
Again, I set this to ALL because I want all these options to be true before displaying a clip.
There are an almost unlimited number of search options available through the Search Filter window. Take time to explore the various criteria. Like Format Info and Keywords, each setting often has multiple options.
SAVE YOUR WORK AS A SMART COLLECTION
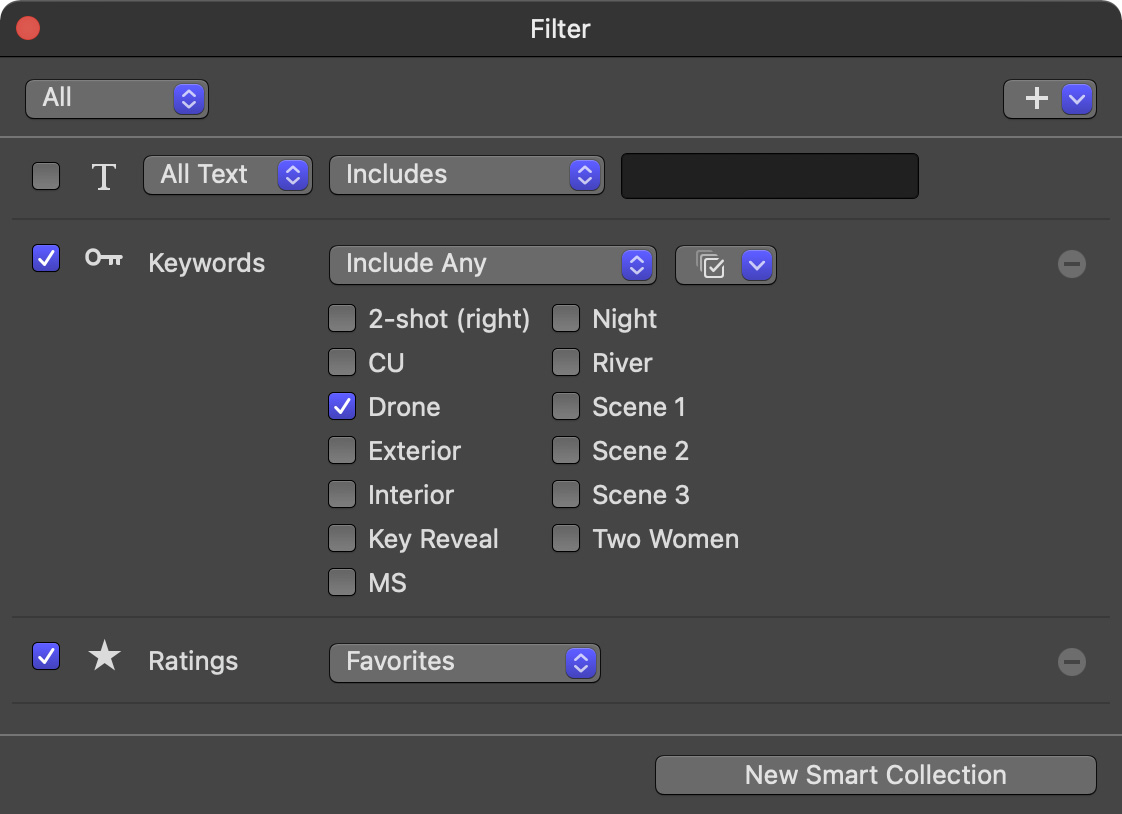
Let’s say we want to save a custom search for Favorite drone footage. Once the criteria are set and you like the results, click the New Smart Collection button in the lower right.
NOTE: A Smart Collection is a very nice name for a “dynamic saved search.”
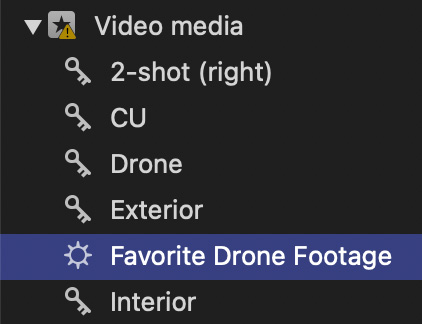
Instantly, an untitled Smart Collection appears in the selected Event. I renamed this to Favorite Drone Footage.
NOTE: See the “gear” icon? This indicates it’s a Smart Collection.
Except… ah, I stored this in an event. I WANT it stored in the library. (Here comes the workaround I mentioned earlier.)
 ”
”
To move it, drag the search gear from wherever it is onto the Smart Collections folder attached to the Library. You just moved the search to apply to the entire library.
NOTE: To make changes to any Smart Collection, simply double-click it. Any changes you make are saved when you close the window.
SUMMARY
Smart Collections are flexible, easy to create and very, very deep. I use them for almost all my projects – except the very simplest.