
![]() There are two critical tools in Final Cut Pro that can make a major difference in the quality of your audio:
There are two critical tools in Final Cut Pro that can make a major difference in the quality of your audio:
The Limiter effect controls audio levels. I find it to be an indispensable tool in any mix. Recently, I created a video illustrating how it works. Watch it here.
What an EQ effect (called a “filter” in audio-speak) does is shape the sound, boosting some frequencies or lowering (called “attenuating”) others.
NOTE: EQ is short for Equalization, which is a fancy word that means adjusting specific frequencies.
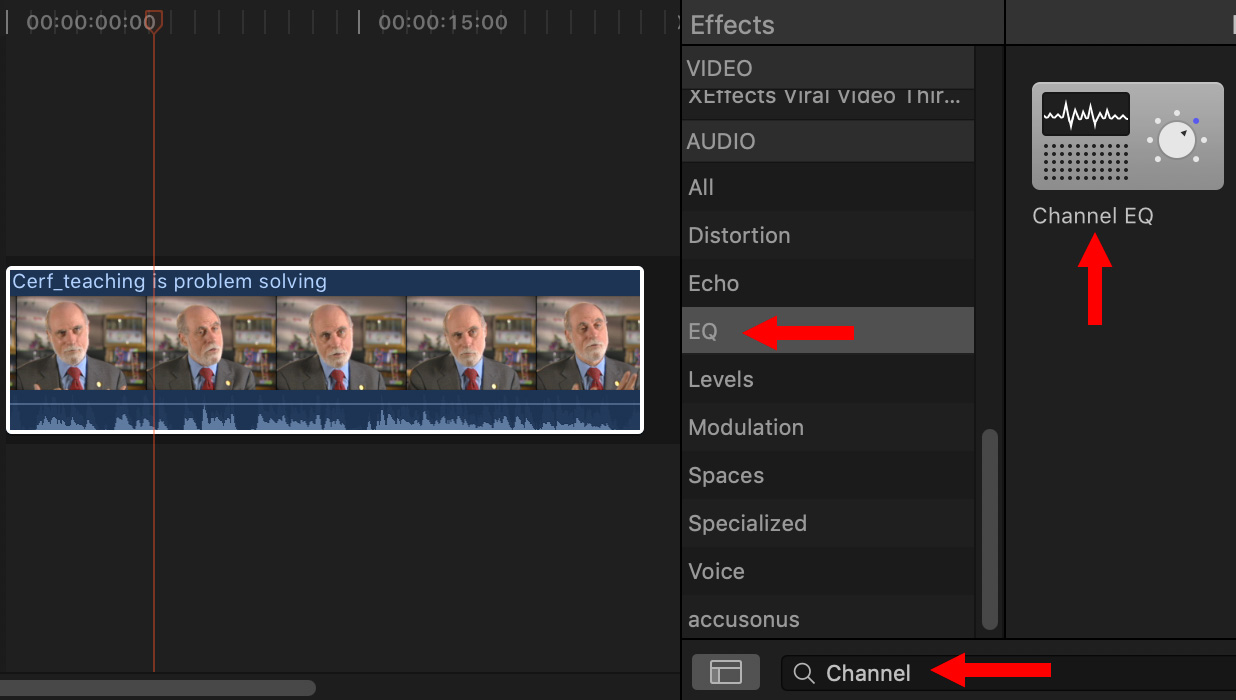
If you are correcting dialog, either the Channel EQ or Fat EQ filter will provide the same results. If you are working with music or effects, the Channel EQ effect divides the range of human hearing into 8 channels, while Fat EQ only supports 5.
I’ve written about the Fat EQ effect earlier (read it here). This week, I’ll illustrate Channel EQ.
NOTE: Audio mixing in Final Cut is quite limited when compared to Avid ProTools or Adobe Audition. The settings discussed in this article work everywhere, but the audio mixing process in FCP is best for podcasts, interviews and other fairly simple audio productions. For anything challenging, I move the final audio mix into a DAW, such as ProTools or Audition.
BASIC CONCEPTS

There are four critical concepts you need to understand in order to use EQ effectively:
Vowels give a voice its character, warmth and identifiability. Consonants allow us to understand what people are saying. So, to make a voice sound warmer or sexier, boost low frequencies. To make a voice easier to understand, boost the high frequencies.
EQ allows us to do all of this, and more.
NOTE: We often refer to EQ as “shaping” the sound because we can manipulate different ranges of frequencies differently. EQ is used extensively in music and sound design, which the Channel EQ can easily support. For this article, though, I’m concentrating on making the spoken voice sound better.
GET STARTED
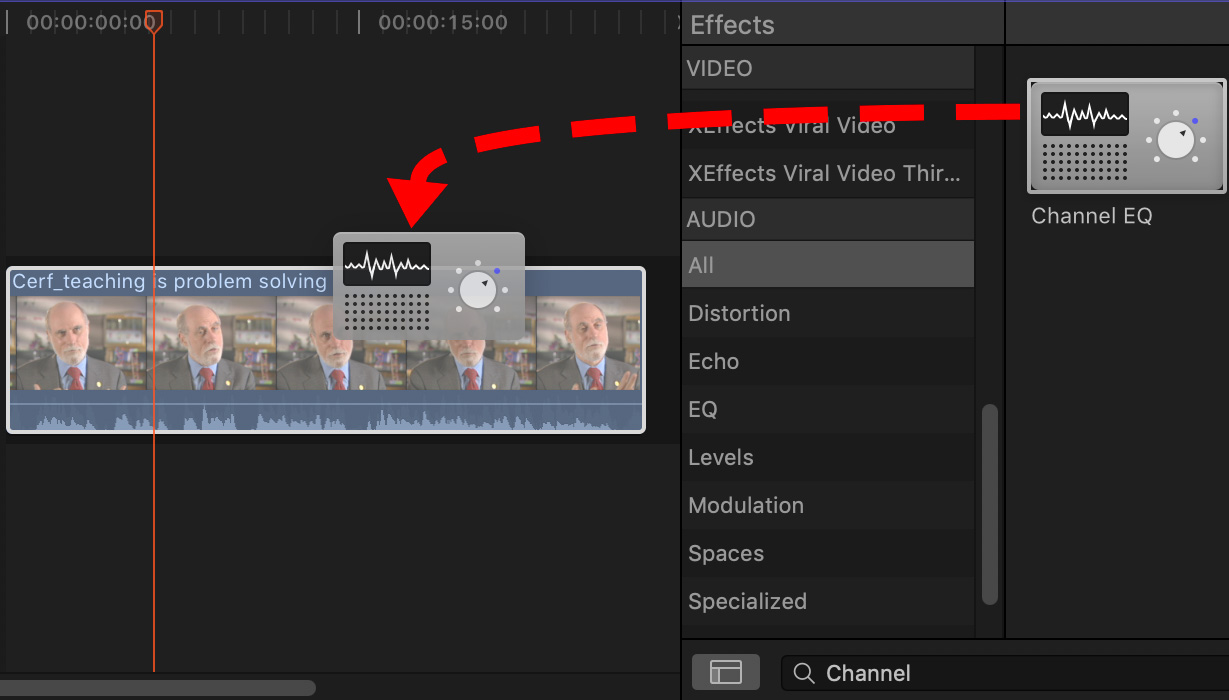
The best way to apply audio effects is to create “stems” or groupings of clips by function. For example, all female speakers. In Final Cut the best way to do that is to use Roles and audio stems.
NOTE: Here’s an article that covers this in detail.
Why not apply the filter to individual clips? Mainly because it becomes too hard to make changes. In Final Cut, EQ is best applied to a range of clips, with settings that don’t change.
To keep things simple for this example, I’ll apply the Channel EQ filter to a single clip. The operation of the Channel EQ filter doesn’t change when applied to multiple clips.
USING THE FILTER
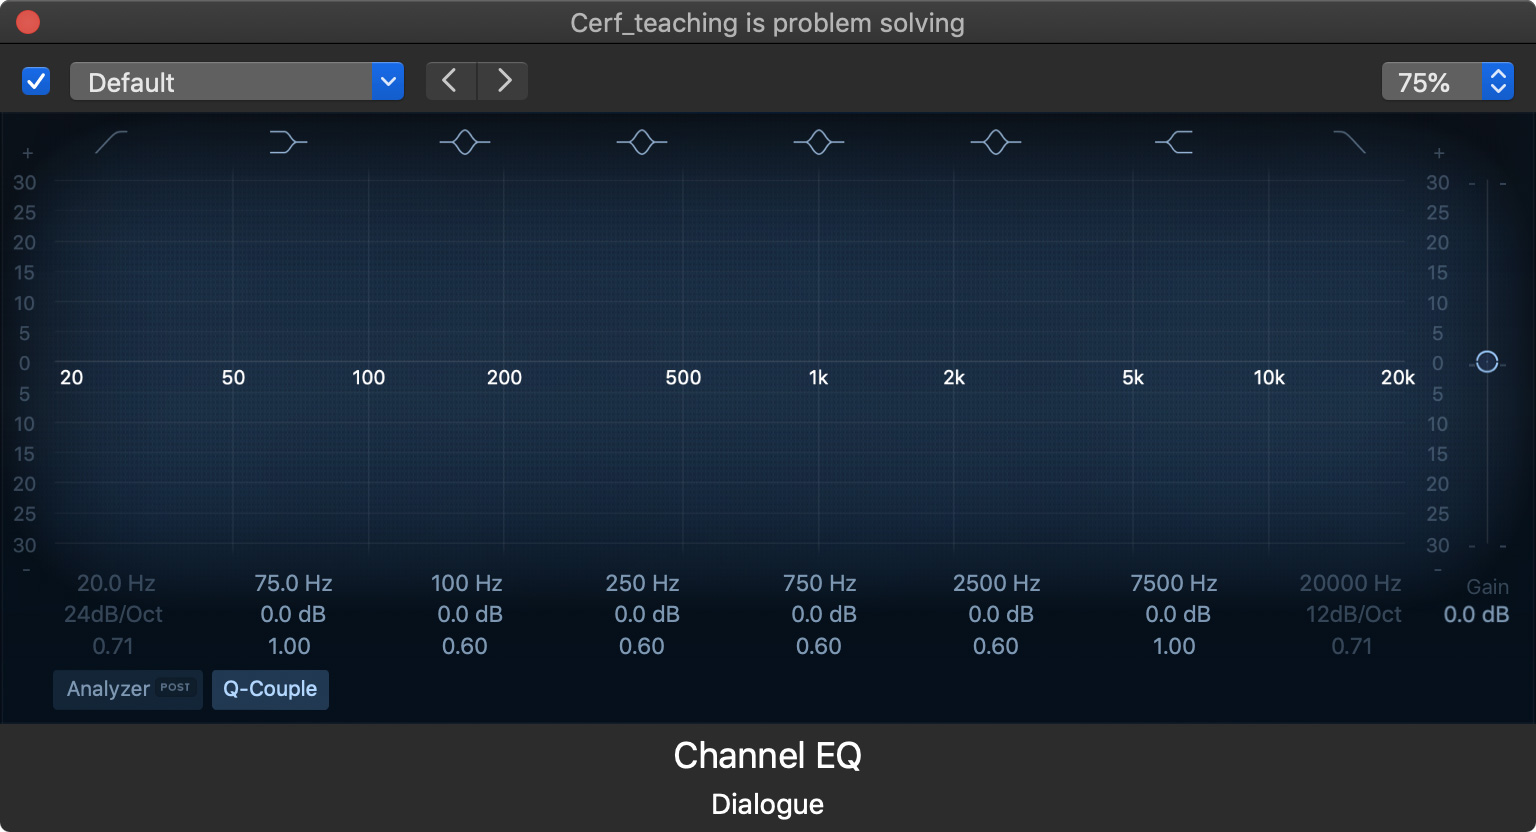
(Click to see a larger image.)
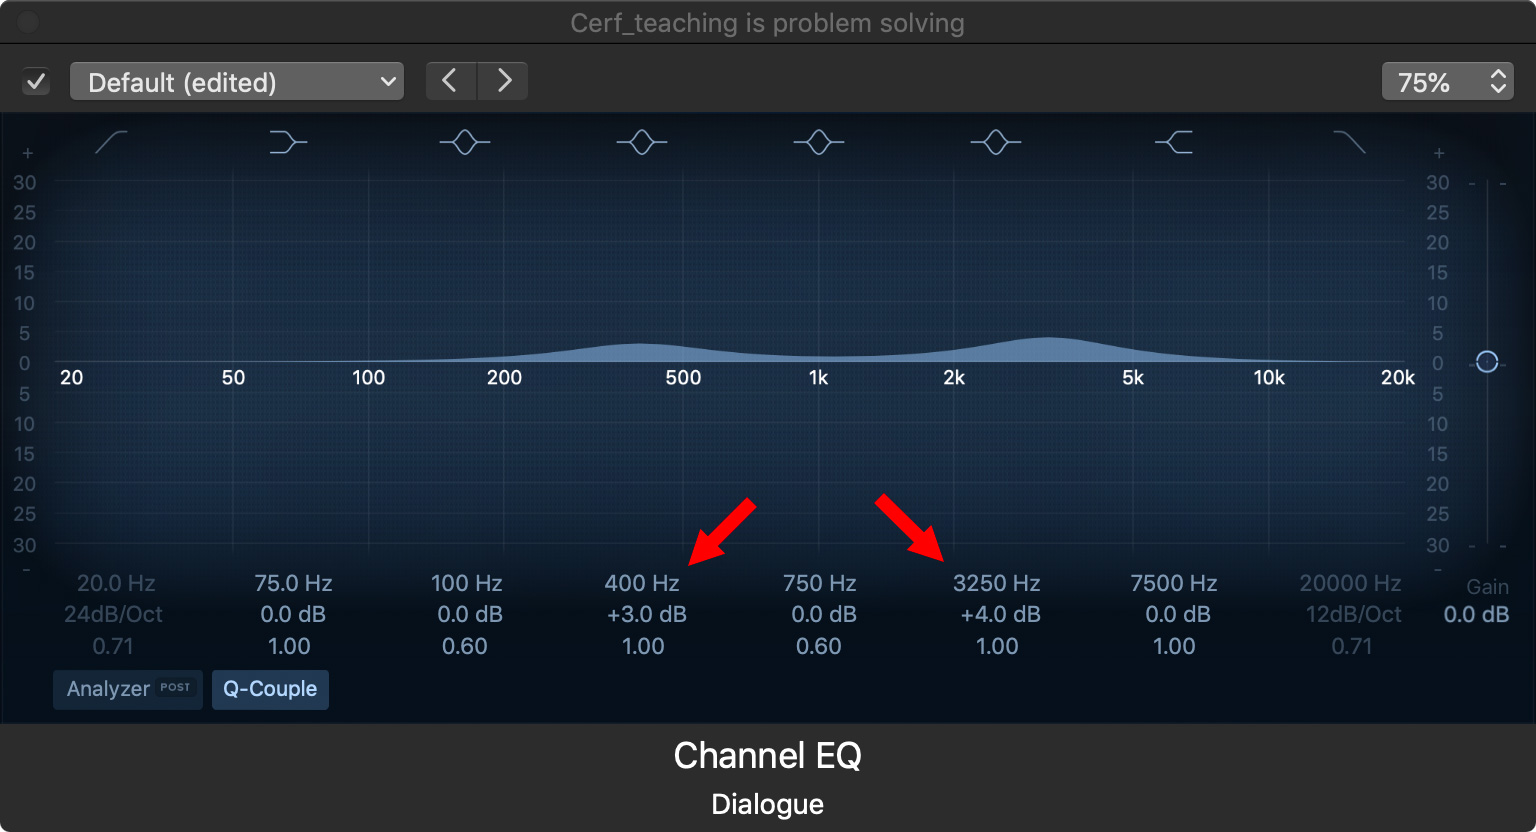
When you first see the filter, no settings are applied. It represents the range of human hearing with a line in the middle of the screen. Bass is always on the left, treble on the right.
If you look closely, you’ll see that human hearing is actually logarithmic. The distance from 20 to 200 Hz is roughly the same as 200 to 2,000 Hz and, again, from 2,000 to 20,000 Hz.
The Channel EQ filter divides this into eight ranges, each centered on a specific frequency:
The first three ranges are below normal human speech. The top two are above normal human speech. This means that, when we are adjusting voices, we only need to concentrate on the middle three: 250, 750 and 2500.
NOTE: In fact, for simple mixes, we only need to adjust two settings: 250 and 2500, as you’ll see shortly.
(Click to see a larger image.)
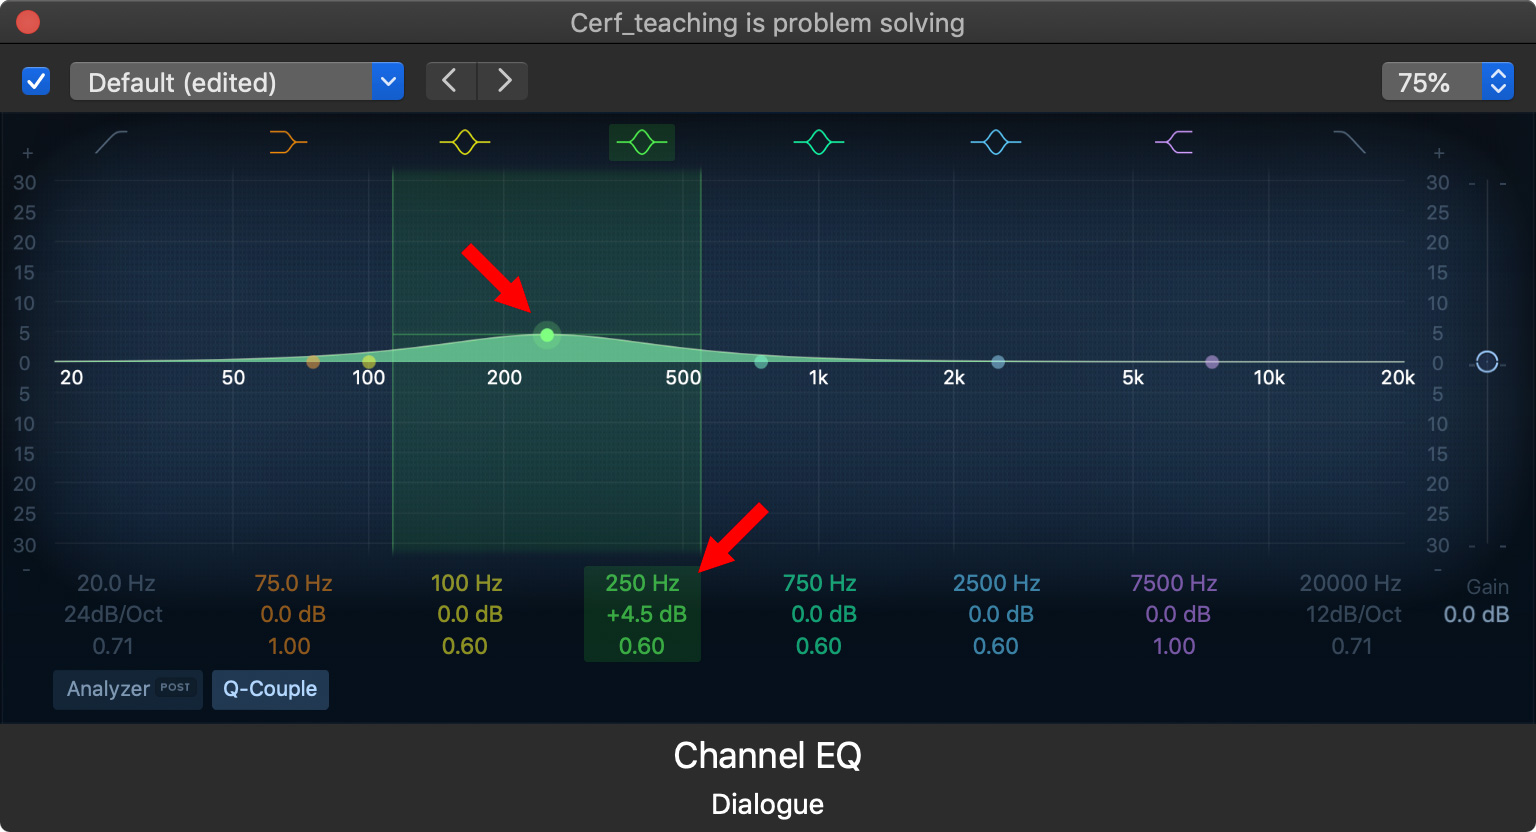
To boost a range of frequencies, drag a dot and drag up (to boost those frequencies) or down (to reduce them).
(Click to see a larger image.)
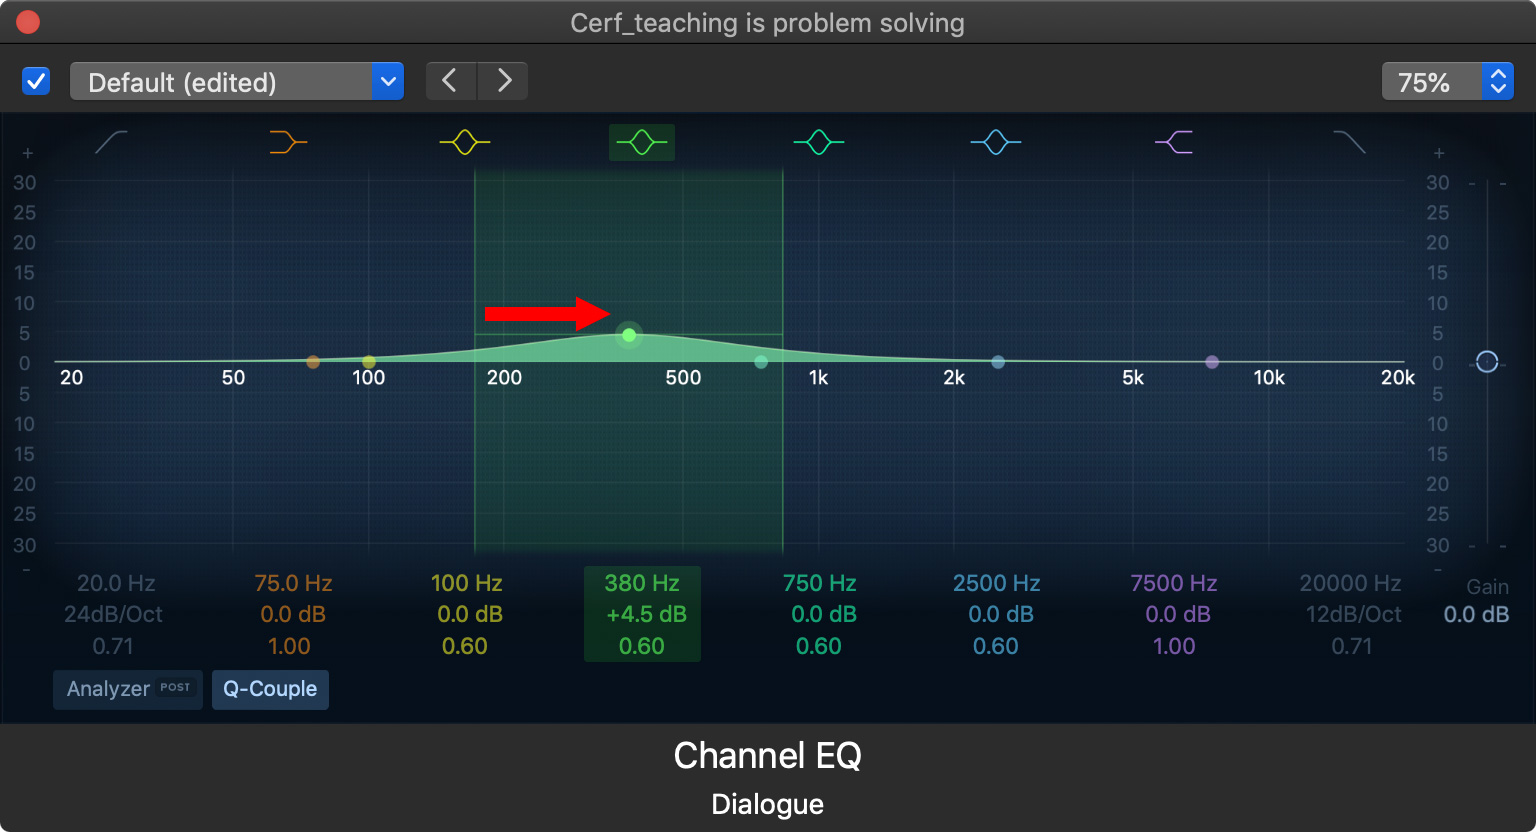
To change the range of frequencies, drag a dot sideways.
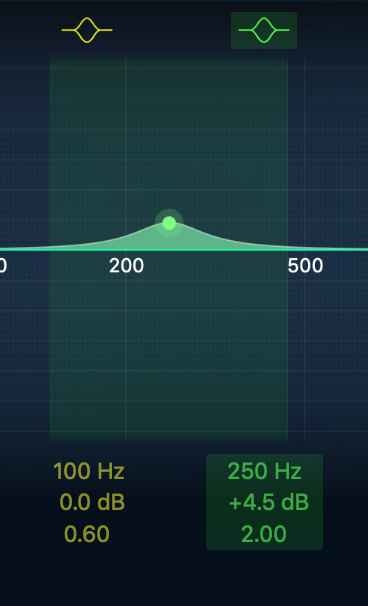
To modify the range by making it broader or narrower, change the Q setting (the bottom number). Lower Q’s include more frequencies. Higher Q’s become “notch” filters, targeting a restricted range of sound.
NOTE: Unlike video, where you can edit down to the pixel, in audio we are always working with ranges of frequencies. This is fine because each voice spans a wide range of frequencies.
SETTINGS FOR A MAN
(Click to see a larger image.)
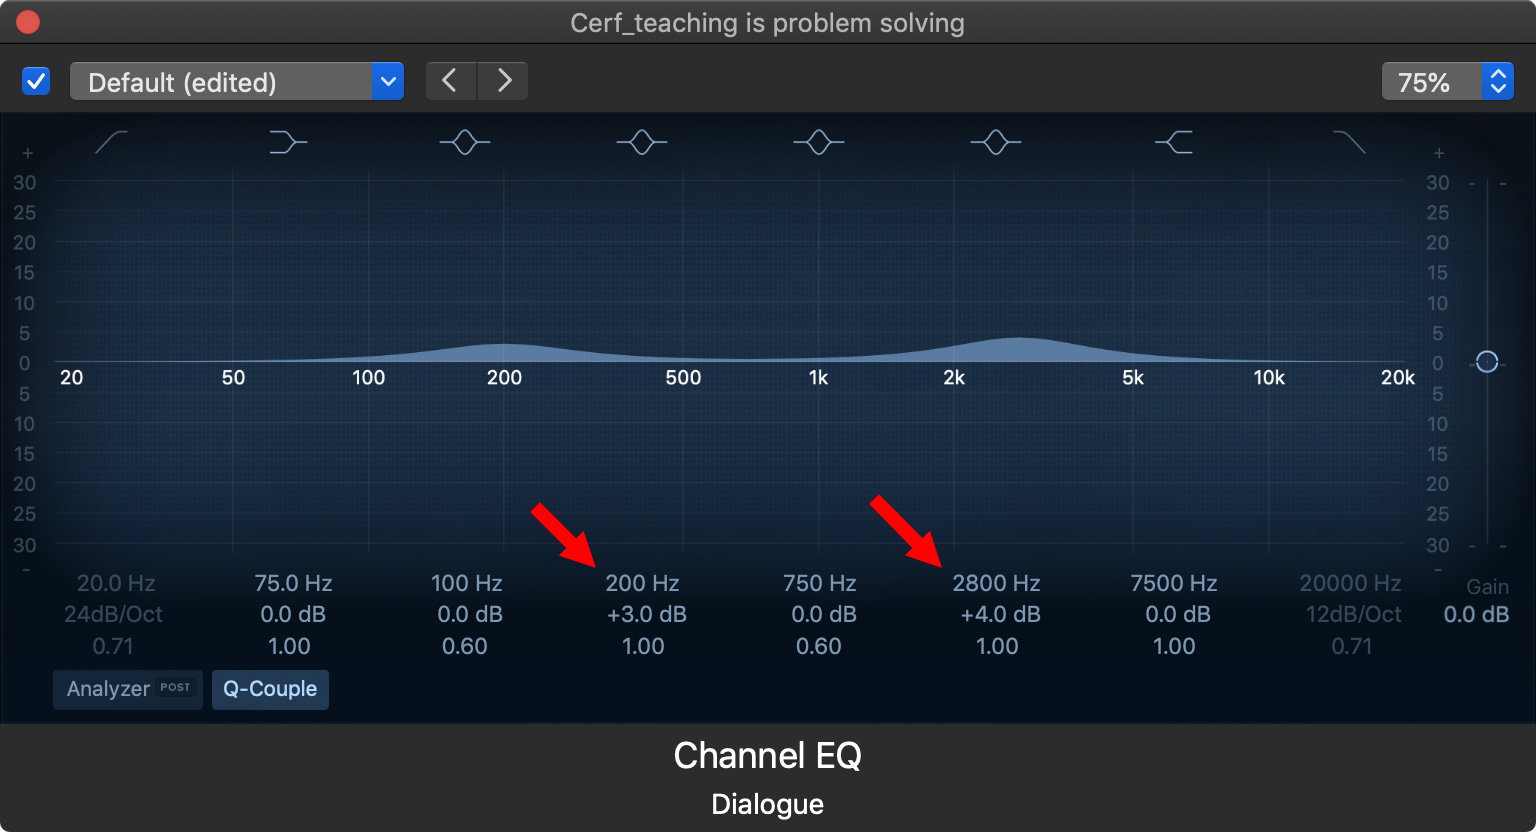
Here are my starting settings for a male voice:
Low frequencies make a voice sexier and more attractive. High frequencies make it more understandable, especially for older listeners.
SETTINGS FOR A WOMAN
(Click to see a larger image.)
The concepts are the same for a female voice, but the settings change slightly:
Then, for both men and women, listen carefully to the sound and tweak until it sounds the best to your ears. With audio, there are no “right” answers – it all depends upon the story you are telling, how the audio was recorded and what sounds good to you.
The basic rule is: As long as your total mix does not exceed 0 dB, if it sounds good to you it IS good.
SUMMARY
Channel EQ is a very powerful filter that does a lot. Feel free to play with the settings and see how they change the audio. In all cases, you are not changing the voice, all you are doing is enhancing it. Similar to adding spice to food, you don’t need to add a lot to make it sound a whole lot better.
4 Responses to Final Cut Pro: Use EQ to Improve Your Audio
Good stuff Larry, thanks for breaking down the concepts and workflows
Thanks Larry, I always come back to your tips when I need a refresher. I’m not editing consistently enough to get it in my bones yet.
One thing I don’t remember seeing anyone say, what order to apply audio effects?
We have
* compressor
* eq
* volume
* limiter
* noise reduction
For example, I have audio that was recorded softer than I would like so the noise floor is a bit high. Do I reduce noise first then apply other effects? I would think so, but stuff like this can end up being counter intuitive.
Even if the initial recording is good, you still have multiple recommendations like this article on how to improve the quality of my sound. But I haven’t see how to put it all together without a lot of experimenting on my part.
I think I’ll also throw this into the Ask Larry Anything queue for this week’s webinar.
Steven:
Great question. I’ll talk about this in tomorrow’s webinar.
In short:
* Noise reduction first
* EQ and other filters
* Then your choice of ONE of: Compressor / Limiter / Volume. Personally, I’d use the Limiter in FCP X and Compressor in other apps.
Larry
Thanks Larry, that’s easy enough to remember. I look forward to hearing additional thoughts on the webinar.