
![]() [ Updated Jan. 30, 2022, with revised text and updated screen shots. ]
[ Updated Jan. 30, 2022, with revised text and updated screen shots. ]
An “adjustment layer” is a video object on a higher layer in the timeline which, when an effect is placed into it, affects all the clips below it. These were first introduced by Adobe years and years ago in Photoshop; then expanded into Premiere around the Creative Cloud release.
Final Cut Pro doesn’t have them, however you can create your own using Motion. Here’s how.
CREATE THE MASTER CLIP
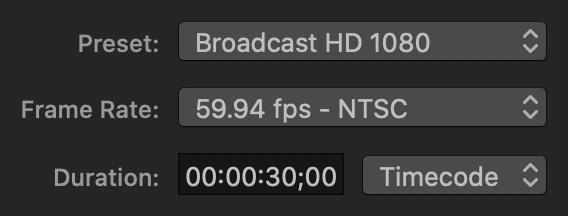
Open Motion and set the Motion presets to match your typical video project for frame size, frame rate and effect duration. (You can always change the duration of this effect in Final Cut Pro when you apply the effect without any loss of video quality.)
NOTE: The Preset menu simply sets the frame size, not image quality. Motion always works at the highest image quality, essentially ProRes 4444 with an alpha channel.

Select the Final Cut Title project option. (This step is really important because it allows the effect we are creating in Motion to work in Final Cut!)
Then, click Open.
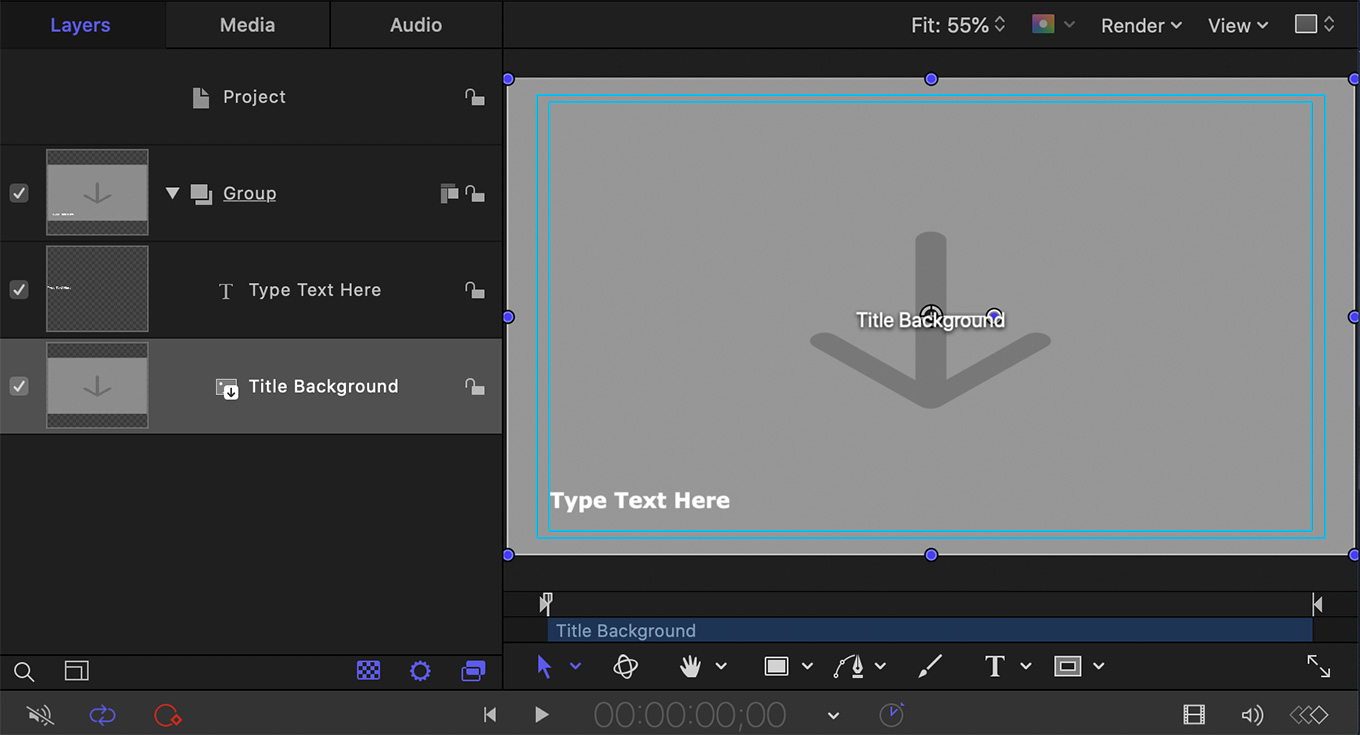
Motion opens, displaying the standard title creation template.
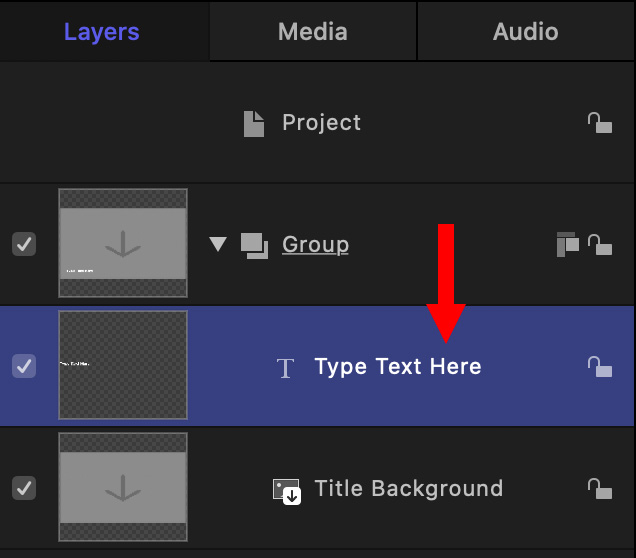
If the Layers panel is hidden, open it (shortcut: F5), select the “Type Text Here” layer and delete it. This is the only change you need to make.

Choose File > Save As, then give the effect a name. Here, I’m using “Adjustment Layer” and storing it in a custom category named “Larry.” You can name this effect anything and store it in any category you prefer. You can create a new category from within the Category menu.
I like being obvious with my effect names so I can remember what it does.
APPLYING THE EFFECT IN FINAL CUT PRO X
I’ve found, when I create new templates, that FCP does not always know something new has been created. So, if FCP is running, I generally quit Final Cut and restart it. That way, it refreshes the list of templates available in each browser.
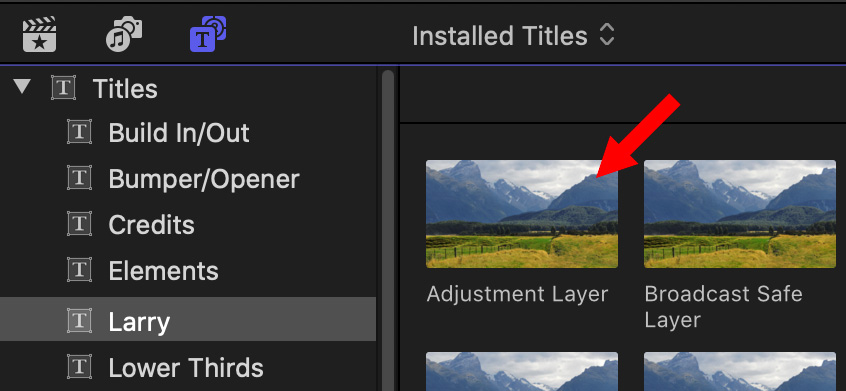
Open the Titles browser and select the Larry category. The Adjustment Layer effect is visible in the icons on the right, generally near the top. Now, let’s put it to use.

Here’s a stack of three clips in the Timeline…

That looks like this in the Viewer.
Drag the Adjustment Layer effect from the Titles Browser and put it on TOP of all three clips.

Adjust the length of the Adjustment Layer clip to run whatever duration you need. Because there are no timed elements in this effect, we can stretch it to whatever duration we need.
Now – and this is the magical part – add any effect to the Adjustment Layer and it automatically applies to all the clips under it!

For example, here’s the Black & White effect. When I drop it on top of the Adjustment Layer effect…

This is the result. ALL the clips under the Adjustment Layer effect now inherit the Black & White effect.
NOTE: This technique works for any effect – including Broadcast Safe. In fact, using this Adjustment Layer effect for the Broadcast Safe effect is faster and more flexible than combining all your clips into a compound clip.
SUMMARY
This is a very fast, very easy technique to use whenever you want the same effect to be applied to multiple clips. AND, you can even use masks on an adjustment layer to mask all the clips under it!
25 Responses to Final Cut Pro: Create an Adjustment Layer
Newer Comments →-
 rodney Ma says:
October 20, 2020 at 6:30 pm
-
 Larry says:
October 20, 2020 at 8:01 pm
-
 Peter Miller says:
October 25, 2020 at 10:43 pm
-
 Larry says:
October 26, 2020 at 7:14 am
-
 Gary Piland says:
October 29, 2021 at 12:48 pm
-
 dMc says:
November 13, 2021 at 5:29 am
-
 Ashton Root says:
January 10, 2022 at 11:38 am
-
 Larry Jordan says:
January 10, 2022 at 12:16 pm
-
 Mary Peterson says:
January 31, 2022 at 9:44 am
-
 Larry Jordan says:
January 31, 2022 at 9:47 am
-
 Michael Emery says:
January 31, 2022 at 10:13 am
-
 Larry Jordan says:
January 31, 2022 at 10:15 am
-
 Nick Nicholson says:
February 8, 2022 at 2:19 pm
-
 Larry Jordan says:
February 8, 2022 at 3:45 pm
-
 Tim Gallagher says:
June 23, 2022 at 10:21 pm
-
 James Heywood says:
February 11, 2023 at 3:25 pm
-
 Larry says:
February 11, 2023 at 9:08 pm
Newer Comments →Not work in Motion 5.4.7
Rodney:
I just tested this. It works perfectly in Motion 5.4.7 and FCP 10.4.10.
What problems are you having? (Remember, you are modifying a title, not a generator.)
Larry
Wow, that is such a brilliant hack. Thanks very much for that, it works perfectly and has saved me a huge amount of time!
Peter:
Cool. This made me giggle the first time I discovered it.
Larry
Genius. Thank you.
>Many< thanks for this.
A bit confused. Repeatedly, in this article and others, it is stated that the Broadcast safe filter should be applied last to any other color grading. However, applying Broadcast safe to an adjustment layer on top of all clips, doesnt that put the adjustment layer on top of and before the other within the clips?
Ashton:
Great question. Effects applied to a clip are processed before effects applied to the adjustment layer. So, the Broadcast Safe filter does its thing after color grading adjusts the individual clip levels.
You can easily test this for your self by adding the filter to an adjustment layer and watching what happens.
Larry
I love using the adjustment layer. I use it to apply LUTs, and vignetting to an entire project. I just have to remember to hold off color grading until the adjustment layer is added.
Another tip: In FCPX use Inspector with the adjustment layer and turn off everything…such as color board, and things that affect sizing, etc. Many times I have accidentally clicked something in the adjustment layer which changed everything in the project, and it has taken me a while to figure the source of the problem.
Mary:
This is a good tip – thanks. Yes, I find adjustment layers invaluable. Wish Apple would make it part of the program.
Larry
I’ve created adjustment layers entirely in FCP using a title track (sans any actual verbiage). This works for me!
Michael:
This is a very cool tip. Thanks!
Larry
Larry:
By chance, did you look into the TourBox Elite controller that I mentioned
previously?
Nick:
I don’t remember you – or anyone else – mentioning this.
Who makes it and I’ll look into it.
Larry
That’s a great tip. I had to make an HD and 4K version of it, but works like a charm. thanks.
This is awesome! Thank you for showing this. Is there a way to only affect the layer directly below instead of all layers below? Thanks Again!
James:
By definition, an adjustment layer affects all layers below it. It can’t be limited to just one layer.
Larry