
![]() The production planning was almost perfect… except, during the shoot an actor wore the wrong color shirt, or a key coffee mug was the wrong color, or, something in the background is just too obvious.
The production planning was almost perfect… except, during the shoot an actor wore the wrong color shirt, or a key coffee mug was the wrong color, or, something in the background is just too obvious.
You can’t go back and reshoot, so, after the swearing stops, how do you “fix it in post?”
Final Cut provides two different ways to fix the color of an object in the frame, without changing the color of the entire frame:
The traditional approach is to use a color mask, but, as you’ll see, these are pretty limited. A better option is to use the Hue/Saturation Curves. In this tutorial, I’ll show how to use both.
A COLOR MASK
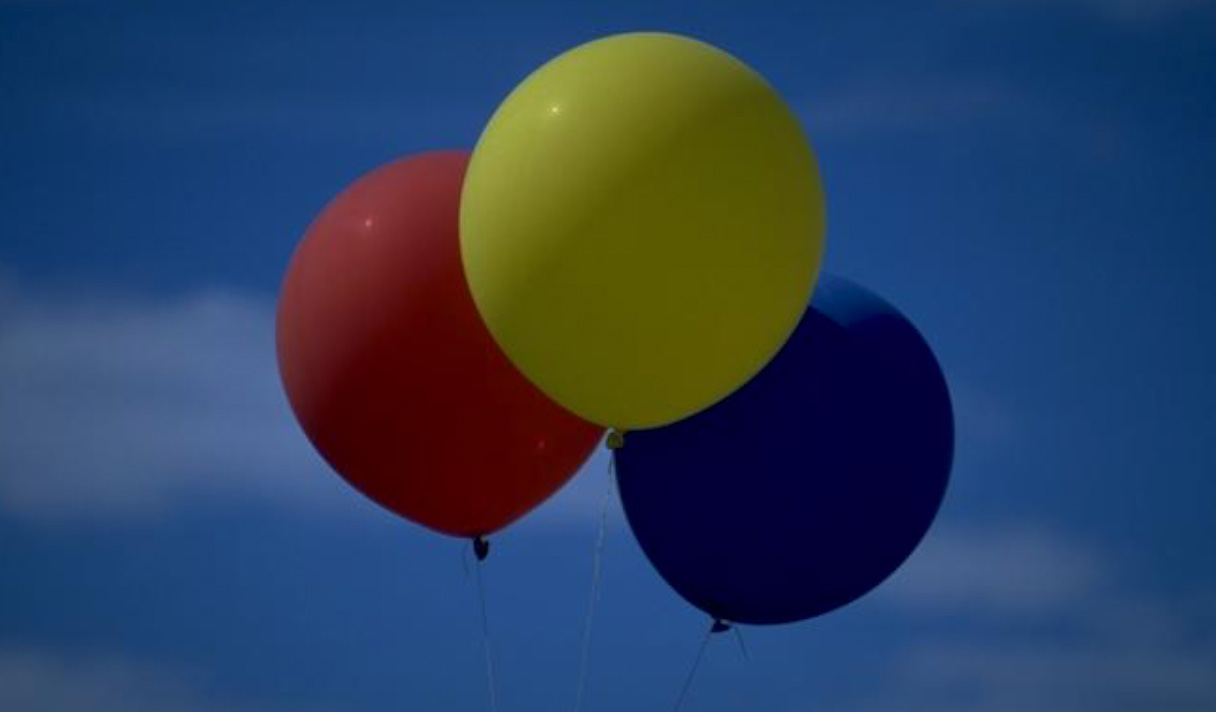
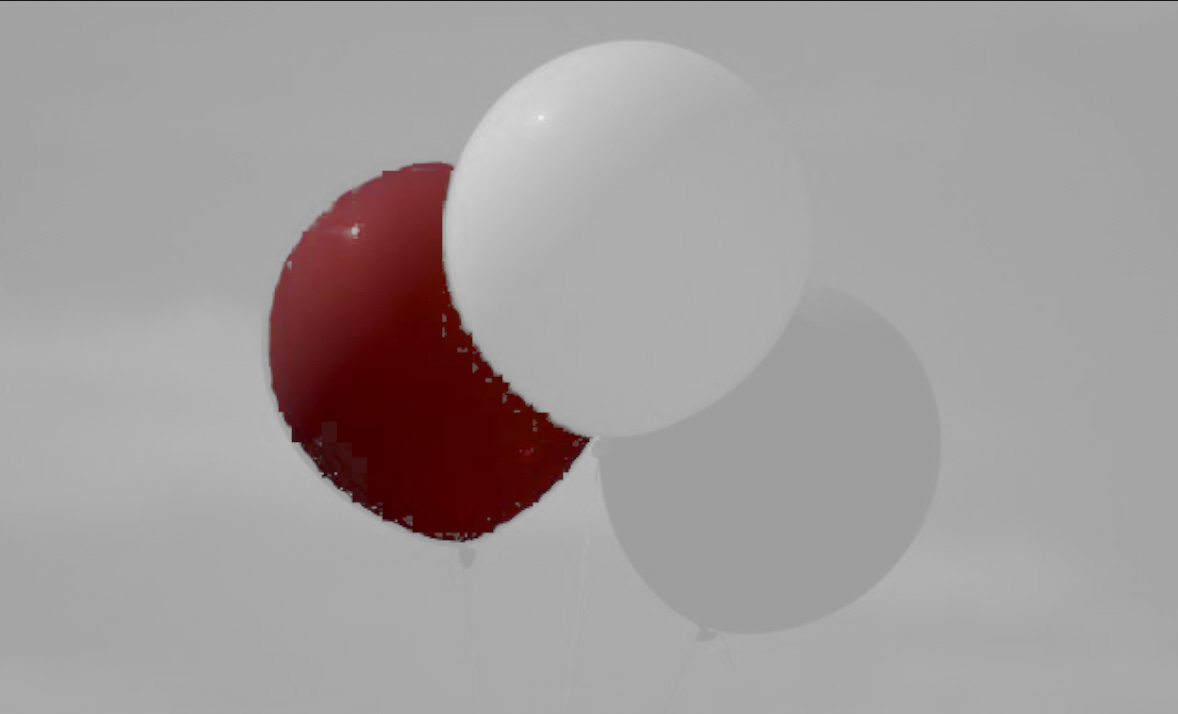
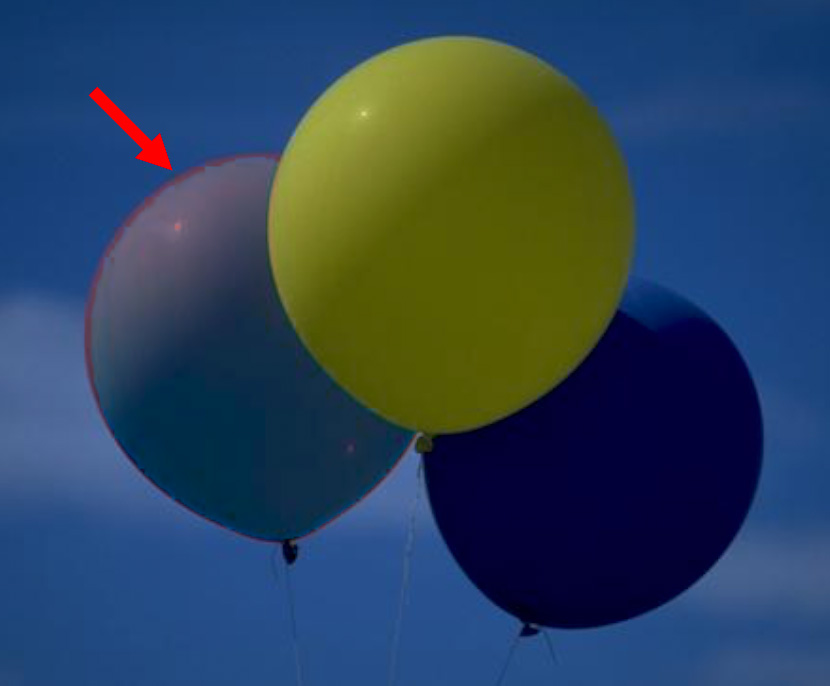
The easiest fix is when there is a clear difference between the color you want to fix – the red balloon – and the rest of the images in the frame. The balloon is, essentially, a single color, in focus, with clearly defined edges.
In order to change the color of the red balloon, we need to select just those red colors. A shape mask won’t work, because the balloon has a very unusual shape. Instead, we need to use a color mask, which selects a portion of an image based upon its color.
Color masks can be used with the Color Board, Color Wheels or Color Curves. The operation is the same in all three. My general preference is to use the Color Wheels for color correction, which is what we’ll use for this example.
NOTE: Apple has improved the color masks a lot in recent versions, so if you, like me, have not looked at them recently, you are in for a pleasant surprise.
To apply a color mask:

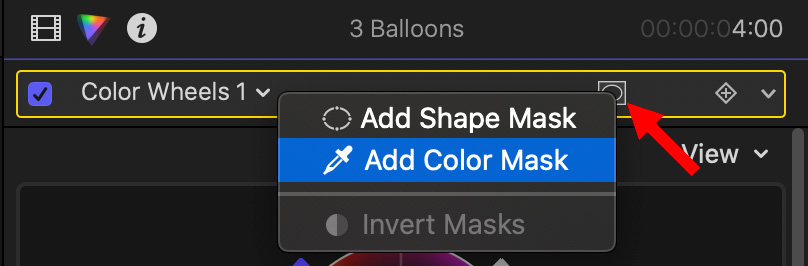
NOTE: If you choose Shape Mask by mistake, make sure it is highlighted with a yellow box and press the Delete key. You can use this same technique to delete a color mask you no longer need.
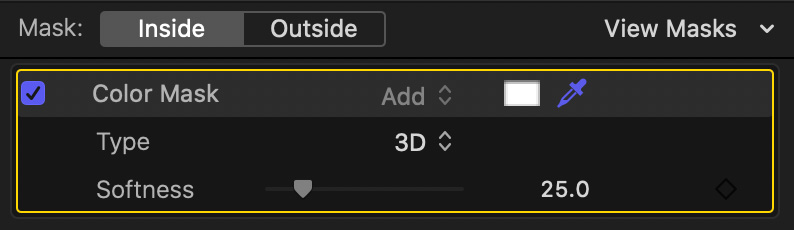
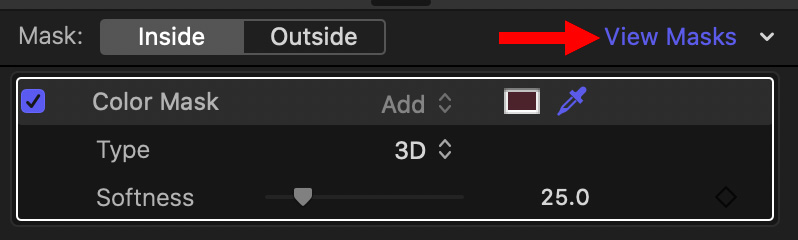
(The controls for a 3D color mask)
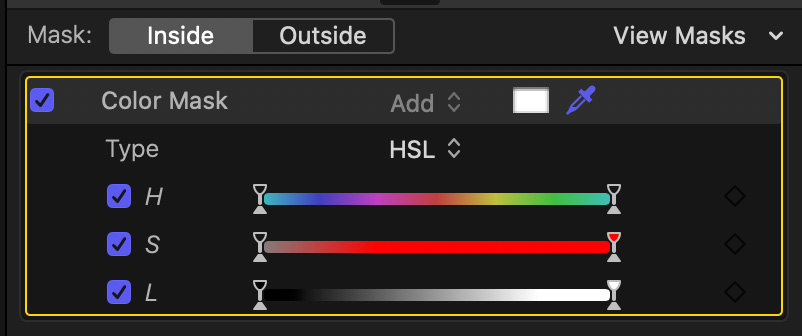
(The controls for an HSL color mask.)
There are two types of Color Masks: 3D and HSL. 3D is newer and easier to use, HSL (which stands for “Hue, Saturation & Luminance”) has more control. You select which one you want to use from the Type menu.
To apply a 3D mask:
To apply an HSL mask:
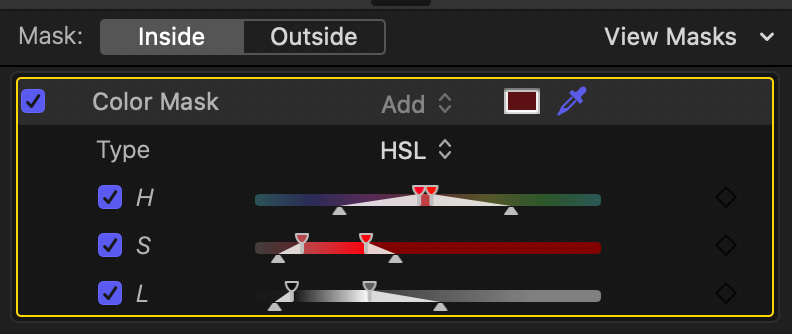
NOTE: The sliders above the red line affect color selection. The sliders below the red line affect feathering. In general, keep the feathering fairly minimal.
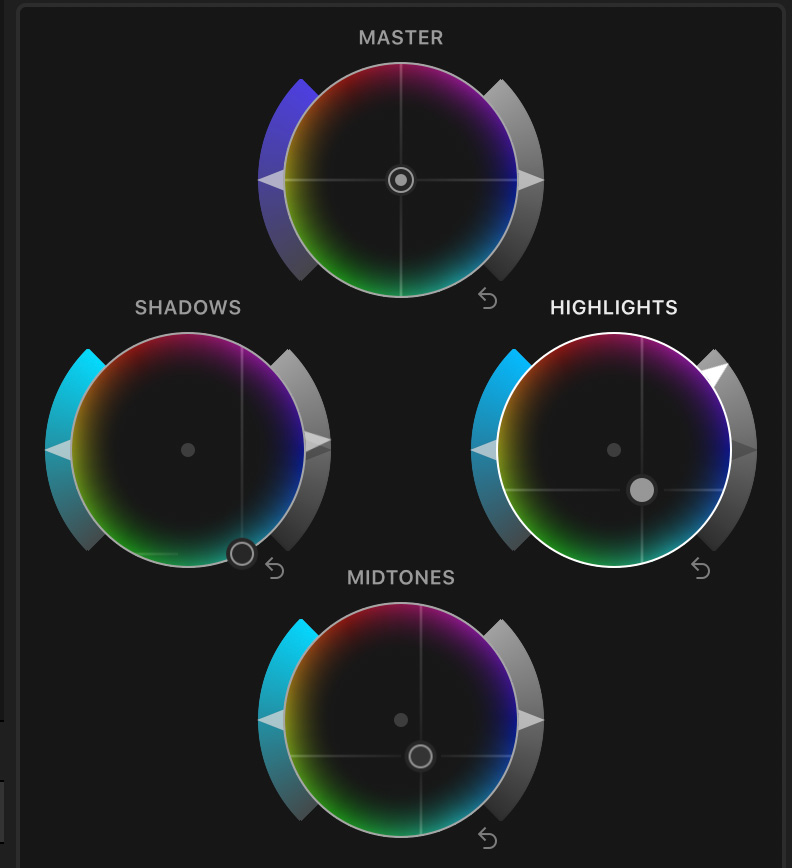
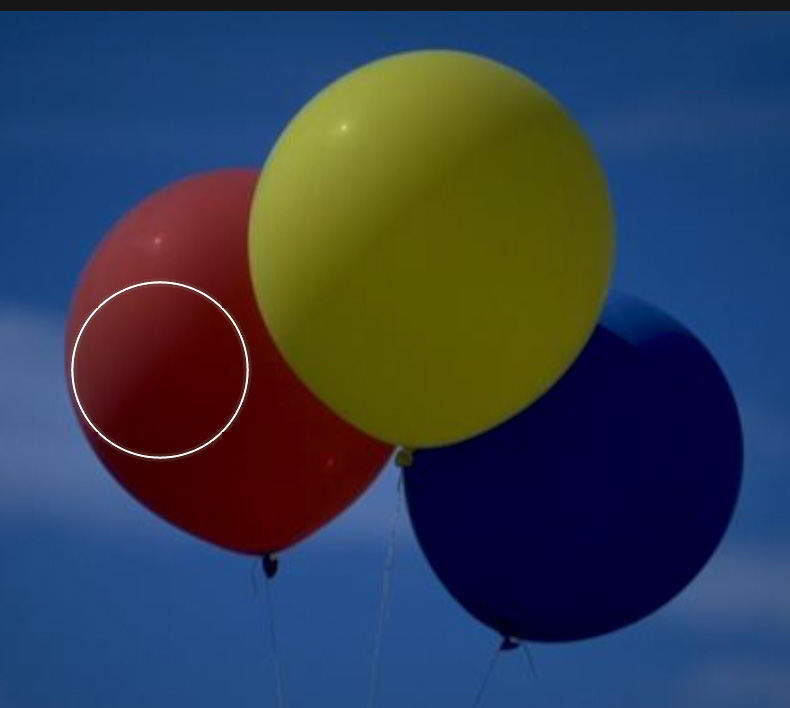
Now that you have the red color selected, adjust the color wheels to change the color, saturation and/or luminance, as illustrated in the changes I made in the screen shot above.
The good news is that this works. The bad news is that this does not work well. As you can see in the screen shot, there is red “fringing” around the edges of the red balloon. There is a very limited range of colors I can change this red into. Worse, this was a best case scenario. Things get much harder when the object you want to change is blurry, moving or translucent.
Time to learn a new tool.
NOTE: To remove a color control, highlight the Color Wheels effect in the Video Inspector and press Delete.
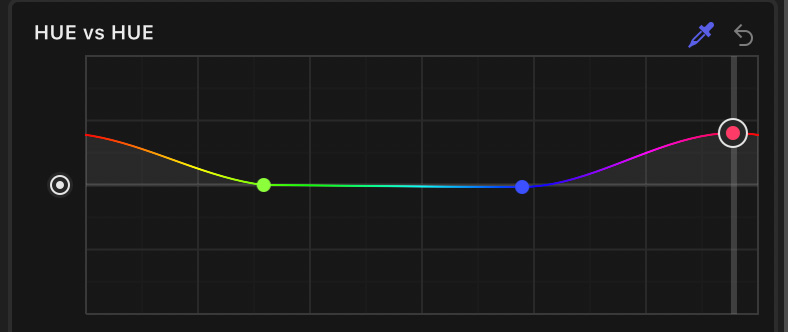
HUE/SATURATION CURVES
The Hue/Saturation Curves are specifically designed for this kind of work: to select a close range of colors and change them into something else.
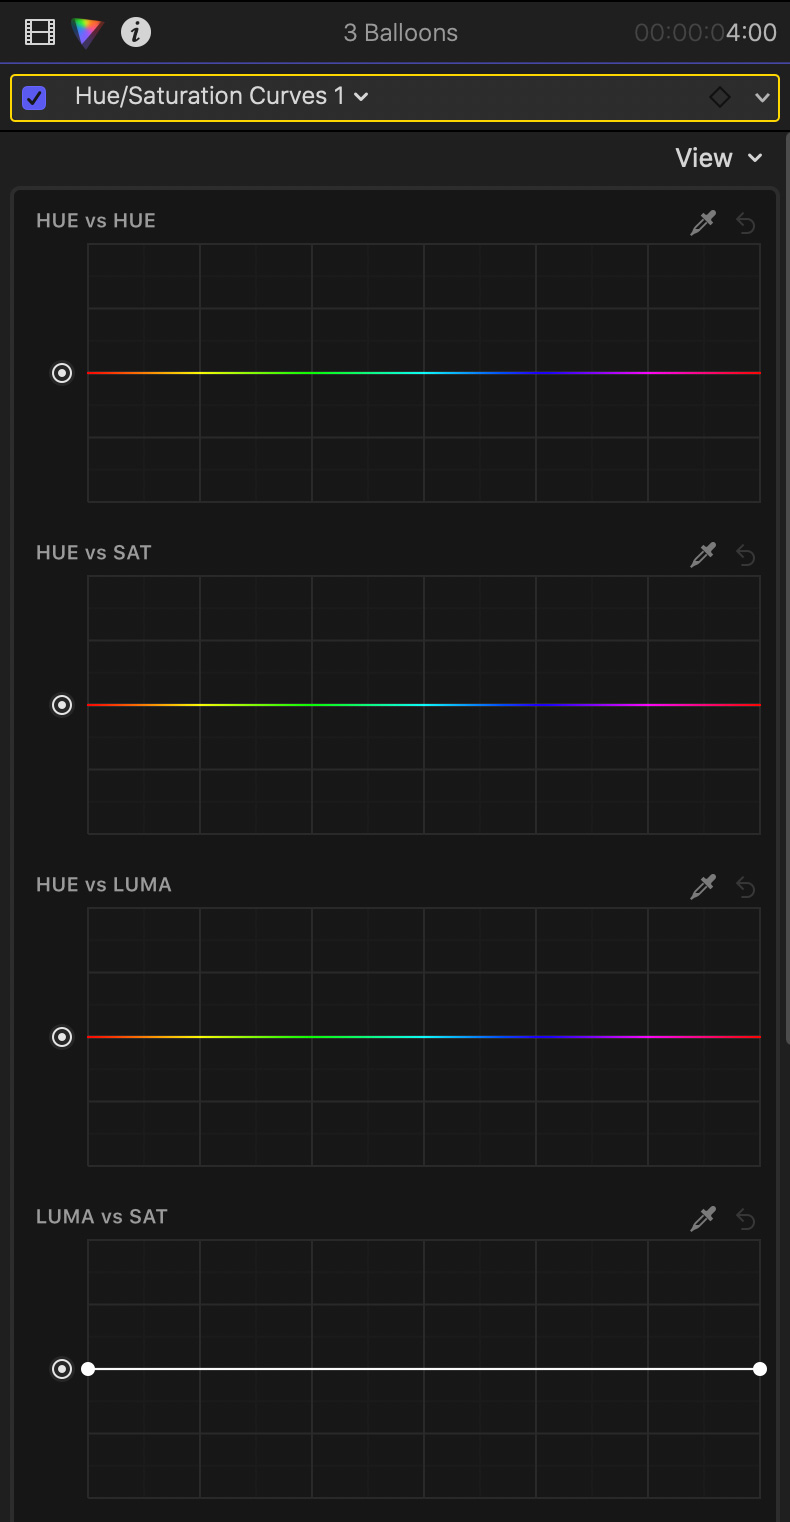
Again, put the playhead in the clip you want to change and select the clip. Then, from the Color Inspector menu, select the Hue/Saturation Curves. There are six of them:
NOTE: Regardless of racial type, virtually all skin has the same color, but not the same saturation or luminance.
To change the color of the red balloon:
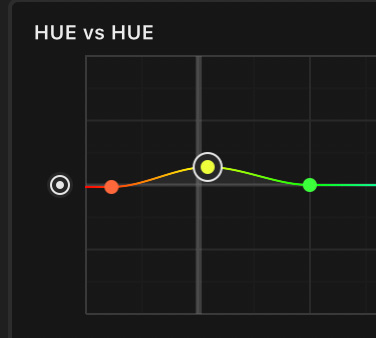
NOTE: In the screen shot above, I selected the color yellow so you could see all three dots more easily. Selecting red wraps the dots around the end of the line, as red exists on both the left and right side. The two dots are still bounding the color, but because one is wrapped around, it is harder to see the relationship.
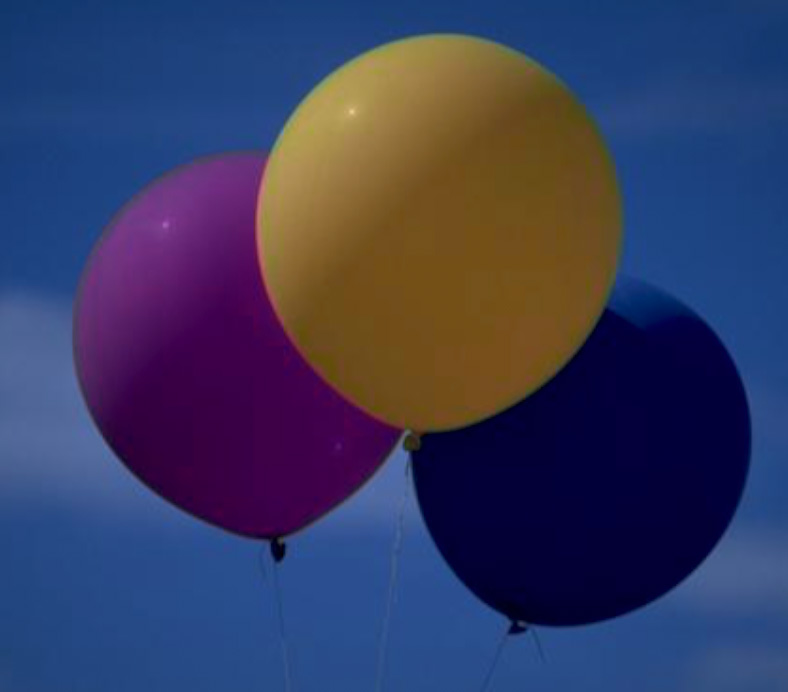
With this color option, you have a LOT more colors to choose from and the ugly edges we saw with a color mask disappears. (The slight red fringing on the yellow balloon is caused by compression artifacts.)
CHANGING BLURRY COLORS
But, wait! There’s more…
Remember, these balloons were a “best case” scenario.
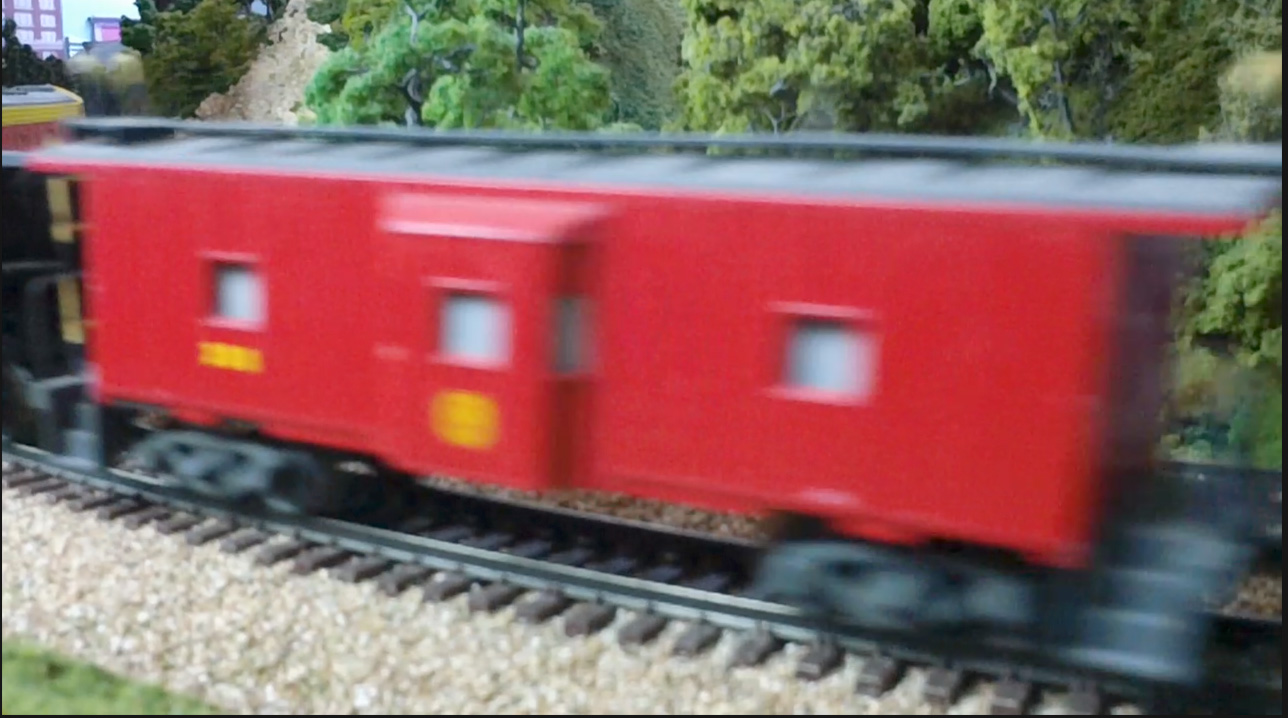
Image courtesy: Model Railroad Builders (www.franandmileshale.com)
In this example of the red caboose, nothing is in focus, because the model train is moving.
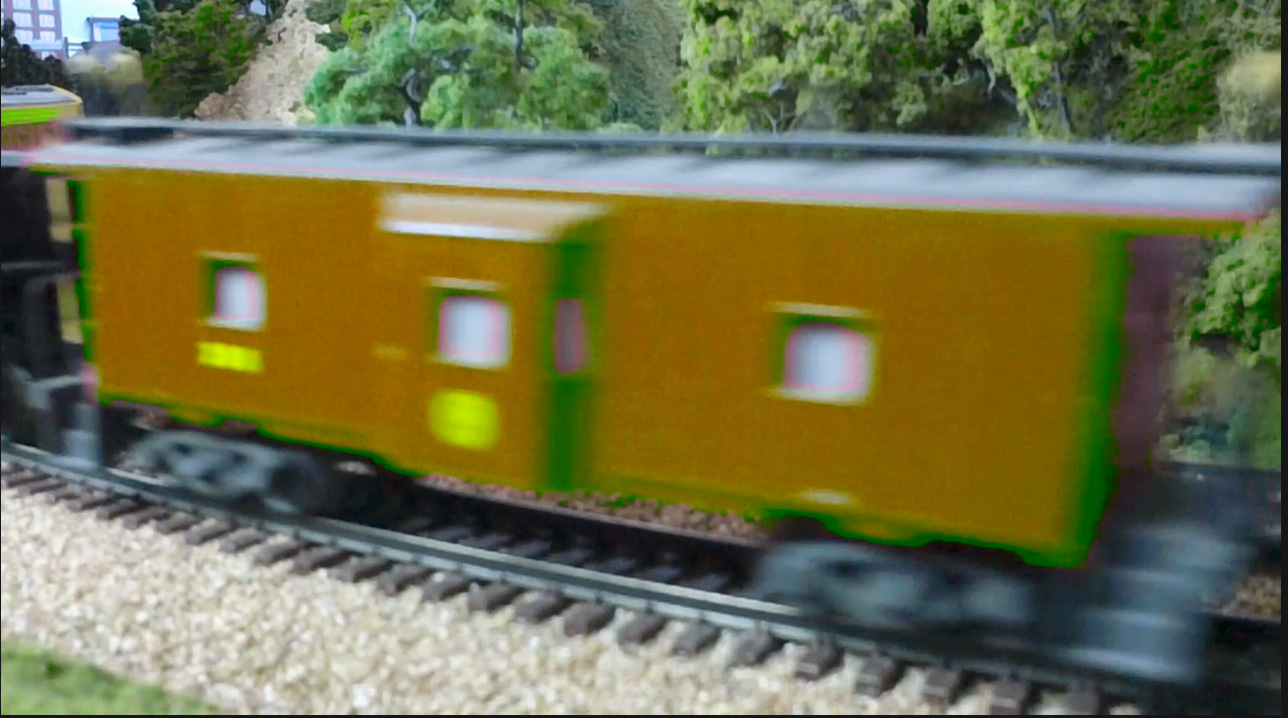
A color mask breaks down completely, as you can see here. Worse, due to limitations in both the color wheels and color board, I can’t create a clean blue or green, just variations on ugly red.
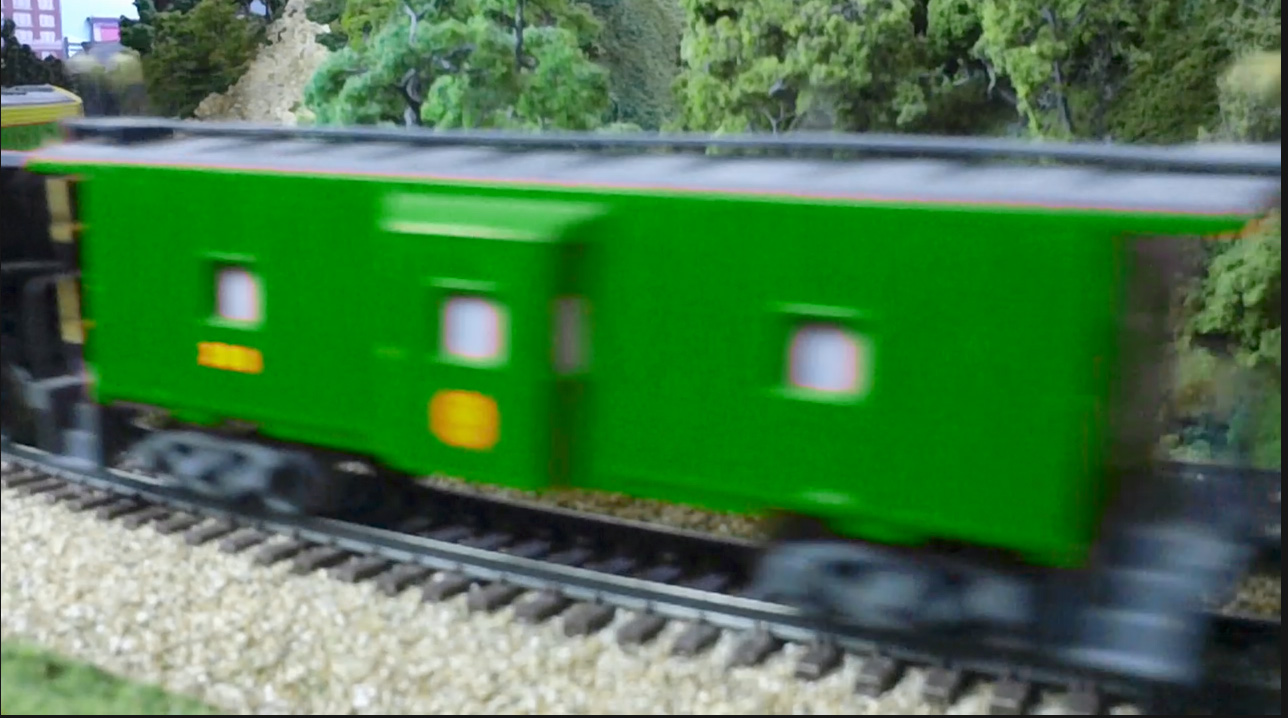
But the HSL Curves Hue vs. Hue makes it easy to cleanly change the color.
CHANGING TRANSLUCENT COLORS
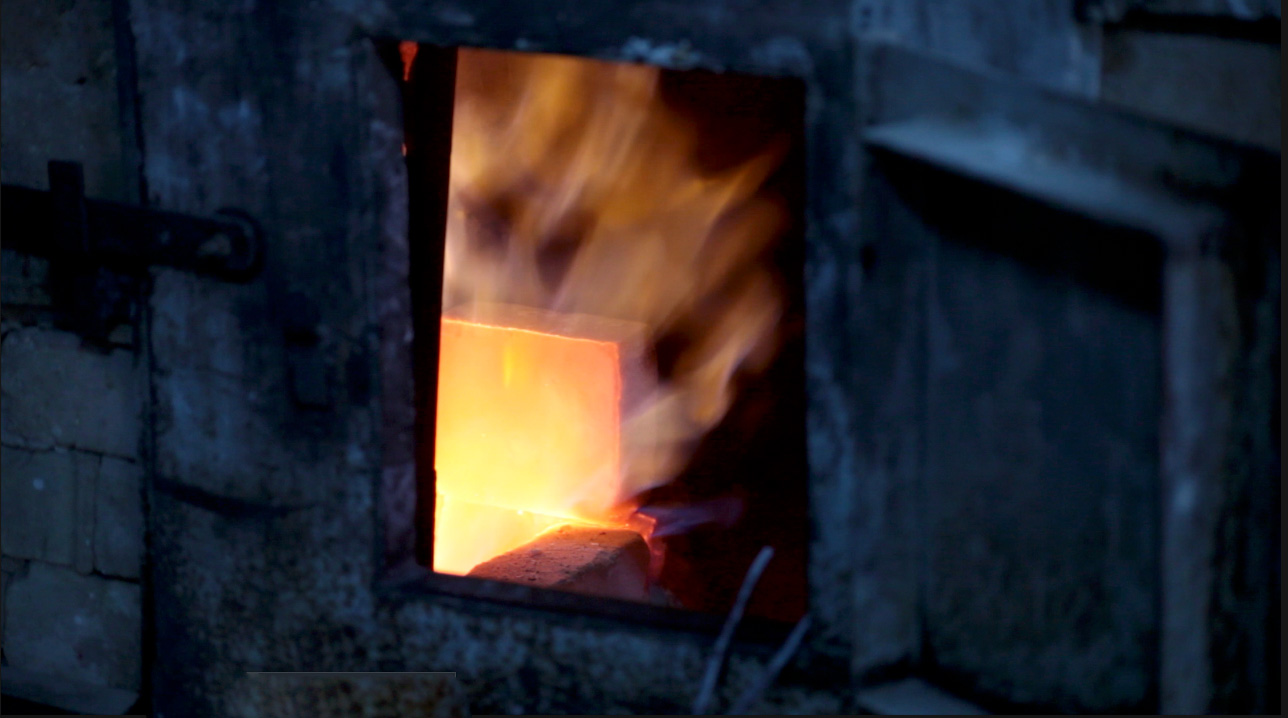
Here’s another example – translucent flames roaring out of a furnace used for melting glass for glass blowing.
I’ll spare you the results of the color mask. It had a very hard time selecting the correct color of the translucent flames.
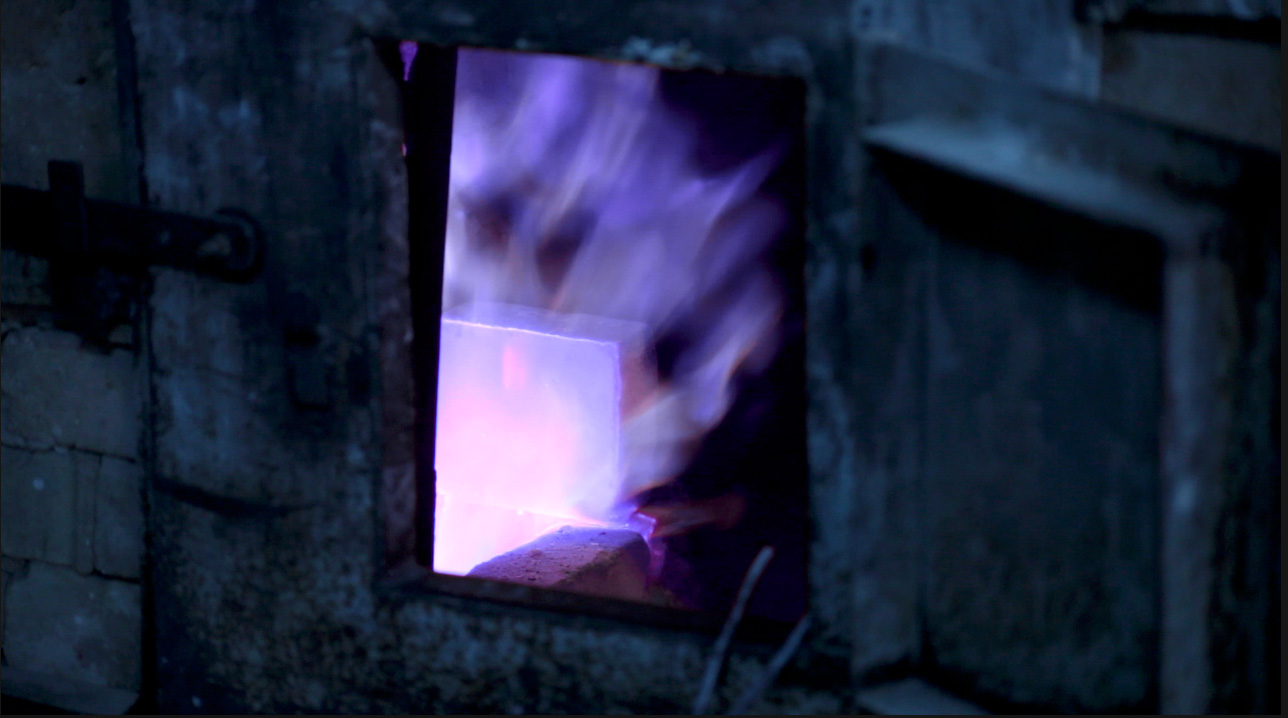
But, using Hue vs. Hue and selecting the orange/yellow heart of the flames, I was able to change all the flames, even those that were translucent over a dark gray background. Plus, we also see a variety of shades of color in the middle of the furnace, something that a color mask would not allow.
Even better, while the flames flash wildly around the frame, the colors never shifted from the new blue setting I applied, with no fringing and no weird borders.
NOTE: To get this to look its best, I tweaked the location of the two bounding dots a bit by dragging them horizontally on the color line.
SUMMARY
Like the other color controls, Hue/Saturation Curves support Shape and Color masks. But, unlike the other controls. most of the time you won’t need to use them.
Using Hue/Saturation Curves provides more precise control over changing colors in the frame. Once you learn how they work, you’ll find yourself almost never using a color mask again.

One Response to Final Cut Pro: A Better Way to Change a Color in the Frame
I had no idea this was possible– what a time saver! I’ll file this under “Any sufficiently advanced technology is indistinguishable from magic”. Fantastic. Thanks!