
Editing a montage of still or moving images to music is a typical editing activity. In this tutorial, I want to show you a technique you can use for your own projects.
First, keep in mind that you are telling a story with your images. So, while I won’t spend any time talking about the process of story-telling in this tutorial, you need to think about how each of the images you are selecting contributes to the story you are trying to tell.
Remember that a story has a beginning, a middle, and an end — and your music should reinforce that story via its pacing, emotion, and rhythms. Remember that your images and music both contain information and emotion – your montage should build on both of these to be effective.
START WITH THE MUSIC
Generally, in a montage, you are editing your images to music. This means that you should start by determining what music you want to use and make sure it is the right length. Finalize your music first, before beginning the video edit.
Then, edit your music into the Primary Storyline; using this layer will make later video editing MUCH easier.
Start by importing your music clip into the Event Browser and select the clip.
Position your playhead in the Timeline where you want the music to start.
Type E, or click the Append edit button in the Toolbar.
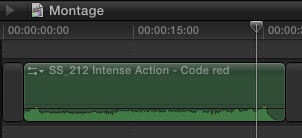
Here, for instance, I’ve edited my music into the Primary Storyline. You can use this technique whether you are editing the montage as part of a larger piece, or a stand-alone sequence.
NOTE: A very cool way to create a montage that you want to integrate into a larger program is to edit it as part of a Compound Clip. (A “compound clip” is what FCP 7 called a nest; which is a collection of clips.) Here’s an article that explains the process.
The benefit to putting your music in the Primary Storyline is that it won’t move as you add, edit, modify, move, or remove the video clips connected to this track. This means that your audio won’t accidentally shift out of sync.
ADDING VIDEO
Adding video to a music clip is the same as adding video to a video project. You add it as a connected clip. (Think of a connected clip as B-roll to your music. In FCP 7, a connected clip would be a clip placed on V2, which covers the video on V1.)

Here, for instance, I’ve selected a scenic clip from Pond5 to use as my starting image.
Position the playhead in the Timeline where you want this video clip to start; in our case, I want it to start at the beginning of the music.

Press Q to edit it to the Timeline at the position of the Playhead. This edits the video as a connected clip.
Hmmm…. It would be useful if that clip would end on the beat of the music. We should indicate the beat using markers. And, because the audio is in the Primary Storyline we can add markers without having to select the clip first.

Here, I’ve added markers to indicate the downbeat (dominant beat) in the music. My edit will look better if I keep these beats in mind.
NOTE: You set markets at the position of the playhead (or skimmer) by typing M. It is easiest to set markers in real-time as you are playing the music. If you need to set markers in a connected clip, select the clip first. To delete a marker, position the playhead on it, type M and click the Delete button.
To jump to the next marker, type Control+’
To jump to the previous marker, type Control+;

A long as snapping is turned on – the snapping icon is located in the top right corner of the Timeline and glows blue when snapping is on – it is easy to drag the end of a clip with the Arrow tool to align with a marker. (To toggle snapping on or off, type N.)

Add as many additional clips as you want, aligning them with the markers (and, thus, with the beat). In this example, I’ve added three clips; I selected the second clip to make it easier to see that there are three connected clips in this example.
TRIMMING
Sometimes, you’ll have more impact if your shots don’t perfectly align with the music. Just as there is a flow to the music, there’s also a “flow” to your shots. You need to keep both in mind as you edit.
However, when trimming connected clips, you can’t just grab an edge and drag it – that does a Ripple trim which will mess things up. We first need to convert these stand-alone clips into a Connected Storyline.
Using the Arrow tool, select the clips you want to convert into a storyline – in our case, this is ALL the clips – and type Command+G.

See that dark gray bar over the tops of the three selected clips? That indicates they are part of a connected storyline. Storylines allow us to trim clips and add transitions.
Time to trim the edit point – which is the location where two clips touch. When trimming, it is wise to turn off snapping, because it interferes with making small adjustments to the edit point (type N to toggle snapping).

To adjust where two clips touch, use the Trim tool – type T to select the Trim tool – then drag the edit point left or right.
The small box above the edit point shows how much you are moving the edit point, measured in frames. Negative numbers mean you are moving to the left.

If you look in the Viewer, you’ll see two images – the left image is the last frame of the out-going clip. The right image is the first frame of the in-coming clip. This two-up display makes it easy to find the exact point you want to switch from one shot to another.

NOTE: If you don’t see these two images, open Final Cut Pro > Preferences and, on the Editing tab, make sure Show detailed trimming feedback is checked.
ADDING TRANSITIONS
The last step in your montage is to add transitions. Generally, these are dissolves, but they CAN be anything. However the purist in me hastens to add that constant wipes get very tiring very quickly.

Select the clips to which you want to add transitions and type Command+T. This applies the default transition – a cross-dissolve – to all selected clips.
Or, if you want to apply wall-to-wall wipes, select all the clips to which you want to apply wipes.
Open the Transition Browser and double-click the wipe pattern you want to use. This transition will automatically be applied to all the selected clips.

To adjust the duration of a transition zoom into the Timeline (Command+[plus]) and slide the edge of the transition icon left or right to change the duration. In this example, I’ve shortened the duration by 9 frames.
Keep making adjustments until you are happy – or, more likely, you run out of time.
NOTE: If you created this montage in a compound clip, simply edit the clip into your main project to add the montage to your edit.
Done.

5 Responses to FCP X: Edit a Montage to Music
Personally I produce a lot of music montage videos for weddings. One feature which is not present in FCPX, which I really miss, is the ability to make a transition begin at the marker, rather than it being 50% on either side of the marker. What happens is that transition appears to start late because it comes in 12 frames before the marker point on the timeline. Generally, working in FCP7, I place the first transition, then select “start on edit”, then I simply copy and paste the transition for subsequent edit points. I see no way of doing this in FCPX and thus I revert to FCP7 for doing all my music montages. I feel this feature needs to be reintroduced to FCPX.
Paul:
Why not just move the edit point 12 frames later?
1. Highlight the edit point.
2. On the keypad, type “+12” and press Enter.
The selected edit point jumps twelve frames to the right. (Enter a negative number and the edit point moves to the left.)
Larry
Larry
Yes I see what you mean. However it’s still not as efficient as copy and paste of a transition which begins at the edit point. In one music video I may have 50 or more transitions so it becomes very time consuming.
Paul
I agree with Paul, I use start on edit, end on edit and even custom start point on some occasions.
Let’s say you want to change the transition length but you need the transition to start on a musical cue, if it is only start on center you will need to move the edit point every time to realign it with the musical cue.
Now you can use BeatMark X: http://ulti.media/bmx