
 With the need for educators to originate lectures at home, Derek Roff writes:
I wonder if you have ever created a lesson or written an article on tips for editing a presentation given by a lecturer who relies heavily on slides to go with the spoken lecture, assuming that the editor has a copy of the slide deck, and that the video was shot of the presenter, not the slide screen.
The answer is that this is easy to create, provided you follow a few key steps and include the “secret sauce.” It starts with the lecturer’s slides in Keynote or PowerPoint.
PREP YOUR SLIDES – KEYNOTE
Ideally, when creating a Keynote or PowerPoint slide deck, pick an aspect ratio that works for video. Most templates are 16:9, so you should be all set; horizontal is the best option.

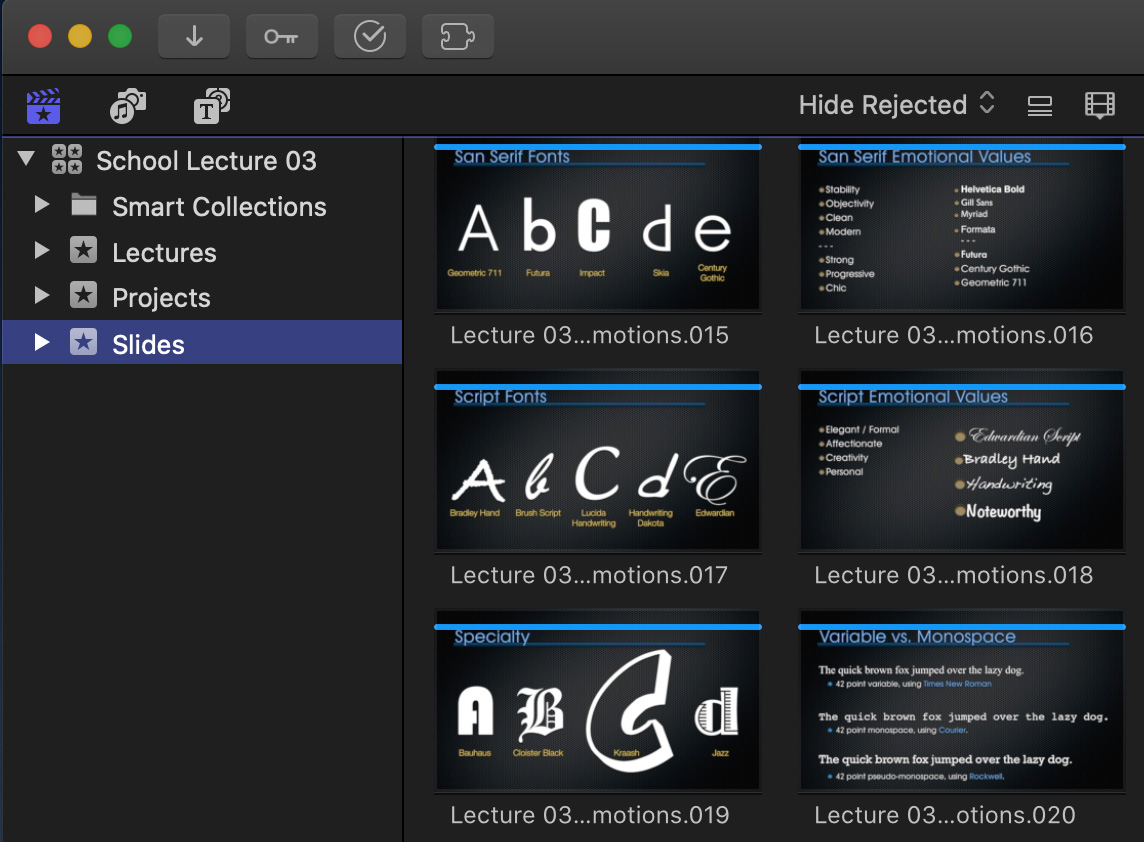
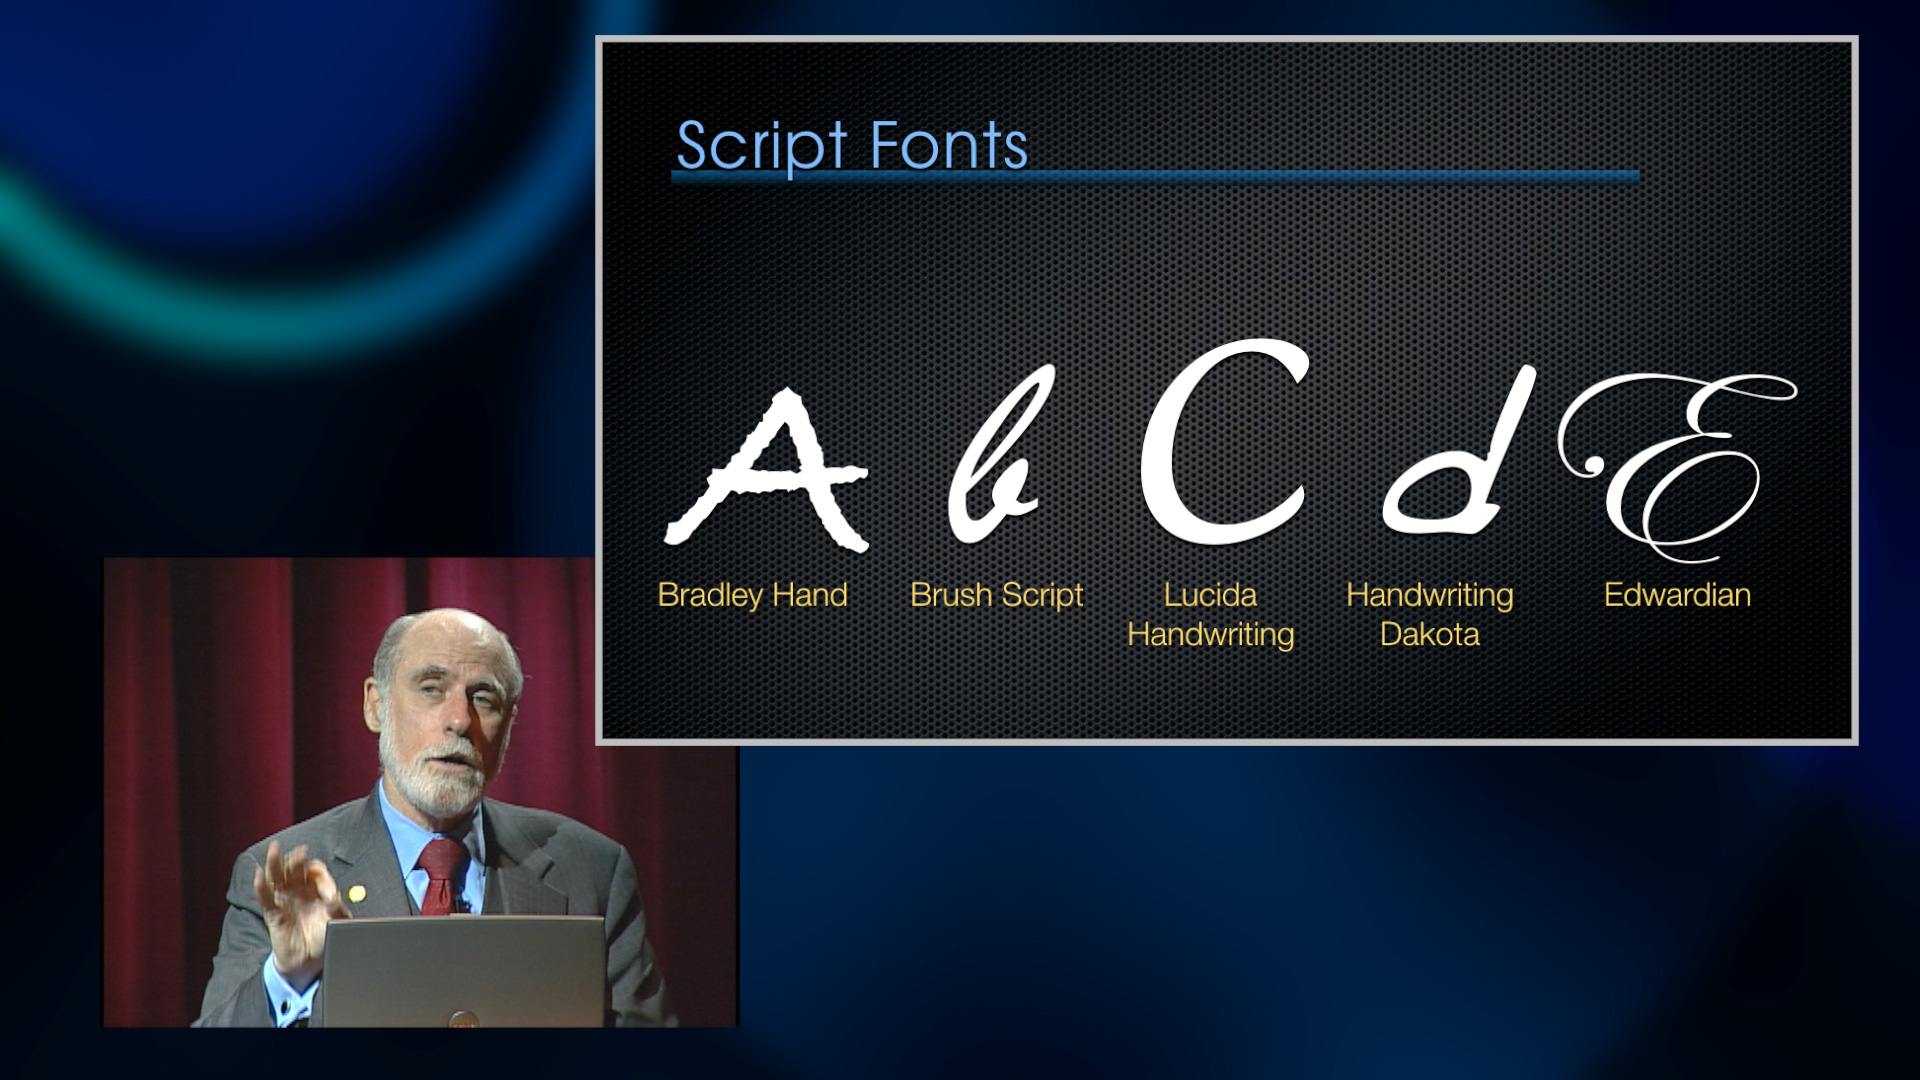
Here, for example, I have a lecture on the Power and Emotion of Fonts.

In Keynote, choose File > Export to > Images. Then, set the Format to PNG (you can also use TIFF; however don’t use JPEG.)
Based on how the slide deck is built, you can export complete slides, or each build of a slide. I generally just export the complete slide.

Keynote exports each slide as a PNG file and stores them in a folder at the location you specify, with each slide named after the original slide deck.
PREP YOUR SLIDES – POWERPOINT

In PowerPoint the process is the same.

Choose File > Export, then choose a file format. Again, I recommend PNG. At this point, you need to set the screen size. Since we will be reducing the slides for the finished video, set them to 1280 x 720, even if they were created at a larger size.
NOTE: You can pick a larger size for your slides if you prefer, but, as you’ll see, you won’t be viewing the slides full-screen. Most of the time, 1280 x 720 will be fully readable.
Whether you start with Keynote or PowerPoint, you now have a folder of PNG images containing all your slides.
CREATE THE BACKGROUND
The editing process is conceptually the same in Premiere, but Final Cut has backgrounds that make this process easier.
NOTE: “Editing” is the process of adding and adjusting clips to the timeline. It has multiple definitions and usages. I’ll try to be clear what we are doing during this tutorial.
Here’s the secret sauce: Neither the lecturer NOR the slides will be full-screen. Instead, we’ll create a dual picture-in-picture effect so we see everything all the time. To do that, we need to place a background behind all the other media to cover the gaps.
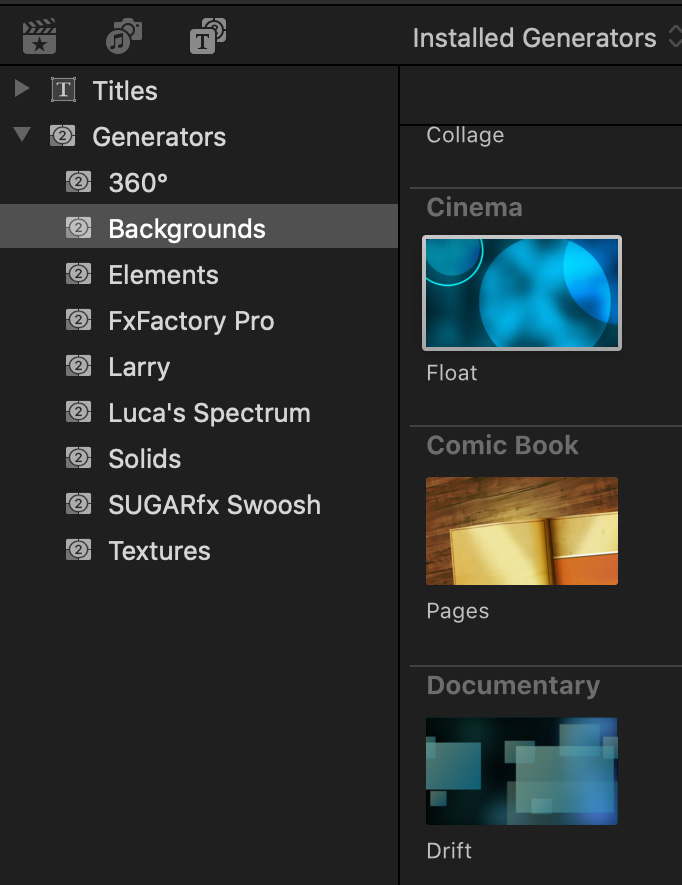
Go to Generators > Backgrounds and pick something dark-ish. I’m using Float, but any darker background will work. Edit it into the Primary Storyline.
NOTE: Backgrounds seamlessly loop by default. After you add the lecture video, stretch the duration of the background to fill the entire time of the lecture. Final Cut supports projects up to 12 hours long, so even the most long-winded lecturer will be covered.
ADD THE LECTURER AND MARK SLIDE CHANGES
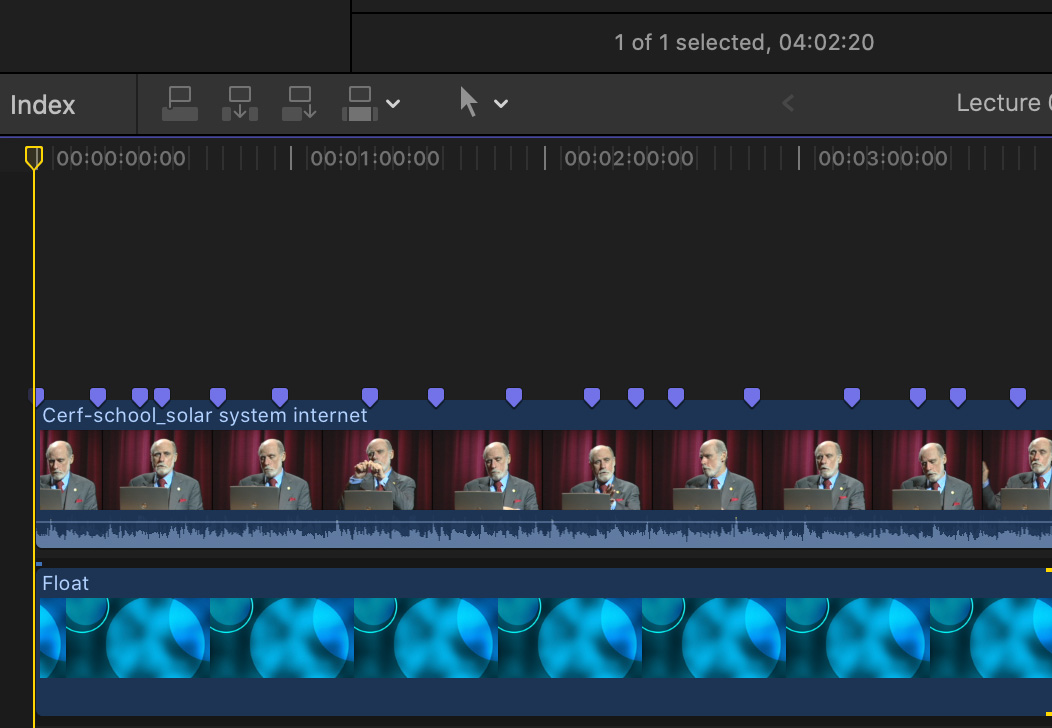
(Images courtesy Alcatel/Lucent & Dr. Vint Cerf)
NOTE: Here’s a video I created that describes how to use the Limiter effect.
NOTE: It is not a good idea to take the video all the way to the corner, follow the guide of the Safe Zones.
ADD THE SLIDES
With the slide changes marked, select the Range tool (shortcut: R ) and drag an In and Out in the lecturer’s clip from one marker to the next.
Select the slide you want to add in the Browser and type Q. This places the slide as a connected clip, matching the duration of the In/Out. This is MUCH faster than adding each slide, then dragging the edge of the slide to match the markers!
Keep all slides full-screen, we’ll resize these in a minute.
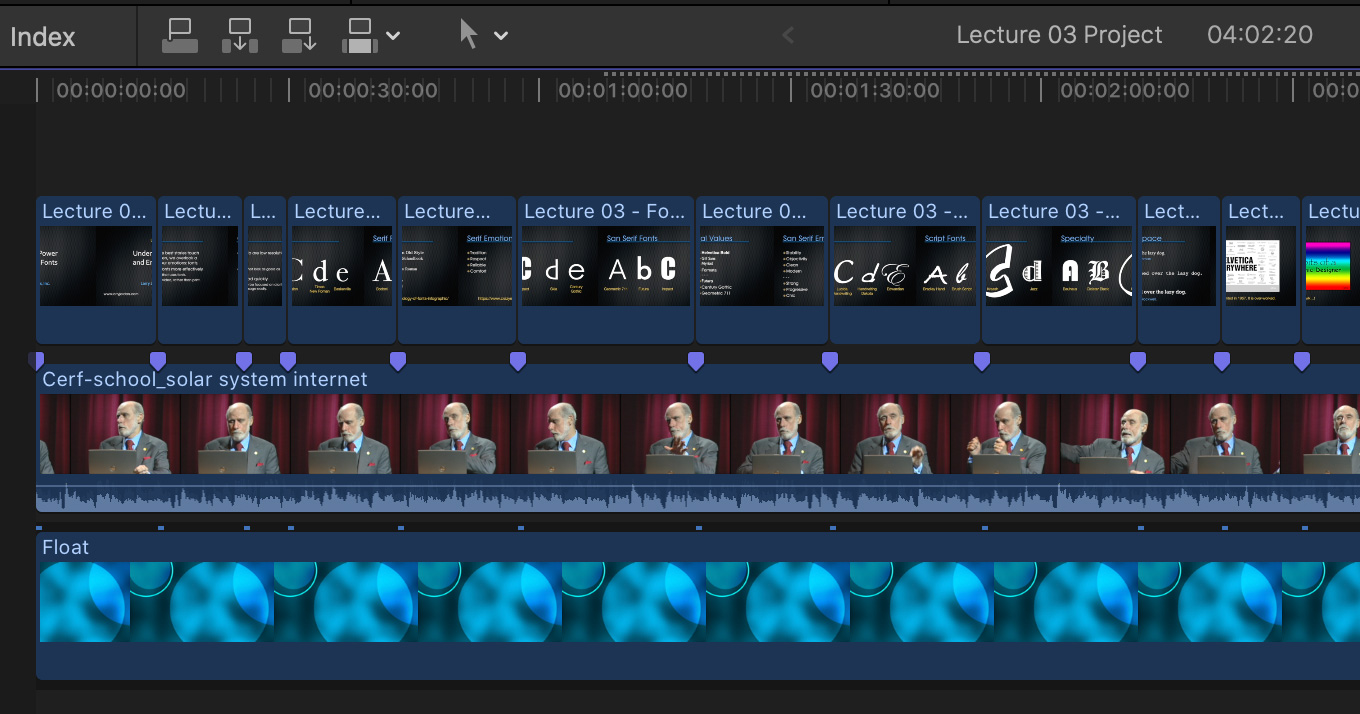
Here’s how things look now: slides timed to markers and full-screen.
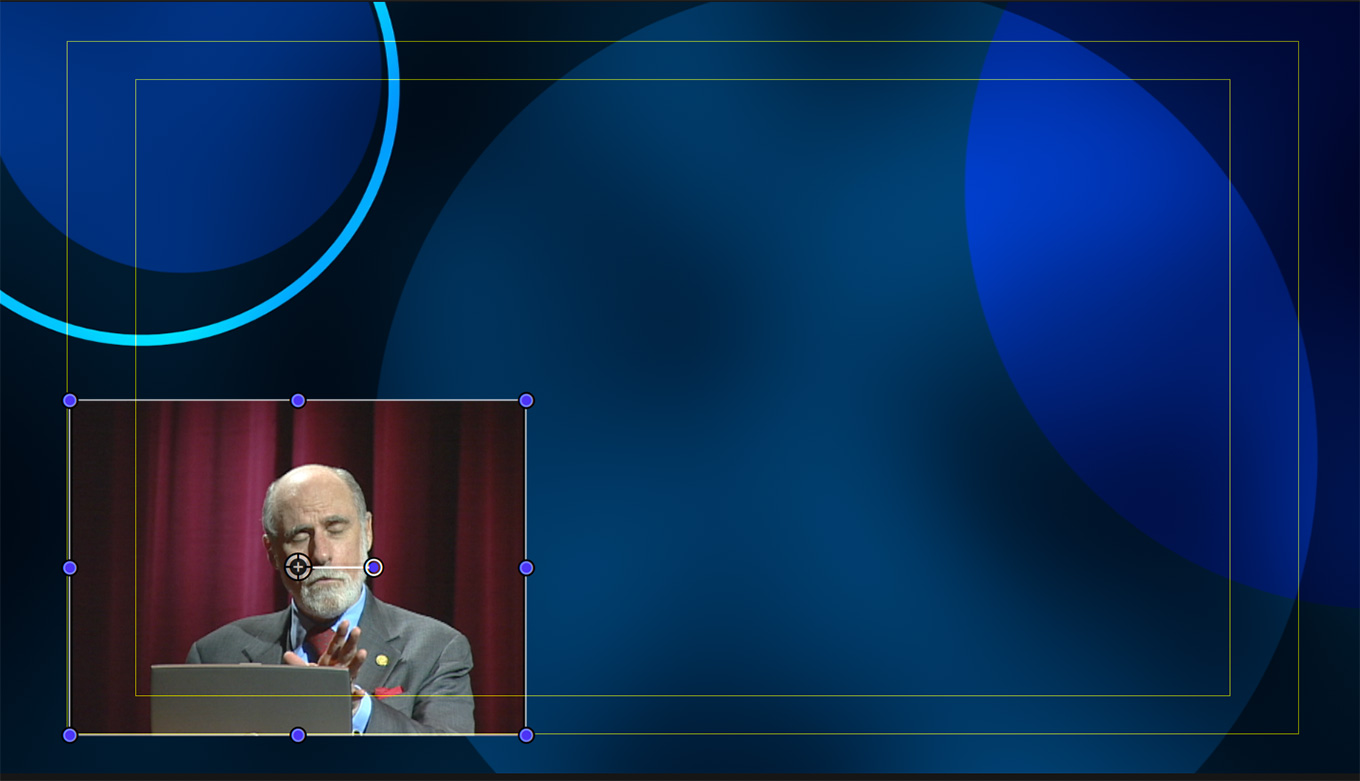
Select the first slide and, using the Transform settings, size it to fill most of the screen, leaving only the lower corner for the lecturer. In my example, I let the two screens overlap a bit because the top corner of the lecturer’s video almost never has anything important in it.
Finally, select the first slide, and choose Edit > Copy.
Select all the remaining slides and choose Edit > Paste Effects. This copies the scale and position settings from the first slide to all the selected slides.
And you are (mostly) done. Export and post.
EXTRA POLISH
Most Apple-supplied backgrounds are too “sharp” and bright. So, in these final tweaks, I selected the background and:

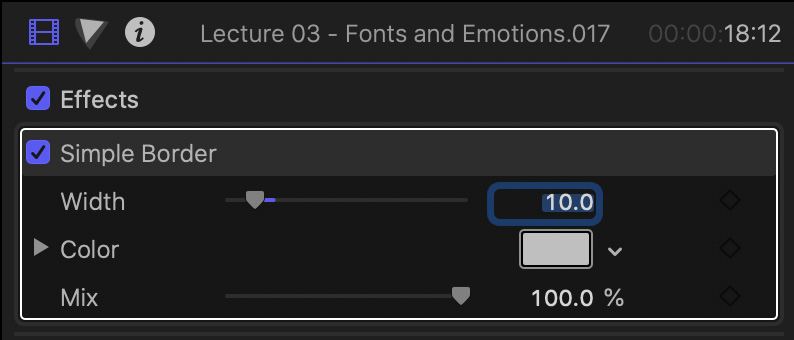
Turning to the slides, I added a light gray border (Effects > Stylize > Simple Border) to all the slides so they would stand out from the background. I also decreased the Width to 10 to make it less obvious.
NOTE: The easiest way to do this is to add and adjust the border to the first slide before copying and pasting effects.
(Click to see a larger version of this image.)
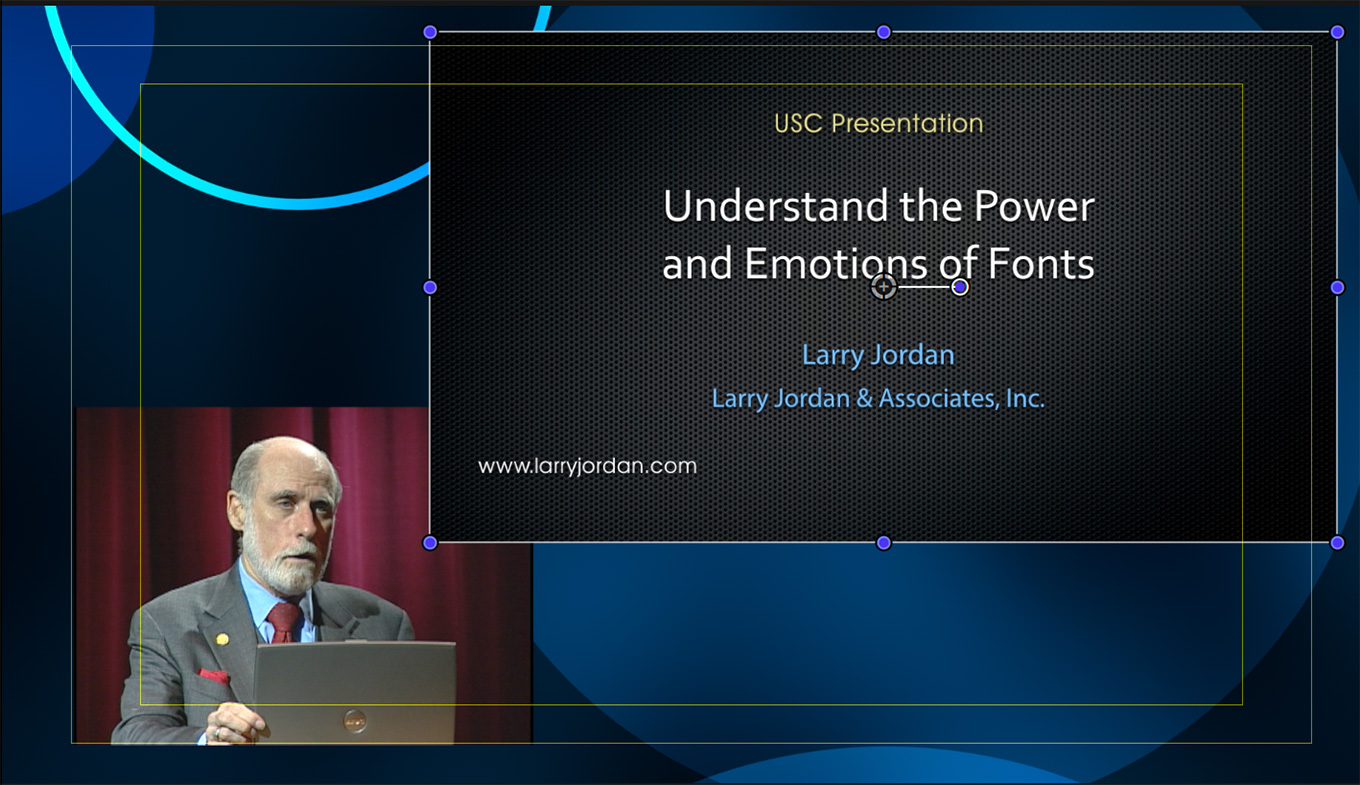
Here’s a finished still from the video. Click the image to view it at full size and you’ll see that both lecturer and slides are big enough to read clearly, in a video that can be posted anywhere.
NOTE: For the record, Dr. Cerf was not speaking about fonts. He was talking about the importance of high school students staying in school and studying the sciences.
Done.

5 Responses to FCP X: Create Illustrated Lectures Using Video and Keynote or PowerPoint
Larry, this is awesome and incredibly helpful. Do you have anything like this for Premiere?
Lee:
The process is similar. I’ll write a specific tutorial for Premiere for next week’s newsletter.
Larry
Thanks — as an educator I really appreciate this. Question: Can the slides and lecturer be sized any proportion. Can this be a half lecturer and half PowerPoints split screen? In my classrooms it is important the students see the lips and facial gestures of the lecturer to help if they are hard of hearing. Thanks.
Christopher:
You are essentially creating a picture-in-picture effect, where each image can be whatever size you need. They can even overlap somewhat if that helps.
Larry
awesome thanks Larry