
![]() This is another in my periodic series on how to create simple effects. In this example, we’ll create an effect containing multiple images, then wipe to and from a starting clip in the Timeline using Final Cut Pro X.
This is another in my periodic series on how to create simple effects. In this example, we’ll create an effect containing multiple images, then wipe to and from a starting clip in the Timeline using Final Cut Pro X.
NOTE: This tutorial uses FCP X 10.2.3, so the interface will look a bit different from the 10.3 version, but the process of creating this effect is exactly the same in FCP X 10.3; or even 10.1.

Here’s the final effect, using a Circle wipe with a “Noir” edge type.
In this example, I want to wipe from a full-screen image in the Primary Storyline, to four images all playing at the same time, back to the full-screen image. To create this effect, we will need to work with settings in the Inspector and compound clips.
GETTING STARTED
Here’s the key rule you need to know: If you want to see more than one image at the same time, then all the images you want to see need to be stacked above each other.
So, to see four images at once, all four need to be in the same vertical stack.

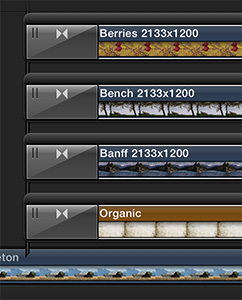
Here, I have one clip – “barn Grand Teton” – in the Primary Storyline. Then, stacked above it are four more clips. Notice that all four clips start and end at the same time. This prevents any clip from appearing on screen earlier or later than the other clips.
NOTE: The easiest way to match durations is to trim the edges of each clip. A faster way is to match the duration using timecode (shortcut: Cmd + D).
CREATE THE EFFECT
Put the playhead in the middle of the four clips, then select the top clip.
NOTE: Selecting the top clip is critically important because when you edit a video clip into the timeline, it is always full-screen and fully-opaque. This means that the clip on top (which are in the foreground) always blocks the clips below (in the background). This stacking order is identical to how Photoshop operates.

Open the Inspector (shortcut: Cmd + 4) and set Transform > Scale to 50%. This makes the selected clip fill just 1/4 of the screen.
Next, adjust the Position X & Y settings until the image is nicely tucked into a corner.
NOTE: “X” adjusts the horizontal position of the selected clip, while “Y” adjusts the vertical position. The center of the screen is defined as 0,0. Left and down are negative numbers, while right and up are positive.

The easiest way to do position a clip is to enable the on-screen Transform controls, then click the rectangular icon in the lower left corner of the Viewer and make sure “Transform” is selected.

Next, drag the image into a corner.
NOTE: If the image is not selected or doesn’t move, re-select the clip in the Timeline.

When the image is in the correct position, click the blue “Done” button in the top right corner of the Viewer.

While dragging the image works, a faster and more accurate way to do this is to enter specific numbers for the X and Y coordinates. (You can also drag the numbers in the Transform portion of the Inspector.) I’ve found it easiest to drag the first clip to figure out what the numbers need to be, then enter numbers for all remaining clips.
NOTE: Remember, to center an image in the frame, enter 0 for both the X and Y values.
Repeat this process for the remaining three clips, putting each one into its own corner. What you’ll discover is that the X and Y values are exactly the same for all four clips, the only differences are whether the numbers are positive or negative. This is one of the BIG benefits to using 0,0 as the center value for the screen.

When you are done, your four images should have a placement similar to this image.
GETTING FANCY

You can add a border around each image by placing a background under the four images, but above the Primary Storyline clip.

Then, either adjust the position of each clip, or change the Scale setting. Here, I left the positions alone, but scaled each clip 48% to add a textured border around the images.
You can select any type of background image with any amount of scaling or re-positioning you like to create the look you want.
ADDING A TRANSITION
While you can dissolve into this effect by adding a dissolve to the beginning of each clip, as illustrated here, you have far more options for transitions than that. As long as all dissolves start at the same time, the result will look that the effect itself fades in.
NOTE: You can stagger the appearance of each clip by changing the length of each dissolve.
If you just want the effect to pop on, then make sure all clips start at the same time and don’t add any transitions to the start of any clip.
However, to wipe to the effect, we need to do one more step: Bundle the clips – including the background if you are using one – into a compound clip.

To do this, select all the clips you want to bundle (and be sure to include the background) in the Timeline. Then choose File > New > Compound Clip.
Give the clip a name – which name you pick is unimportant – and click OK.

A compound clip bundles all the selected clips into a new “bundle,” called a compound clip.

Now, you can add any effect you want at the beginning of the compound clip and watch as the entire effect wipes on at once. Here, I’m using a Star wipe, rotated 54°, with a Noir Edge Type.
Very cool!

4 Responses to FCP X: Create a Multi-Image Effect (Quad-Split)
Great, fun little exercise! Keep ’em coming!
Yes, great explanation! Thanks!
Larry, you and your team are great teachers! Thanks!
This was fun reading and going to try this out. I was looking after reading your Inside tip on split-field diopter and if this can be recreated in FCPX.