
![]() This morning, Jerry asked on YouTube how to display four images at once in a vertical video using Apple Motion. (This technique is so popular it has its own name: a “Quad-Split.”)
This morning, Jerry asked on YouTube how to display four images at once in a vertical video using Apple Motion. (This technique is so popular it has its own name: a “Quad-Split.”)
Motion makes this easy, once you understand how its coordinate system works. Here’s how to create quad splits for horizontal 1080p and UHD video, then I’ll illustrate how to create a vertical UHD quad-split using vertical 1080 or UHD source clips.

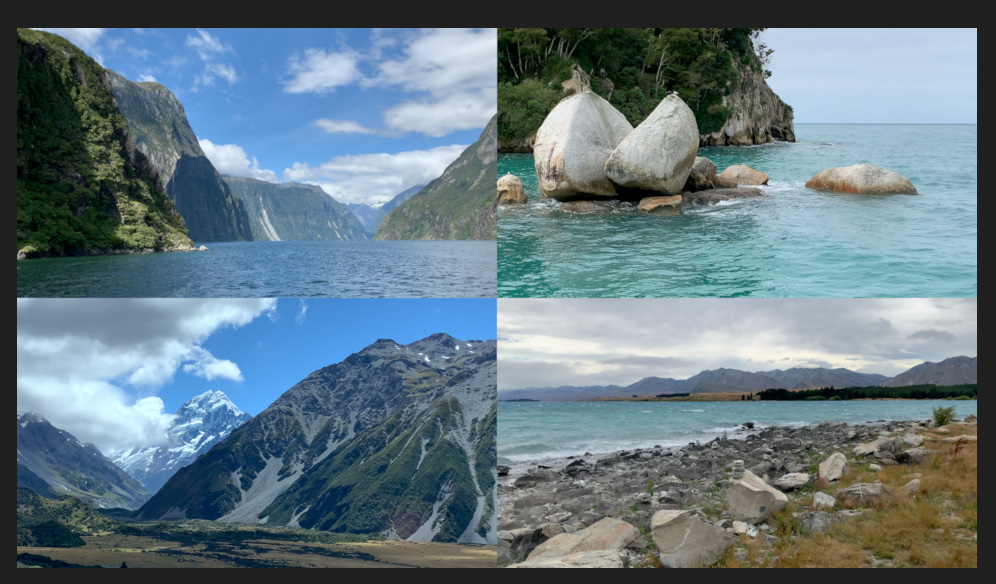
Here’s where we are going: four moving horizontal images on screen at the same time.
HORIZONTAL 1080P VIDEO
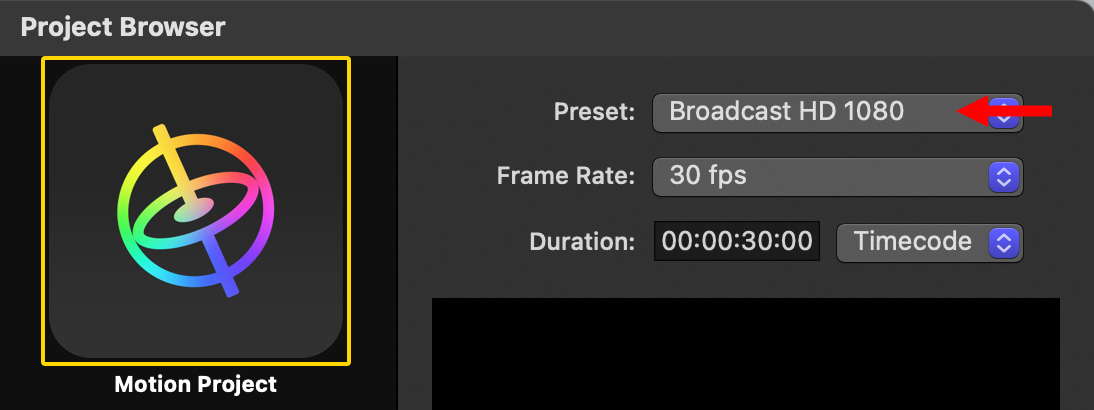
Create a new Motion project. Make SURE! to set the correct frame rate; it should match the source video if at all possible, You can’t change the frame rate later. Pick the frame size and duration you need. If you plan to add transitions, make the duration slightly longer to allow time for the transitions to complete.
In the screen shot above, I selected a 1920 x 1080 (horizontal) frame size with a 30 fps frame rate.
NOTE: Motion always creates video at the highest quality. The preset simply determines frame size.

Import or drag the four movies you want to use directly into the Layers pane. Notice, like the project, the video clips are all horizontal. Working with different aspect ratios will be really difficult.
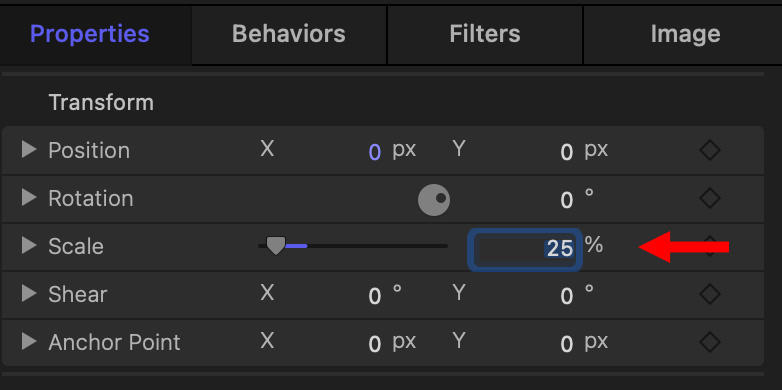
Size each movie so that it is 1/2 the frame size of the project. So:
KEY POINT: Motion (and Final Cut) define the center of the frame for both movies and projects as Position X = 0 and Position Y = 0. We call this the “0,0” point. This means that as we move images around both the position number and sign (positive or negative) change as the position shifts. (X represents the horizontal and Y the vertical position.)
Once you know the position of the first image, all other images in the quad split will use the same numbers, but simply change the sign. This is easier to show than to explain.
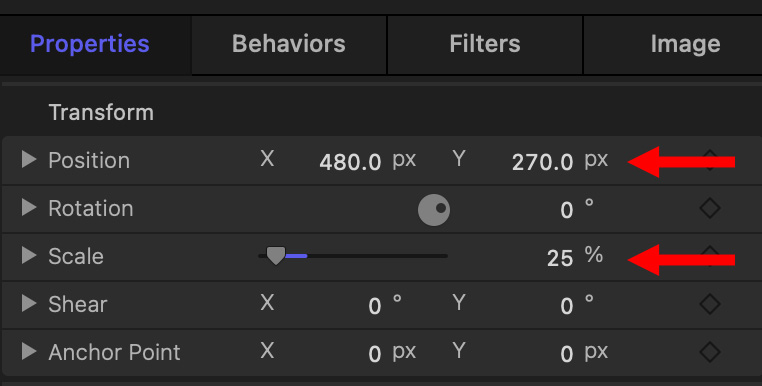
Select the image you want to put in the TOP RIGHT corner. Using Inspector > Transform, set Position X to 480 and Position Y to 270. How did we get these numbers?
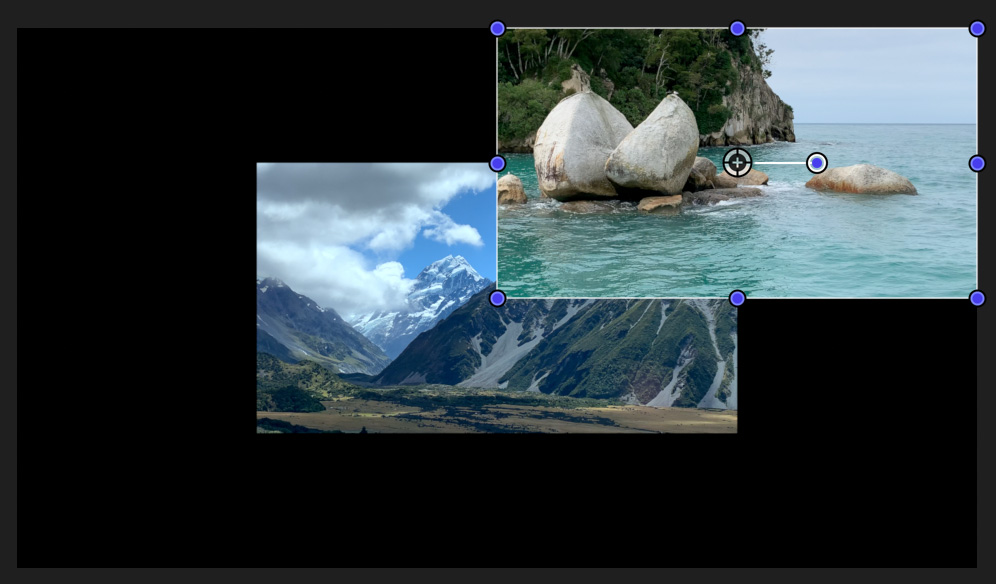
Here’s where we are so far. The top right image is set into position, while the remaining images are stacked on top of each other in the center. (I included a bit of the surrounding black area around the frame in the screen shot.)
Now it becomes easy, because we use these same position settings, but change the sign.
Select the image for the LOWER RIGHT corner. Then set:
See what we did there? Because the horizontal (X) and vertical (Y) centers are defined as 0, anything with a positive number is above, or to the right, of the center line, while anything with a negative number is below, or to the left, of it.
Here are the numbers for the TOP LEFT image:
Here are the numbers for the LOWER LEFT image:
Ta-DAH! Done.
MAKE IT LOOK BETTER
To separate the images, apply Filters > Border > Simple Border to each image.
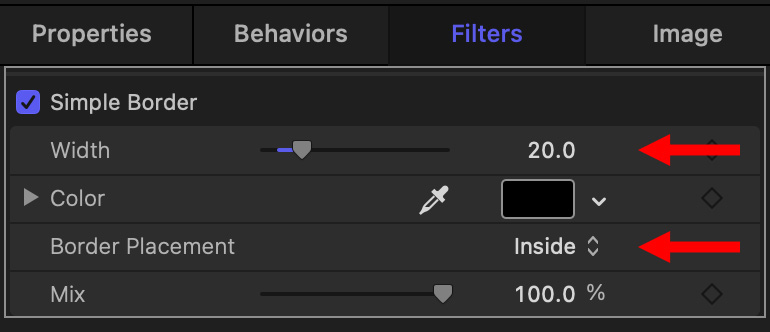
Make sure Border Placement is set to Inside. Then adjust the Width until you get the look you want. 20 worked for me. Finally, Option-drag the filter from the first image in the Layer pane to the other images to copy it and its settings to all images.
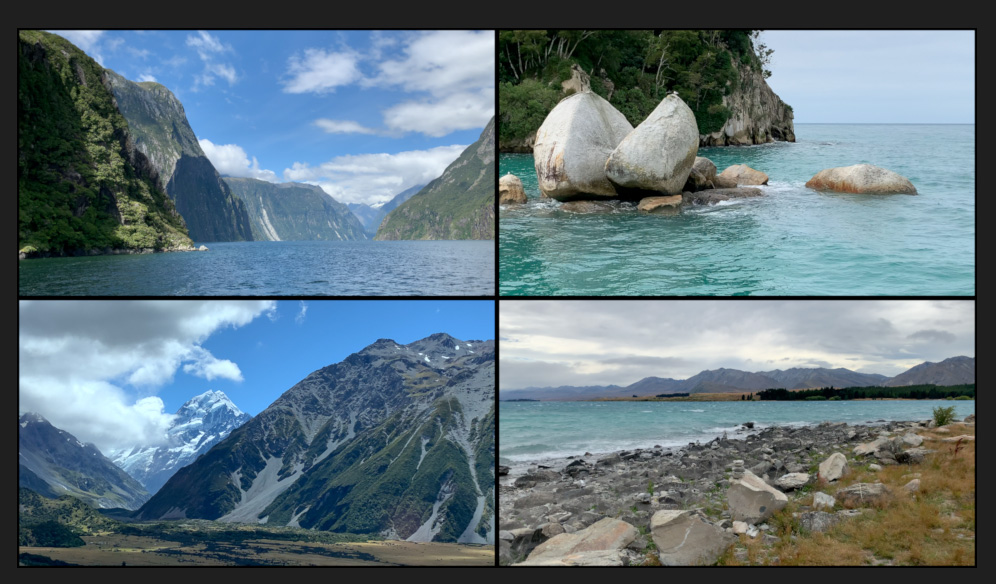
Here’s the finished result.
CREATE A UHD QUAD SPLIT
The process for a UHD (3840 x 2160) project is similar to what we went through. Here are the differences:
The frame size for UHD is 3840 x 2160. 1/4 of that is 960 x 540. Here are the position numbers for a UHD Quad Split:
Yup, the results look the same, it’s just that the Motion project frame size is now MUCH bigger.
CREATE A 4K QUAD SPLIT
It will be very hard to mix UHD and 4K (4096 x 2160) images in the same effect, because the aspect ratios don’t match. I don’t recommend it. Instead, for true 4K projects shoot 4K source images.
Then, scale the 4K videos to 50%. Everything will look great.
The frame size for 4K is 4096 x 2160. 1/4 of that is 1024 x 540. Here are the position numbers for a 4K Quad Split:
CREATE A VERTICAL VIDEO QUAD SPLIT
The process for creating a vertical video quad split is the same – EXCEPT that the Motion Preset menu doesn’t have any vertical video settings. Not a problem. Here’s how.
NOTE: Just as there’s a challenge fitting 4K images into a UHD project, you will have problems fitting horizontal video into a vertical video project. It can be done, but you’ll be cropping a lot of the image. Instead, this tutorial assumes using vertical video for a vertical quad split.
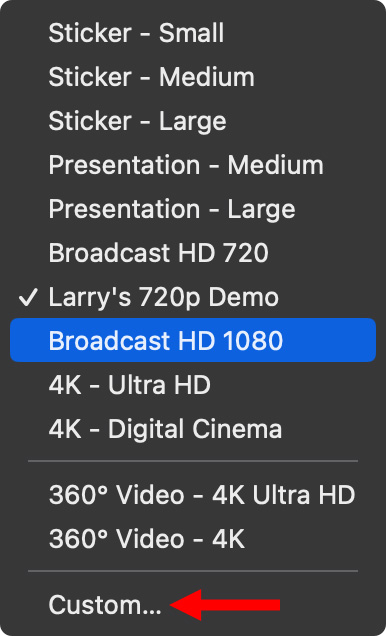
In the Preset menu in the Project Browser, select Custom.
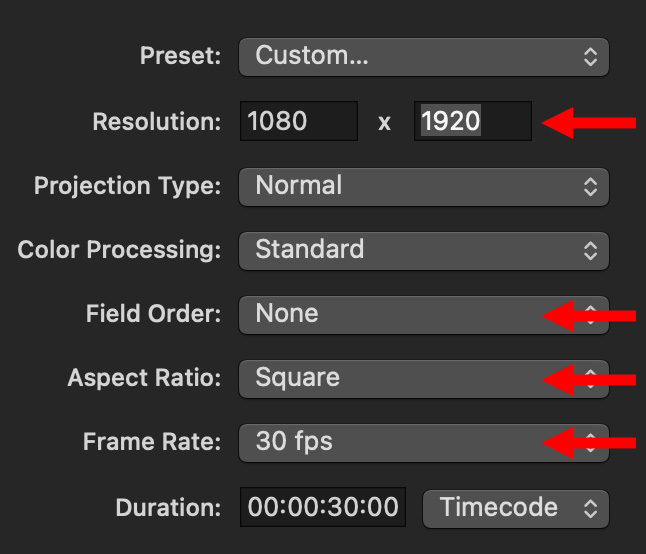
To create an HD vertical video:
NOTE: For a UHD vertical video, the Resolution would be 2160 x 3840.
Then, click the Open button to create the project and open it in Motion. Again, as always, Motion creates images at the highest quality in every project.
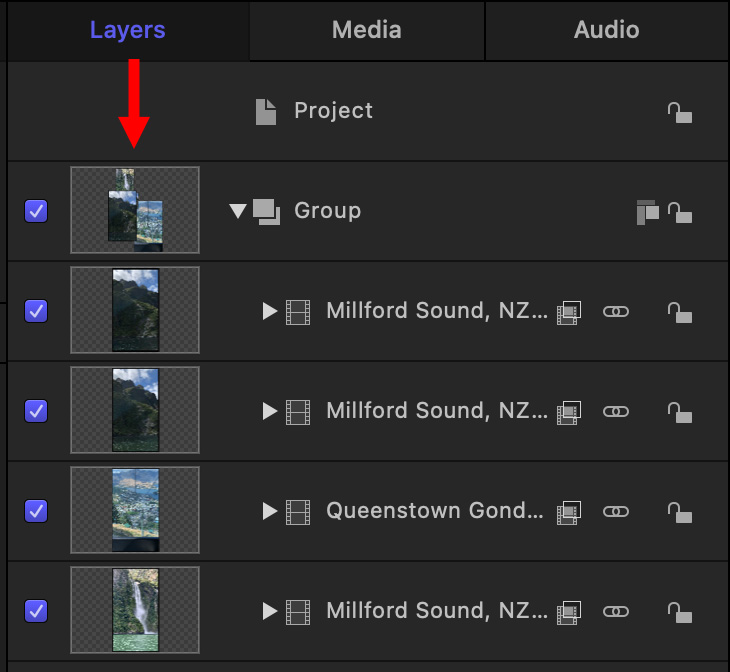
Import four vertical videos into the Layers pane. Notice, in this screen shot, that all four videos are vertical. Next:
We calculate the position coordinates the same way we did earlier.
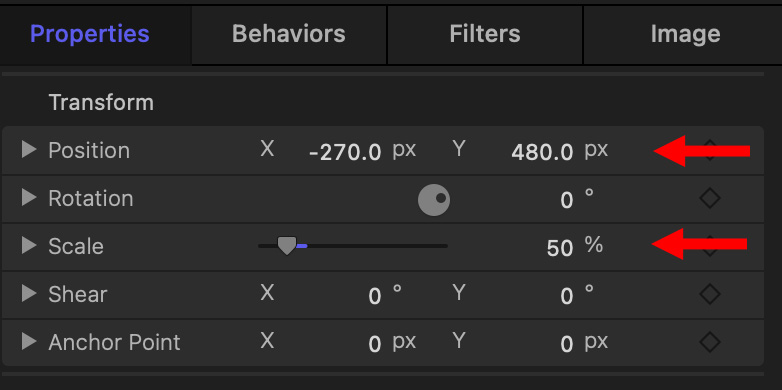
Here are the position numbers for a 1080 x 1920 vertical video:
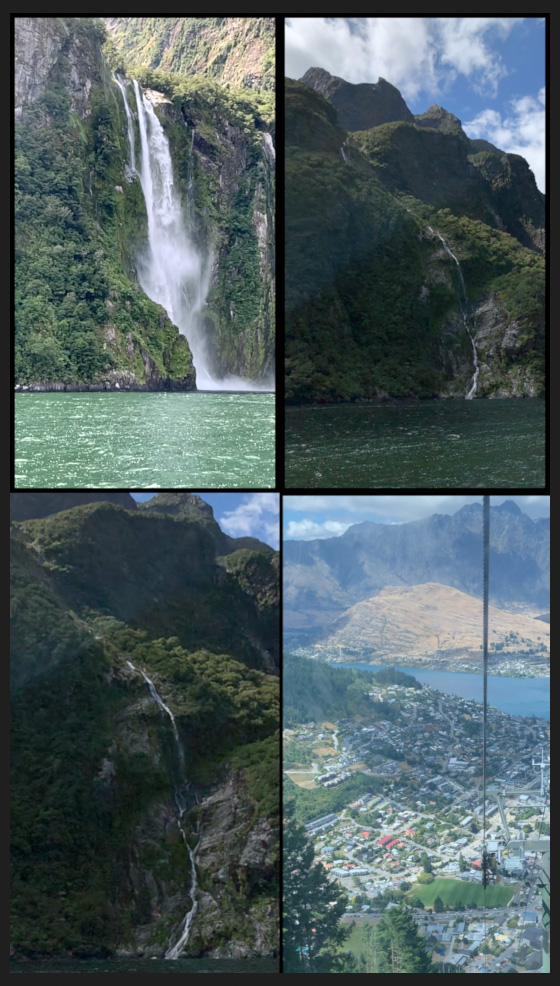
And here’s the finished result. I added a simple black border, as above, to better separate the images.
EXPORT THE PROJECT
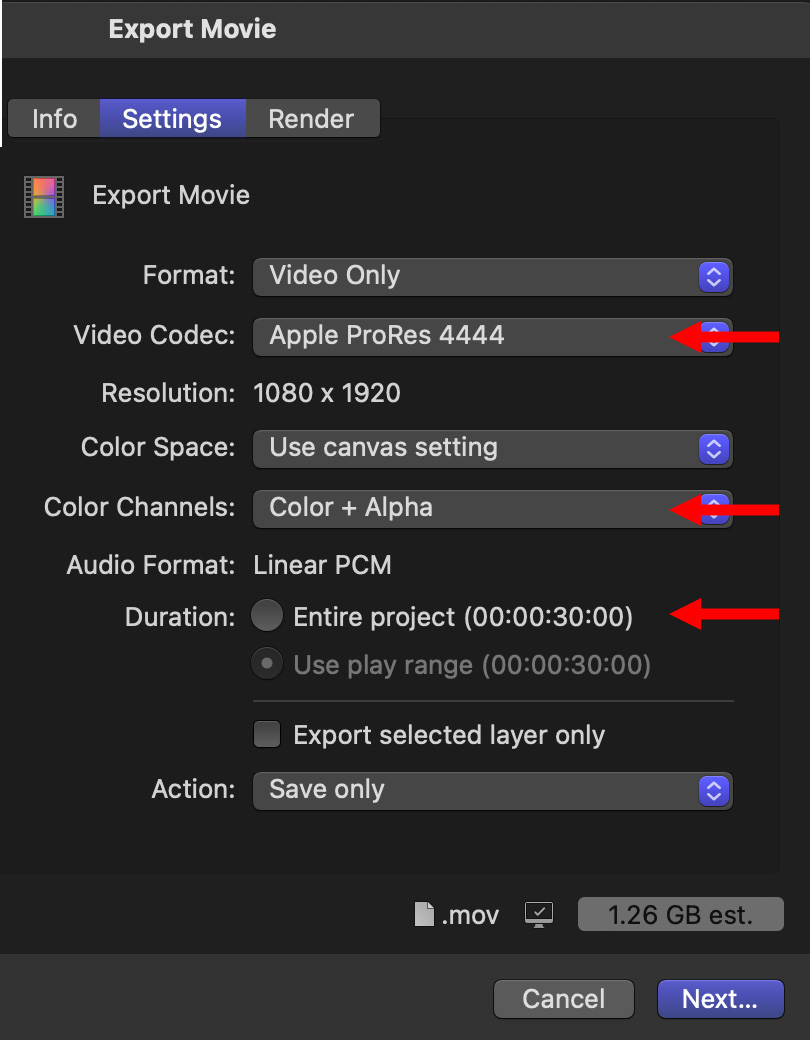
To export the finished effect, choose File > Share > Export Movie.
The default settings are the best: Apple ProRes 4444, Color + Alpha, and Entire Project.
SUMMARY
The coordinate system in Motion and Final Cut makes creating these kind of effects simple – once you understand how it works and how to properly scale the video clips.

6 Responses to Display Four Images At Once – a Quad-Split – in Apple Motion
Thank for this tip, Larry. I only shoot horizontal video’s. That probably has to do with my age, and the fact that my eyes are NEXT to each other. I guess, that if you want to do this more often, it is handy to make a Motion Effect of this, creating four dropzones!
Jan:
You are exactly correct. Drop zones in a template for Final Cut are the ideal way to handle this. However, Jerry was new to Motion and I didn’t want to make this tutorial too complex.
Larry
Larry,
Drop zones in a template for Final Cut is a great idea. Just did the tutorial. Tried publish as a template but it didn’t work Do I have to convert it to an FCP effect?
Any help would be appreciated.
Thanks,
Philip
Philip:
Save them as a Final Cut generator.
Larry
Larry,
Did that. Is there a way to get the border on all sides of the drop zones?
Thanks,
Philip
Philip:
Yes. It’s all in how you configure the border in Motion when you are constructing the template. You could either do a border, with it set to display inside the drop zone, or simply create lines and boxes and overlay them on the drop zones.
Larry