
![]() Chroma-keys, also called green-screen keys, are a staple of video production. They allow us to replace one background with another, without damaging the foreground image.
Chroma-keys, also called green-screen keys, are a staple of video production. They allow us to replace one background with another, without damaging the foreground image.
DaVinci Resolve can easily create these keys, but figuring out how is tricky because Resolve has so many places to create effects, it’s hard to know where to look.
Chroma-keys can be created in either the Cut or Edit page. I’ll illustrate this in the Edit page, because I prefer the controls it provides for editing. The effect is the same either way.
So, here’s what you need to know.
NOTE: Here’s an article that illustrates three different ways to remove “garbage” from the foreground shot. These range from very simple to very flexible.
CREATE A ONE-COLOR KEY
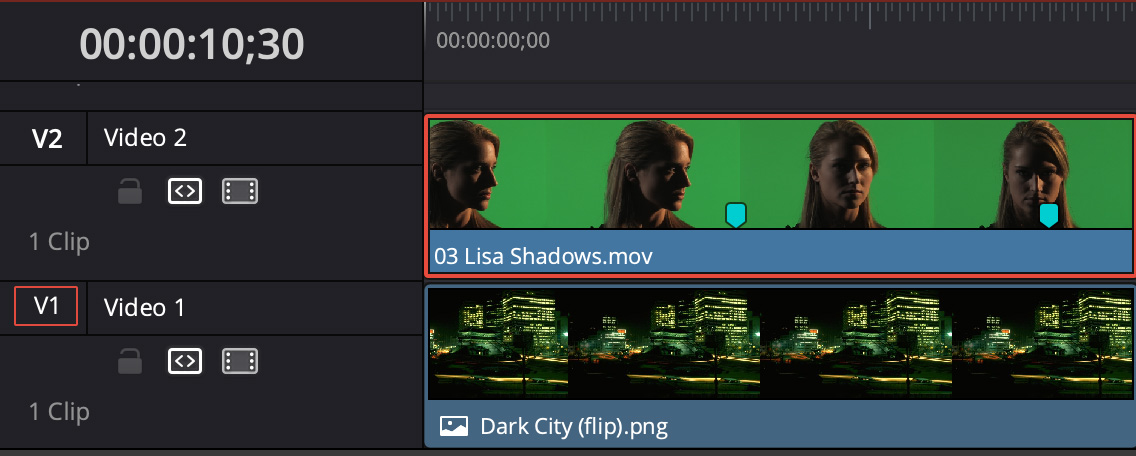
For a simple key, create a two-layer stack in the timeline with the background on Track 1 and the foreground above it on Track 2.
NOTE: The markers are there to locate my screen shots. They are not necessary for a key.
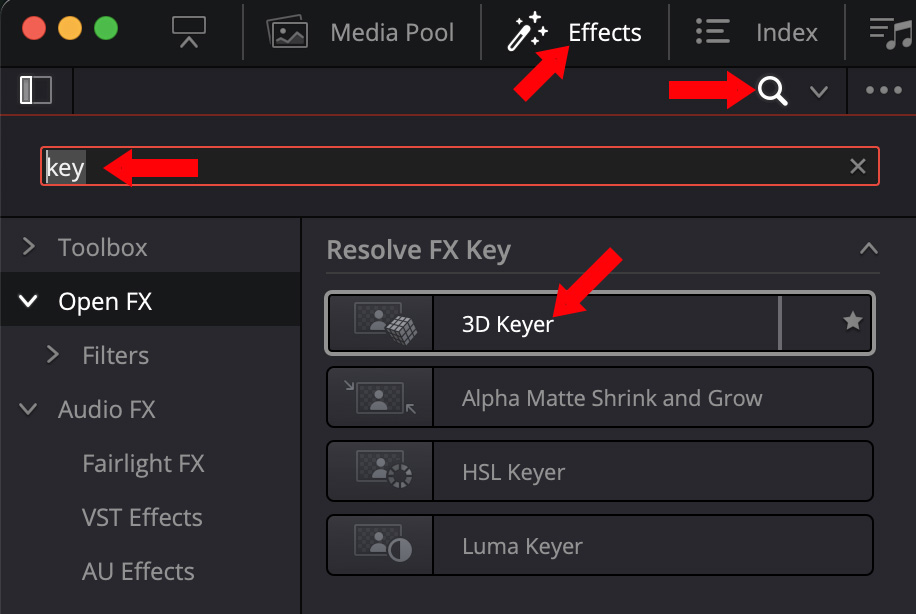
Click the Effects button (top red arrow) to reveal Resolve’s built-in effects.
Click the Magnifying Glass icon (middle red arrow), then enter “key” in the search box.
NOTE: Yeah, entering “chroma” or “green” won’t find anything. Resolve calls this effect the 3D Keyer because why should this be a name you know?
Drag the 3D Keyer into the top (foreground) clip in the timeline.
NOTE: Don’t panic. You won’t see any changes yet.
Select the top clip.
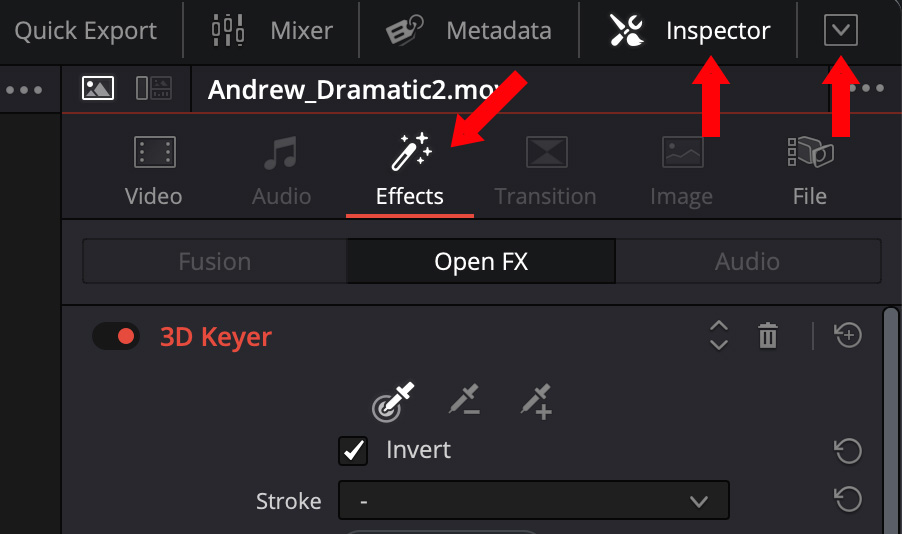
The Inspector should automatically open, but, if it doesn’t, click the Inspector text button (middle red arrow), then click Effects (left red arrow). Finally, to see all the available controls, click the “chevron in a box” icon (right red arrow) to expand the Inspector to full height. (Click this icon again to shrink the Inspector height back to 1/2 size.)
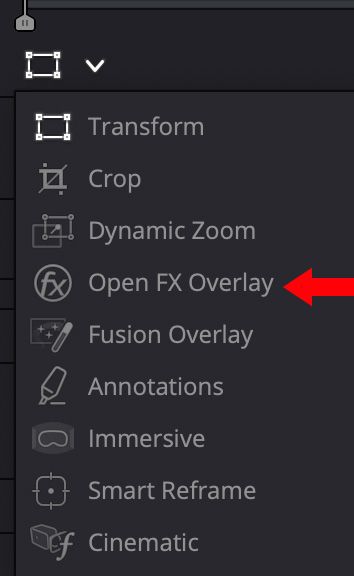
Finally, in the lower left of the Viewer, change the display to Open FX Overlay. This displays the onscreen controls in the Viewer.
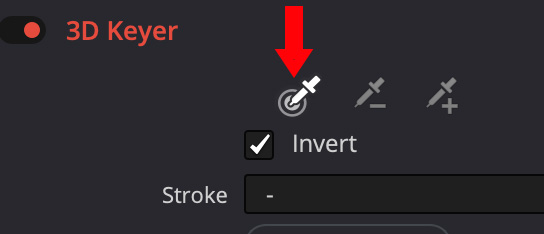
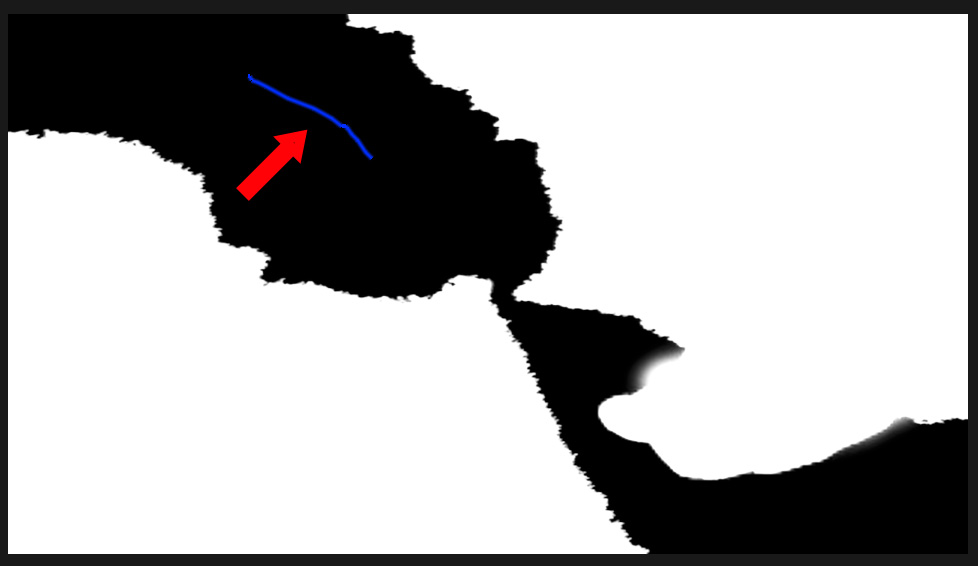
The correct color picking tool is selected by default (red arrow).
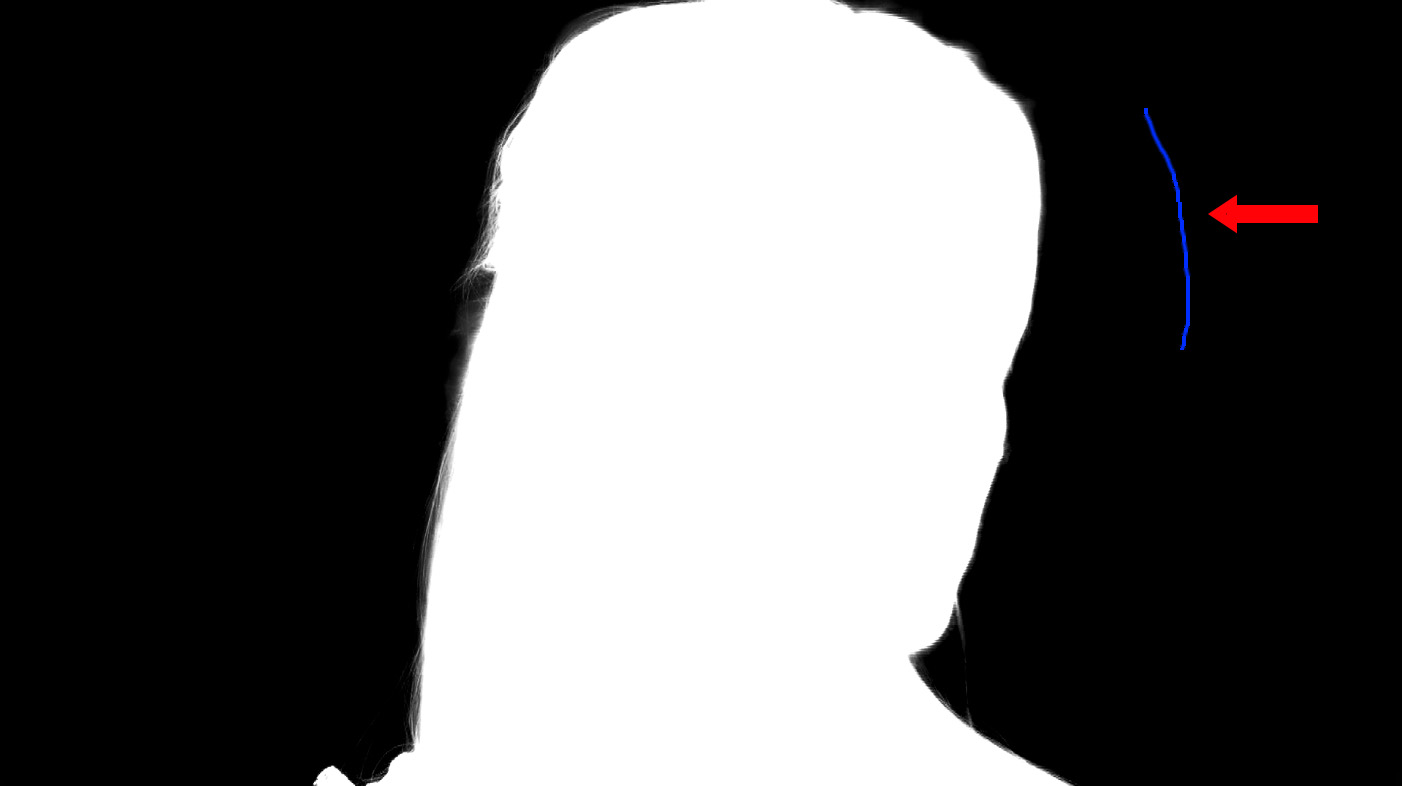
Drag the tool across the background you want to remove in the Viewer until no shades of gray are visible. The blue line (red arrow) shows the area you are dragging across.
The Viewer displays images in one of three colors:
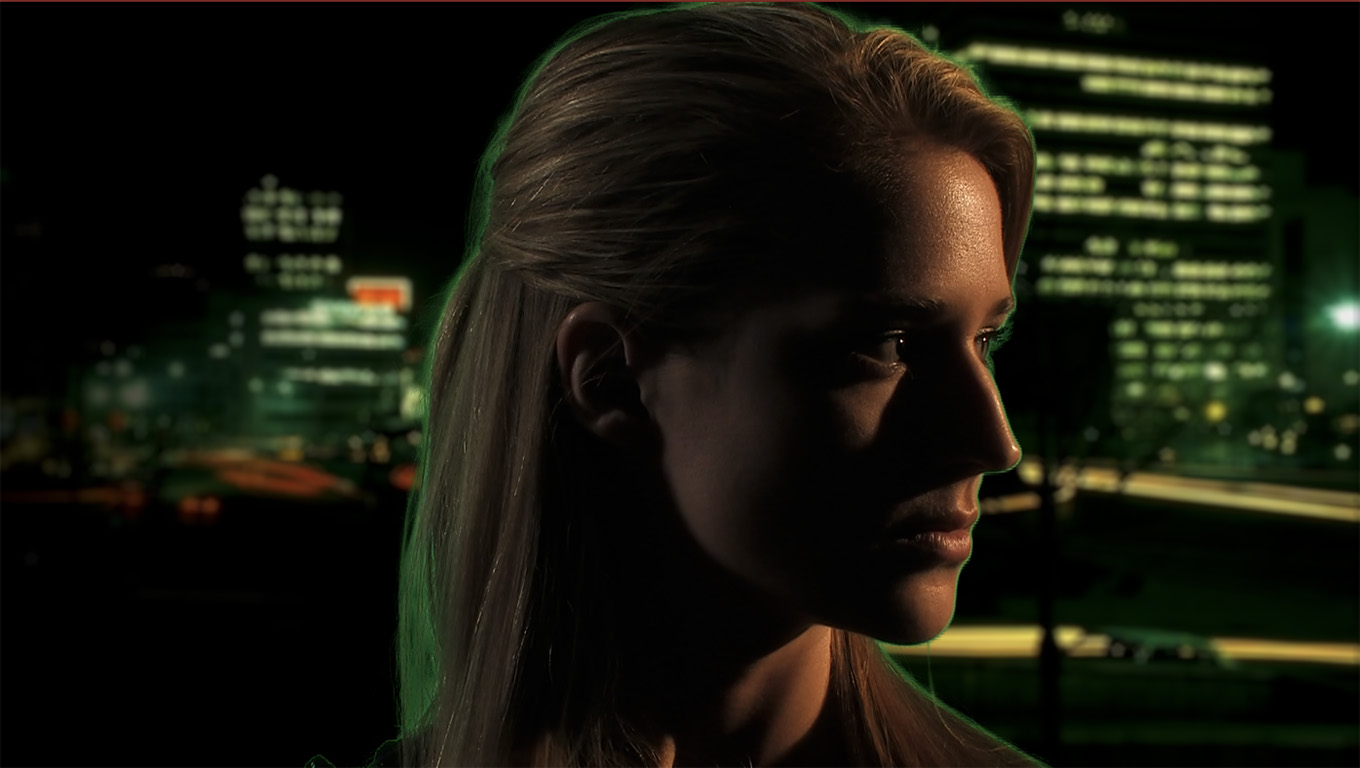
Instantly the new background appears.
NOTE: I adjusted the background by darkening it and adding a slight Lens Blur effect.
So far, OK, but there’s a green border around her face. This is the result of part of the image showing gray – a mix of old and new backgrounds.
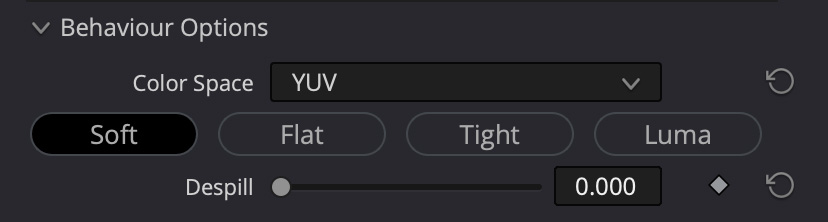
Click each of the four buttons below Color Space to see which creates the best edges on your key. The default is Flat. I decided to use Soft, because it looked slightly better. There is no one correct answer for all keys.
Adjust the Despill slider to remove the green edges.
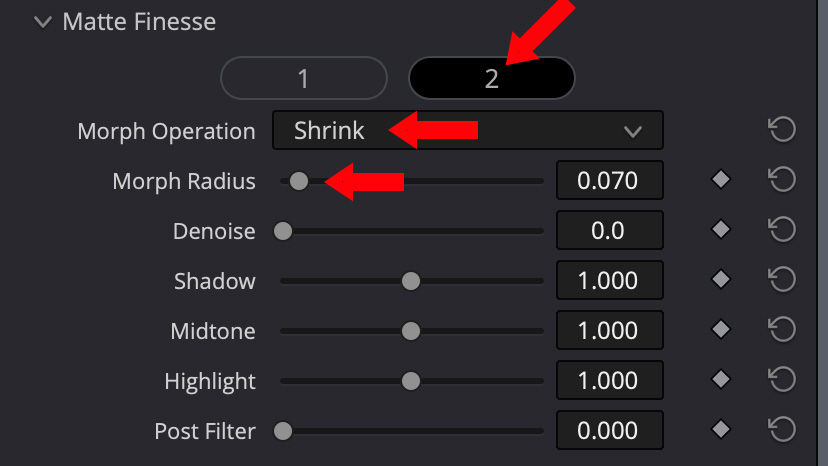
If you still have a bit of green edge, open Matte Finesse, click the 2 icon (top red arrow), change Morph Operation menu to Shrink (middle red arrow), then adjust Morph Radius (bottom red arrow) until your edges are clean, but the actor’s hair still looks good.
Done.
CREATE A TWO-COLOR KEY
Two color keys are used to transition between two different videos. Here’s an example of how to create one.
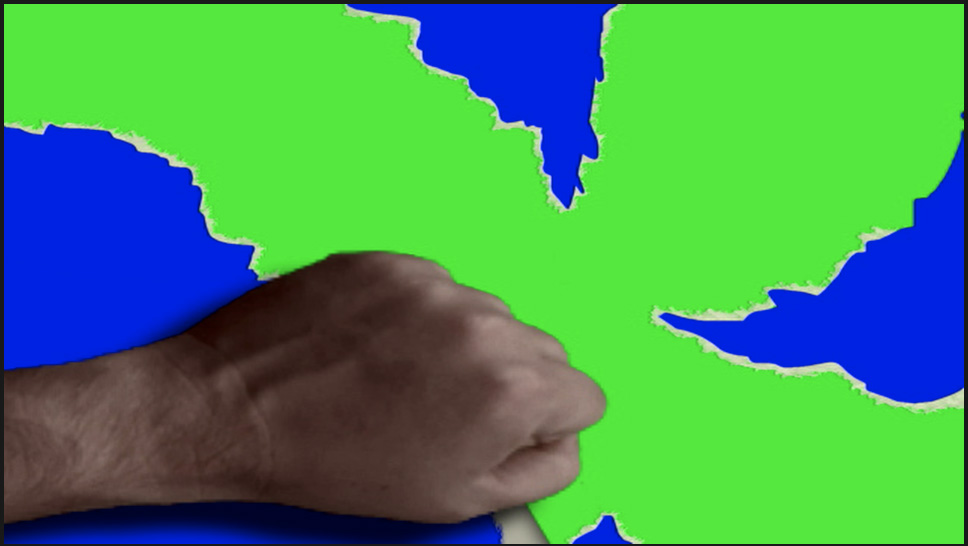
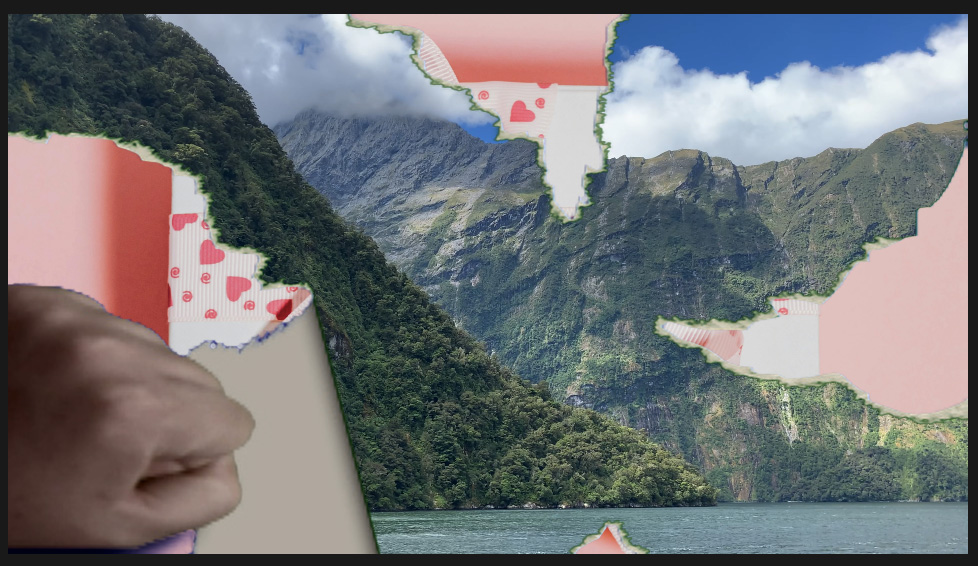
For this example, I’m using video of a hand opening a present. The blue background represents the packaging. The green represents what’s inside the package. I want to keep the hand, but replace the two background colors.
NOTE: I didn’t color grade the hand, because it wasn’t necessary to show this effect.
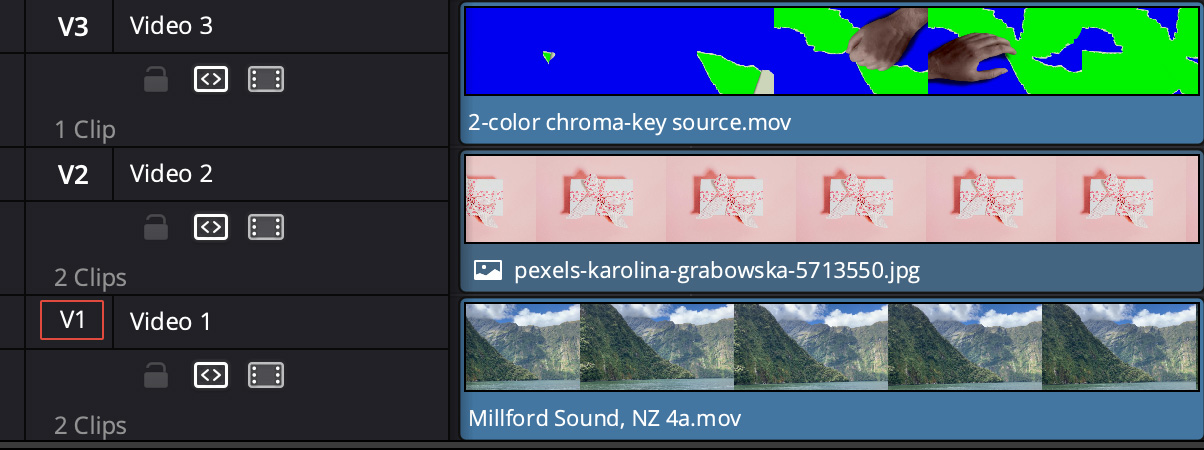
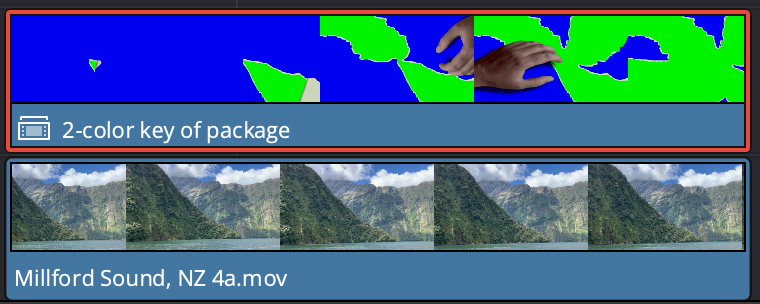
Put the shot you want to end with on Track 1, the interim shot on Track 2 and the 2-color chroma-key clip on Track 3.
Select the Track 3 clip and create a chroma-key as outlined above; except this time you are selecting the blue color, not green. When you are done, you should see the clip on Track 2 replace the blue background.

Here, we see his hand starting to peel back the blue paper. The green is not yet keyed out.
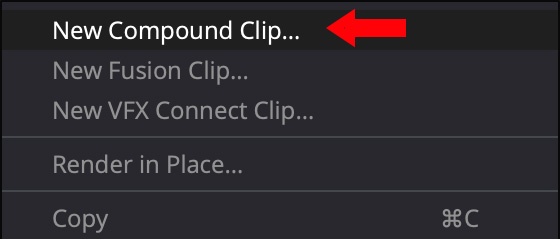
Select the clips on Tracks 2 & 3, then right-click them and choose New Compound Clip. (It will be the top choice in the pop=up menu.)
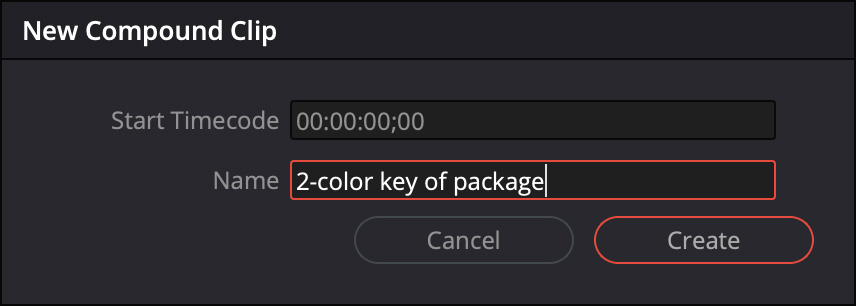
Give the compound clip a name that means something to you and click Create.
Instantly the top two clips collapse into a single, compound, clip.
Apply the 3D Keyer to that compound clip…
and, this time, key out the green as shown by the blue color-selection line (red arrow).
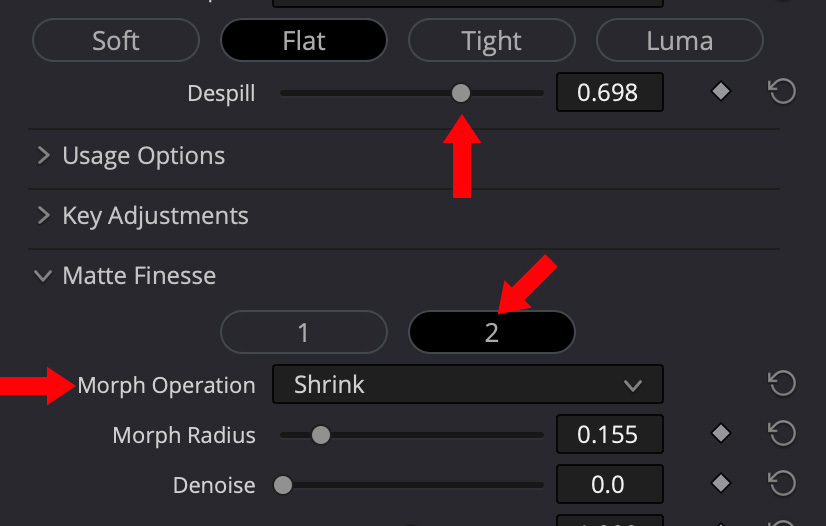
As usual, apply both DeSpill and Matte Fitness > Shrink. (Remember to click the “2” button to reveal the Shrink menu.)
Done.

2 Responses to Create a One- or Two-Color Key in DaVinci Resolve 20
Thanks Larry, super-helpful as always. Can I ask if there’s a way to mask the keyed area? All I seem to be able to find is the rectangular garbage matte, but there’s no way to draw your own mask and then keyframe it? Am I missing something? Premiere allows you to do just that, if the talent inadvertently waves their arms outside of the originally keyed area, so I wondered if Resolve had a feature that was somewhere else? Thanks Larry!
Nik:
Yes. these type of masks are called “garbage masks,” because they get rid of “garbage” at the edges of the image. Built-into the 3D Keyer are two: rectangle and ellipse, you can find them in the garbage mask section of the Meyer in my screen shots above. You can also use the Magic Mask 2 in “Faster” mode. You can also used trimming.
Larry