
[I re-discovered this effect while researching my webinar “Clip Speed Changes in Adobe Premiere Pro.”]
![]() A fit-to-fill edit combines an overwrite edit with a playback speed change. It takes a marked clip in the Source montior, then changes its speed to fit a specified duration in the timeline.
A fit-to-fill edit combines an overwrite edit with a playback speed change. It takes a marked clip in the Source montior, then changes its speed to fit a specified duration in the timeline.
The most common use for this is when editing clips to music. The musical beat often determines when edits need to occur, while the shot going into that spot may take a different amount of time to complete. A fit-to-fill edit solves that problem.
NOTE: Because a fit-to-fill edit changes the speed of a clip, it is not appropriate for any clip that has synced audio.
The process is simple: mark a clip in the Source monitor, mark a duration in the timeline where you want the clip to edit, then press the “secret key.”
Here are the details.
Drone images courtesy of Terry Holland, Northeast Drone Video (www.NorthEastDroneVideo.com)
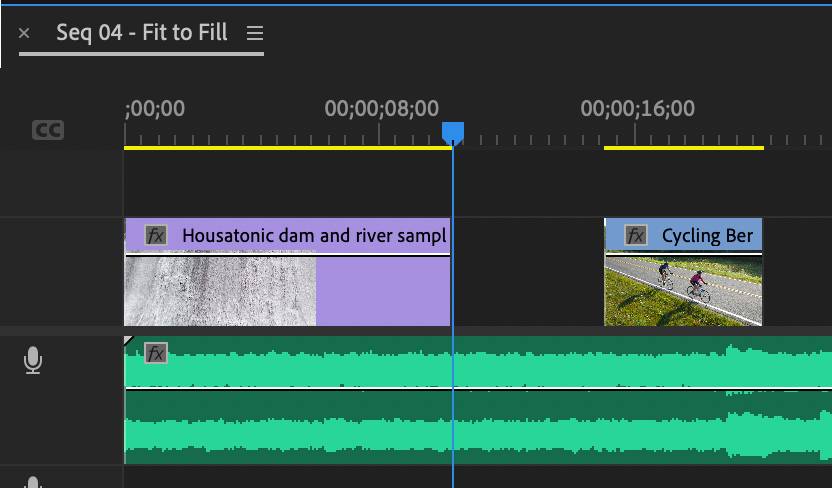
I first added a music clip in the timeline. Now I’m editing video to illustrate it. Two initial clips are added, but I left a gap where the second clip needs to go because it hadn’t been shot when I started. Now, it’s available.
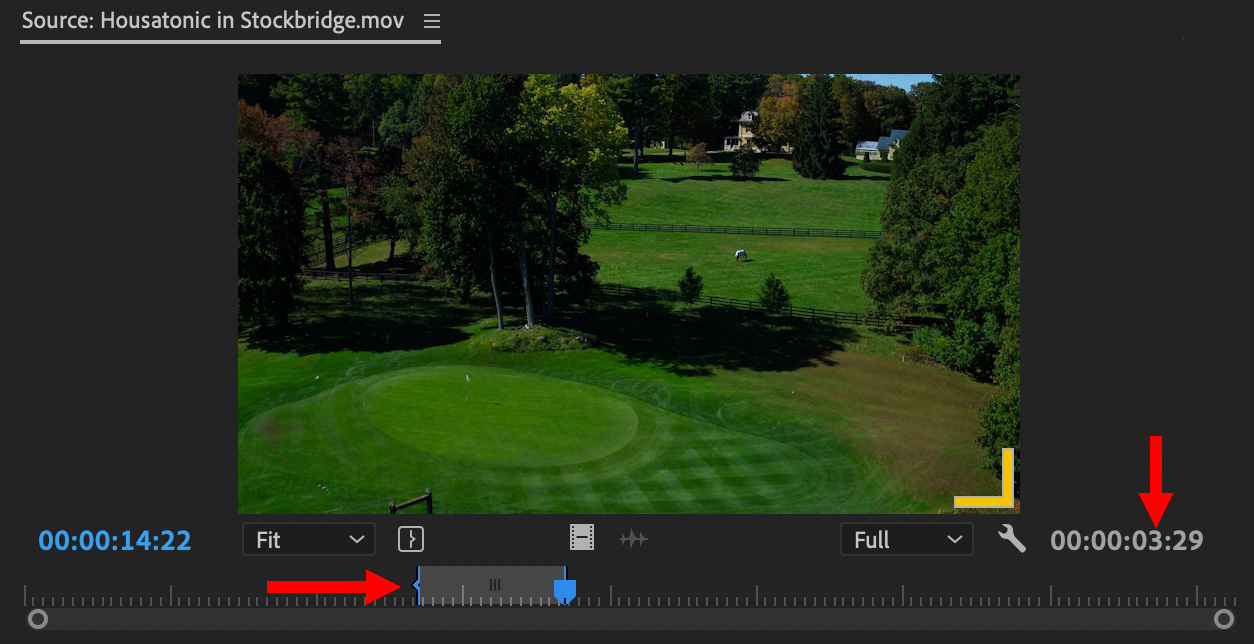
I opened the clip I want to insert in the Source monitor and marked an In and Out. Note that the duration is 3:29.
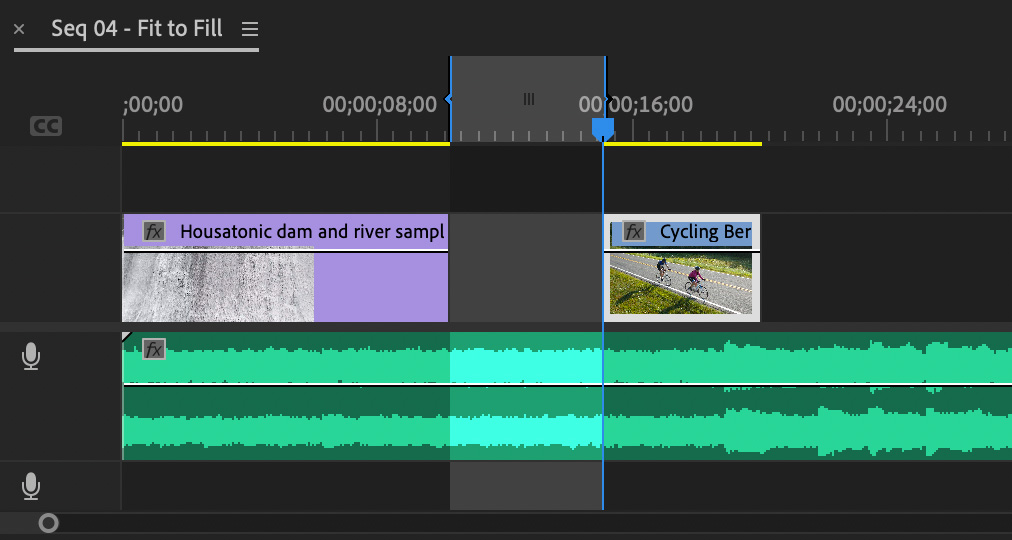
In the timeline, I also marked an In and Out where I want to insert the shot. In this example, the timeline duration is 4:25. Hmm… I don’t have enough source video to cover it.
That’s where the fit-to-fill edit comes it: It changes the speed of the source clip (faster or slower) so that it fits into the timeline In and Out.
NOTE: A fit-to-fill edit requires an In and Out marking the source clip AND an In and Out marking where it goes in the timeline.
Now – and this is the secret part – to perform the edit, press the period [ . ] key. Duh, just like every other overwrite edit.
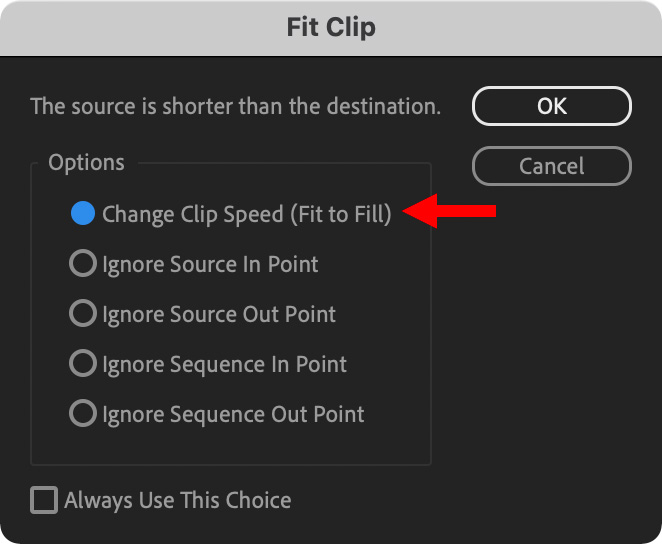
The Fit Clip dialog window appears. Click the radio button next to Change Clip Speed, then press OK.
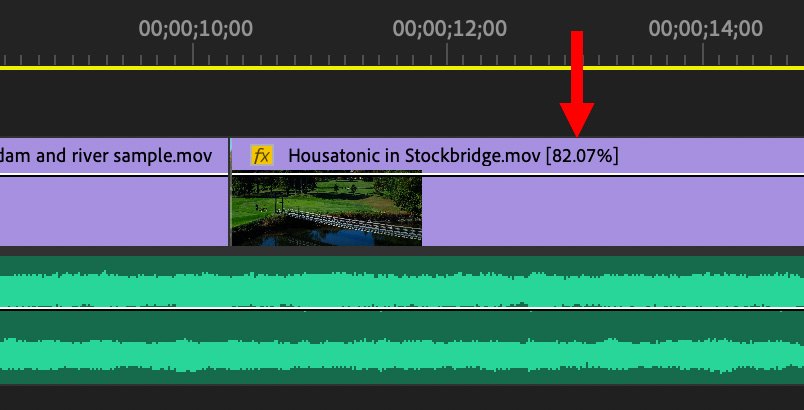
The source clip (Housatonic in Stockbridge.mov) was slowed 82.07% to fit the timeline duration.
Done!
ADDITIONAL THOUGHTS
If you trim a clip after its speed was changed, the duration of the clip changes, but not the speed. Clip speed does not adjust dynamically. However, you can change the speed of any clip using the Clip Speed / Duration window (Shortcut: Cmd + R), but that’s a technique for another tutorial.
A fit-to-fill edit is simply a special form of an overwrite edit, where the speed of the inserted clip changes to match the marked duration in the timeline.
6 Responses to Create a Fit-to-Fill Edit in Adobe Premiere Pro
Ive done everything (in out source and in out timeline BUT PRESSING (.) DOES ABSOLUTELY NOTHING ! NOTHING! what the hell am I doing wrong ?
Smile.
Probably selecting the wrong thing.
Send me a screen shot – larry@larryjordan.com.
Let’s see what’s going wrong.
Larry
Same… pressing period does nothing (perhaps because I have my own keyboard shortcut map, though I never assigned the period to anything different). I have done this before, many times, and I always forget the shortcut when I need to perform a fit to fill. It was more intuitive in FCP.
In case anyone else is looking for an answer to Joe’s issue…the period key should be mapped to overwrite. And then navigate to Preferences > Timeline and at the bottom press “reset fit clip dialog” and it will function for you after that.
Here is a video that shows this: https://www.youtube.com/watch?v=x7hOwJwT_Rk
There is a chance if you’re using an Avid logic keyboard on a Mac, that you will not have a functioning “.” key. So map “overwrite” to a different button and pressing that should activate the “fit clip” dialog.
Thank you to Larry Jordan for being a great Premiere guru!
Ugh, back again because it’s been this long since I needed to make a fit to fill edit. And once again, I forgot how to do it. Adobe should make it an option in when you drag a clip to the program window…
Here’s the deal… I can’t use the period because of the way my keyboard preferences are set up, but that’s not the issue. Generally where’s there’s a keyboard shortcut, there’s also a menu command for the task. I can’t find it if it exists.
Now after getting some trial and many errors, I was having no success, even after finding the steps and doing them form the Adobe manual on 4 point editing…
So what did I discover? You need to grab the clip from your bin, then edit the in/out in the source monitor. I tend to (and forget that it does’t work) grab a clip from the timeline and then edit my in/ out in the source monitor, but when I hit the insert or overwrite buttons nothing happens. So you have to grab the clip from the bin. Once you do that, the option menu pops up automatically when you choose insert or overwrite in the source monitor.
I tend to do a lot of editing within the timeline, so it’s just a different mindset.
I hope I remember this for next year when I need to make that random one time fit to fill edit again 🙂
Joe:
Thanks for sharing your workaround.
Larry