
![]() Cast shadows, unlike drop shadows, are not simple objects. They vary in distance from the object, blurriness, and size when compared to the source object. However, they are fairly easy to create in Motion.
Cast shadows, unlike drop shadows, are not simple objects. They vary in distance from the object, blurriness, and size when compared to the source object. However, they are fairly easy to create in Motion.
NOTE: I’ve written about creating cast shadows in Final Cut, where there is an effect we can use. This time, I want to show how to create drop shadows from scratch in Motion.
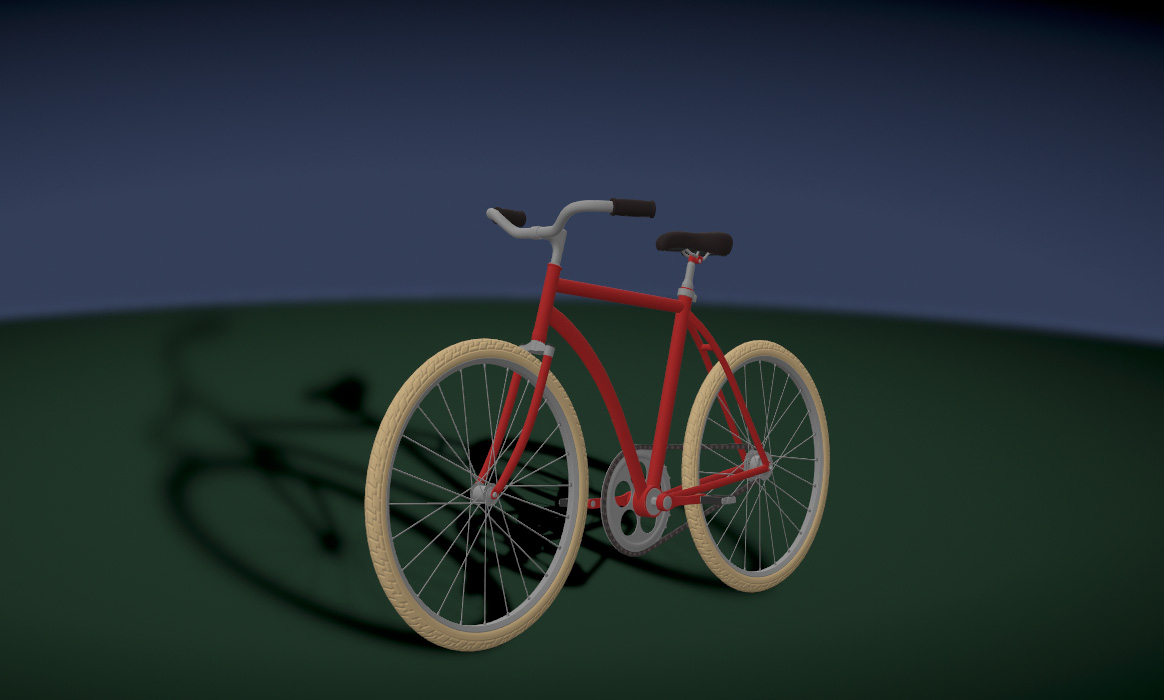
Here’s where we are going. A 3D object – a bicycle – with a cast shadow. Here are the basic steps:
NOTE: This technique works with any object, 2D or 3D.
CREATE THE BACKGROUND

Here’s the background: Library > Content > Backgrounds > Gradient Stage 08.
ADD THE SOURCE ELEMENT

Add a bicycle (Library > 3D Objects > Transportation > Bicycle), or any object you want, actually.

Using the 3D Transform tool (Shortcut: Q) rotate the bike and move it lower in the frame.
NOTE: You can position your element wherever you want, it just needs to fit with the background and have room for a shadow.
CREATE THE SHADOW

Control-click the Bicycle element in the Layers panel and choose Duplicate. This duplicates the bike image and places it one layer below the source object.

Click the visibility box for the source bike to make it invisible. Now, you can see the duplicated layer below it. Select the duplicated element. Apply Filters > Color > Threshold. This converts all the colors of the image to (mostly) black.

Using the 3D Transform tool, click the small circle that generates a red loop, and lean the shadow back. As you do, you may see parts of the shadow displaying highlights. Don’t worry, we’ll fix that in a couple of steps.

Again, with the 3D Transform tool, drag the top of the box to stretch the shadow.

In the Layers panel, select the Threshold filter. Then, use Inspector > Filters > Threshold to adjust the Threshold setting until the shadow is solidly black.

Select the shadow bike, again, and apply Filters > Blur > Variable Blur. Adjust the settings or this effect in the Inspector until the edge of the shadow that touches the source is in focus, with the shadow getting blurrier as it extends away from the source.
Turn on the source bike image, and you are done.
SUMMARY
This sounds like a lot of work, but it only takes a minute or two, once you understand the procedure. Because the shadow and bike are separate objects, you can animate them differently.
You can also change the color of the shadow, to simulate different lights hitting the source, by applying Filters > Color > Colorize to the bike’s shadow.

One Response to Create a Cast Shadow in Motion
How smart! Thank you,