
 [ Updated October 18, 2025, with additional explanation of Position settings. ]
OTHER REFERENCES
Barton writes:
I would like to create an even, constant rate of speed where I am panning across an image but also zooming in. For example, after adding keyframes, as the pan/zoom travels leftwards and up becomes increasingly fast, starting out quite gradually.
My assumption is that I need to add sets of keyframes along this path from Point A to Point B. Give that these 2 points are defined by numbers as to their Position, is there a mathematical equation or formula that would ensure a smooth pan across this path by selecting the values for those intermediate keyframe Positions (assuming I am right as to how this is done)? It seems like that should be the case.
Larry replies: Barton, not to panic. No equations are necessary.
What you are seeing is an artifact of how digital media zooms. When starting with a wide shot, the zoom is moving across a large number of pixels, which makes the move feel “slow.” Then, as it gets closer, it is moving across a smaller and smaller number of pixels, making the move feel faster.

Speeds vary due to changing the number of pixels being manipulated.
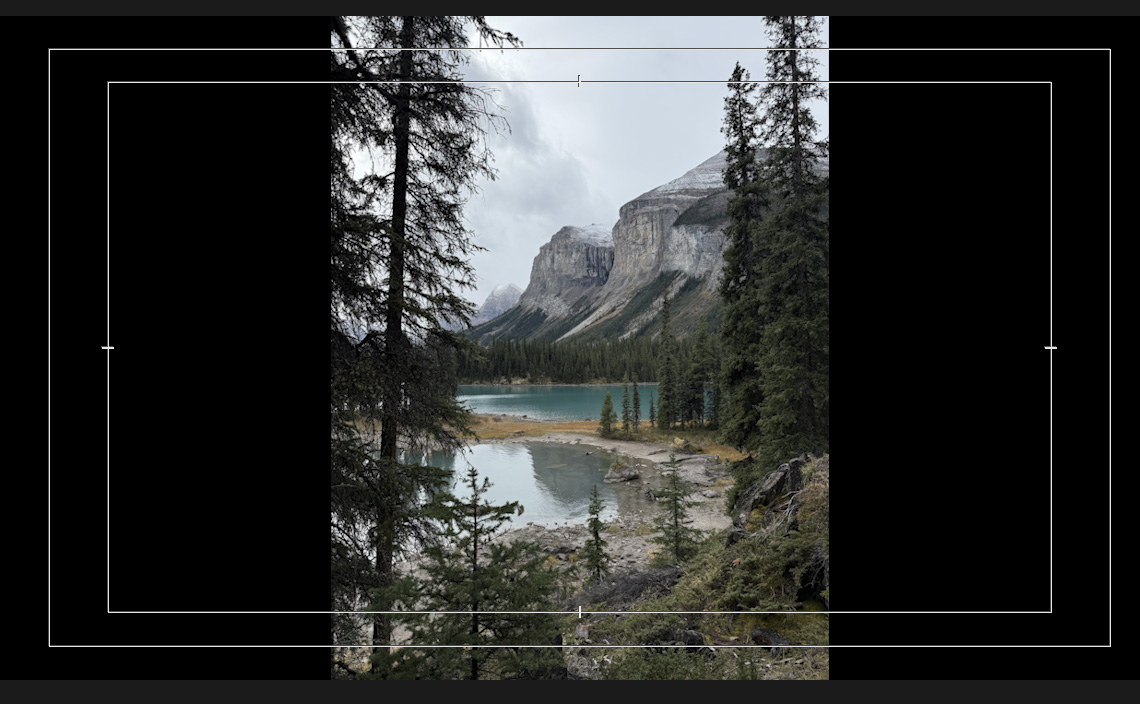
Here’s an example. Starting with the red box, the image contains 90,000 original pixels. As Premiere zooms in, the number of pixels rapidly reduces to 2,500 original pixels in the blue box.
In terms of actual magnification, the speed is constant. But, in terms of numbers of original pixels in the shot, the effect speeds change as the number of original frames contained in the frame change.
NOTE: What the zoom also does is increase the size of each original pixel so that the remaining image still fills the frame, even though there are fewer original pixels in the shot. (This is why zooming in makes images look blurry.)
CAN THIS BE FIXED?
Yes. We can manually add acceleration or deceleration to each keyframe to change the speed leaving (“ease out”) or arriving (“ease in”) at a keyframe.
NOTE: The amount of acceleration varies depending upon how far into the image you are zooming, the speed of the zoom, and the number of pixels in the original image.
Here’s my source image – a 12 megapixel vertical photo of Malign Mountain east of Spirit Island in Malign Lake near Jasper, Alberta, Canada.
I want to start at the bottom of the photo, then move up and in.
NOTE: Why, yes! This is a photo from my recent Canadian vacation. How kind of you to ask.
Click to see larger image.
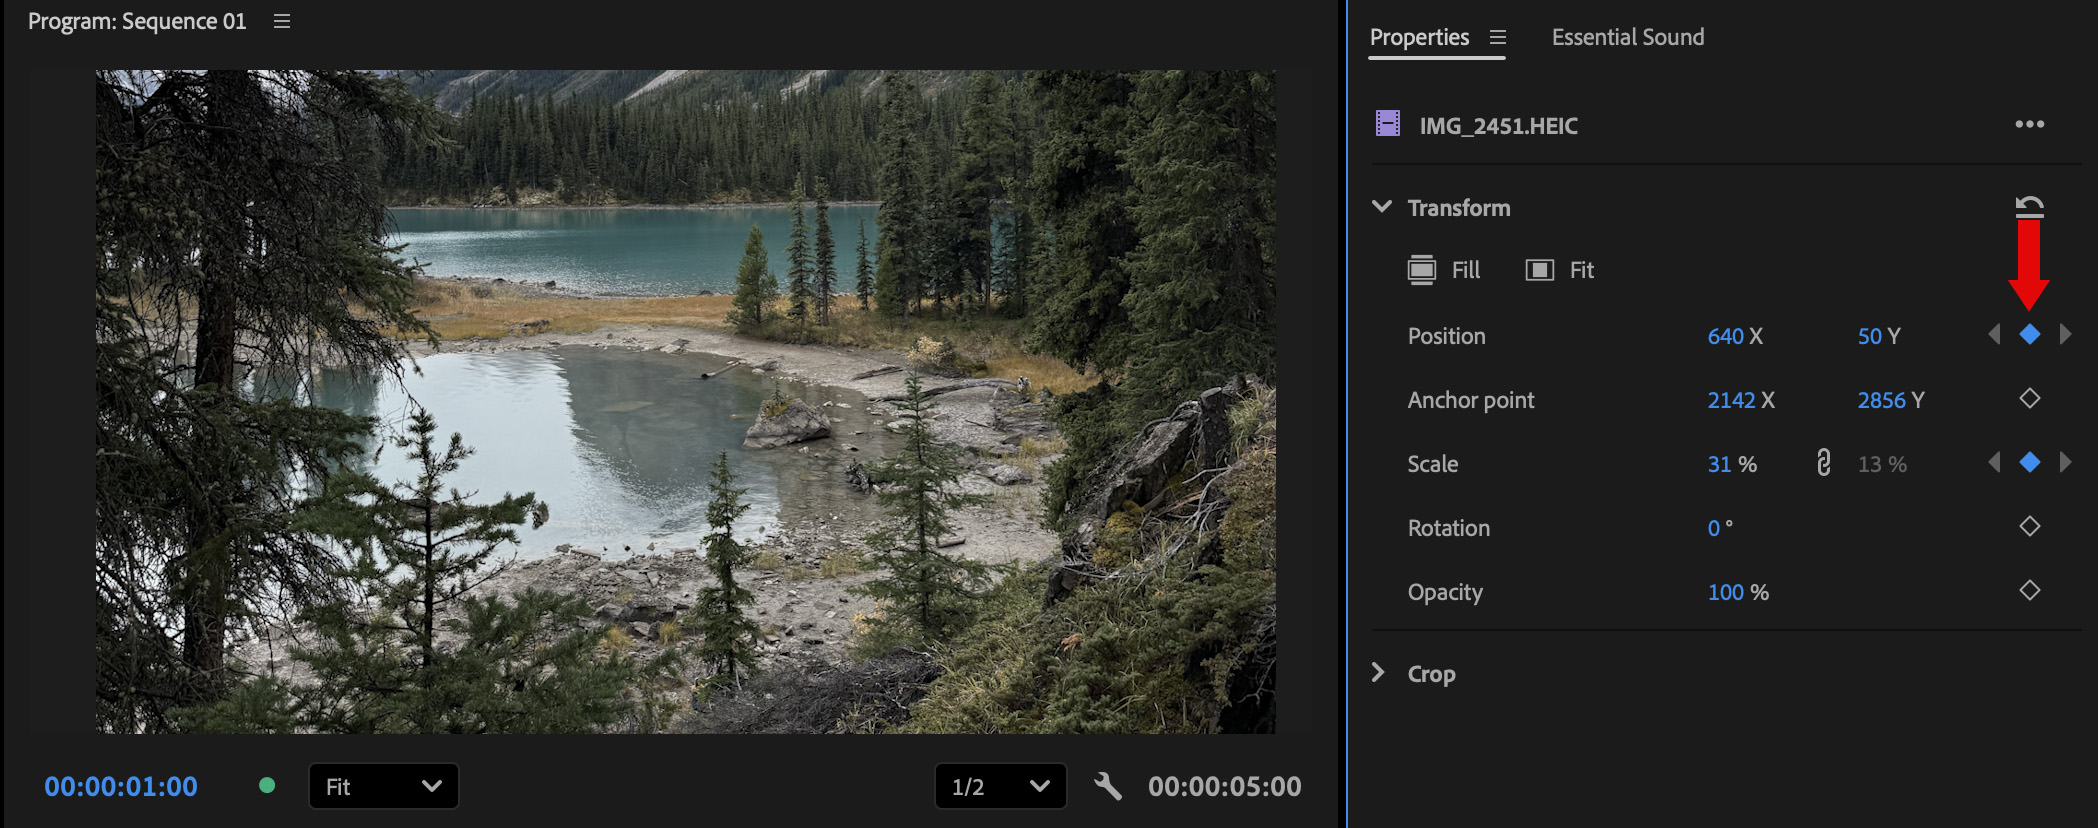
Using the Properties panel, I set the opening position for the image, then, placing my playhead in the timeline where I want the move to start, I set keyframes for both Scale (size) and Position (red arrows).
NOTE: A solid diamond indicates a keyframe exists for that setting on that frame. A hollow diamond indicates no keyframe is present.
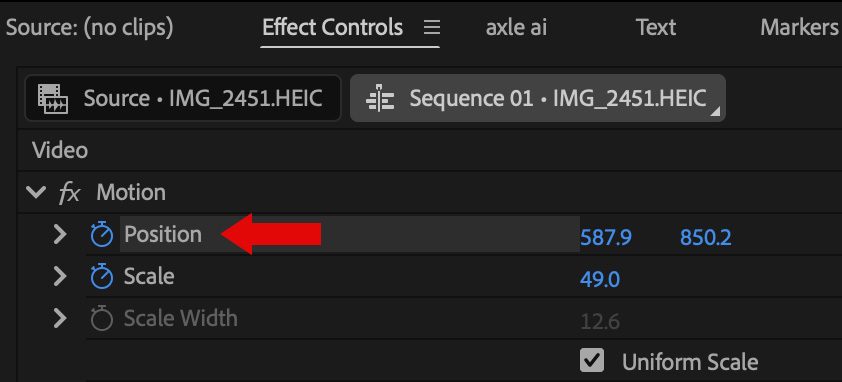
In the Effect Controls panel, I selected Position to reveal the on-screen controls in the Viewer.
UPDATE: Position settings determine the placement of the center of the image within the frame. Position 0,0 places the center of the image at the top left corner of the program monitor. For a 1080 image, positioning the center of the image in the lower right corner of the program monitor would create Position settings of 1920,1080. For images larger than the frame, there could be negative numbers because the image size is larger than the frame size.
Moving the image up or to the right increases Position settings. Moving down or to the left decreases them.
Click to see larger image.
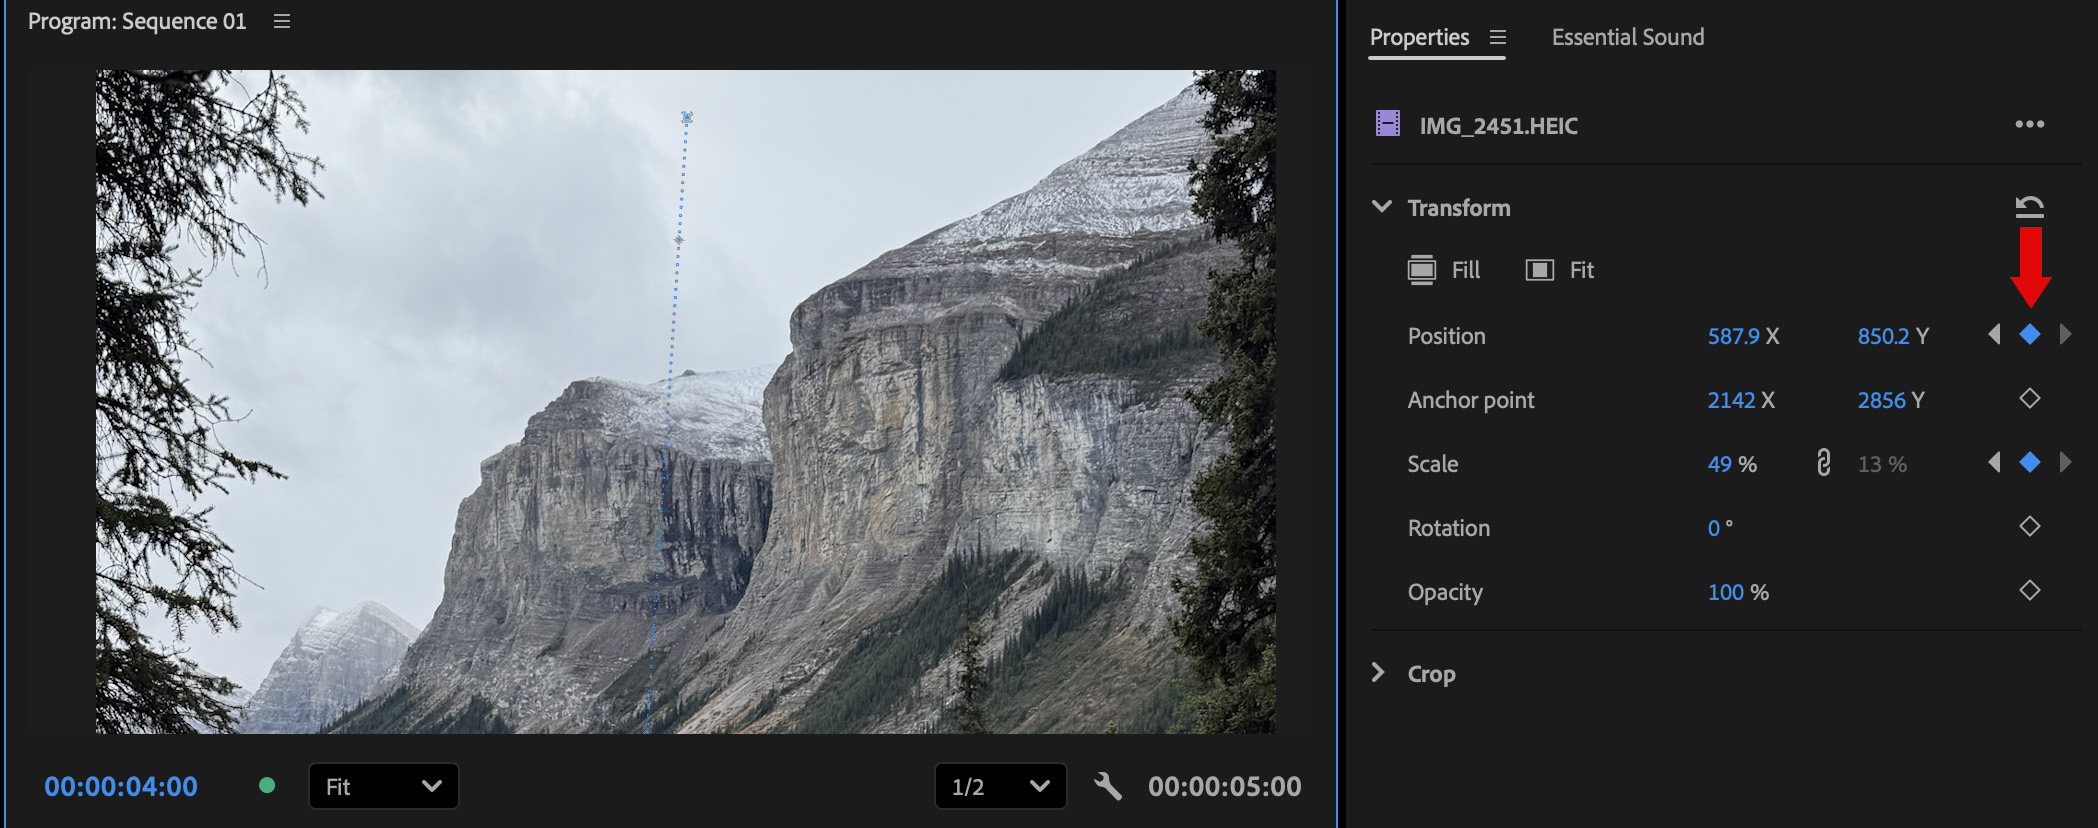
Moving the playhead to where I want the move to stop, I used the on-screen controls and Scale setting to create the final position of the image (red arrows).
NOTE: Once you set a keyframe for an Effect parameter, like Position, anytime you change that setting new keyframes for that parameter are created automatically.
When the timeline is played, the image movement is jerky due to not being rendered. But, the speeds also change.
Click to see larger image.
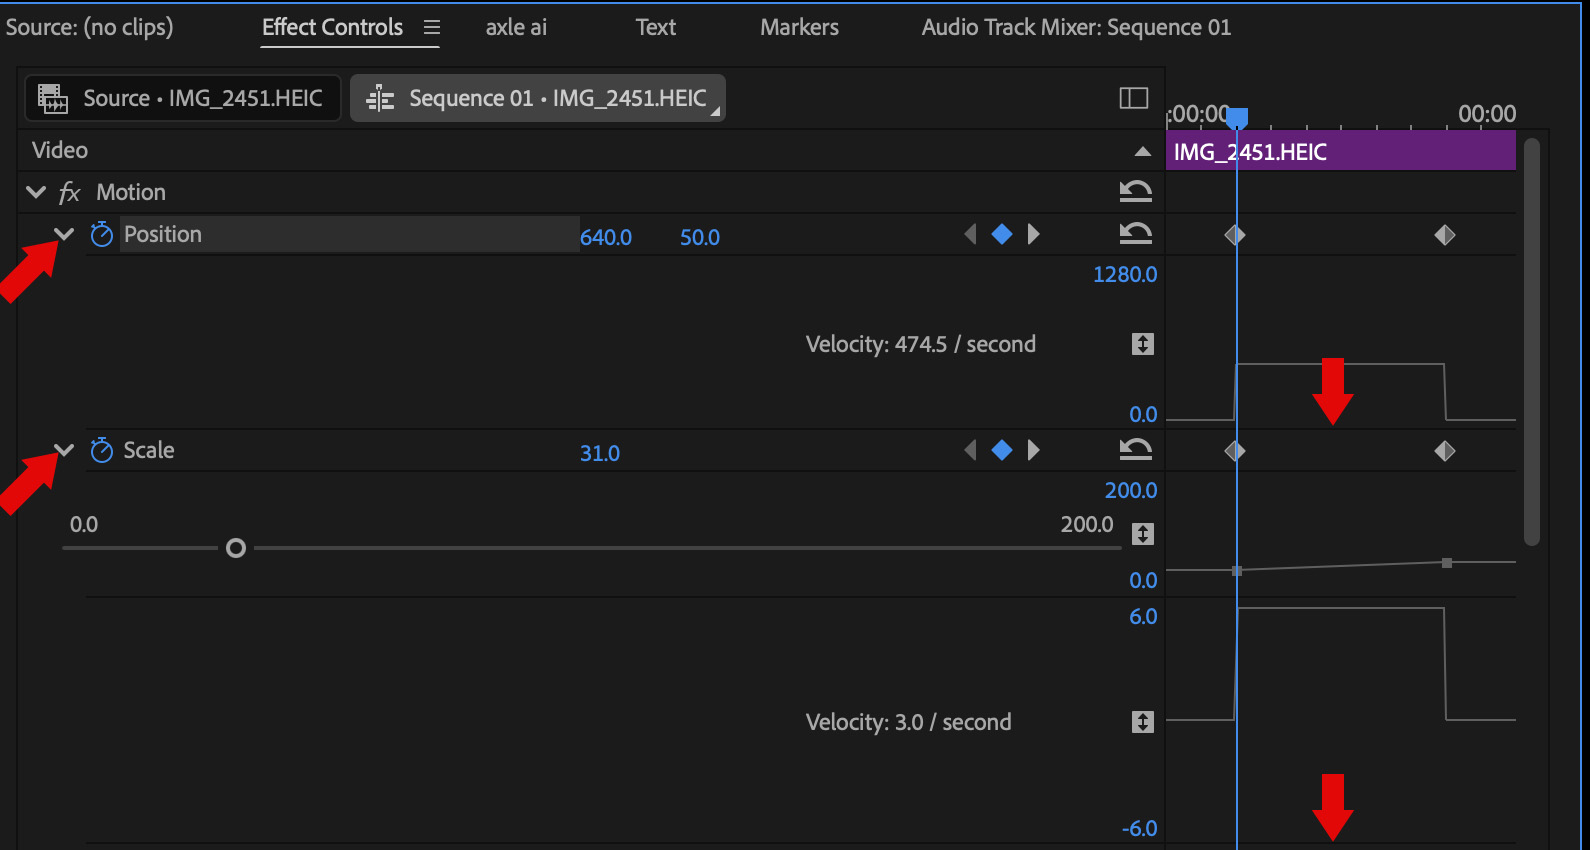
One of the new features in Premiere is improved keyframe handling. Twirl down the right-pointing chevrons (left red arrows) to reveal additional keyframe control settings for each parameter.
In the Effects Control panel, drag the dark horizontal line below Position down to expand the view. Then, do the same for Scale.
NOTE: Yes, this dark horizontal line is impossible to see. Also, you can only drag in the keyframe section (right red arrows) NOT where the numbers are displayed. This is unnecessarily tricky, but keep playing and you’ll find the right place to drag.
Put the cursor in the Effect Controls panel, then press Tilde ( ~ ) to expand the keyframe panel to fill the monitor screen. Press Tilde again to shrink it back down.
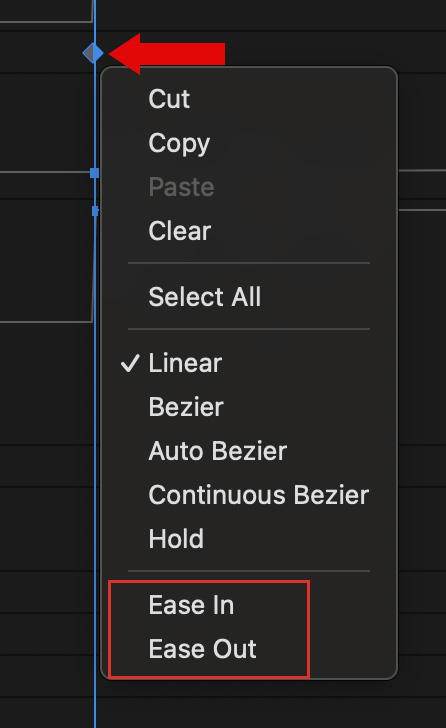
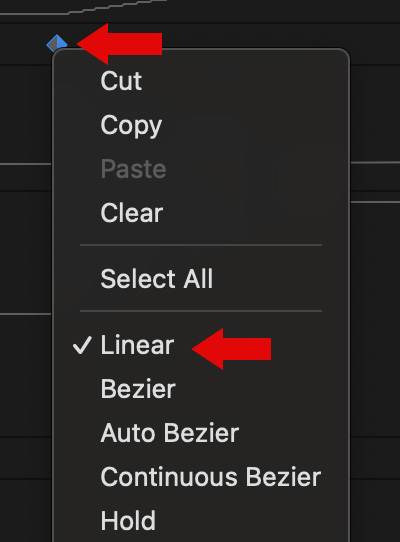
Drag a keyframe (diamond icon – red arrow) horizontally to change its position. Right-click a keyframe (red arrow) to display an acceleration menu. To change the speed LEAVING a keyframe, choose Ease Out. To change the speed ENTERING a keyframe, choose Ease In.
NOTE: This menu appears for the Scale keyframe. Linear means no change in acceleration. Ease In / Out allow changing just one direction. Bezier is the best option when you want to make multiple changes.
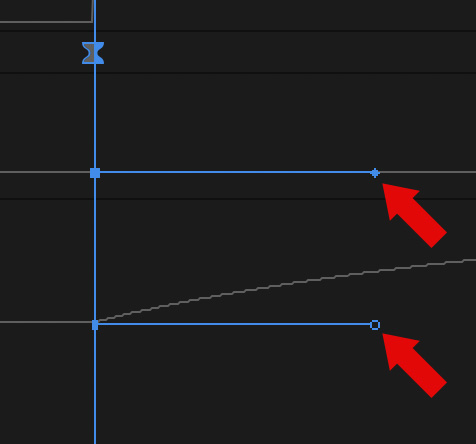
Adjust the blue control dots (red arrows) at the ends of these handles to vary the acceleration for each keyframe.
NOTE: The easiest thing is to play with these handles and see what works best for your move.
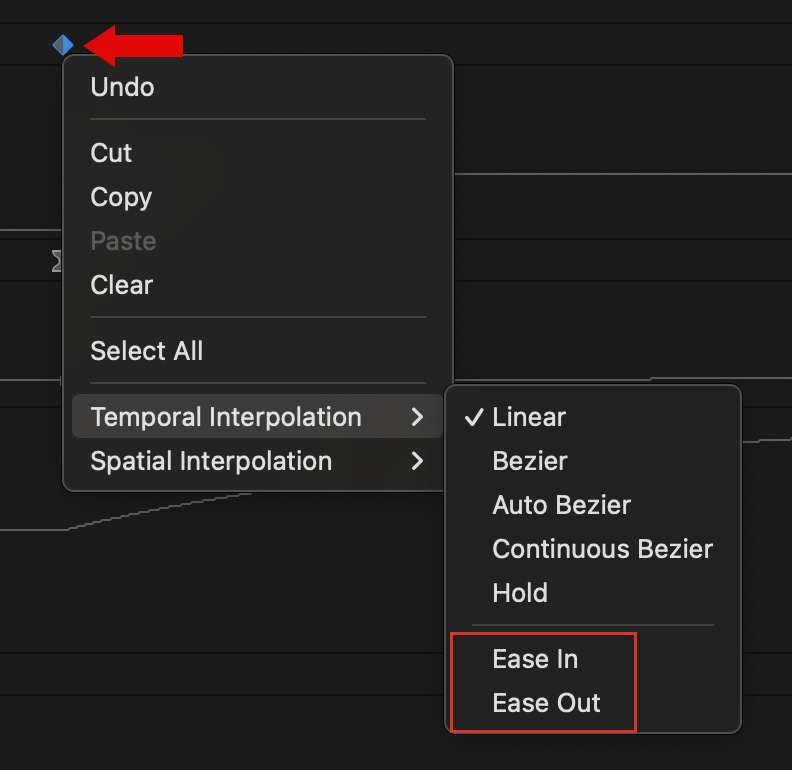
This menu appears for Position keyframes with two addition choices: Temporal and Spatial.
Temporal varies timing, spatial varies position. While you can modify each of these individually, you may get the best results setting both of these to the same setting: Ease In, Ease Out or Bezier.
To reset a keyframe, right-click and select Linear. This is very useful if settings get so screwed up you have no idea where you are. Once reset, try again until you find settings that work best for you.
SUMMARY
Every image is different but, in general, switching these from Linear to Bezier is often the only setting you need to change.

2 Responses to Add and Modify Keyframes in Adobe Premiere Pro 2025
Any possibility of making a video of the above tutorial?
Lori:
Yes, but not for a few days.
Larry