
Adobe Prelude CS6 is a brand-new application for Windows and Mac that shipped last week with the rest of the Adobe CS6 update. According to Adobe’s website: “Adobe® Prelude™ CS6 software streamlines your production tasks. Ingest nearly any file-based format and begin logging immediately, creating searchable markers and other temporal metadata that flow through post-production, so you can work faster and stay organized.”
This description doesn’t do it justice, however. I’ve been working with it for the last few weeks and I want to share my observations with you.
WHAT IS PRELUDE?
Prelude is designed to speed the review, ingest, logging, selection, and export of tapeless media. Specifically, it allows one person to review and capture all footage, build a selects reel, and INSTANTLY export it into Premiere Pro CS6, or Final Cut Pro 7, so that the editor can begin editing immediately.
Because Prelude seamlessly integrates with both Premiere Pro and Final Cut Pro 7, it can be used either in a team environment or where one person is doing all the work.
Imagine you have a TON of footage to review – think reality or documentaries. Why tie up an editor and an expensive edit suite when you can have a production assistant, associate producer, or producer reviewing the initial footage and building a collection of selected clips.
Someone using Prelude is not editing, they are collecting and organizing clips, and putting them all into one spot for the editor. This ability to off-load the screening and selection of clips can make the entire editing team more efficient.
DEFINITION: We “capture” clips from tape, “ingest” tapeless media, and “import” clips which are already readable on the computer.
THE PRELUDE WORKFLOW

With an interface similar to other Adobe applications, Prelude is built around a straight-forward workflow:
(By the way, special thanks to Fran and Miles Hale of Model Railroad Builders for the use of their footage – www.modelrailroadbuilders.com.)

There are four workspaces, or interfaces, in Prelude:
Each workspace can be customized by moving tabs and rearranging windows, as with any other CS6 application.
INGEST

The Ingest workspace allows you to review clips before capture and transfer them to your hard disk from the camera, card, or hard disk where the source masters are stored.
You can ingest entire clips, or portions of a clip. You can provide a link to the media, copy it to a different destination, or transcode the media into an entirely different format.
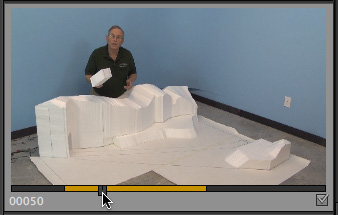
To ingest a clip, click the small checkbox in the lower right corner of each thumbnail. To ingest a portion of a clip, click inside the image and use the playhead to set the In and the Out as you would in any editing program.
When you have selected all the clips you want to ingest, click the Ingest button in the lower right corner.
NOTE: Ingesting a portion of a clip requires that you transcode — convert — it into a separate clip for editing. The best transcode options would be ProRes, DNxHD, or Cineform, however these require you to create a custom transcode setting in Adobe Media Encoder. This is not difficult, but it is an extra step in a separate program.
SIDEBAR: TRANSCODE LIMITATIONS
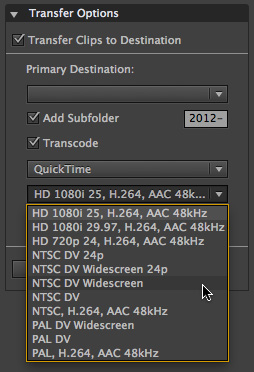
Prelude allows you to transcode your video into any format supported by Adobe Media Encoder (AME). However, the HD presets supplied with AME are optimized for web distribution, not editing, which I find to be a limitation and hope Adobe fixes in the next update.
If you plan to edit your media in Premiere, the fastest option is to ingest entire clips and use subclips to create smaller clips. If you plan to edit in Final Cut Pro, I strongly recommend you transcode your media into ProRes during ingest, because it will make moving clips into FCP very, very simple.
LOGGING CLIPS
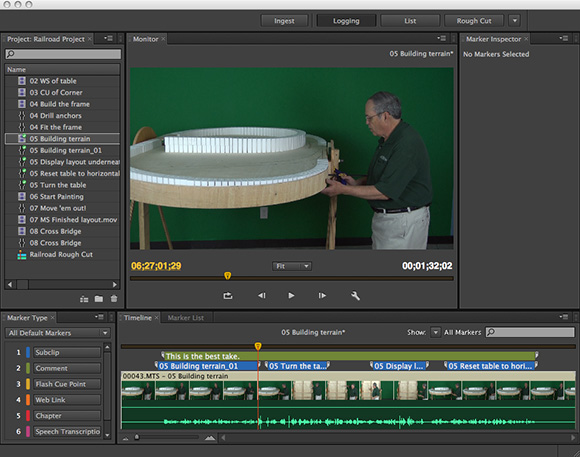
Once you have your clips ingested, it’s time to log them. Switch to the Logging workspace and mark the best regions of each clip. This is done using markers.
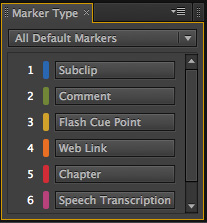
There are six marker types in Prelude:
By far, the most powerful and useful marker is a subclip. These are used to indicate shots that you want to send to the editor. Both clips and markers easily import into Premiere or Final Cut.
NOTE: Chapter markers that are set in Prelude won’t export to a QuickTime movie in a form that Compressor or DVD Studio Pro will read. You are better off setting chapter markers in FCP during your edit, just prior to final output.

The key point to remember about markers in Prelude is that they all have durations. For instance, here, in the Timeline, I’ve added four subclip markers (blue) and one comment marker (green). Notice that markers can easily overlap.
NOTE: To record markers that you’ve added, modified, or deleted from a clip, save the clip (Command+S). Each subclip appears as its own icon in the Project panel. Subclips can be named as you wish, however, in this example, I began each subclip name with the name of the source clip so they would sort next to each other.
BUILDING A ROUGH CUT
When you are done reviewing and logging your clips, its time to build a rough-cut.
A rough-cut is not an edit. It is a collection of selected clips that are sent to the editor for editing. (Think of this as a “selects” reel.) This ability to create a rough-cut showcases the true power of Prelude: an editorial assistant can review, log, and collect the best clips; then send the entire collection of selected clips to the editor to shape into a story.
As we increasingly work with massive amounts of footage, having the ability for initial screening to be done outside the edit suite offers a huge time-savings.
Select File > Create Rough-cut (Command+N). Rough-cuts are very small data files that can be named anything and stored anywhere. However, don’t lose them, as they are essential for exporting your clips to Premiere or Final Cut.
Double-click the rough-cut icon to open it in the Timeline. To see more of the Rough-cut, switch to the Rough-cut workspace.

Drag the clips – and subclips – you want to send to the editor into the Rough-cut. They are added in the order you selected them, as you can see from the screen shot above.
NOTE: Cool shortcuts. Select a clip by clicking it. Press [comma] to move it to the left or [period] to move it to the right.
Your goal in creating a rough cut is not to edit the piece, nor even to get clips in the correct order – though you can – but to assemble all the good takes in one spot so the editor doesn’t have to look very far to find the clips she needs.
Select File > Save to save the rough-cut before going on to the last step.
SENDING FILES TO PREMIERE PRO CS6
Moving files from Prelude to Premiere Pro CS6 (but not earlier versions) is unbelievably fast. Select the rough cuts and clips (you can send more than one) you want to send and select File > Send to Premiere Pro.
Instantly, Premiere Pro starts up and your clips are transferred from Prelude to Premiere. (If Premiere is already running, the transfer is essentially instantaneous!)
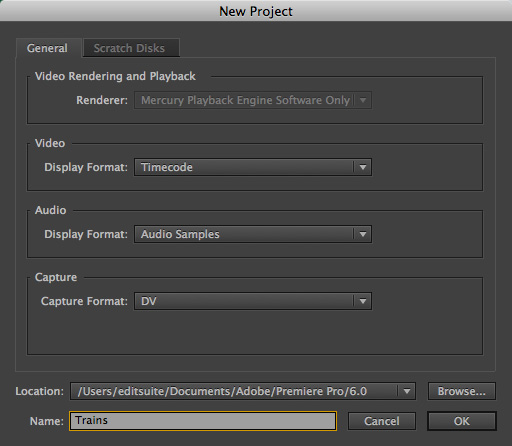
Fill out the New Project dialog that appears when Premiere opens and click OK.
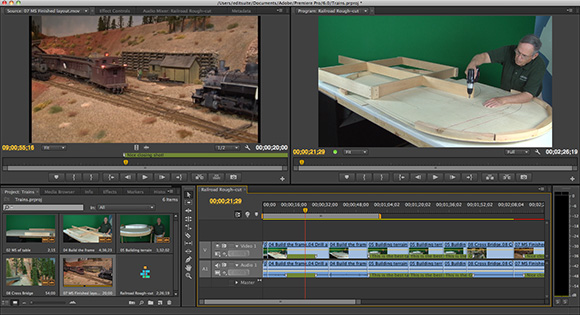
All your selected clips and rough-cuts immediately appear in Premiere, ready to edit, as you can see from the screen shot above.
SUMMARY
There are many things I like about Prelude:
Earlier today, I posted a complete video training series that shows you exactly how Prelude works. If you are considering adding this software to your workflow, this training gets you up to speed in two hours. Click here for the details.
If your goal is to work more efficiently with tapeless media, especially as part of a team, you need to look into Prelude CS6.
3 Responses to First Look: Adobe Prelude CS6
Larry,
Have tried Prelude is fine but have had problems with the ftp function exactly as you do in Premiere.
This is a great opportunity for any software developer to look at this model and adapt it to work in other areas maybe stripping out some of the clunky stuff. Great idea and hopefully some bright chap/company will get this sorted then I would be perfectly prepared to shell out up to say £50.
Maybe Adobe should think about “unbundling” this as it would be a great advert for their software offerings introducing people to Adobe.
Russ:
I also agree that Prelude should be available separately.
Larry
Larry,
BTW. Thanks for all the detail you are putting in to these articles..A lot of work for you and very interesting for us out here to read.
Cheers,
Russ