 Katie asks:
I’m going through my project to make sure that all of my levels are within 0 and 100 to ensure a successful QC pass. However, when I put broadcast safe on my timeline clips, once the clip renders, some of the RGB parade levels still sneak past 0/100, and some of the Luma as well…. I love the way the movie looks (color, contrast, whites and blacks). I just want to make sure I don’t get stuck in QC hell. Please help!
The basic problem is this: For all media work that does NOT go to the web, SD and HD video levels (Rec. 601 and 709) must be equal to, or less than, 100 IRE. However, most cameras today shoot video levels that are brighter than this. Which means that we need to correct these levels – keep them “legal” – during the editing or color grading process.

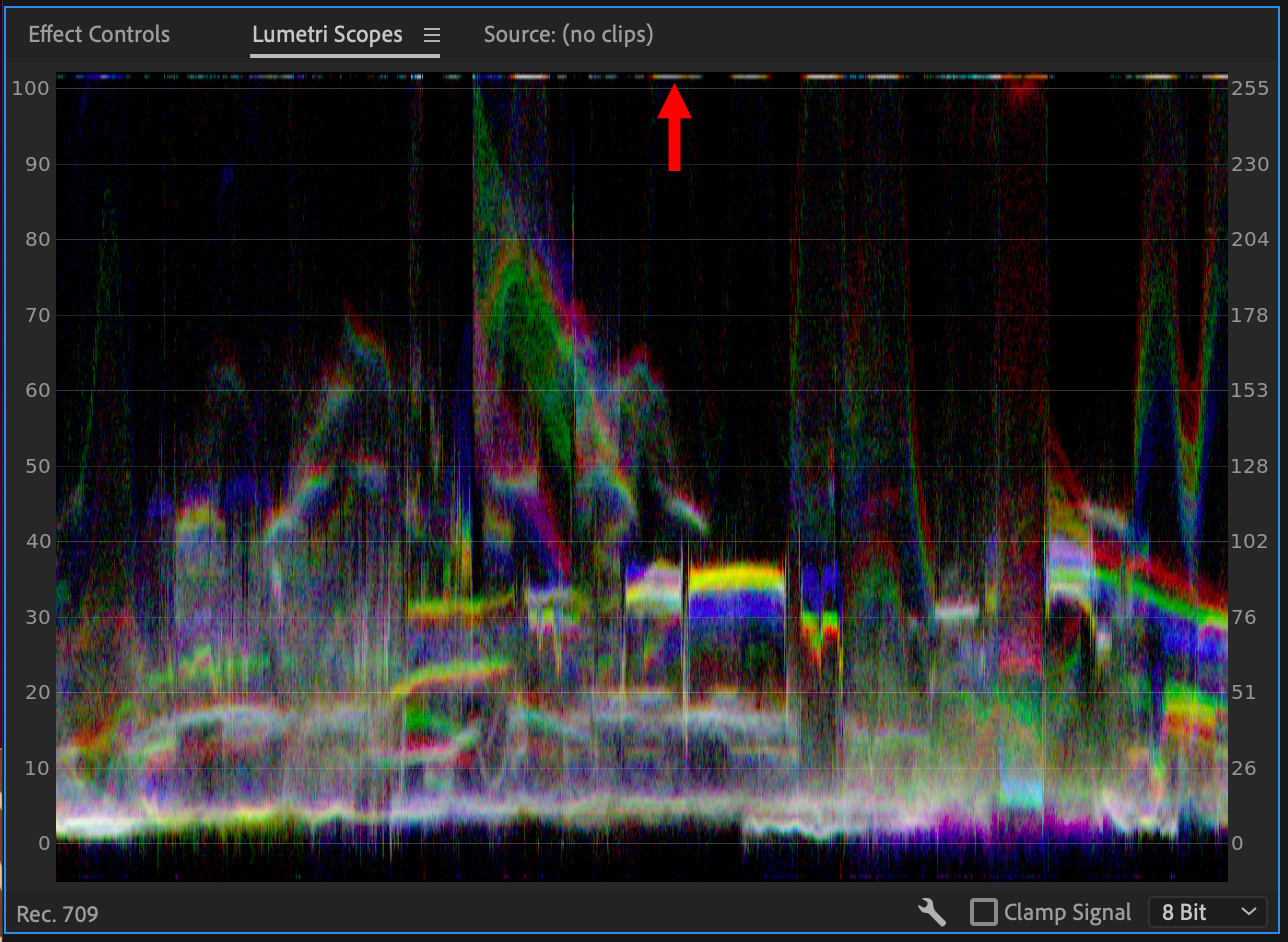
Here’s an example of video shot on a digital camera. Note that white levels exceed 100 IRE, red arrow top right. These levels are quite typical. While the web will support any video levels we post; broadcast TV, streaming services, DVDs, and cable are much more restrictive.
NOTE: To be sure you are seeing accurate video levels, uncheck Clamp Signal.

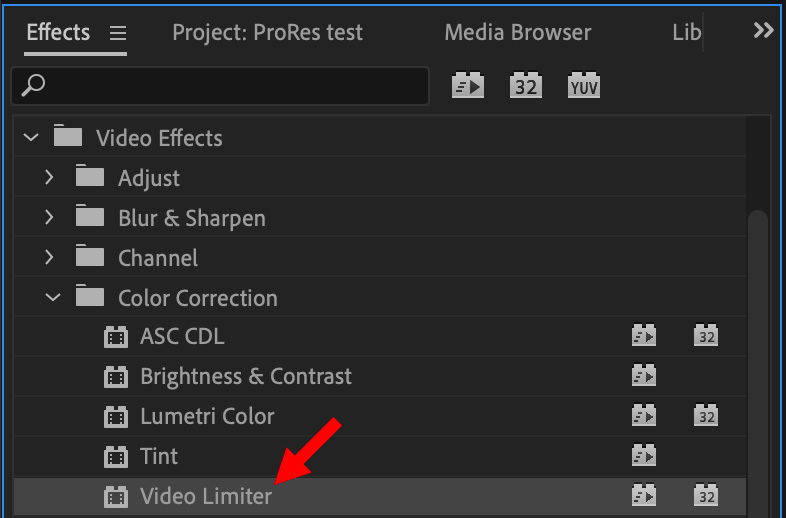
To fix this, select the clip in the timeline that you want to limit and apply Effects > Color Correction > Video Limiter.
NOTE: As you can see from the icons next to it, this effect is GPU-accelerated, supports 32-bit color and works in YUV color space.

Instantly, the video levels are lowered, but, surprisingly, not enough. Only to 103 IRE.

That’s because the default Clip Level setting in Effect Controls for the Video Limiter is 103 IRE, rather than 100.

To change this, click the Clip Level menu and change it to 100 IRE. Instantly, highlights are limited (“clamped”) to 100 IRE without changing the black or shadow levels.
What “clamping” does is reset any highlight levels greater than 100 to exactly 100 (or the level you set in the Clip Level menu). While this keeps your video “legal,” it also means that any detail in the brightest highlights will be lost.
NOTE: Check with your distributor to see if they prefer one of the other options in this menu. The correct setting is dependent upon what your distributor requires.

The Compression Before Clipping menu determines how this filter handles highlights that approach 100 IRE. Most of the time None will be fine. However, experiment with the different settings to see if one looks better to you.
While 100 IRE is a hard limit, how highlights are handled at slightly lower levels is an aesthetic, rather than technical, choice.

For example, here, the excessive highlights are caused by the ceiling lights. Losing highlight detail is not a problem.

Image courtesy: Yury Chumakov
However, in wedding videos, preserving highlight detail (the whites in her dress) is essential. So, manually adjusting white levels using the Lumetri color wheels is preferable to clamping them when retaining highlight detail is important.

Check Gamut Warning to flag all elements in the frame (in pink, the Gamut Warning Color) that are altered by this effect.

This helps you determine if any essential visual elements are getting lost. You can see the results of this checkbox in the screenshot above.
REAL-WORLD USE
The Video Limiter is an essential tool. But, applying it to individual clips is time-consuming and impractical. Especially when projects today include hundreds of clips scattered across multiple levels. A better option is to use an adjustment layer, similar to those in Photoshop.
To create an adjustment layer:


SPECIAL NOTES

By default, the Waveform Monitor displays both chroma and luma levels. This can lead to misinterpreting video levels.

To prevent this, click the Wrench icon in the lower right corner of the Lumetri Scopes panel and set Waveform Type to Luma.

Finally, to prevent problems caused by other filters manipulating video levels, when you use the Video Limiter be sure to drag it all the way to the BOTTOM of the Effect Controls stack.
NOTE: If this is the only effect applied to a clip, the default position for the Video Limiter is correct.
SUMMARY
For web work, you don’t need to worry about video levels. However, for just about all other video projects, you do. In those cases, it’s nice to know the Video Limiter effect has your back.
4 Responses to Using the Video Limiter to Protect Video Levels in Adobe Premiere Pro
I never knew what the Video Limiter effect was for! Thanks for explaining so clearly.
Scott:
You are welcome.
Larry
Very helpful and informative information! Though one thing I’ve noticed is that when the timeline is rendered out (green bar at the top), some clips still go above 100 or below 0 on the scopes. Exporting the video and importing that into the timeline shows the same thing. Does this mean the limiter isn’t correctly limiting the footage, or is there another explanation for this?
Thanks!
Zac:
That depends. By default, the Waveform monitor shows both luminance and color. Color values will go over 100%, which is, generally, OK.
You also need to change the setting for the Video Limiter from its default of 103 to 100, to properly clamp levels.
Larry