 When I was editing my recent NAB Show interviews, I knew that I wanted to post a transcript of the video, along with the video itself, to my website.
So, I used Adobe Premiere Pro to transcribe the finished project into a text transcript and captions. Here’s what I learned in the process.
TRANSCRIPTION

There’s a preference setting that can simplify transcription. Inside Premiere Pro go to: Premiere Pro > Settings > Transcription and enable Automatically Transcribe Clips. Enabling this option means that as soon as I import a clip, transcription starts in the background.
NOTE: You may want to disable this if you are importing clips without dialog or if you are importing a ton of media and don’t want to spend the time transcribing quite yet.
It will also help to set Speaker Labeling to “Yes, separate speakers.” This would have saved the problem detailed below with re-transcribing the clip.

The first time Premiere created a transcript, all my speakers were lumped together.

So, from the “3-dots” menu in the top right corner of the Transcript panel, I selected Re-transcribe clip…

…and enabled labeling separate speakers.

The resulting transcript then separated speakers.
NOTE: Premiere does not reliably identify speakers. So, knowing I was going to manually review the transcript later, I didn’t bother making changes in this panel. As you’ll see, there’s a better way.

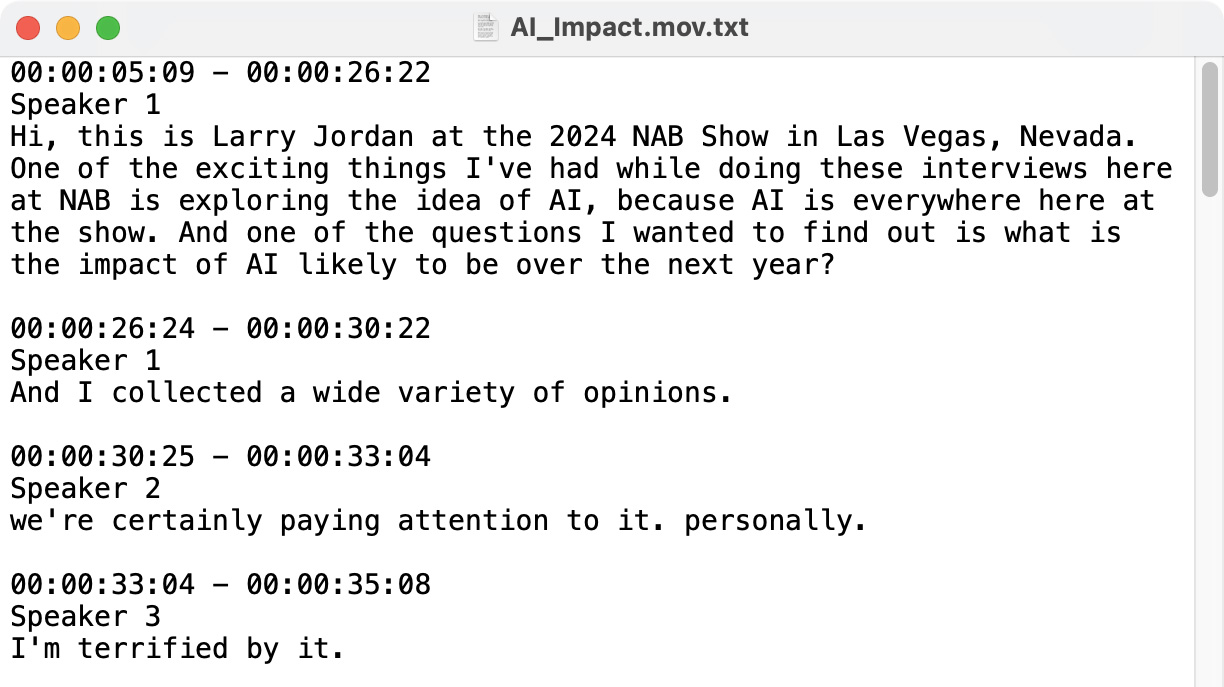
I then exported the rough transcript into a text file: 3-dots > Export > Export to text file.

Here’s what that rough transcript looked like in TextEdit. From here, I manually cleaned the transcript, added accurate paragraph breaks, speaker names, and verified spellings.
NOTE: Here’s the result – a cleaned-up transcript of the video.
SECOND NOTE: Windows users can use any text editor. The key is for the file to remain pure text without formatting or HTML markup.
UPDATE THE TRANSCRIPT – CREATE CAPTIONS

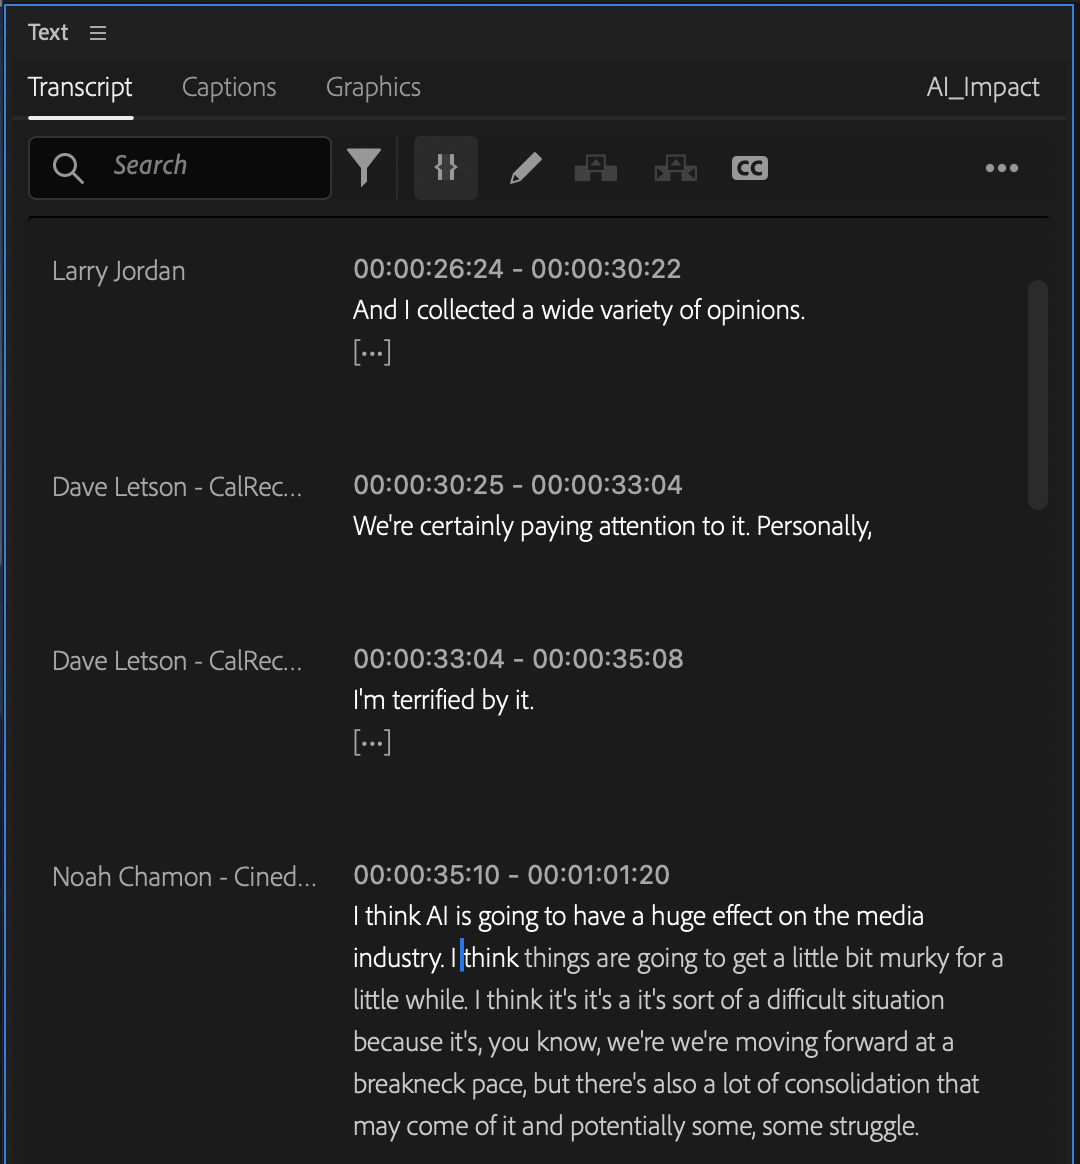
Hm… Since I cleaned up the text in TextEdit, and properly identified speakers, it would be great if I could use it to update the transcript itself in Premiere. Well, I can!

To do so, select the source clip – NOT the timeline – to load the source clip transcript into the Transcript panel. Then, choose: 3-dots > Import > Import corrected transcript (txt).

Instantly, the edited transcript was substituted for the original! And this is the exciting part: all the timings were retained even though I changed paragraph breaks, added words, and corrected the text!
THAT was amazing … no resyncing the transcript!

The next step is to go through and manually update all the speaker names.

Finally, back to the 3-dots menu to create captions. Again, virtually instantly, it took my corrected text and turned them into captions.


I could now export the video with burned-in text, or as a separate .SRT sidecar file for uploading to YouTube.
SUMMARY
The Adobe Speech-to-Text engine is powerful, but not very accurate. Based on my limited work with three videos, I would guess about 80%. But that is 80% of the text that I did not need to transcribe on my own. Yes, making changes manually is a pain. But I was starting much closer to the finish line than if I had to create the entire transcript myself.
What amazed me was how fast and painless the rest of the process was. I’m keeping this in mind for my webinars in the future.
3 Responses to Using Speech-to-Text for Finished Projects in Premiere Pro
Please elaborate on “select the source clip”. What does that mean? If I have a sequence with 20 sources am I making 20 separate transcripts and correcting them as opposed to one transcript for the whole sequence, correcting it then importing that back in? If so then again what does “select the source clip mean” given the sequence has 20 source clips? Hope my questions make sense?
David:
Transcripts are stored with the clip, not the sequence. So, if you have 20 clips, you have 20 transcripts. If you load a clip into the timeline, only the transcript for the clip(s) in the timeline are displayed. If you correct a word in the transcript in the timeline, that correction is passed back to the source clip.
If you need to change a word/phrase, that can be done in the timeline or by selecting the source clip. If you want to change a speaker name, that needs to be done in the source clip.
So, if you are going to correct a timeline, do that using the Transcript panel. However, if you want to correct a transcript outside of Premiere, then reimport it, that needs to be done using the source clip. While Premier supports exporting a sequence transcript, it does not support reimporting the corrected transcript because it does not have the time references needed to properly sync it up with the timeline edits.
Larry
Thank you sir👍