 Auditions are a little-understood feature in Apple Final Cut Pro which quickly allow instant comparisons between clips. While comparing video clips is probably the most common use, even more helpful is using Auditions to compare audio clips.
Auditions can become very useful as you experiment with different music beds or background effects to see which works best for the story you are telling.
Here’s how these work.
WHAT IS AN AUDITION?
An “audition” is a container in FCP that holds one or more clips allowing you to instantly compare them.
While not required, it is good practice to “finalize,” or disconnect, the clips in an Audition. This allows projects to be transferred to other NLEs, as well as improve system performance by not loading all the clips in an audition into RAM each time a project containing auditions is opened.
HOW TO CREATE AN AUDITION

Image courtesy: John Putch “Route 30, Too!” (www.route30trilogy.com)</em
Here we have the stunning resolution of the dramatic soap opera: “Lightning in a Bottle.” Trust me, no one saw this ending coming! But, it needs music…. or something. Maybe sound effects; I’m not sure.
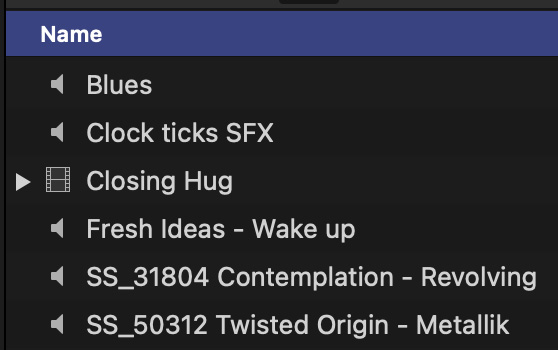
So I imported a variety of audio clips into Final Cut to see which works the best.
With video, we generally edit based on the position of the In. With audio, especially audio that ends a segment, we care more about where the audio ends than where it starts.
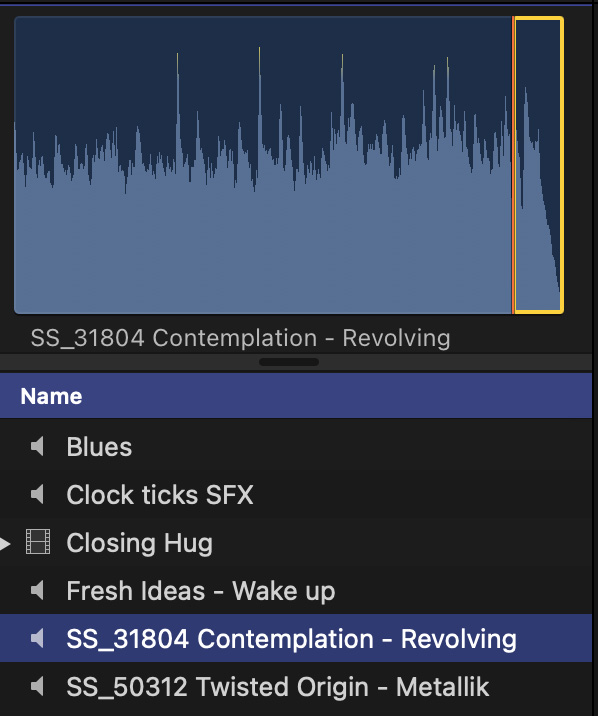
Since we can’t back-time clips in an Audition – that is, edit based on the position of the Out – I opened each clip in the Browser and set a rough duration so they would all run about the same amount of time.
NOTE: Since I’m primarily listening to decide clip works the best for this scene, I will tweak the actual clip timing in the timeline once I figure out which audio clip I want to use.
I repeat this process of setting rough Ins and Outs for all the audio clips I want to compare.
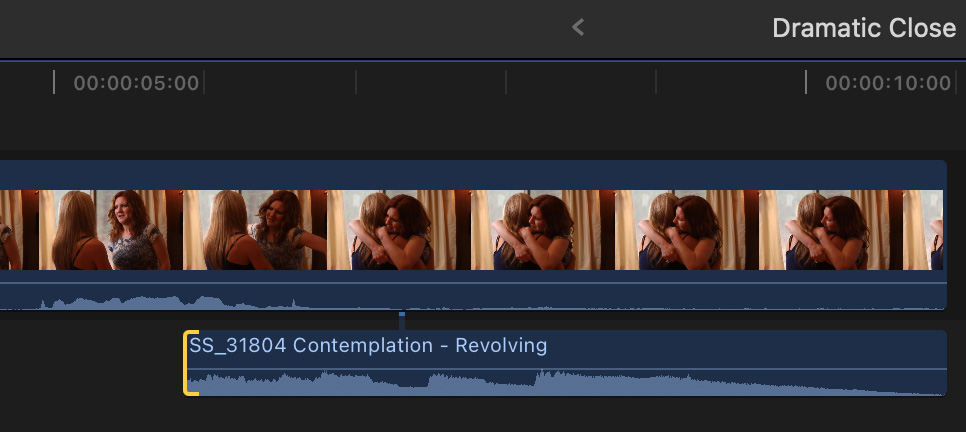
I then edit the first audio clip into the timeline roughly where I want the music to start.
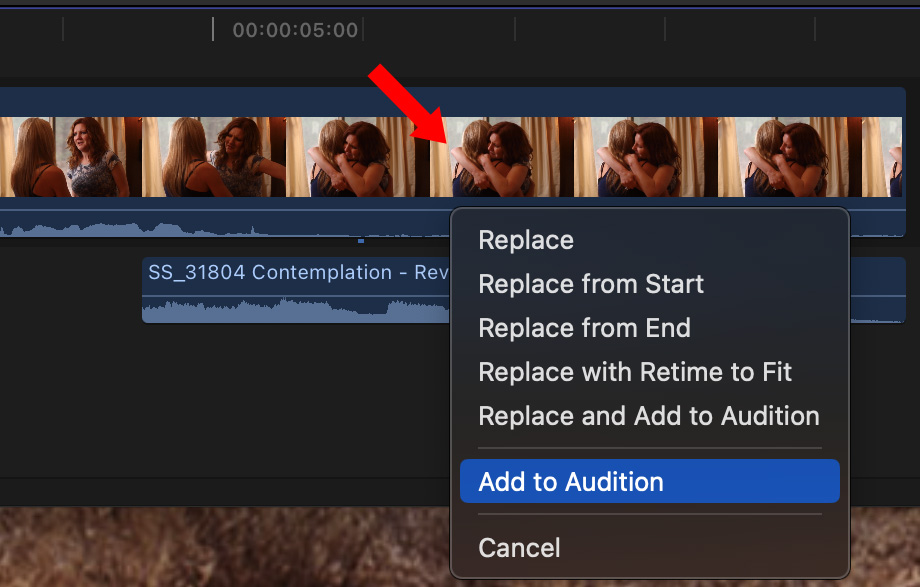
Then, I drag another marked audio clip from the Browser on top of the timeline audio clip and select Add to Audition. I repeat this process of marking and dragging every audio clip I want to compare – four, in this example.
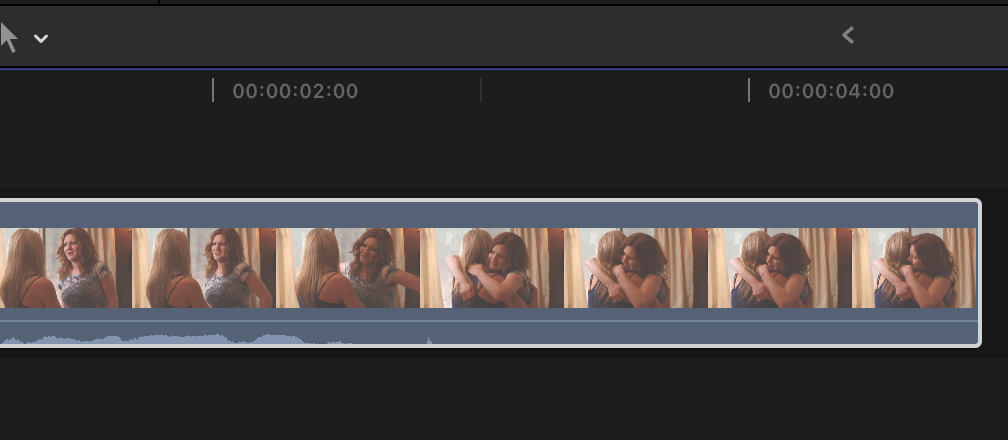
NOTE: Remember, drag each audio clip on top of the existing timeline clip – so that the timeline clip turns white. Then, select Add to Audition from the pop-up menu.
When all clips are added to the Audition, it’s time to test them during playback.
PLAYING AN AUDITION
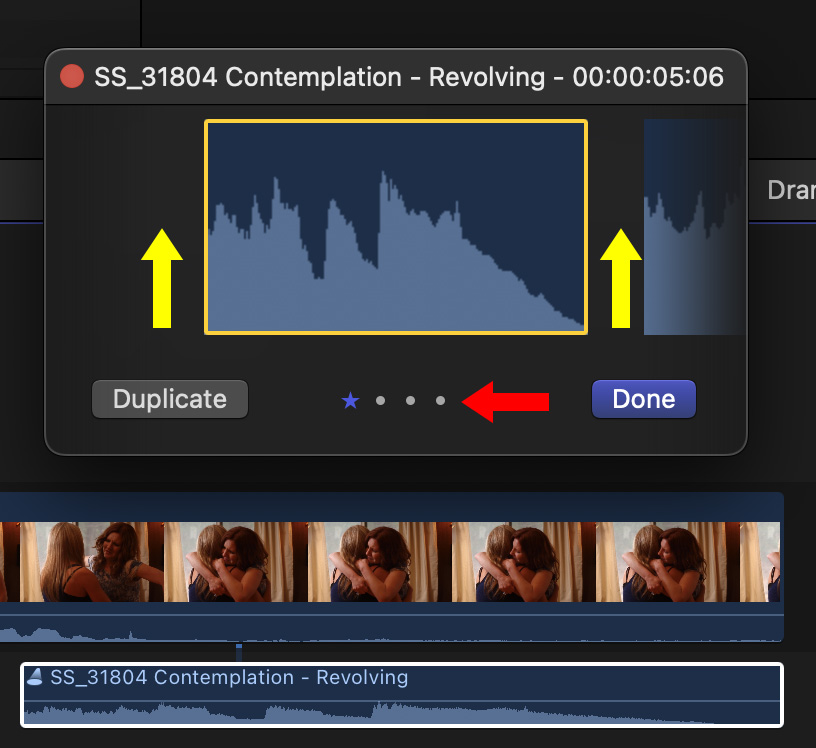
To play the clips in an audition, select the audition clip in the timeline and type Y – or choose Clip > Audition > Open. This displays the Audition interface.
NOTE: See those four dots under the waveform (red arrow)? That means there are four clips in the audition.
NOTE: Once an audition starts playing, click on either side of the current waveform in the Audition window to switch to that clip and play it.
Cycle through clips as many times as you want until you find the sound you like.
FINALIZE AN AUDITION
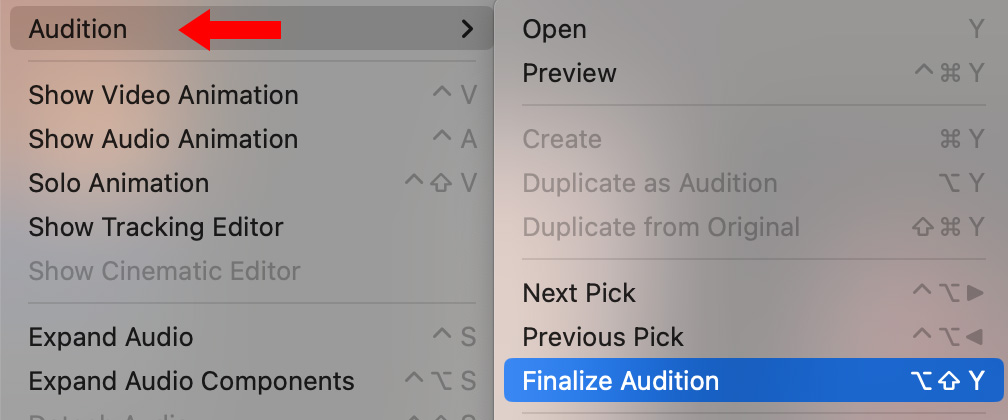
Once you find the audio clip you like, choose Clip > Audition > Finalize Audition (shortcut: Option + Shift + Y) to release all clips from the Audition except the currently selected clip. This step is not required, but it does decrease the load on your system.
NOTE: If there’s a chance you might want to reconsider your choice, don’t finalize the audition. That allows you to go back and reedit it anytime you want. Most modern systems won’t show any appreciable slowdown when playing auditions.
SUMMARY
Auditions are easy to create, providing very fast and accurate previews using a variety of different clips. While I still need to tweak the exact timing and levels of any auditioned clip, this is still faster than stacking clips several layers deep, then toggling them on or off.
EXTRA CREDIT
Here’s how to use Auditions to compare different visual effects added to the same clip.