 Last week, in my on-going effort to learn, I edited my webinar in DaVinci Resolve. While the experience wasn’t “difficult” – aside from the usual “where the heck did they PUT this?” – there was one issue that tripped me up time and again forcing me to reedit my webinar three times.
Project Settings.
Project settings in Resolve are significantly different from either Premiere or Final Cut. They are the technical foundation upon which an entire edit is built. These settings determine how clips are imported, how timelines are constructed, how images are monitored, how color is determined, and far, far more. Since Premiere and Final Cut don’t behave this way, editors moving to Resolve from other platforms – like me – are going to be surprised.
WHAT MAKES PROJECT SETTINGS DIFFERENT
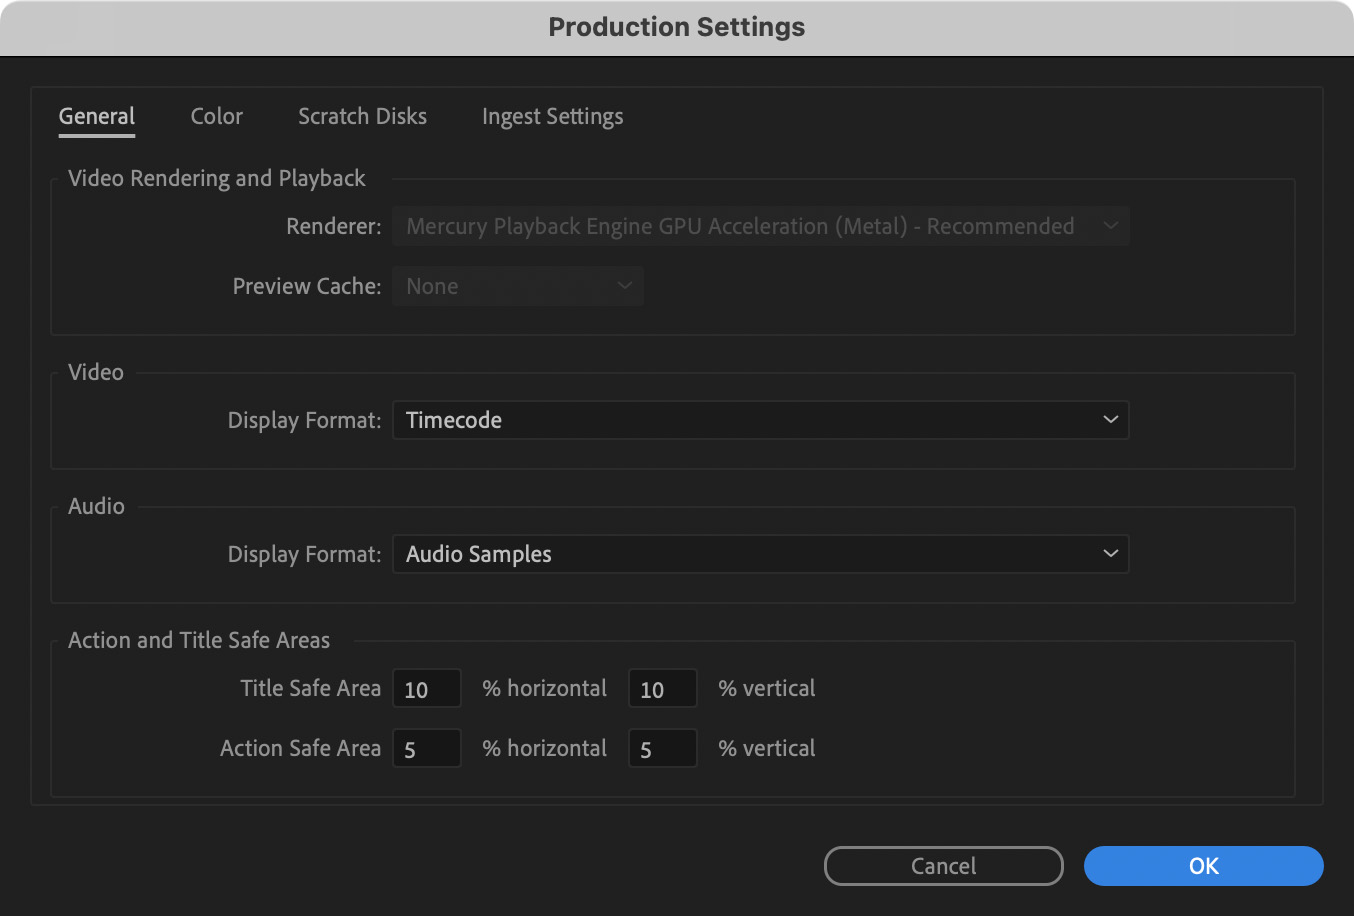
In Premiere, there are no project settings for a standard Premiere project.

However, Premiere does provide Production settings (above). These settings can be changed at any time and don’t directly affect the edit.

In Final Cut, library settings are a simple choice between SDR and HDR (above).
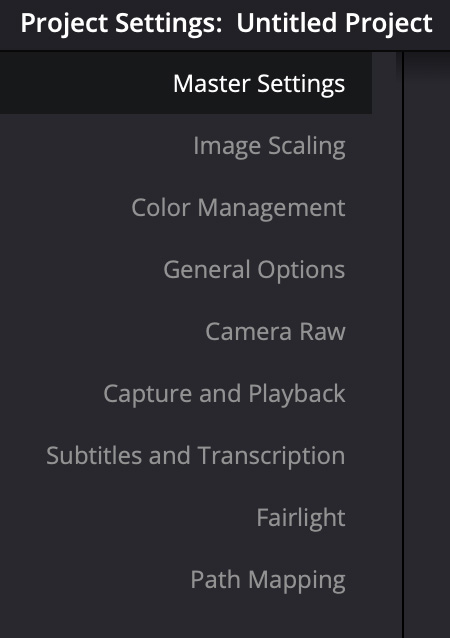
But in Resolve, Project settings are nine SCREENS of deeply technical settings, several of which determine how media is imported and can’t be changed once media is inside a project.
In other words, while Premiere and Final Cut editors don’t need to think about project and timeline settings until after media is imported and timelines are created, in Resolve you need to think about these before you begin a new project.
WHAT PROJECT SETTINGS COVER

There are nine categories of settings that all directly control how media is imported, processed, edited and displayed. By default, these settings create 1080p/24 fps horizontal timelines.
Which, in my case, never matches the media I’m editing.

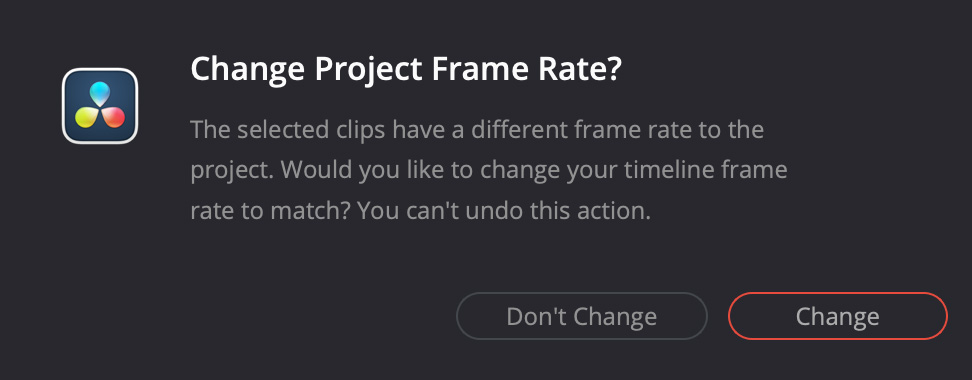
When you import media, if the frame rate of the imported media doesn’t match the frame rate in Project Settings, this dialog appears.
NOTE: This notice in Resolve emphasizes that you can’t undo this choice.
In almost all cases, you’ll want to change the frame rate to match the media you are editing. Otherwise, Resolve will automatically conform that media to the default frame rate of 24 fps.
My clips, though, are 30 fps. This meant that Resolve was automatically conforming my media to match the timeline by dropping frames from my master clips. Worse, those frames are dropped at import, not when the clip is added to the timeline.
So, after screwing up my first edit, I started over and clicked the “Change Frame Rate” button.

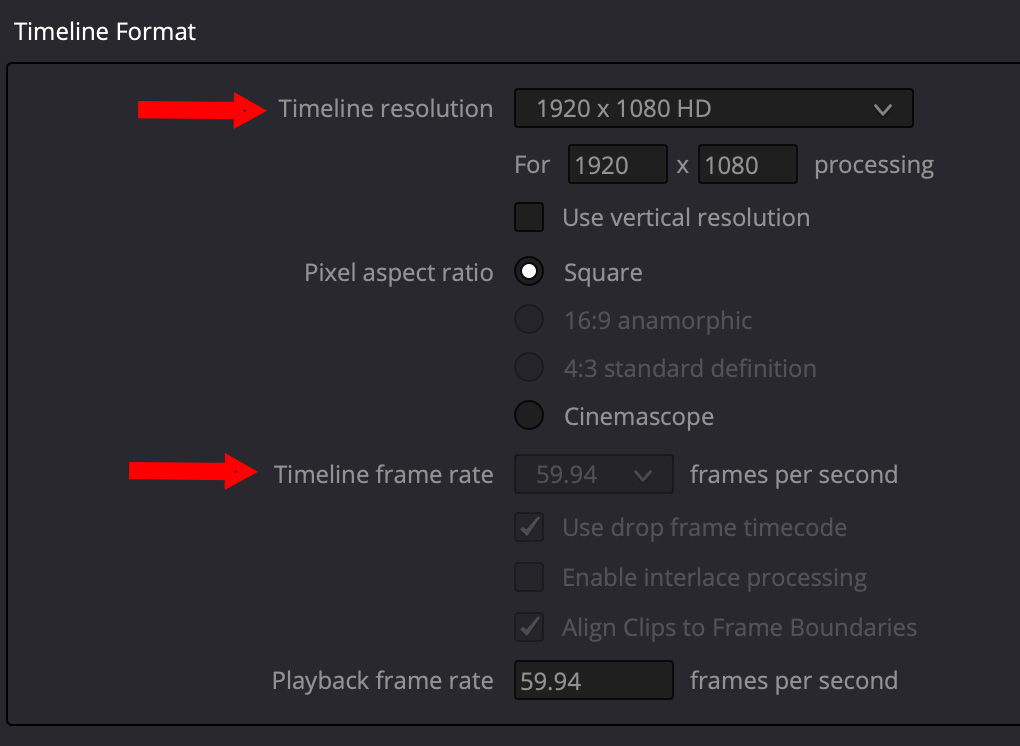
This changed the timeline format to match my clips (lower red arrow), but Resolve DIDN’T change the frame size to match the clip frame size (top red arrow)!
So, I clicked the correct button, but this didn’t make all the changes that needed to be made.
WHAT’S THE IMPACT?
In my case, the first time I edited my webinar, it was edited at the wrong frame rate, with Resolve dropping one frame out of every six. Copying and pasting existing media into a new timeline with the correct frame rate doesn’t help, because the frames were dropped during import.
The second time I edited my webinar, the frame rate was correct, but the frame size was too large. All my clips were enlarged and blurry. (My webinars are 1600 x 900 to reduce download file size and improve the readability of onscreen menus.)
I couldn’t find a way to adjust this using Project Settings because, since there was already media imported and in a timeline changes were not allowed.
So, the third time I edited my webinar, I made sure to change project settings for both frame size and frame rate BEFORE importing any media.
After that, there wasn’t any problem – aside from my general learning curve.
WHAT DO PROJECT SETTINGS CONTROL
There are several hundred technical settings controlled by this panel. So, just to give you a flavor, here are three of them – all part of the Master Settings section.
For details on what these do, please refer to the DaVinci Resolve manual.

Note the default settings of 1920 x 1080 at 24 fps (red arrows).
SUMMARY
As one reader pointed out, DaVinci Resolve was created for professional editors who need to adjust their timelines and media to meet deeply technical specifications. I have no objection to that.
The purpose of this article is simply to alert editors moving from Premiere or Final Cut to Resolve to learn about Project Settings and make SURE they are properly set before importing any media, or they will find themselves re-editing the same material until these settings are correct.
13 Responses to The Critical Importance of Project Settings in DaVinci Resolve
Thank you Larry! This is great information to have. I have stumbled and redone edits multiple times (all while searching the web for answers). I love Resolves color editing capabilities as well as a few other features. I use Black Magic cameras which I like as they work well with my gimble set up. As the saying goes, it can be like “taking a drink of water from a fire hydrant hose “! Hope you keep up the info on DR. 👍
Bob:
Yup, learning Resolve takes works. What I’m discovering is that I don’t need to know all of it to use it successfully. And, the more I use it, the more I understand. My next two articles – which I’m still working on – will look at editing and audio mixing in the Edit Page.
Larry
Color Management is another brick you want to setup at the beginning as well.
Olaf:
I suspect you are right. But I haven’t studied these enough to know which settings, if any, to change.
Larry
At some point in my learning curve I stumbled onto the discovery that I could change the default settings for the project and I think for a lot of us, once we did that, it’s pretty much where we want it to be for most projects.
I loved the “apple-ness” of FCPx, everything was simplified. Resolve often has 4 ways to do something. That bugged me for a while, then it started to dawn on me that having options allowed me to craft my workflow the way that works best for me. For instance, the color settings can be used to convert the color space to rec 709 based on what camera it was shot on, for the whole project, all at once. But it could also be done clip by clip if needed, or to the whole timeline, on the color page, with a “color space transform” node.
Fwiw….
John:
Good thoughts.
Larry
Once your project settings are set, you can save them as the default or as a preset under the 3 dots at the top right corner of settings page.
Elias:
Good to know. Thanks!
Larry
Nothing like being in the drivers seat — LOL LOL!!!!
I make a base project that is mostly empty with all my settings and preferences and then call that up, rename it, import media, and get to work.
Daniel:
This is another great tip. Thanks!
Larry
Thanks for the clarification. But what do you do if you get material with different fps und various frame sizes (which happened to me editing a video from a collaborative project with clips from various smart phones and cameras). I did this in FCP, but I think I cannot do this in DVR. Still I’d like to have the audio transcribed like in DVR (that’s why I bought it). (And in DVR i’d like voice isolation applied on clip level like in FCP, so the transcription is more accurate)
Well you cannot have it all , sigh
Yours Ulli
Ulli:
You can use multiple frame rates in Resolve, you just need to be sure that the project frame rate matches your output format. Then, Resolve will conform any non-matching clips to the project automatically.
Larry