 In the far distant past, the only way we could get an audience to watch our video was on television. (Well, yeah, there were theaters, but they used film.) Or, in the somewhat less distant past, cable. Hmm… also VHS and DVD. These were all analog video formats.
A big problem with these formats was that, technically, analog hardware DID. NOT. LIKE! IRE levels greater than 100 or below 0. When excessive levels passed through an analog distribution system, they caused an audio buzz, distorted video and lots of screaming and yelling.
So, every NLE created their version of the Broadcast Safe effect to prevent this problem by clamping any excessive highlights precisely at 100 IRE and shadows at 0 IRE.
NOTE: I should mention that, in those days, PBS preferred clamping highlights at 90 IRE. So, whenever you are feeling constrained by insufficient highlights in HDR, please remember it was far, far worse in the past.
The web, however, is different because it is end-to-end digital, rather than analog. It doesn’t care about video levels, since all it is really doing is passing a series of numbers from a server to the viewer’s computer.
Therefore, since most of our video goes to the web, we don’t need to worry about Broadcast Safe; which is true technically, but not aesthetically.
Let me illustrate.
BIG NOTE: I’m illustrating this using Apple Final Cut Pro. But Premiere Pro, Resolve, Media Composer, and almost all other NLEs with a background in analog video, have their own version of Broadcast Safe which works the same way. The creative results are the same.
BACKGROUND
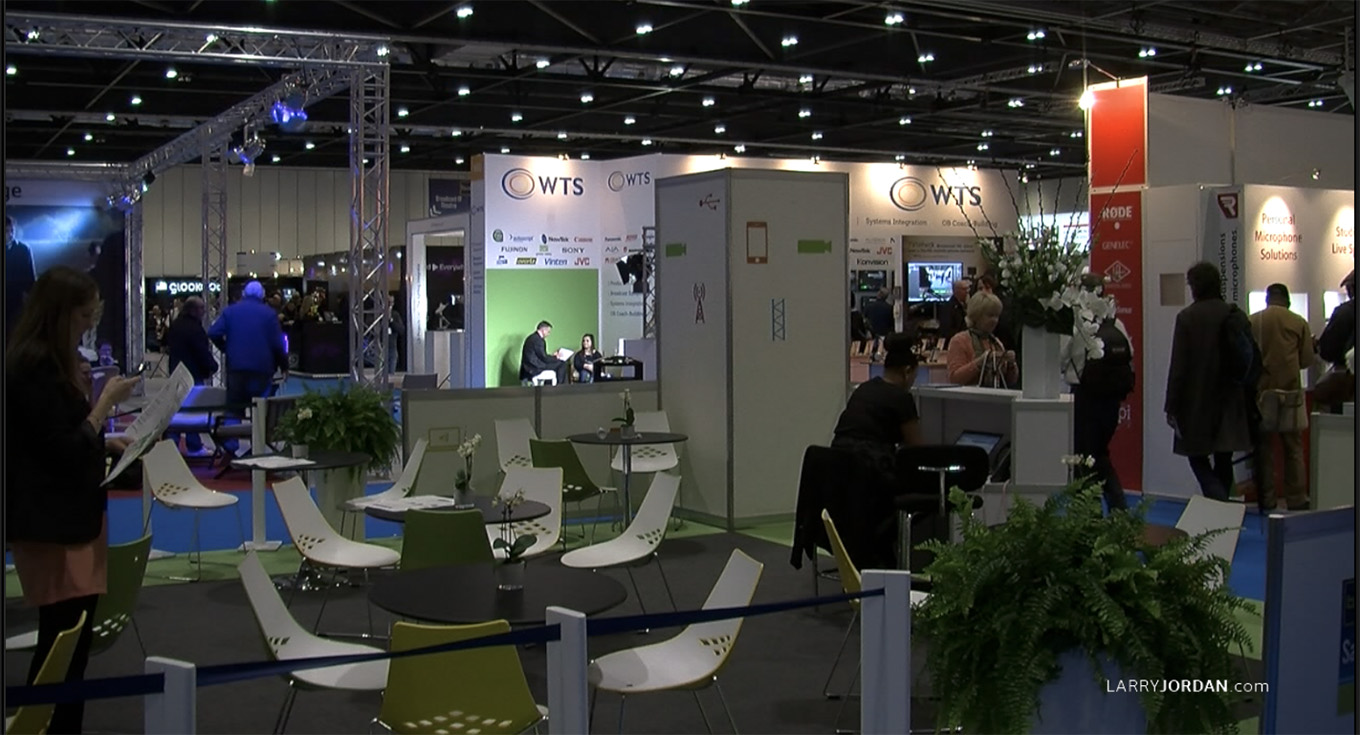
Here’s an image, taken at the BVE trade show in London in 2014. (Thanks, Michael, for running camera!)
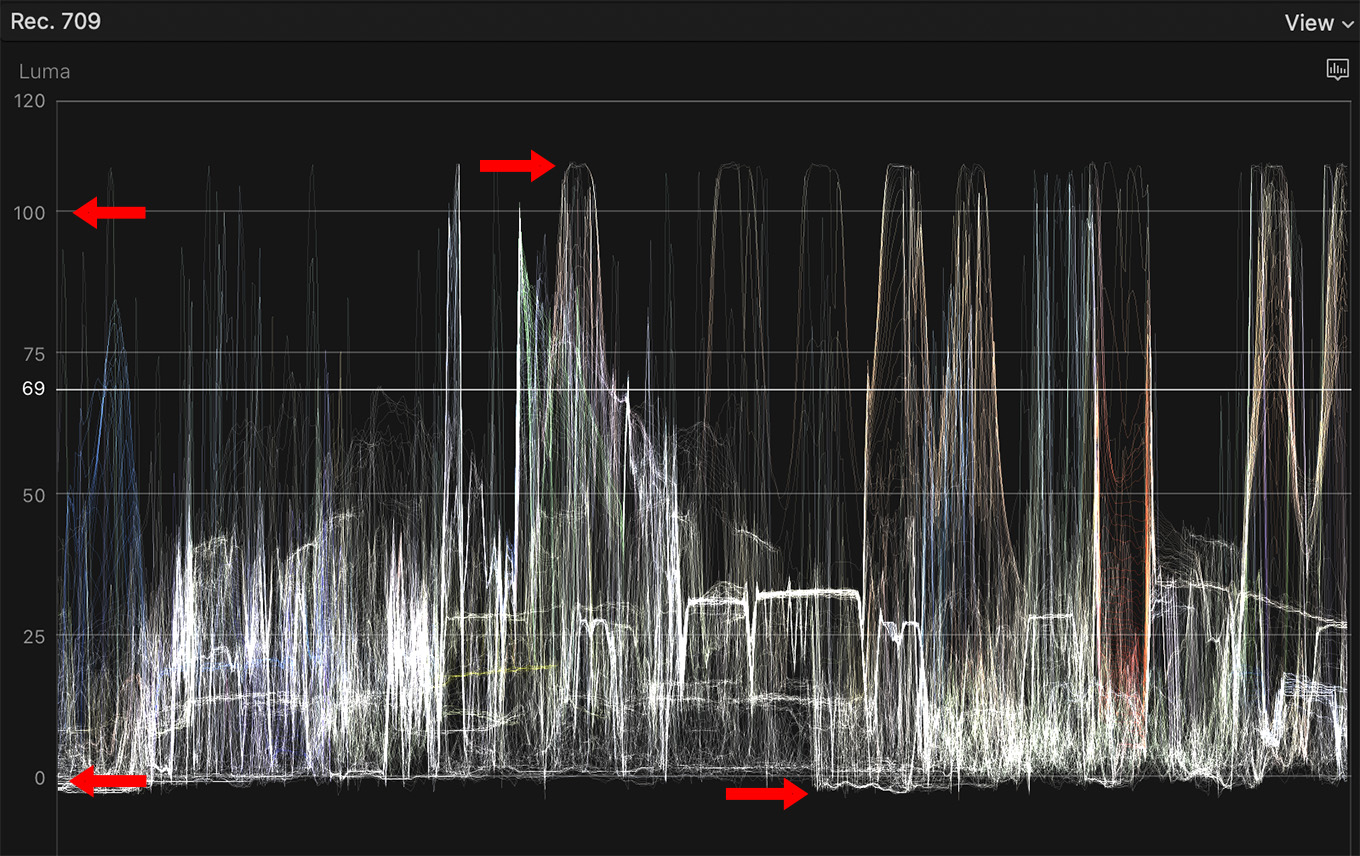
Here’s what it looks like on the Waveform Monitor. Notice highlights are above 100 IRE (top right red arrow) while shadows are below 0 IRE (bottom right red arrow). Both of these are illegal levels in analog video.
The excessive highlights are coming from the lights in booths and ceiling. The excessive shadows levels are from the dark ceiling.
NOTE: Again, just to stress, video posted to the web has no “illegal levels,” whatever you shoot can be posted.
TO PRESERVE OR NOT TO PRESERVE?
If we want to preserve the image detail in those highlights or shadows, yet still keep video levels inside a “legal” range, we would adjust the highlights and shadows using a color grading tool.
For example, in a wedding video, we need to preserve the highlight detail in a white wedding dress, so adjusting the highlight settings below 100 is critical.
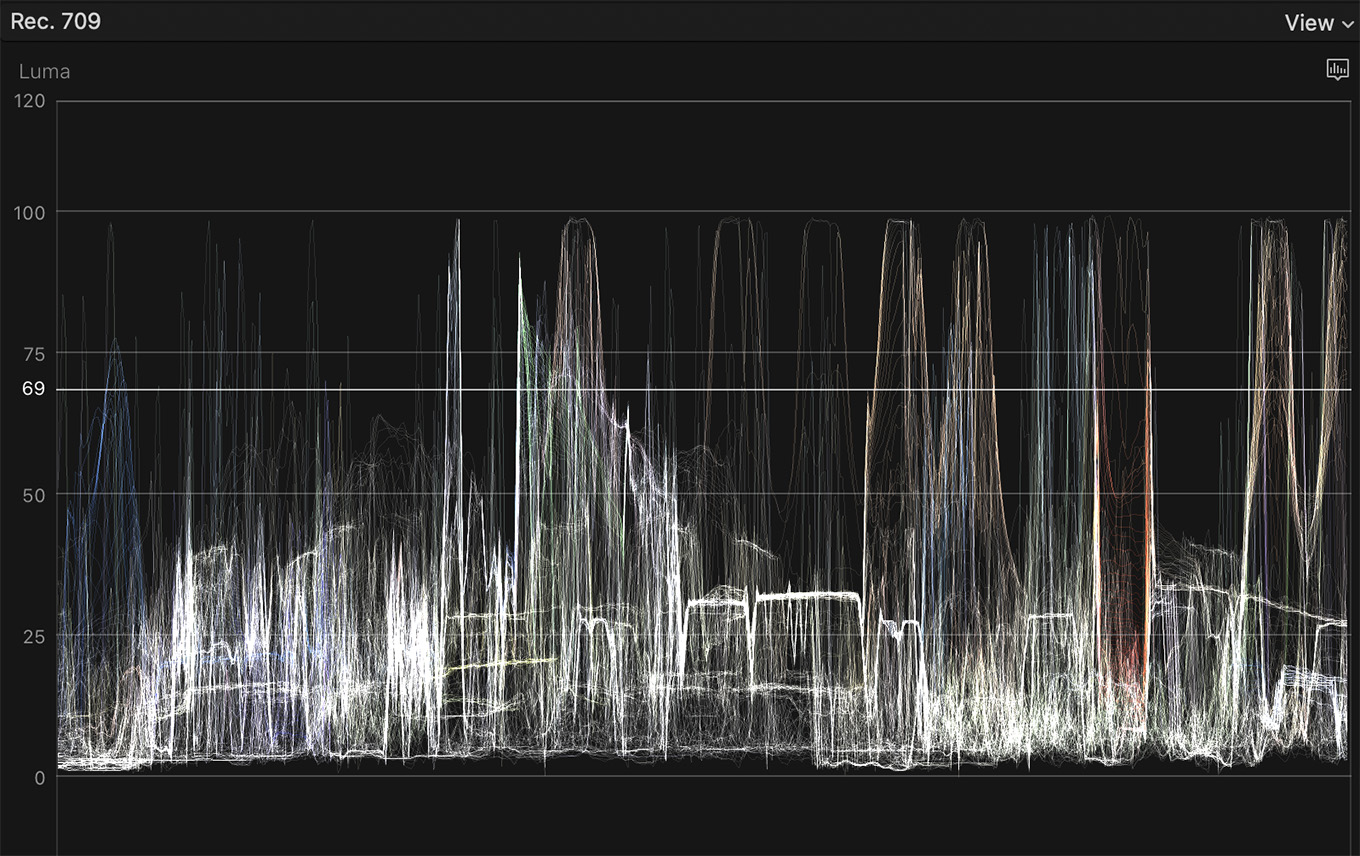
Here’s an example where both the highlight and shadow detail is preserved by adjusting levels. See the “rounded” tops of the highlights. That shows the image detail is still there. You see it also in the shadows in the “bumply” levels.
This is the perfect solution to retaining the image detail in a wedding dress, white drapes or other bright textures. But, these are ceiling lights and black ceiling. There’s no detail there that needs to be saved.
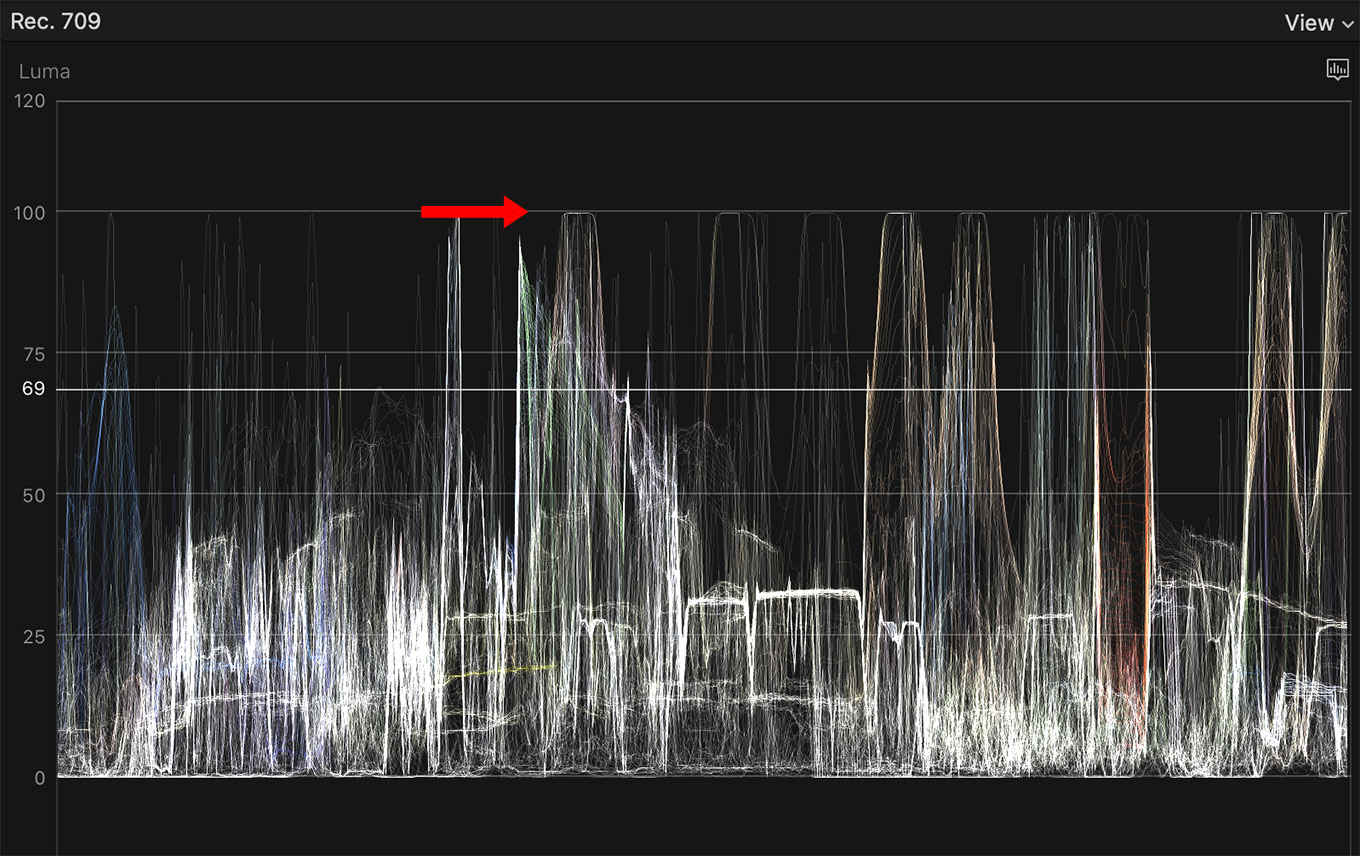
This is the same shot with the Broadcast Safe effect (Effects browser > Color > Broadcast Safe) applied. Adding the effect is a whole lot faster than adjusting color settings.
Notice how the tops of the highlights are flattened and exactly at 100 IRE? The same with the shadows – flat and set to 0.
These levels are now “clamped,” or locked, such that they don’t go above 100 or below 0. Every highlight level above 100 is replaced with a highlight level of exactly 100. All shadow levels below 0 are replaced with shadow levels of exactly 0.
The levels are now “safe,” but all that texture in the changed pixels is lost.
WHY SHOULD WE CARE?
Most of the time these days, you don’t need to care. Just go with whatever levels make your image look good.
But, there’s an interesting use case where Broadcast Safe can solve a bad lighting problem.
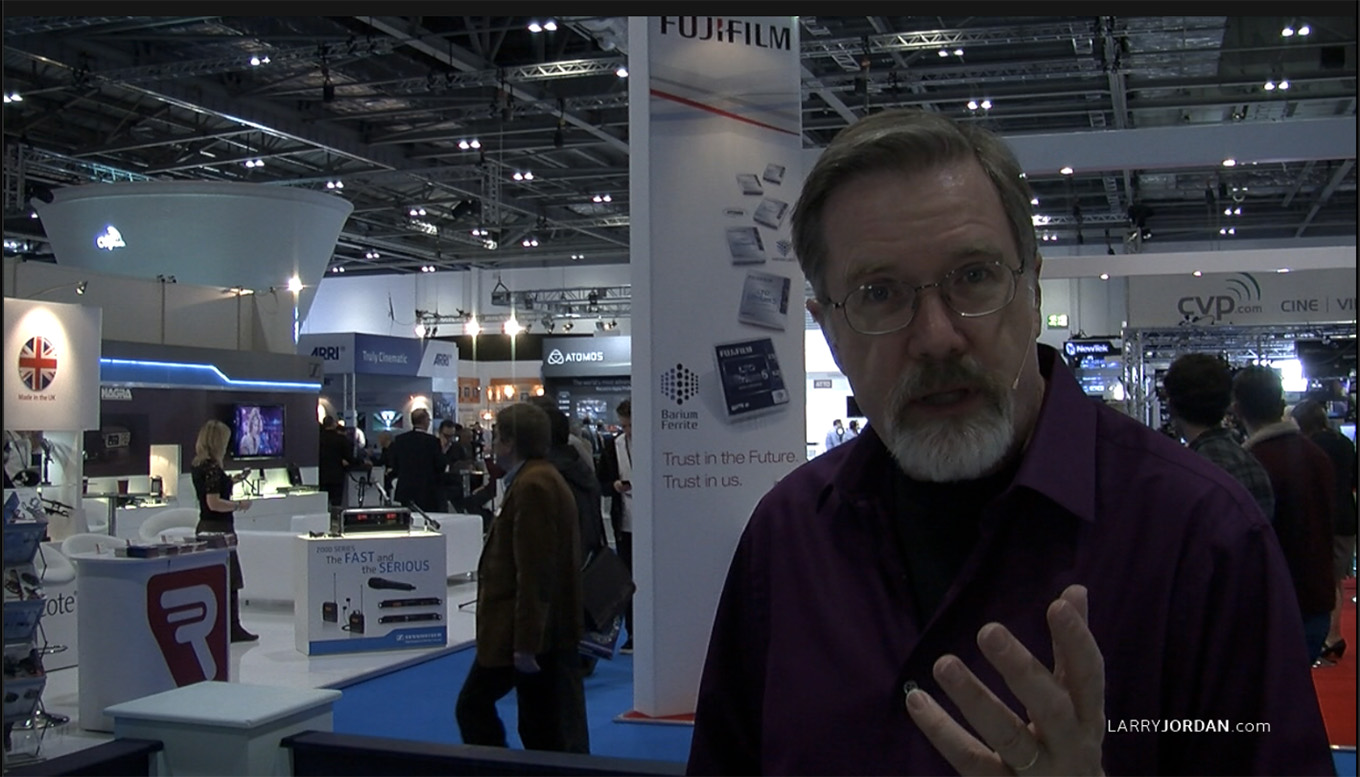
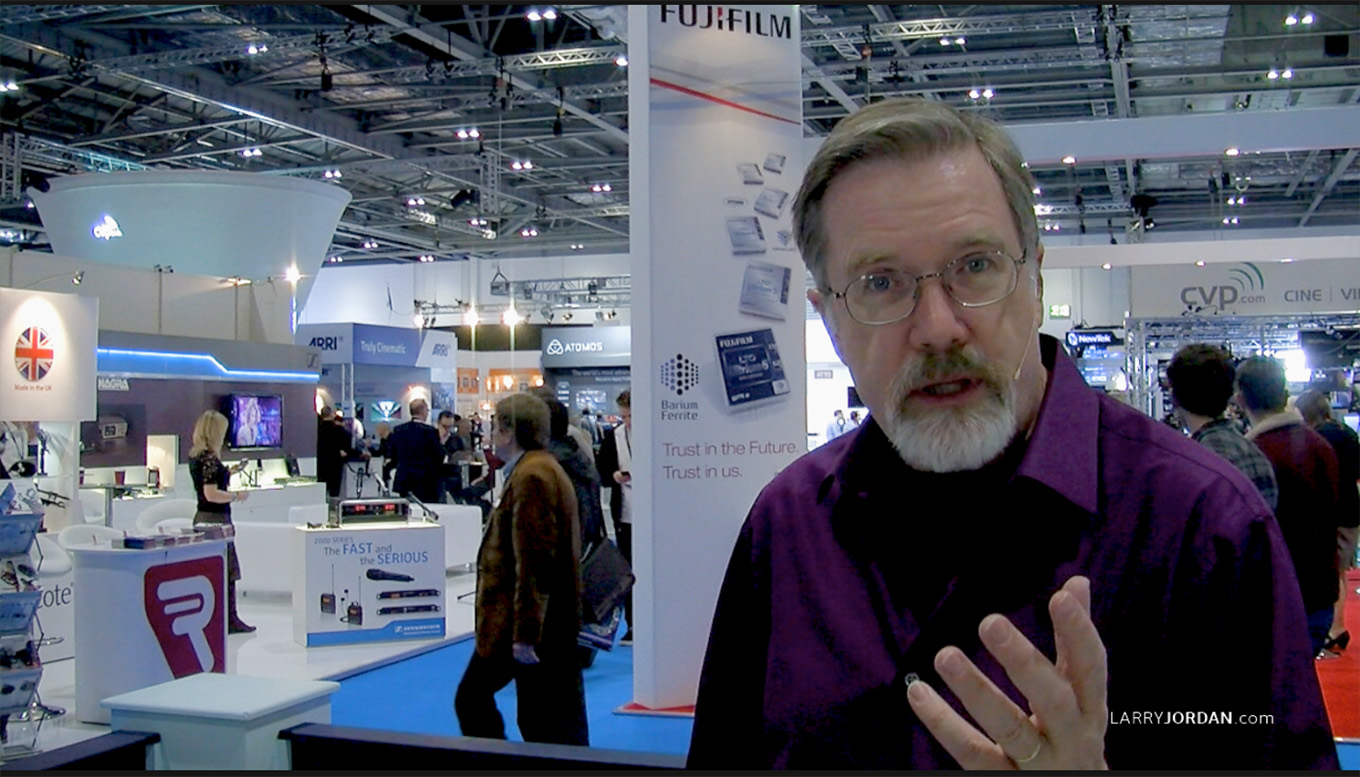
This is it. When I was doing my stand-up at the end of the trade show, I didn’t have a light.
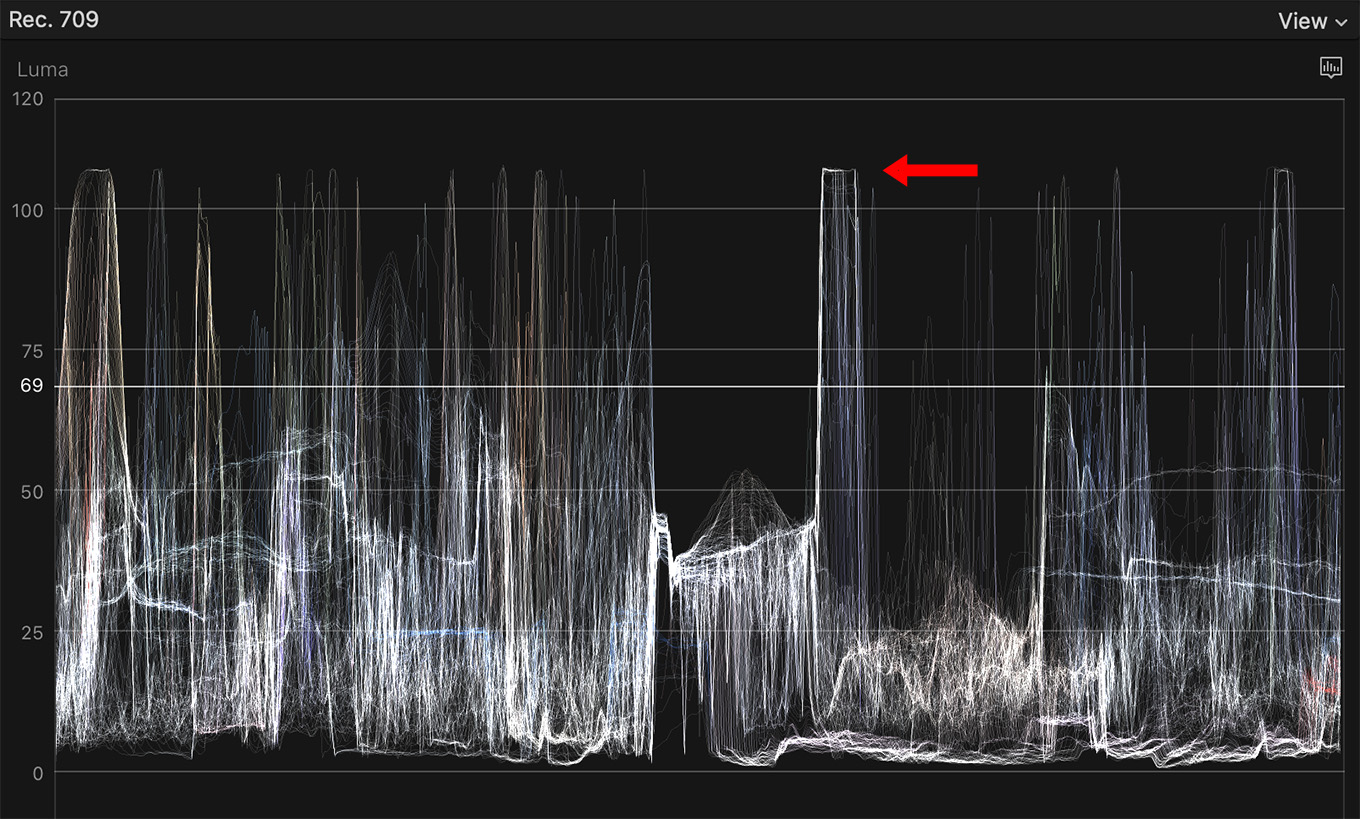
Here’s the Waveform Monitor for that shot. Shadows are fine, but the highlights are too “hot,” meaning they are too bright. I need to make my face brighter without ruining the rest of the shot by making it too bright as well.
In the past, for example last week during my webinar, I showed how to fix this problem using a shape mask and tracking. It works, but the effect calls attention to itself.
This morning I realized there was a much better solution: Broadcast Safe to the rescue.
HERE’S THE TRICK

I applied the Broadcast Safe effect to this clip. This clamps highlights at 100 and shadows to 0. (The Rec. 709 setting with an Amount of 0 is the default and perfect for HD video.)
NOTE: Normally, don’t adjust the Amount value on Broadcast Safe. The default of 0 clamps levels correctly. But, in this case, I’m about to lower shadow levels below 0. So, adjusting the Amount brings the shadows back up to 0 to make the image look richer. This is the first time, in all my years of working with Final Cut, that I adjusted the Amount setting. Cool.
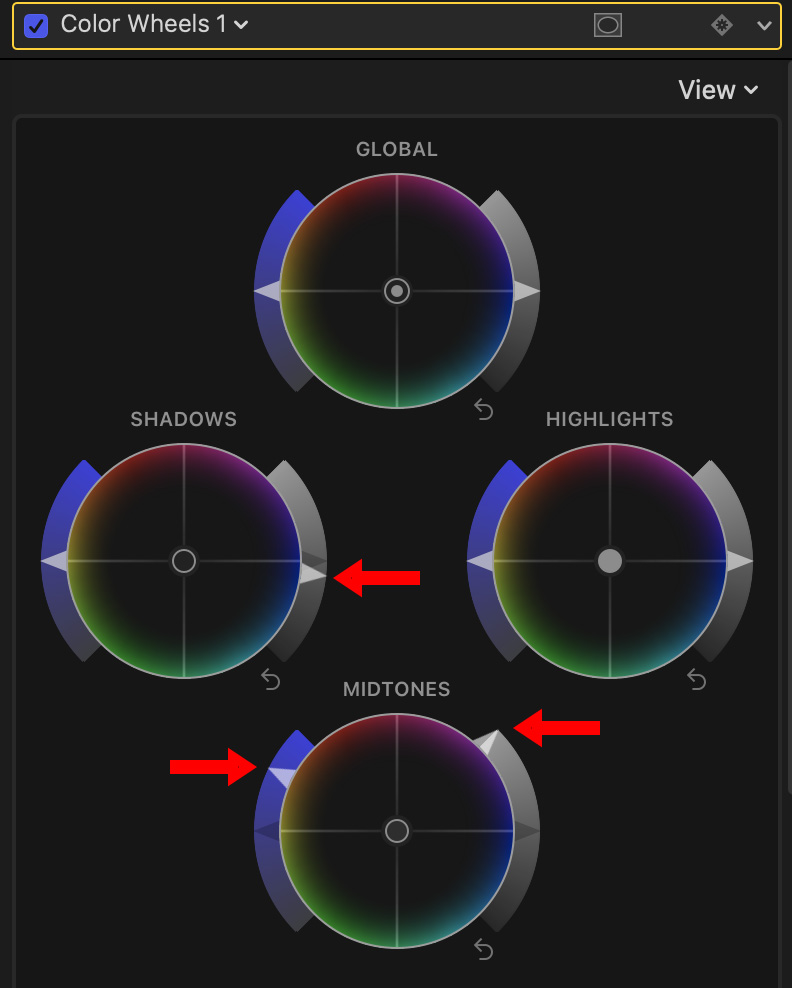
After applying the effect, I:
Because the Broadcast Safe effect was clamping highlights, it prevented the highlights in the background from changing and getting too bright. This restrained the overall brightness of the image.
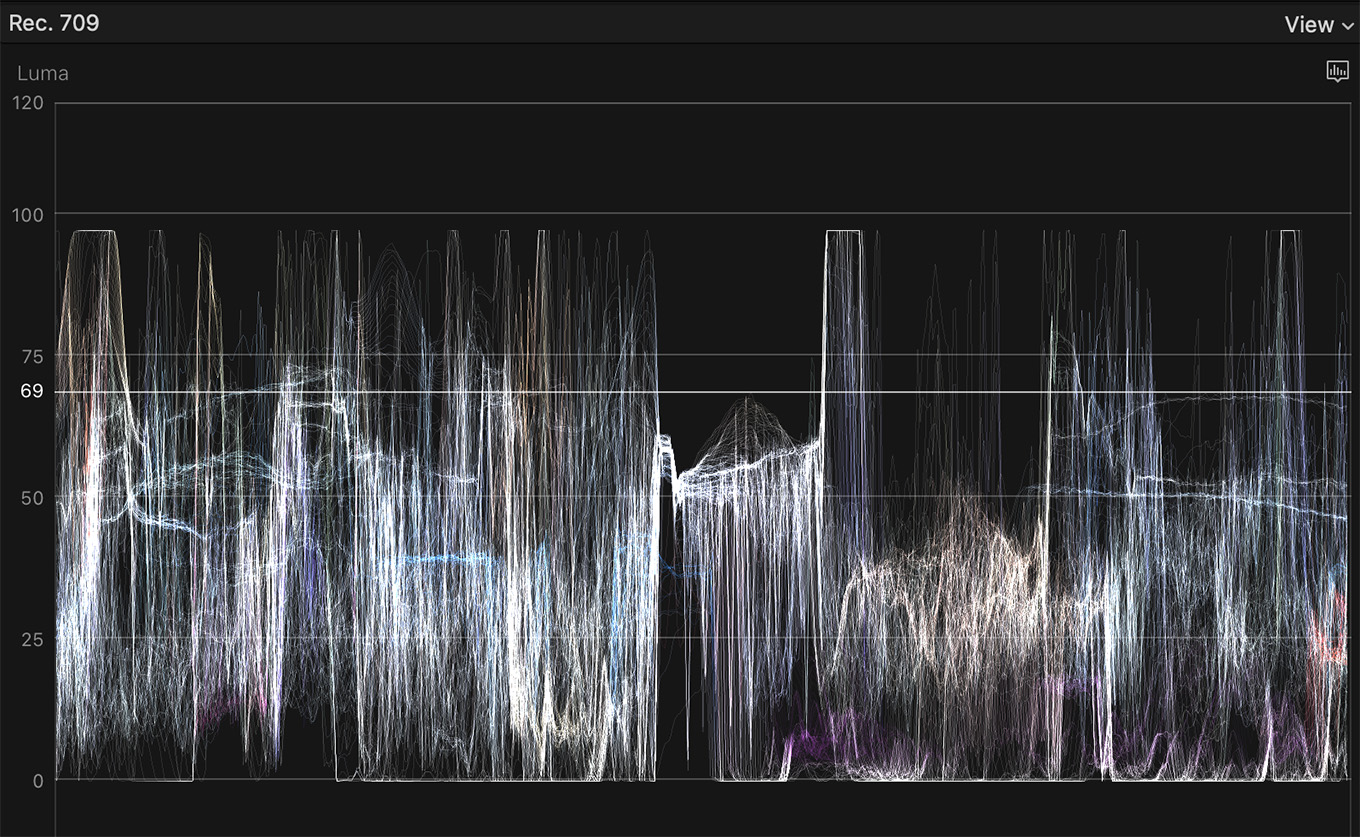
Here’s what the scope looked like for the corrected image. Shadows clamped at 0, highlights clamped around 95.
NOTE: When a level is clamped, we often say that it is “crushed.” The terms are essentially synonymous.
Because both the highlights and shadow levels were locked, I could massively adjust midtones without blowing out the entire image. The final result looks like I actually brought a fill light for my stand-up.
NOTE: Where this trick is most visibly effective is in clamping shadow levels. This achieves results you can’t get by simply adjusting shadows in the Color Board or Color Wheels.
SUMMARY
Our goal, in color grading, is to fix problems and/or create the image we need for the story we are telling. By clamping excessive levels, the Broadcast Safe effect allows us to modify mid-tones without worrying about blowing out the highlights or shadows.
I only discovered this trick recently, but I KNOW I’ll be using it a lot in the future. It won’t work when you need to retain highlight detail, but it works great when you don’t.
6 Responses to The Broadcast Safe Effect Isn’t Just for Broadcast
This is a great tip Larry, I record lots of conferences where the lighting is not dissimilar to what you had at that event. I find a lot of organisations don’t give much thought to the needs of video recording at conferences and the speakers are in low light areas but with brighter light elsewhere. I am going to be using this old effect a lot. Thank you.
Cliff:
Thanks for the kind words. Happy to help.
Larry
Great and useful tool. In transferring home film movies to digital in poorly exposed scenes this should prove useful.
Never thought of that. I have miles of super 8 film with exposures all over the map. I’ll have to give that a whirl!
This is a great tip and thank you for sharing it. I would like to posit, however, that paying attention to broadcast safe levels may still be wise. I primarily make video content for the web. However, my local PBS affiliate sometimes wants to use my content for their broadcasts. If you ever have a chance for your work to be broadcast, it might be nice to add broadcast safe protocols to your workflow just to keep things streamlined.
Ellen:
This is a really good tip.
Thanks,
Larry