 The cool thing about shooting video with a handheld camera is that you can move the shot instantly. The bad thing is that your audience gets motion sick watching shaky footage.
Final Cut Pro comes to the rescue with two different ways to stabilize shaky footage.
NOTE: Stabilization works on whole clips, not ranges. If you need to stabilize a section of a clip, cut it first.
HOW IT WORKS
All image stabilization works the same way. It starts by analyzing the video to determine:
NOTE: Analysis is generally faster than real-time. However, the time needed is dependent upon the speed of your CPU, the duration of the clip, the amount of movement and the frame size of the video.
Once unwanted subject movement is determined, the software moves the entire frame in the opposite direction to the unwanted movement and by the same amount. For example, if the frame drops by 20 pixels, the software raises the frame by 20 pixels. The result is no net movement.
Because the entire frame is moved, black borders appear around the edges as the frame is moved outside the edges of the timeline. So the final step for the software is to zoom into the frame just enough to hide any black edges.
However, zooming in tends to blur the image because existing pixels get larger. So, the stabilization software allows you to vary the amount of stabilization from smoother to locked down. The more stabilization, the steadier the shot, but this results in moving the frame more which requires more zooming in.
It’s a balance. Fortunately, it’s a balance that we can adjust to get the results that best suit the shot.
NOTE: As far as I can tell, even if you use larger frame size video in a smaller frame size project, you can’t turn off zooming into the stabilized video.
As you can probably guess, the “magic” of stabilization is how the software determines the actual subject of the video. For that reason, Final Cut provides three options so that we can select the one that works the best.
OPTION 1 – AUTOMATIC

Stabilization is applied on a clip by clip basis in the Timeline, not the Browser.

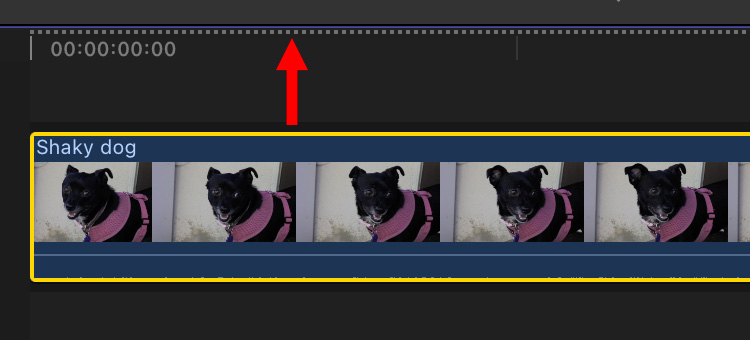
While you can play the clip, the white dots at the top of the timeline indicate the clip needs to be rendered for best results.
NOTE: Stabilization can do weird things to the background behind the subject. The greater the stabilization, the greater the weirdness. This varies by shot and subject.
OPTION 2 – SmoothCam

SmoothCam was the first version of stabilization that Final Cut supported. It works best when there are no significant pans or zooms.
OPTION 3 – InertiaCAM

InertiaCAm uses a different technique to determine what the principle subject. Apple says it is “optimized for video footage that has camera moves such as pans and zooms.”
SUMMARY
I use stabilization to smooth a shaky shot. My goal is to reduce the shake, but not eliminate it. This means that my audience won’t get sick and I also won’t lose too much image quality when the effect zooms in.
2 Responses to Stabilize Shaky Video Footage Using Apple Final Cut Pro
I have found this works incredibly well. I shoot video using a Panasonic GH5 Lumix camera with stabilized camera body and lens so – together with the FCP stabilization – I seldom need to use a tripod. However, I have found that the FCP stabilization does not work if the clip has had Transform applied to it – for example to level the horizon – so you need to apply stabilization before applying transform.
[…] Stabilize Shaky Video Footage Using Apple Final Cut Pro – January 4, 2023 by Larry Jordan […]