 [Read my product review disclosure statement here.]
Video Walls 3.0, from Luca Visual FX, is simply amazing. Not only is it a great way to create a wide variety of video wall effects, but it is a fascinating way to play with 3D objects in Apple Final Cut Pro.
A couple weeks ago, Luca Bonomo, creative head of Luca Visual FX, asked if I would be interested in reviewing his software. When I said “YES!” he sent me a demo copy.
NOTE: This software is offered through FXFactory.com and requires Final Cut Pro 10.6 or later.
EXECUTIVE SUMMARY
The 3.0 version of Video Walls includes a total of 24 templates, nine of which are new. This package of generators and effects provides the ability to build animated displays of one or more clips in 3D space.
The customizability of these effects provides a virtually unlimited range of tweaks, enhancements, or repositioning of just about every clip or setting.
Whether you are creating an effect from a single clip or a video wall of dozens of clips, the power, flexibility and creative design uses of this plug-in will expand your creative horizons without driving you nuts from trying to figure out how it works.
Video Walls 3.0 is a creatively stunning visual effects tool.
Developer: Luca Visual FX
Product: Video Walls 3.0
Website: https://www.lucavisualfx.com/product/video-walls-for-fcp/
FXFactory link: https://fxfactory.com/info/videowalls/
Price: $49 normally, $39 during launch
A free trial is available.
EXAMPLES OF WHAT YOU CAN CREATE
Let me show you some of the effects you can create; though these example don’t convey their range of animation.
This is a replicated image wall effect of a single clip. Note the 3D depth, random rotation, depth, edges, and colors. All of these settings can be adjusted.
This is a mega screen effect. This splits a single clip to look like it is displayed on a video wall. Note the blue colors, the red accent edge lights, depth, rotation, separation of the cubes, and the animation. All of these settings can be adjusted.
This effect creates a six-panel video wall. Each image is its own drop zone, which can be adjusted for scale, position, rotation, and opacity.
NOTE: A drop zone is a container for a clip which can be animated, positioned and/or lit separately from the clip inside it.
All these video inserts are playing, moving and animated in 3D space.
MORE DETAILS
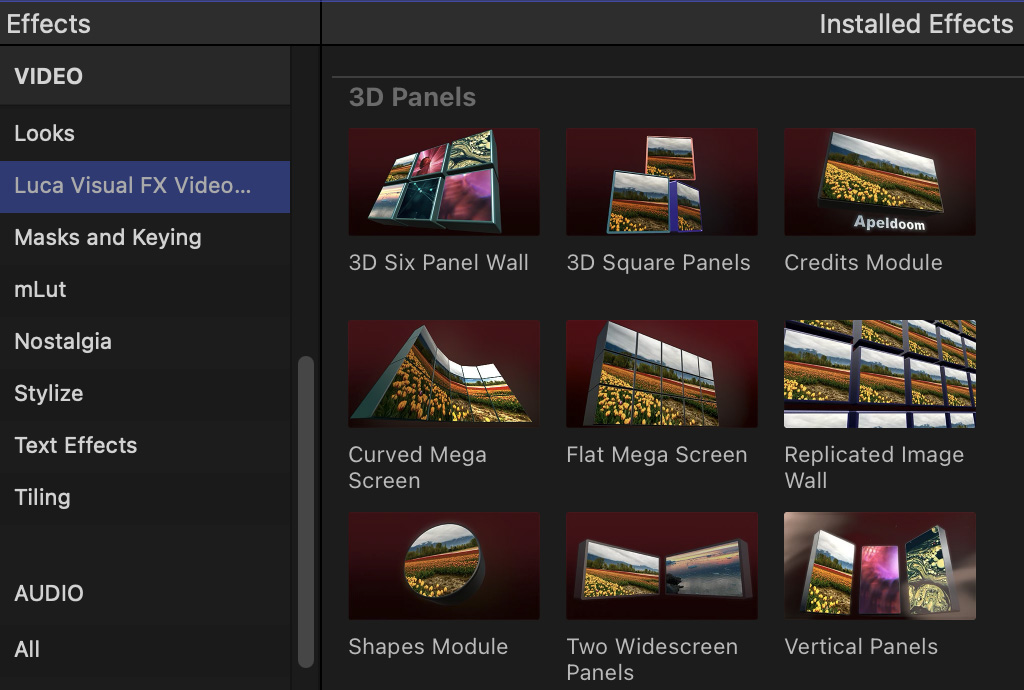
There are nine effects. Each effect is applied to a single clip.
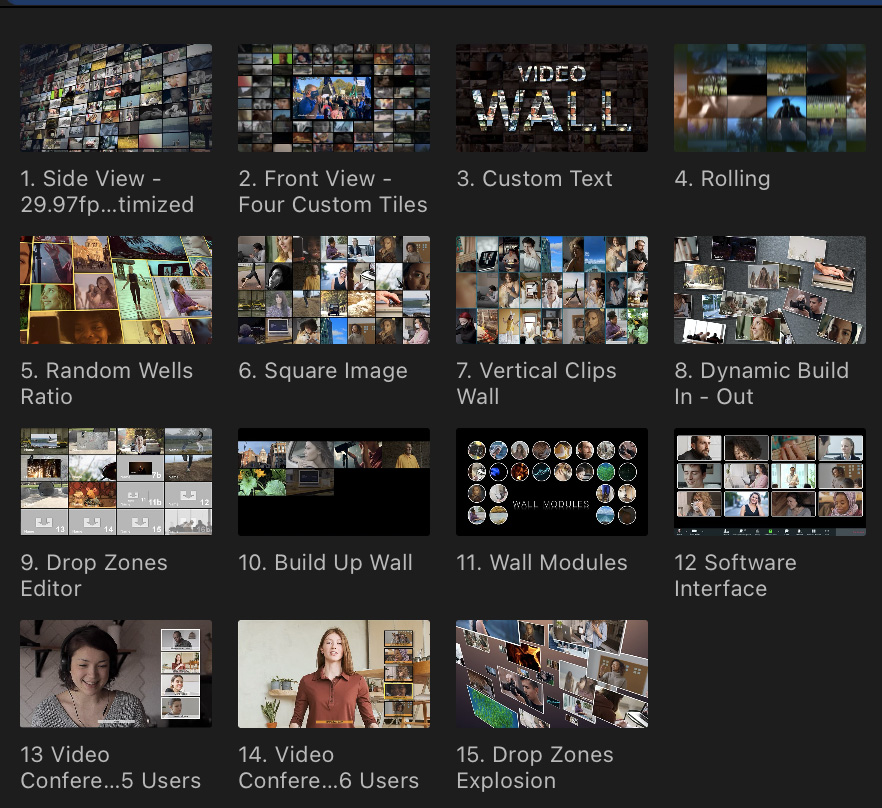
…and 15 generators. Generators are a single clip that can contain multiple other clips; essentially an effect template.
For example, this is a generator to create a video wall of up to 144 separate videos!
NOTE: Because each drop zone is playing a full-screen video at a reduced size, all these effects need to render for smooth playback. A 144-element video wall could easily exceed the maximum bandwidth speed provided by Thunderbolt 3 or 4!
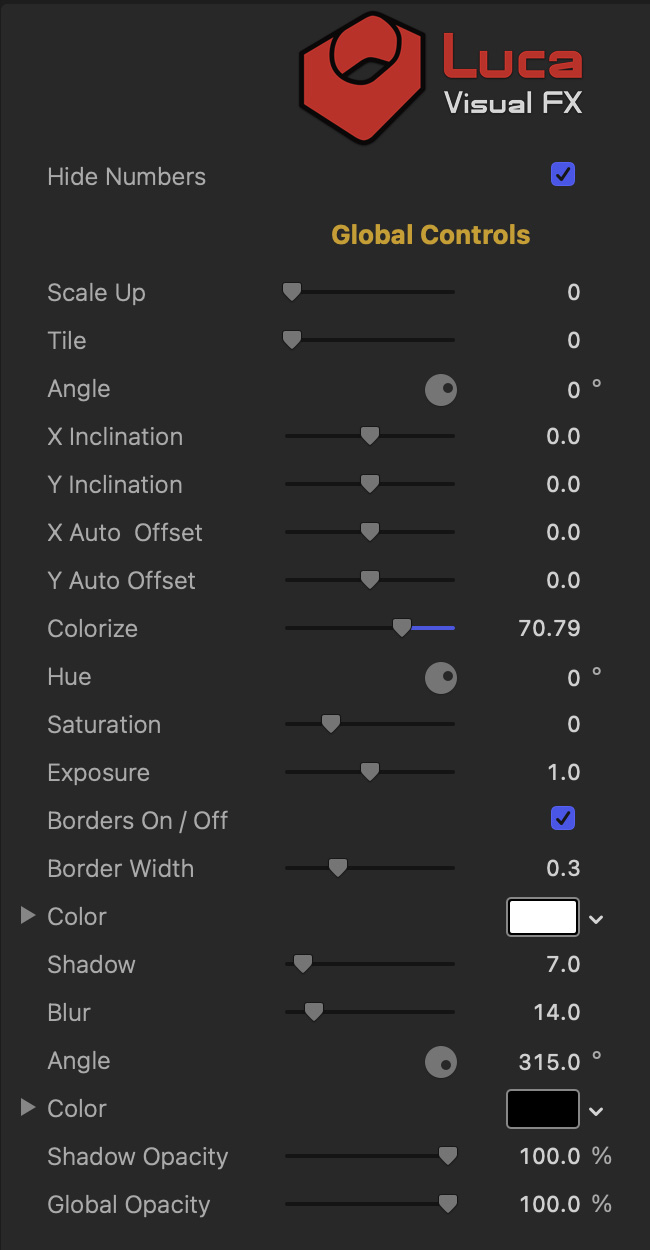
Here’s an example of the configuration controls available for a 3D master element, like a wall.
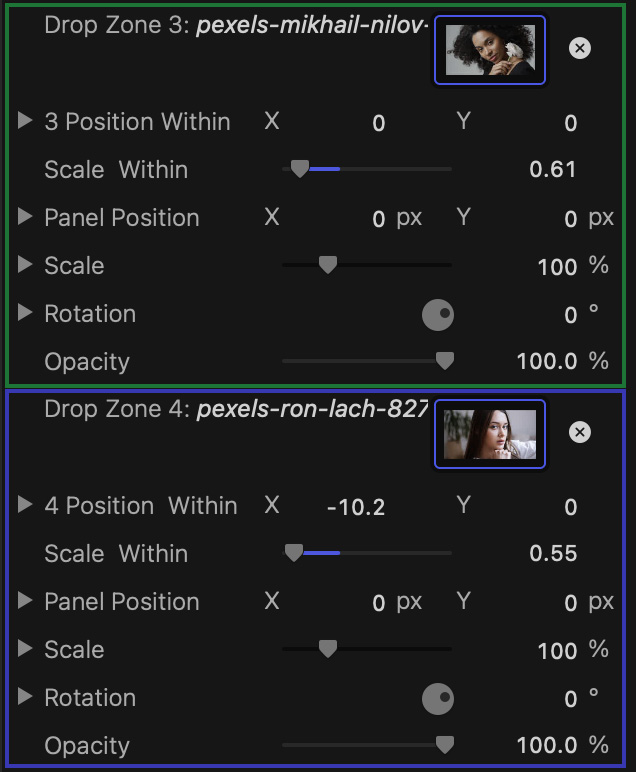
This is an example of the clip controls inside each drop zone. The green box indicates one drop zone, while the blue box indicates a second. Images are placed inside the drop zone.
NOTE: The easiest way to add a clip to a drop zone is to select the clip you want to add in the Browser, select the drop zone in the Inspector, then click the image of the clip displayed in the Browser. You CAN drag a clip, but clicking is MUCH faster with fewer hassles.
Drop zone videos always start at the beginning of the video, not at an In.
VIDEO WALL EXAMPLES
Here’s an example of a smaller video wall with only 22 video clips. While you can put any video – horizontal or vertical – in each frame, you can’t change the size of the frame itself. You can change the position and scale of the clip inside the frame.
NOTE: The numbers are to associate a frame with a drop zone. They can be displayed or hidden in the final video with a single mouse click.
This is an animated explosion of images, moving through 3D space. You can change the background color, the amount of animation, and the content of each frame.
NOTE: Not all drop zones need to have images inside them. To make a drop zone invisible, set its opacity to 0.

(Image courtesy Ron Lach – Pexels.)
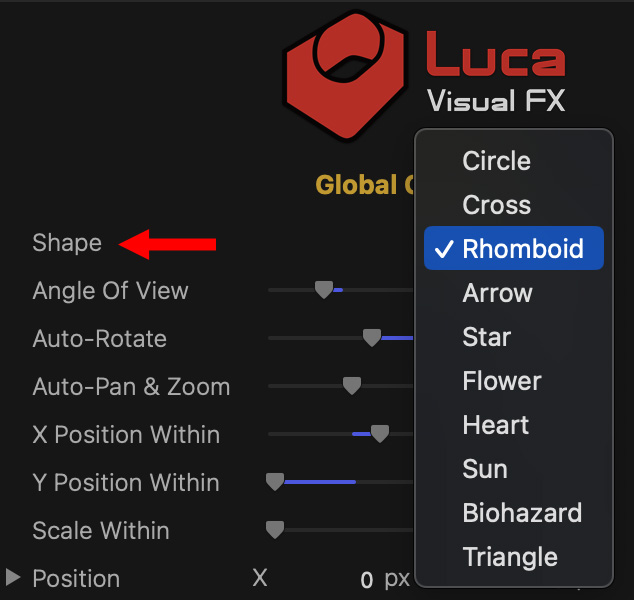
A single animated clip can be inserted into one of ten shapes, using a variety of animation movements. Multiple shapes can be added into the timeline, just as you could add multiple clips to create a multi-image effect.
SUMMARY
Video Walls 3.0, by Luca Visual FX, is an extremely well-thought-out, highly-flexible series of 3D video wall effects for one or more clips. The controls are detailed and the results are mind-boggling.
Even better, though, the defaults work without any modifications, so if you are pressed for time, you don’t need to tweak anything to get an outstanding effect.
Get the free trial and play with it. You’ll be amazed at what you can do.
2 Responses to Review: Video Walls 3.0, from Luca Visual FX
Do video clips need to be made into compound clips in order to put them into the drop zones?
Genie:
That depends. You only need to use compound clip if you want to use a piece of video that isn’t at the start. Drop zones always start video at the beginning of the clip – or compound clip.
Larry