
 Update, Nov. 17, 2024. After owning this monitor for a year and a half, I love how the screen looks and the stand it is on, but one feature that drives me completely nuts: How difficult it is to connect cables without laying the monitor on its side.
Compounding connecting cables, the monitor labels are engraved into the plastic case, which is a dark, dark gray. The labels are impossible to read without a flashlight and magnifying glass.
If you never change cables, this isn’t a big deal. But, it should not be this difficult.]
Update: Jan. 17. 2025. I’ve discovered how the input toggle on the back of the monitor works – and it works well. A feature I REALLY like is that I can connect two computers – one via Thunderbolt and one via HDMI/DisplayPort and watch both of them at the same time. Switching between them is easy – once you figure out the toggle on the back. There’s also a way to drag from one computer to the other using the Thunderbolt connection on the monitor. I’ve gotten it to work once, but haven’t figured out how to do it again.
About a month ago, I purchased a BenQ PD2725U monitor because I wanted a color accurate monitor for scanning still images and video editing. My goal was to get a monitor that I could trust that what I was seeing was what the image actually looked like. The specs of the BenQ met that goal.
As I was researching this review, I also learned that I have set the color spaces of my monitors incorrectly… for years. This review describes how to properly setup any monitor – not just BenQ – to provide accurate color representation.
NOTE: Since my earliest days in television, I realized that I have no control over how the viewer adjusts their monitor. It could be mis-adjusted in all sorts of completely inappropriate ways. All we can do – then and now – is to make the image look as good as it can and meet the specs for the job. After it leaves our hands, there’s nothing we can do except hope for the best.
EXECUTIVE SUMMARY
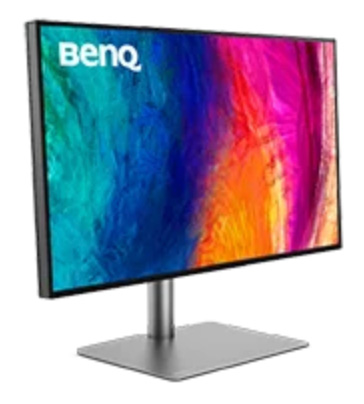
The BenQ 2725U-T 27″ is a 4k (3840 x 2160 pixel at 163 ppi) monitor designed to provide color accurate color for a wide variety of uses. What impressed me about BenQ, the company, was their focus on color accuracy. They have a color lab specifically devoted to color reproduction.
The PD monitor series is marketed for designer and videographers. BenQ has other models designed for other monitor tasks.
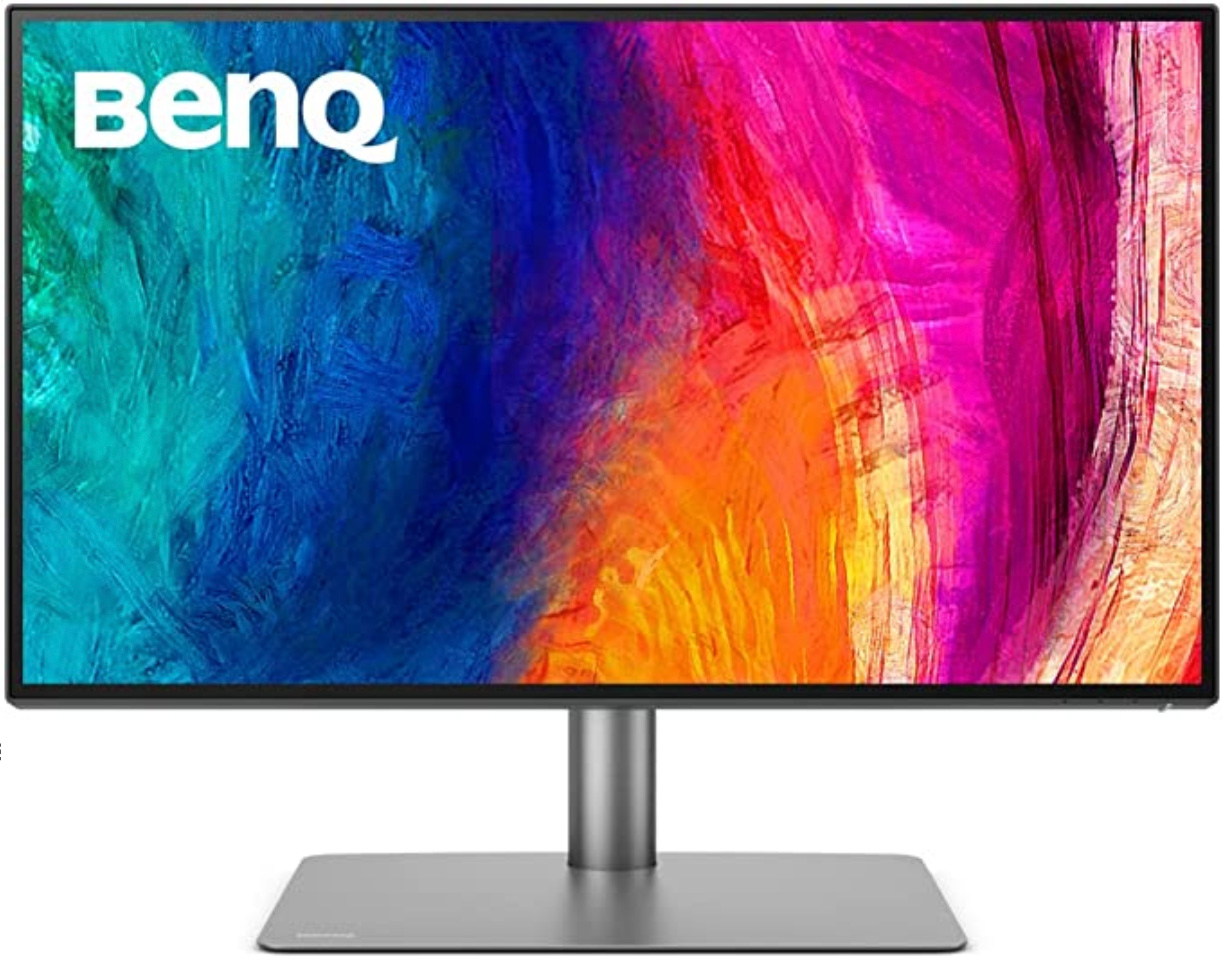
Its IPS display is evenly backlit, with no vignetting (darkening) in the corners. Its default color settings exactly match those of MacBook Pro laptops, though somewhat darker.
NOTE: BenQ invented AQColor (link) for people who require precise color accuracy.
The PD2725U provides ports for USB-C, ThunderBolt 3/4, DisplayPort and HDMI. Up to four video signals can be connected at once. Their website says it provides up to 65 watts of power to a connected laptop. A USB hub is available on the back of the monitor, however I was not able to test this because I could not get the USB-C/Thunderbolt port to work.
NOTE: The monitor does not seem to support auto-sensing input video signals, requiring the video input port to be set manually.
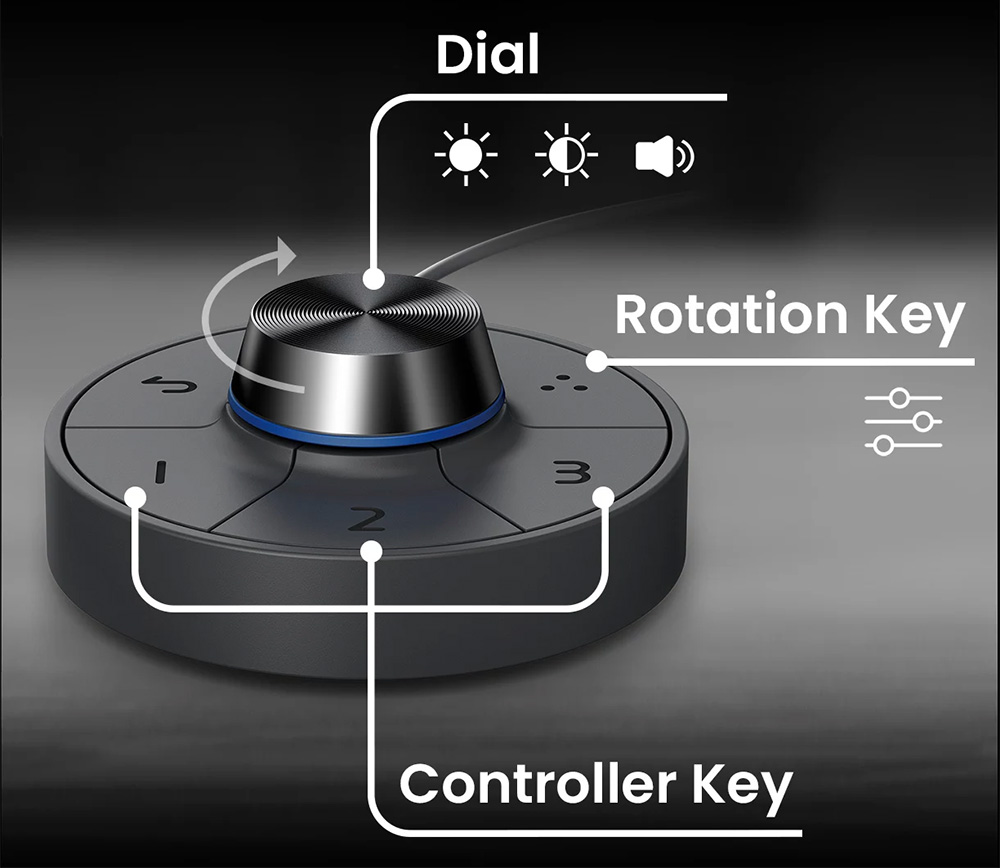
It includes a programmable hotkey puck so users can quickly control common features like brightness, contrast and audio volume.
The PD2725U is Pantone-certified for color accuracy. It is calibrated at the factory for color accuracy and through choosing the right menu can support:
With an average brightness of 250 nits (maximum of 400 nits) and a contrast ratio of 1200:1, this is not an HDR monitor. Nor is it as bright as the display of a MacBook Pro. However, it is ideal for still images and standard (Rec. 709) video, neither color space requires more than 160 nits of brightness. (In fact, the normal limit for Rec. 709 is 100 nits.)
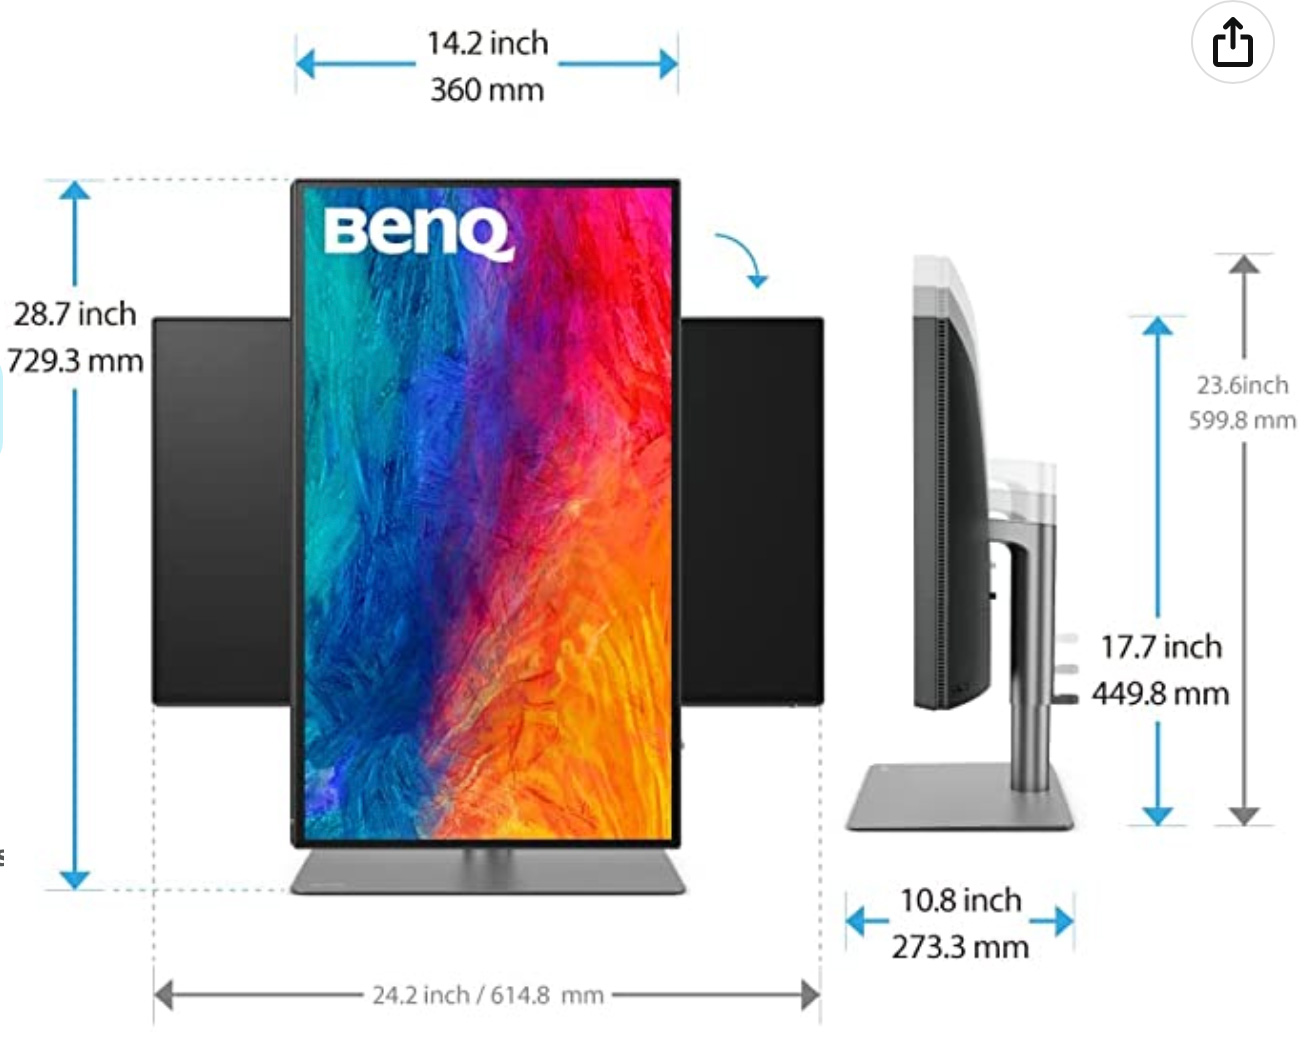
Assembly is easy, the monitor stand is a delight, providing 4″ of vertical lift, tilt, pivot and swivel movements that reposition the monitor without effort at any time.
NOTE: However, once cables are connected – especially if using the cable clip – vertical rotation may be constrained.
The BenQ also includes speakers and a headphone jack, which I don’t need and didn’t test.
If all you need is a monitor for your computer, there are excellent choices from a variety of companies that cost less than the BenQ. However, if color accuracy is important to you for editing or correcting still or moving images, and you don’t want to pay extra for the monitor stand, the BenQ PD2725U is an excellent choice.
Manufacturer: BenQ
Product: BenQ PD2725U-T
Website: https://www.benq.com/en-us/monitor/professional/pd2725u.html
Price: $849.00 (US)
TWO TYPES OF MONITORS
NOTE: I am indebted to Art Suwansang, BenQ Global Ambassador, for providing the technical background I relied on for this article.
There are two ways to calibrate colors on a monitor: hardware and software. High-end monitors such as Sony, Flanders Scientific, Azio and others use hardware calibration. This requires a chip inside the monitor that specifically handles color calibration and display. These monitors are priced in the thousands of dollars.
Software calibration handles calibration in software, where color changes are made on the video card. (All Apple monitors, including the Pro XDR HDR display, use software calibration.)
Also, there is a YouTube video featuring a BenQ color expert talking about the “danger” of connecting computer monitors using HDMI cables causing inaccurate color. While this is a true statement, it only applies to hardware-calibrated monitors. For software-calibrated monitors, how you connect is unimportant and yields the same results.
MONITOR SETUP
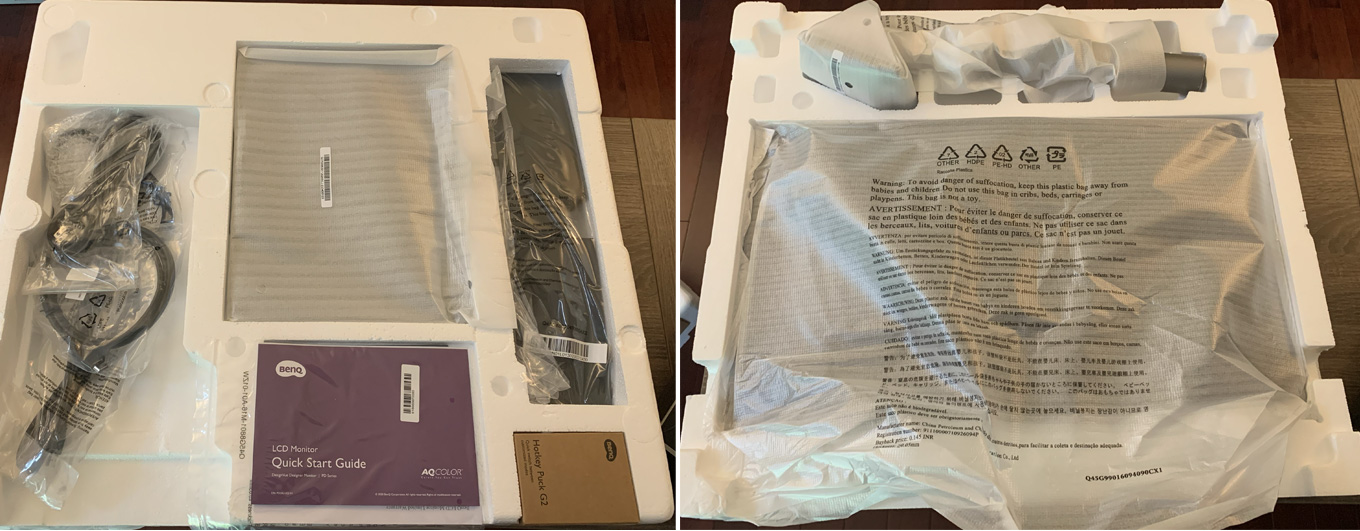
After admiring the all-cardboard packaging of the Apple Studio Display, the BenQ arrived surrounded by plastic bags and styrofoam. While this safely protects the monitor during shipment, it wins no extra points from the environment.
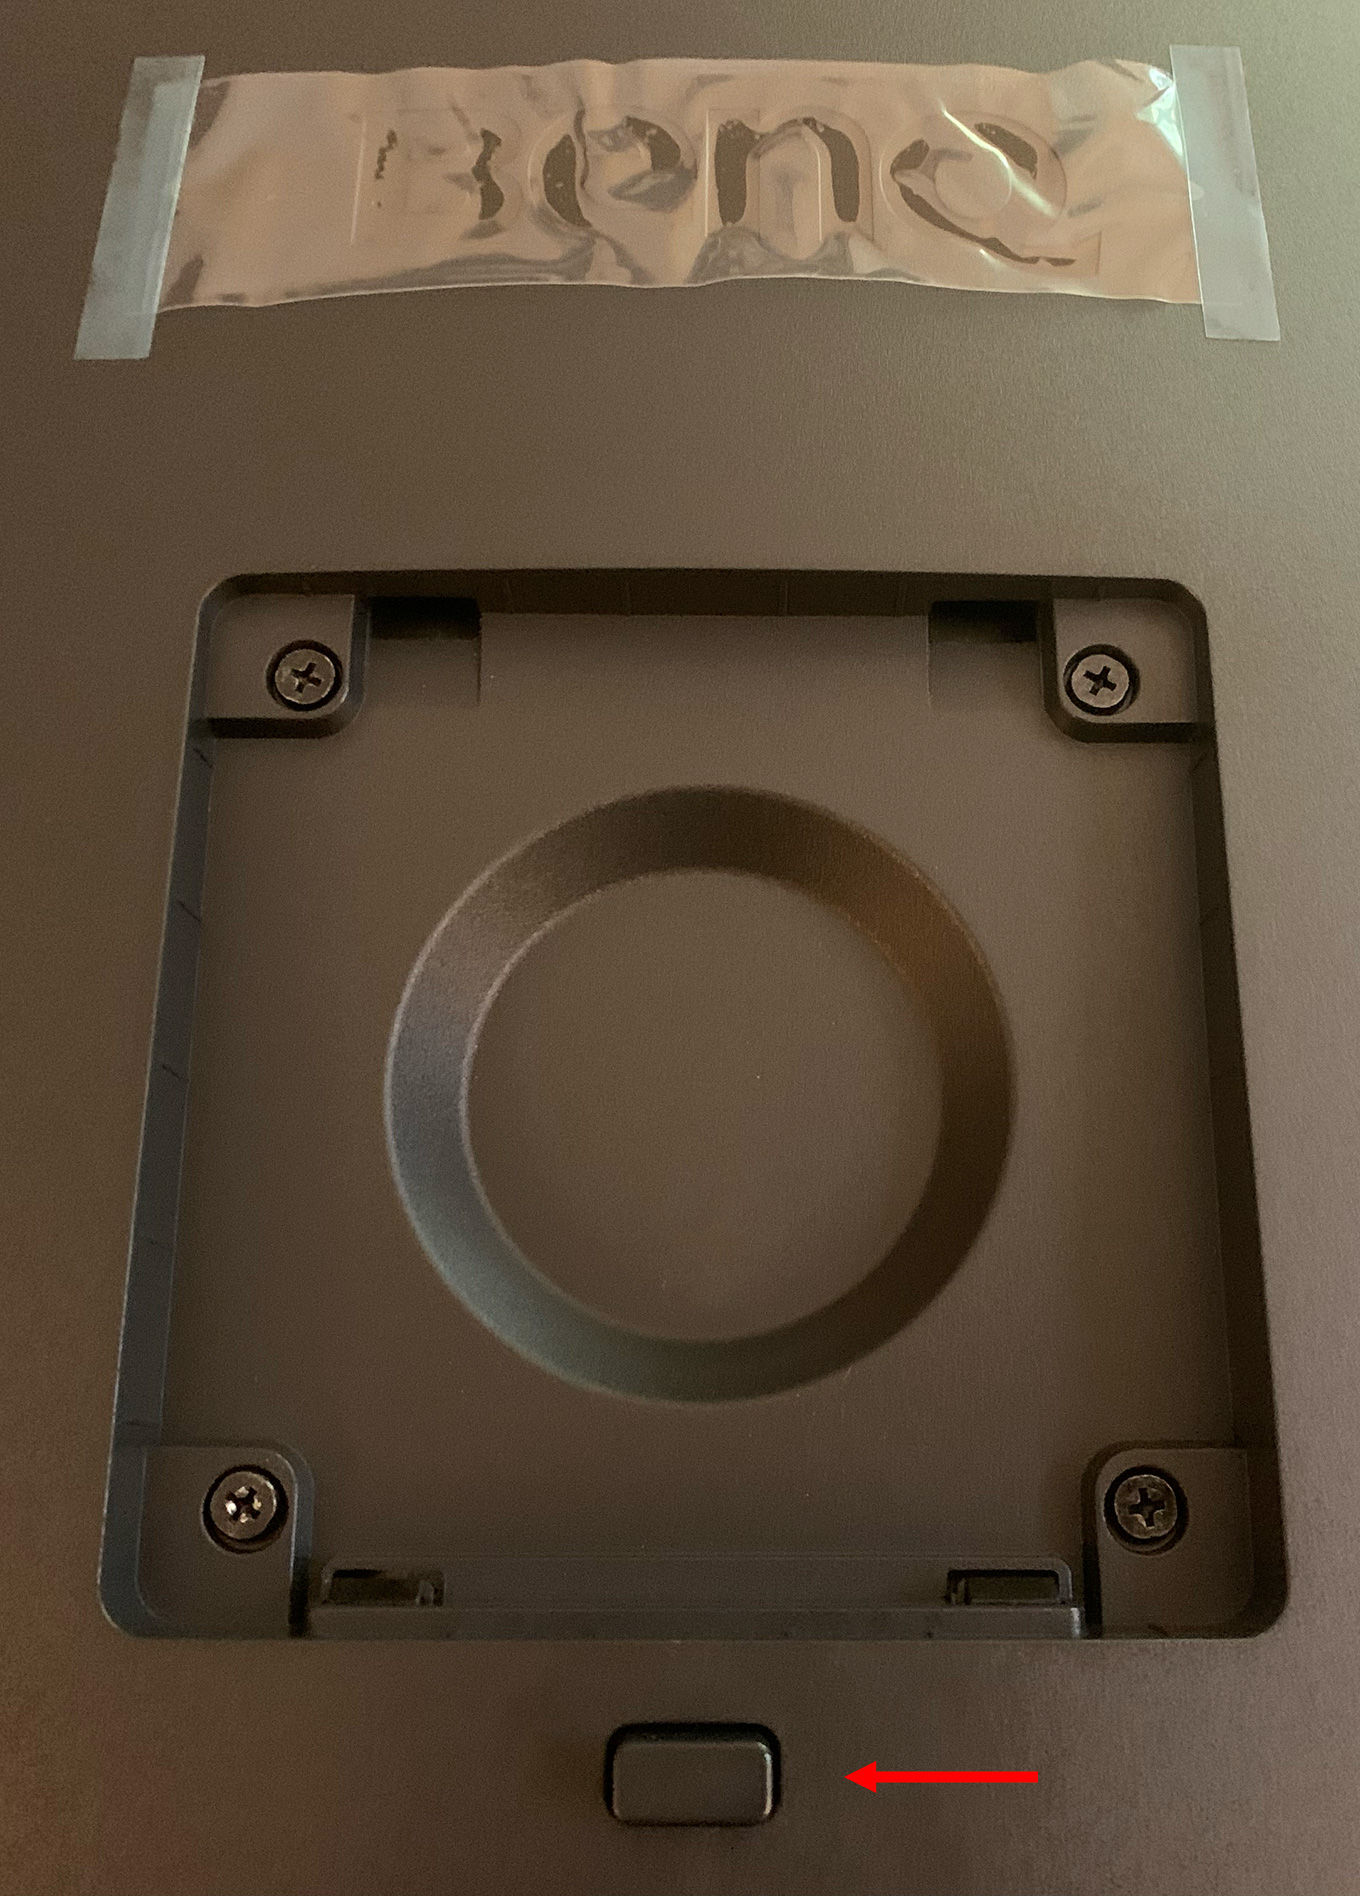
Setting up the monitor took about fifteen minutes, half of which was spent reading the manual and changing my mind on where to put it. The stand easily clips into the back plate (see screen shot above). there is also a button (red arrow) providing a fast release if/when you need to disassemble the monitor. This is light years better than the work needed to disassemble the stand on an LG display.
NOTE: The monitor also includes support for VESA mounts.

The back of the monitor holds all connections. These all point down, with a plastic cover to hide them from view. The monitor supports connections via: HDMI, DisplayPort, USB-C and Thunderbolt.
It also supports picture-in-picture from two different video sources, or up to four images using four different image sources.
However, as far as I can tell, it does not auto-sense active video signals and figuring out how to use the joystick to set the correct video source is so cryptic as to essentially be trial and error. Also, once the correct video source is selected, it takes the monitor up to five seconds to recognize it, so it is important to be patient when testing to see whether you’ve selected the correct setting.
TIP: Plug in all cables and attached the cable clip before you stand the monitor up and attach the back plastic cover. It is virtually impossible to find the right port and plug in a cable with the monitor standing. And removing the plastic cover while leaning over from the front of the monitor is… challenging.
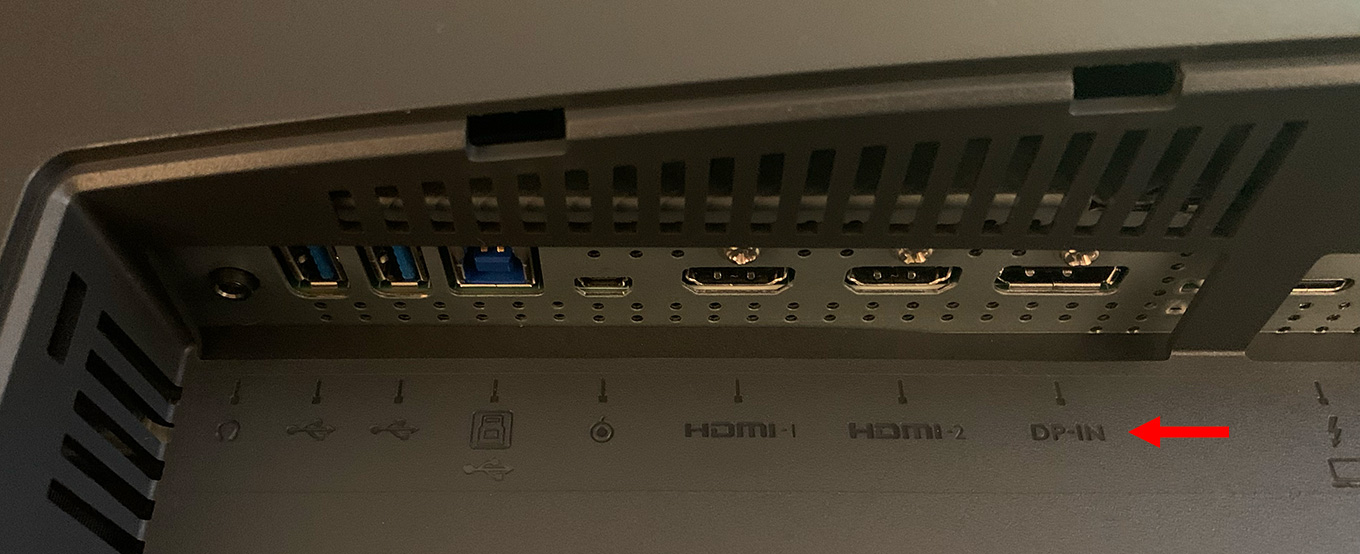
Also, like many monitor manufacturers, BenQ labels monitor connections by stamping text into the plastic. This may save BenQ money, but it is DARN HARD to read these labels in any sort of light. (The red arrow above points to the port labels.) I took six different photos before I found the right angle of camera and light that made these labels at all readable. Sheesh!
NOTE: Nothing I could do would get the BenQ to recognize a Thunderbolt 3 connection from the MacBook Pro to the monitor. I tried both ports multiple times over two days. Connecting via HDMI or Display Port worked fine. This may be an operator error – the input selection switch is very cryptic.
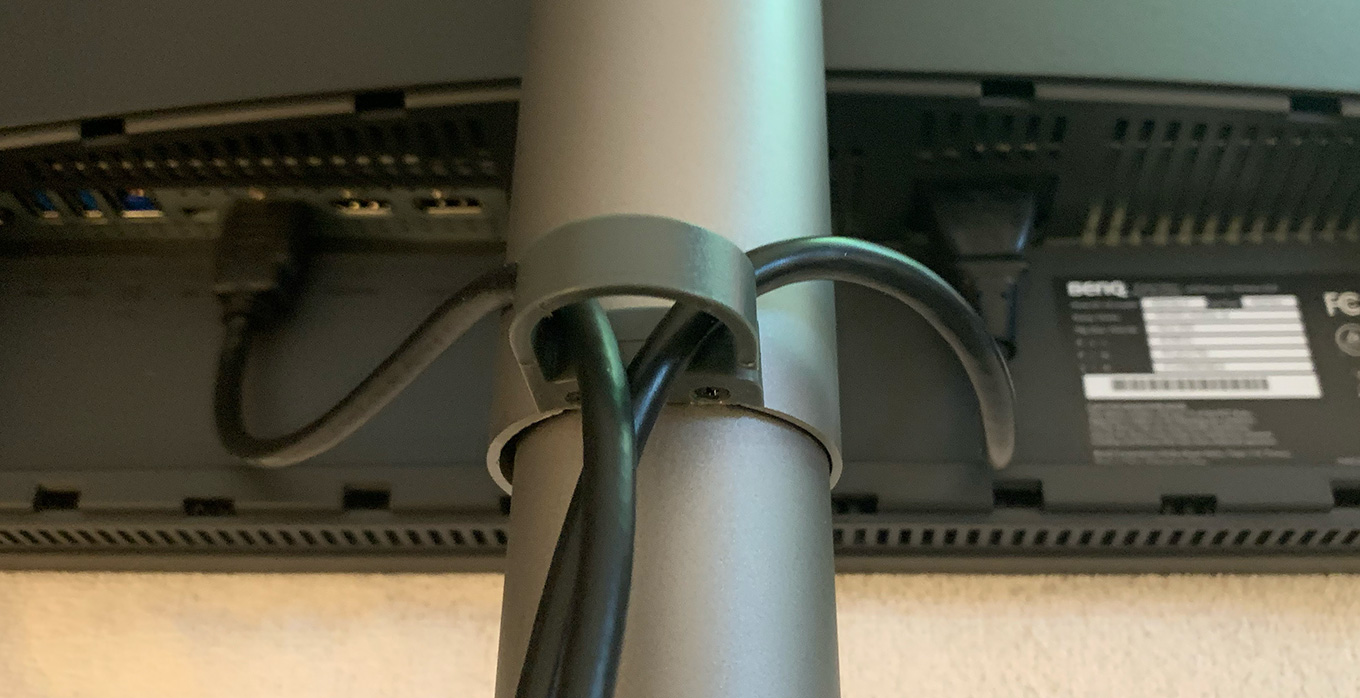
Something I like is that cable management is simple and neat. A clip hold cables to the monitor stand. This clip is easy to add, remove or change position.
The plastic back cover takes practice to get on or off; especially with cables attached. But, since I changed my mind several times about how I wanted to cable this monitor, I got plenty of practice.
I move this monitor between two computers: a Mac mini and a MacBook Pro; though both are never connected at the same time. The Mac mini connects using HDMI, while the MacBook Pro connects through a CalDigit dock using DisplayPort or directly using HDMI.
TIP: Rotate the monitor before connecting any cables, especially if you plan to use the cable clip. If you plan to rotate the monitor regularly, don’t use the cable clip because the cables and clip will prevent the monitor from rotating.
OPERATION
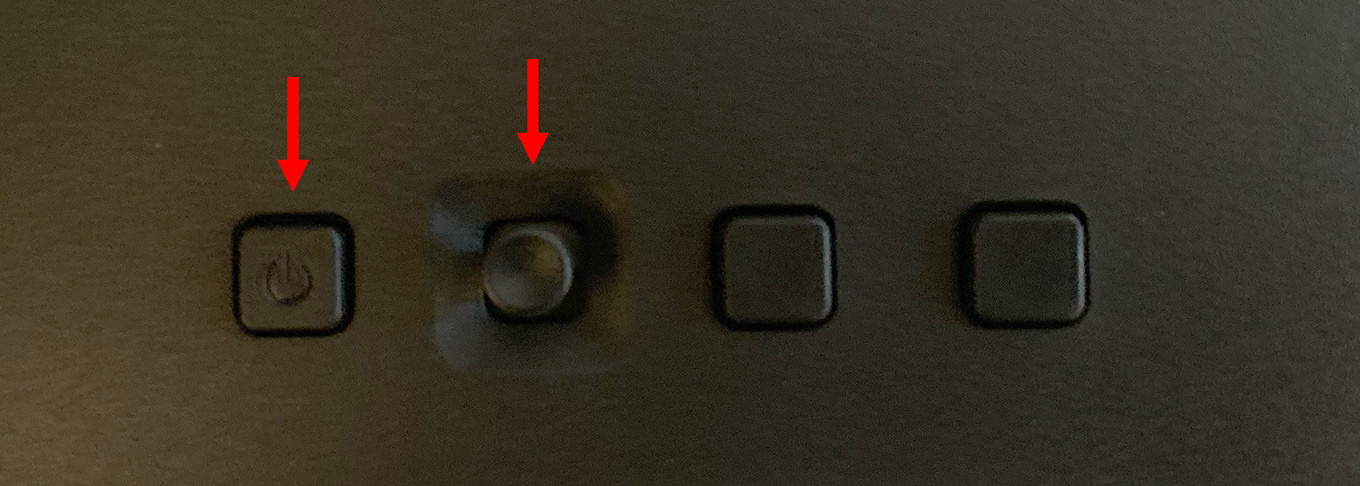
Press the power button on the back (left red arrow) to turn the unit on or off. The joystick (right red arrow) controls the on-screen display (OSD) menu options.
Since the BenQ comes factory set with display settings that match a Mac, if all you need is to match your Mac monitor, you are done.
From unpacking the box to full operation took 30 minutes – including time spent reading the setup guide and trying different cable connections.
CHANGING DISPLAY COLOR SETTINGS
This is the section where I learned the most in writing this review. Here’s the key statement:
Never change color settings on the computer.
Change color settings on the monitor.
Here’s how.
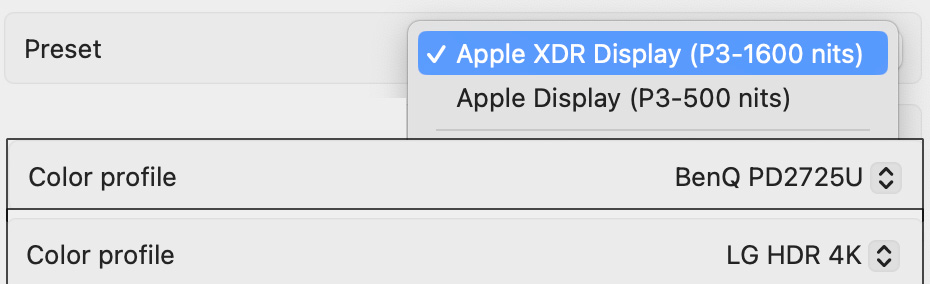
We use the Apple Display Settings to set the Color Profile of the computer to match the profile of the monitor. It will have the monitor name in the profile name.
The easiest way to think about what’s happening behind the scenes is this analogy: The computer feeds a high-quality “raw” image to the monitor, defined by the monitor profile. The monitor then takes that feed and applies a LUT to it so that the image then conforms to a specific setting; for example Rec. 709, sRGB, P3, and so on.
In other words, we change settings on the monitor, not the computer.
ON-SCREEN DISPLAY OPTIONS
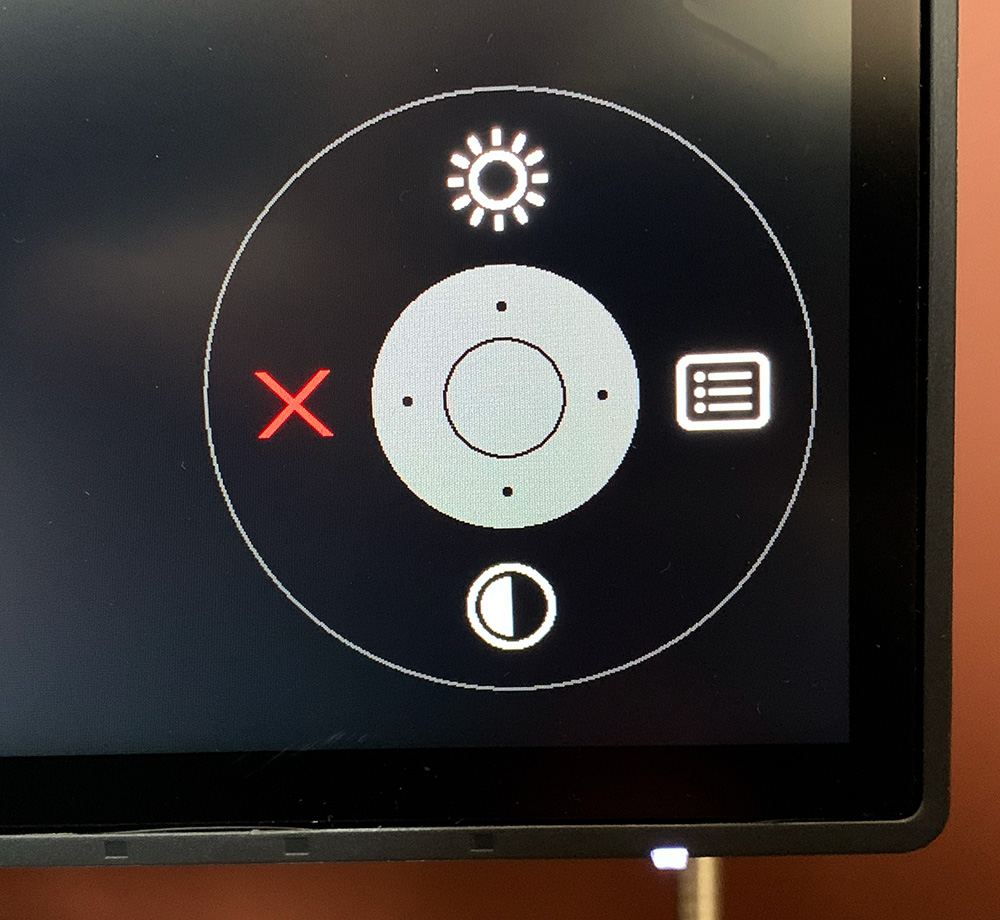
The on screen display (OSD) has a variety of setup options to choose from.
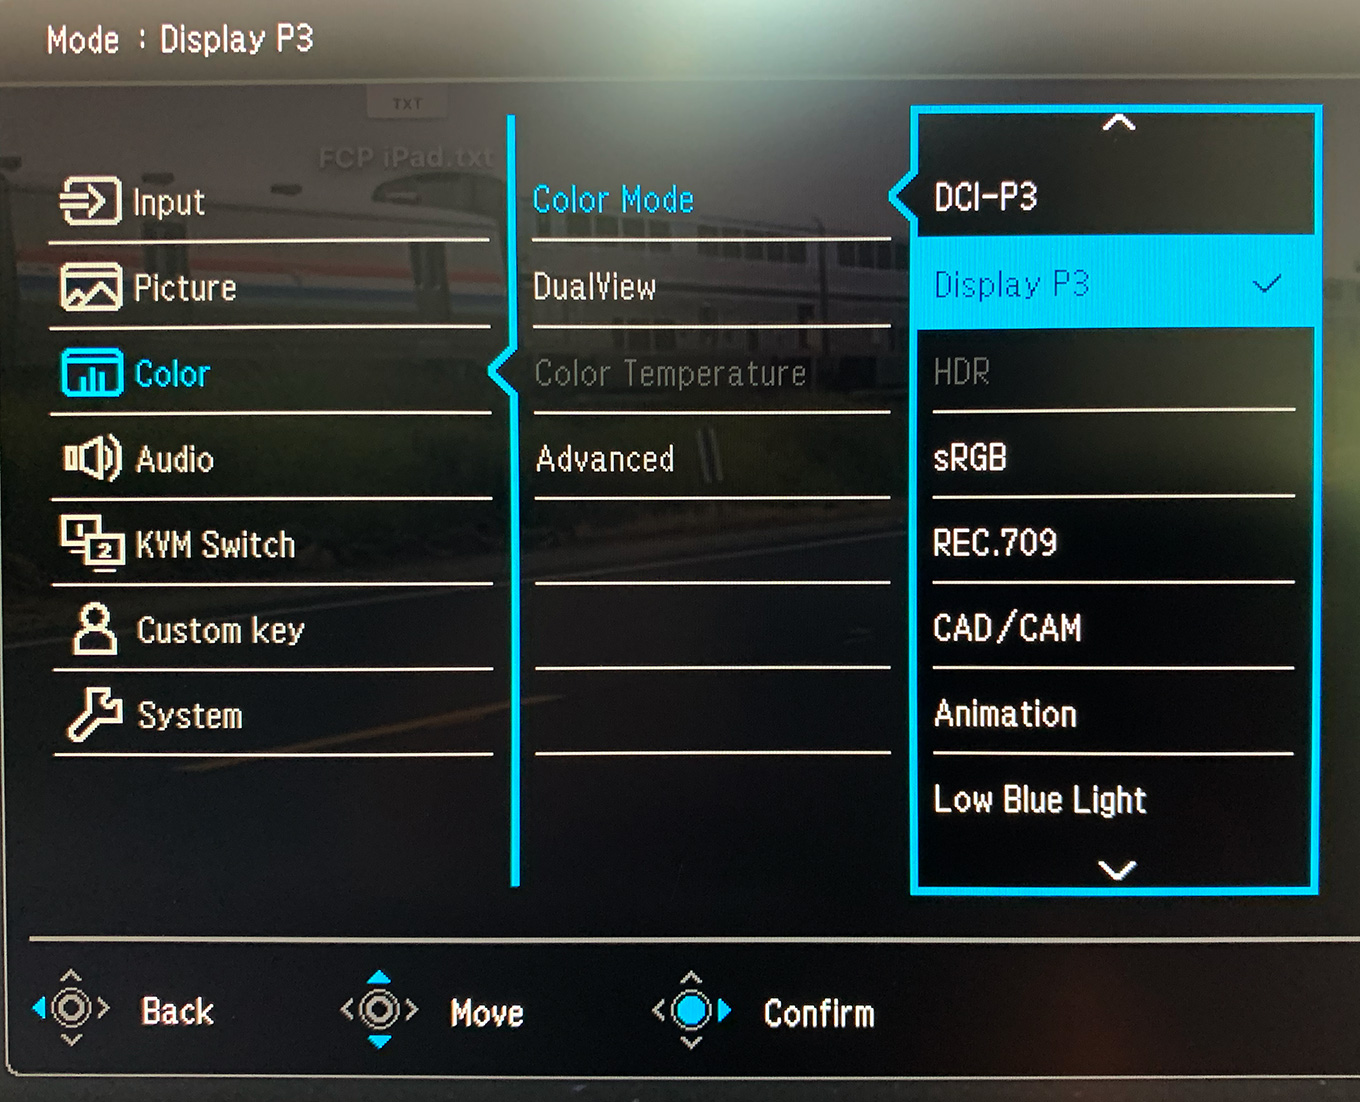
These are some of the color spaces the BenQ supports.
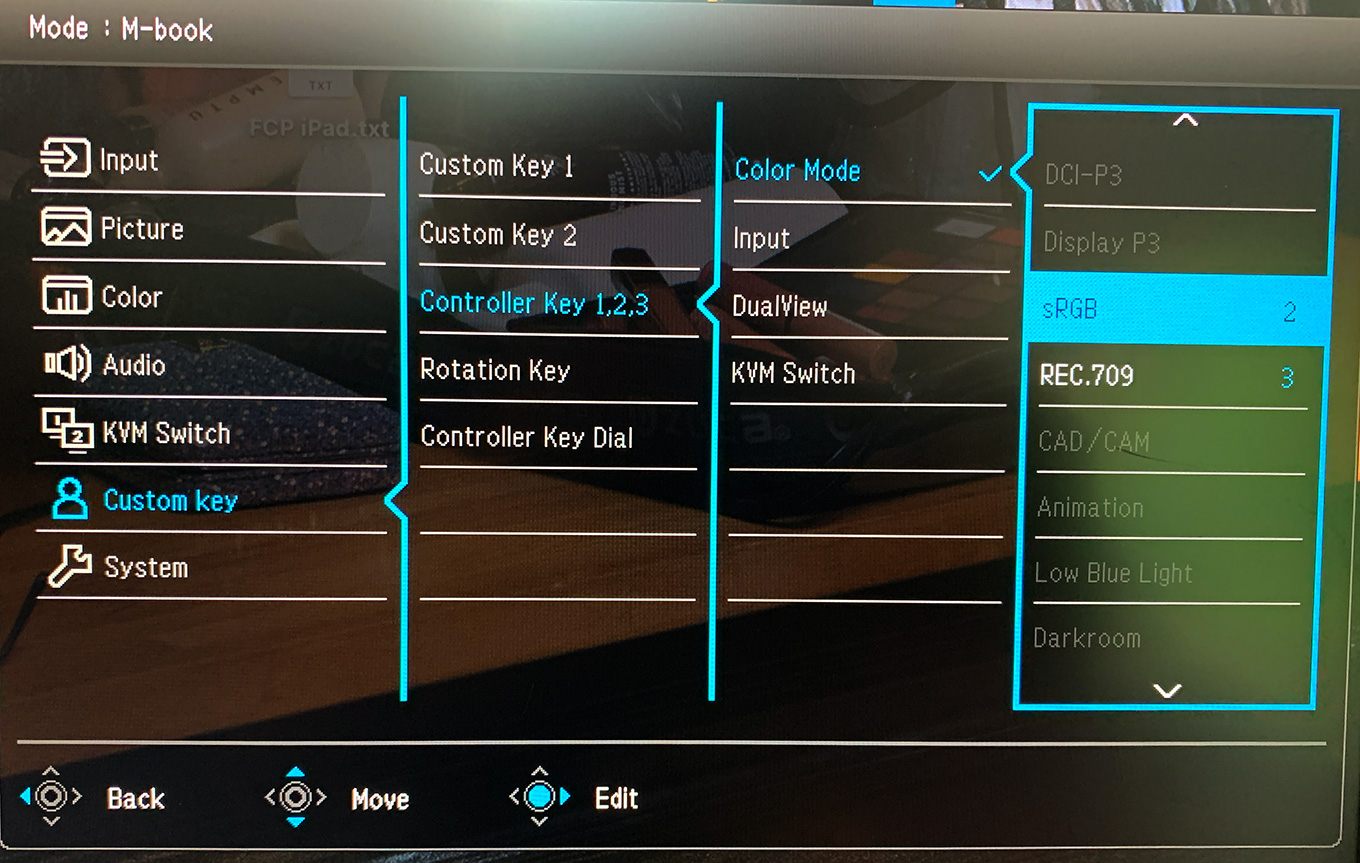
The hotkey puck has five buttons on it. I programmed three of them to switch between the default MacBook Pro settings, sRGB and Rec. 709. This makes it easy to quickly switch color modes. Aside from this switch, I don’t use the puck during normal operation.
CAN WE TRUST IT?
Once we have the monitor set for a specific color space, the key question remains: Can we trust the images the BenQ displays? Well, like everything in tech, the answer is: “It depends.”
Because I do both video and stills, my goal is to use a calibrator – which I don’t yet own – to set the brightness levels to 120 nits. That setting covers both.
SUMMARY
At the end of the day, as my British friends say, it comes down to trust. I don’t have the technical gear to verify that this monitor is actually displaying 100% of the Rec. 709 or sRGB color space.
But I CAN easily see the grain in a still photo or the noise in a video signal. I can see the extra edge detail added by an iPhone camera, or the subtle details in grayscale or color. All of these are easy to spot.
There is a clear difference when switching color spaces between P3, sRGB and Rec. 709. The image is stable, with no flicker, and text is easy to read. Colors are bright, lighting is even from edge to edge with no vignetting.
Based on what I’ve learned and seen, I’m comfortable making color and composition decisions based upon what I see with the BenQ PD2725U. And that’s the highest praise you can give any monitor.

22 Responses to Review: BenQ PD2725U-T Computer Monitor [u]
← Older Comments-
 JED ORME says:
March 12, 2025 at 12:50 pm
-
 Larry Jordan says:
March 12, 2025 at 12:55 pm
← Older CommentsLarry,
Many thanks for this input about HP and the difference between Thunderbolt 3 & 4. Your continued satisfaction with the BenQ PD2725U is most reassuring, so much so that I just ordered one from Amazon. I don’t get my Mac Mini M4 from my Apple store until the end of the month due to ordering one with more storage (after much self debate about using an OWC external SSD drive for this), and wanting also to avoid getting caught up in any tariff war issues if Apple or BenQ were to become affected. Thanks again for your advice. Jed
Jed:
Smile… happy to help.
Enjoy your new toys!
Larry