 Earlier this week, I was working with a client trying to help him learn how to color correct his footage. He had purchased a variety of different plug-ins and was dragging sliders with a wild abandon, but not getting the results he was hoping for.
The problem wasn’t his plug-ins, but his understanding of color correction.
NOTE: I have webinars that go into color correction in a lot more detail. Here’s a link for one covering Final Cut Pro X. And here’s a link for one covering Adobe Premiere Pro CC.
THE KEY CONCEPT
Video, unlike printing, combines colors additively. This means that equal amounts of red, green and blue equal gray.
While this is an interesting concept, it doesn’t help us fix color problems. However, when we turn this around it becomes a very powerful recipe to help us fix color casts:
If something is SUPPOSED to be gray, then it must contain equal amounts of red, green and blue.
NOTE: In this article, I’m illustrating this process using Final Cut Pro X. However, this technique works EXACTLY the same in every version of Premiere, every version of Final Cut, and every color correction plug-in.
IN PRODUCTION

Many of us color balance a camera by shooting a white piece of paper. I suggest instead that we shoot a card containing mid-tone gray; ideally, a gray scale chip chart, like the one illustrated above. (These cards can be found online from a variety of sources.)
Why? Because mid-tones support greater color saturation than highlights or shadows. And using a gray-scale chips also allows you to quickly set white and black levels accurately in post.
NOTE: To help with color correction in post, it is important to also record 10-15 seconds of the gray card or chip chart. You’ll see why in a minute.
IN EDITING

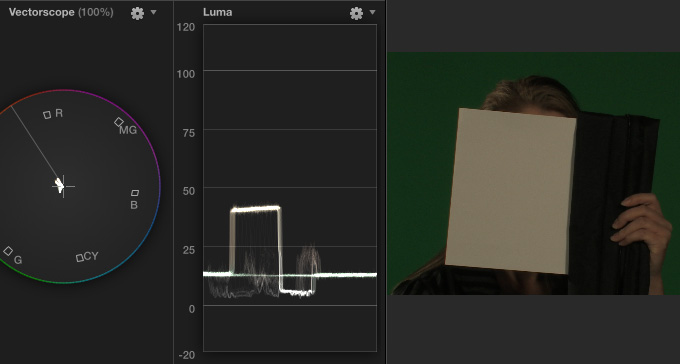
Here’s an example of a problem shot. This green screen shot is dark, with elevated black levels. In an ideal world, I would shoot her holding a card with white, black and gray on it. But, I didn’t have it during this shoot. So, I “made do.”

Once in editing, I first set the white levels as close to 100% as I could, though the image is still a bit dark. Next, lower the black levels to 0.
Then, make sure mid-tones for the skin are:
NOTE: Yes, there are individual and gender variances. This is a Quick Tip article, not a detailed analysis of skin types and color theory.

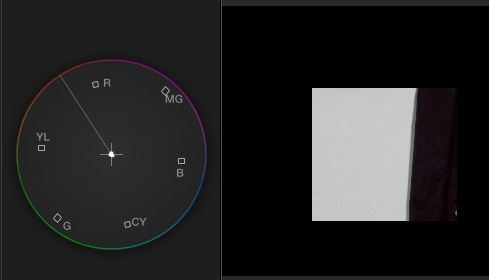
Next, and this is where the gray card is most useful, I crop into the image so that I only see the gray card.

Because gray should be a single dot in the center of the Vectorscope, anything that isn’t is a color cast that we need to get rid of.
NOTE: Remember, white, black and gray are all “gray;” that is, regardless of gray-scale value, they all contain the same amount of red, green and blue.

So, using the color correction tools in my editing software. I adjust the colors – most often the mid-tones and highlights – until the Vectorscope has the smallest possible dot in the center of the scope.

Here’s the final result.
SUMMARY
At this point, you’ve dialed out any color problems that were recorded during production and can now tweak your colors to get the look that you want.
The key is to shoot and record a gray card – ideally a chip chart – at the beginning of every clip where the location or lighting change. And make the image of the card big enough that you can crop into it during editing to isolate the gray from everything else in the shot.
The best place to put the card is directly in front of your talent’s face. (It gives them something to do just before you start recording….)
2 Responses to Quick Tip: Color Correction
as usual, the best stuff is the simplest. Thanks Larry for this trick!!!!
Stu
Folded in my run-n-gun kit bag, I carry a large square of neutral cotton fabric to use as a white balance target. Packs smaller than a chip chart, rugged, and makes sure I always have with me a known quantity as a target. I found fabric with a large pattern of neutral grey patches in values from white to black, so it passes as a crude chip chart as well. Tested against a calibrated chip chart, I have a sense of where the patches fall on the grey scale chart and how the camera responds. No excuse not to shoot that calibration clip.