 Jon Gay asks:
I have multiple objects that I want to motion track and blur in Motion. I’ve created a project that does this, but is there a better way?
Larry replies: This is a fascinating question. Let’s take a look at how Motion does this.

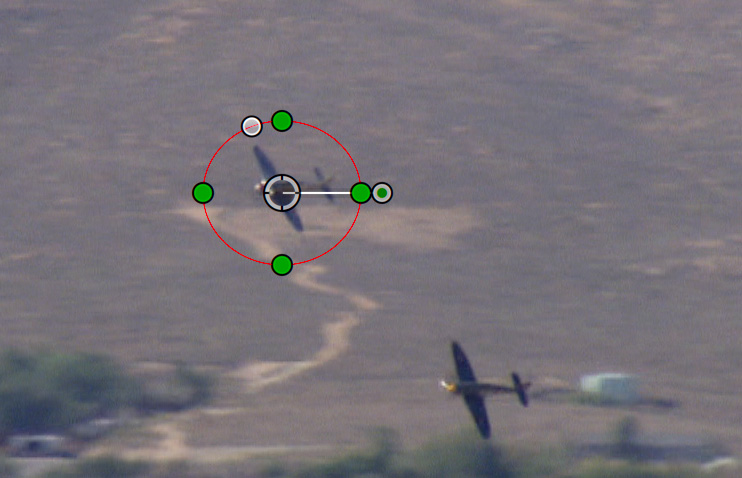
The source image was taken by Jon back in 2012 at an air race. As an experiment, he wants to mask the two planes, which, not surprisingly, are moving through the frame.

Here’s where we are going. I created a tracking mask for each plane, blurred each mask then, because I could, colorized both.
OVERVIEW
This requires two layers:
CREATE THE BACKGROUND

Create a new Motion project that matches the frame size and frame rate of the source clip.

Rename the initial group to Background and import the media.

Set an In where you want the clip to start by positioning the playhead on that frame and typing I. Then, drag the clip in the mini-timeline until the clip starts at the beginning of the project – or whenever you need the clip to start.
At this point, you are done with the background. You can twirl it up.
CREATE THE FOREGROUND

In the Layers panel, create a new group (Shortcut: Shift + Cmd + N) and rename it Foreground.
NOTE: Renaming groups is not necessary, but helps avoid confusion as projects get more complex.
Then, Option – drag the Air show clip from the Background into the Foreground group. This makes a copy of the clip.
CREATE THE MASK
Select the foreground clip. (From here on out, if I refer to “the clip” I am always talking about the foreground clip.)

Draw a circle mask around one of the planes you want to track and blur. Reshape the mask, as needed, by dragging the green dots.

With the circle mask selected, apply Behaviors > Motion Tracking > Match Move. This puts a white target around the circle blur, with a red tracking dot centered on the object you want to track.
NOTE: When you apply the Match Move behavior to a mask, the masked object is selected as the source.
Adjust the placement of this tracking dot so it is placed on an easily identifiable and high-contrast edge. The corner of wing and fuselage is a good point. The key is that it be clearly defined and visible during the entire track.

Click the Analyze button and Motion builds a motion track of, in my case, the moving plane.
NOTE: Use the magnified image in Track Preview to refine the location of the tracking dots.

If the track breaks, adjust the tracking point to find a more definitive location. Also, click the Show button for Anchor and decrease the Fail Tolerance setting. If you still have problems, slightly increase the Look Ahead Frames setting.
(Motion’s help files state that you can apply multiple motion tracking points to an object. While this is true, I couldn’t get the movement of the tracked mask to match properly in the transition between tracking dots. For this reason, I kept tweaking the location of the tracking point.)
If the track totally breaks:
Repeat this process of creating a circle mask for each element you need to blur, then track each circle mask.
NOTE: In my case, tracking one of the planes worked perfectly on the first try. The second plane took a number of adjustments to the tracking point until Motion found one that worked reliably.

Both planes are now masked and tracked in the foreground layer.
FINISH UP
Because the foreground layer only contains the elements we want to blur, we apply the blur to the foreground group, not the individual elements. Then, just to show off, we can also colorize the blurred planes.


Done.
EXTRA CREDIT
You can use this technique to provide highlights around an element, blur an element, track text next to it, or anything else that catches your fancy.
In his note, Jon wrote: “Ultimately, I was trying to go for a standalone Motion project with a drop zone.”
Unfortunately, Final Cut doesn’t support motion tracking natively. The best way to handle this is to open the clips you need to track in Motion, then export them as a master file. Import that master file into FCP and treat it as you would any other clip.
Save the Motion project in case you need to go back and make changes.