
![]() Markers are an invaluable navigation and commenting aid in Premiere. My problem with markers is that I can never put them where I want them. I want them in the timeline, but they go into the clip. Or I want them in the clip and they go in the timeline. Sigh…
Markers are an invaluable navigation and commenting aid in Premiere. My problem with markers is that I can never put them where I want them. I want them in the timeline, but they go into the clip. Or I want them in the clip and they go in the timeline. Sigh…
Then, once I get them safely put, I can’t find them again in the Markers panel.
Fortunately, over the last few upgrades, Adobe has improved marker behavior. Here are the new features.
FINDING MARKERS
Markers are always placed at the position of the playhead in whatever clip is selected. If no clips are selected at the position of the playhead, the marker is placed in the timeline.
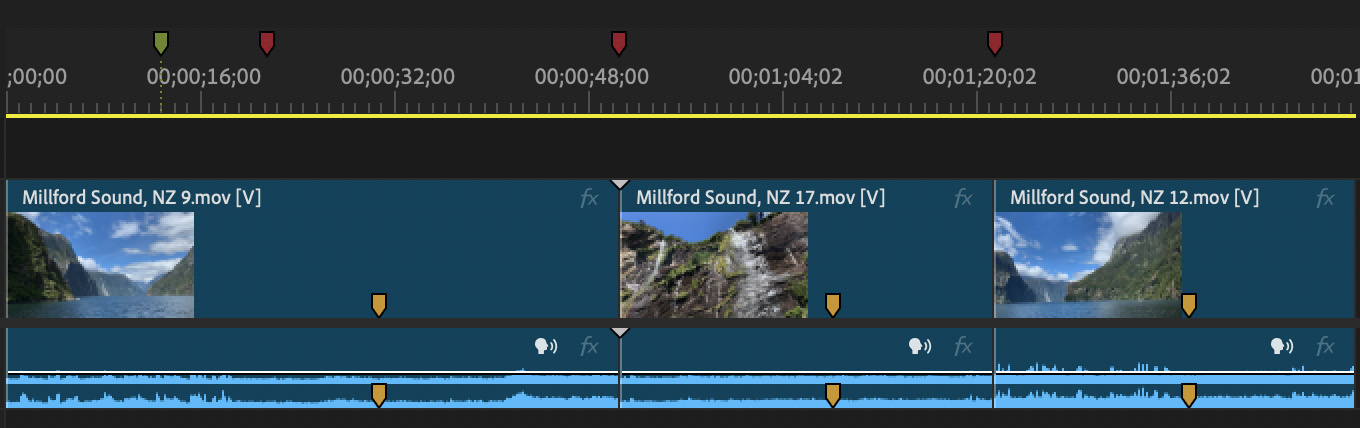
Here is a short sequence with four timeline markers and three clip markers. (I added custom colors, ah, simply because I could.)

Markers can be assigned up to eight different colors (the default is green), and can include both a marker name and comment. In this example, I decided to color all my sound effects (SFX) markers in red.
NOTE: To create a marker, type M or choose Markers > Add Marker. To review, revise or delete a marker, double-click it in the Markers panel.
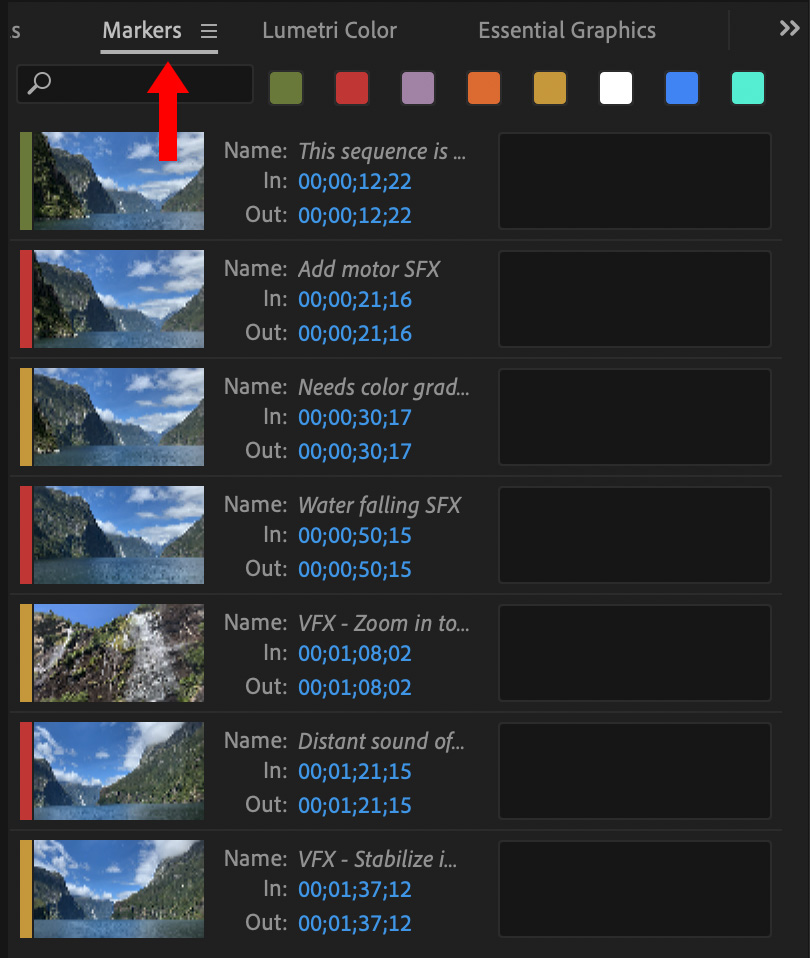
Once a sequence starts to fill with markers, you can view them in the Markers panel (red arrow). If you select a clip, only markers contained in that clip are displayed in the Markers panel.
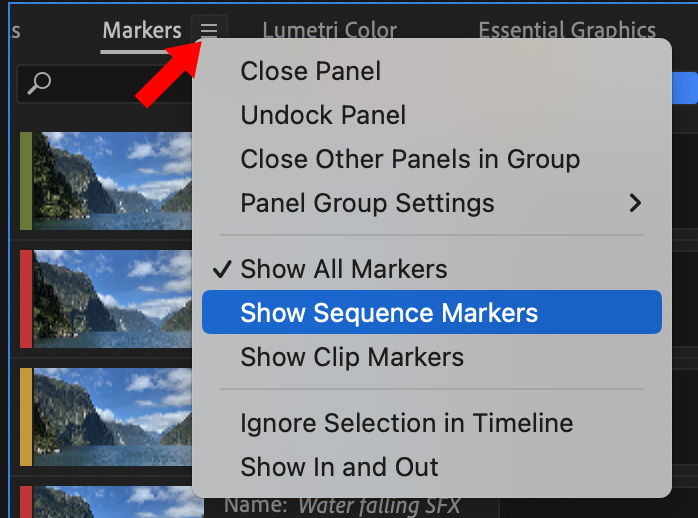
Another new feature allows us to select just sequence or just clip markers from this menu (red arrow).
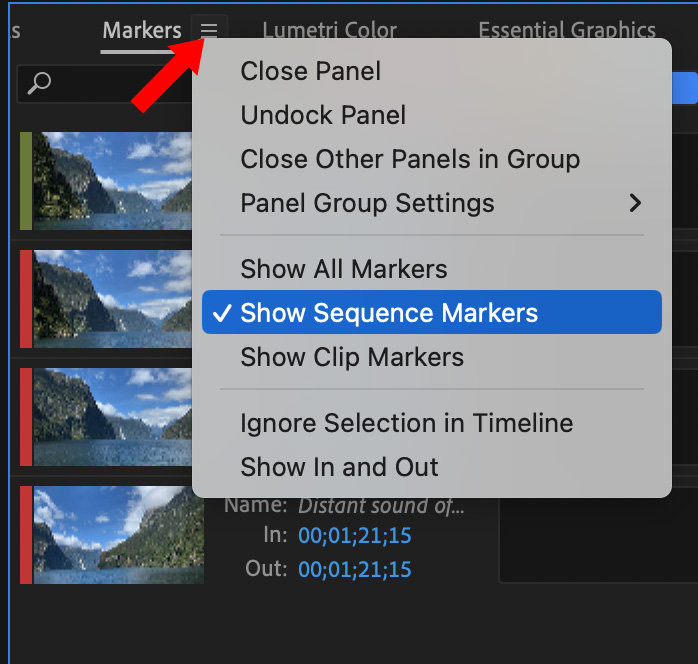
Here, for instance, just sequence markers are displayed. If a clip, or clips, are selected, only markers from the selected clips will be displayed in the Marker panel.
NOTE: If you select Ignore Selection in Timeline from the Marker panel menu, all markers will be displayed, regardless of which clips are selected.
ADD MARKERS TO TEXT
In May, Adobe added the ability to add markers to text transcripts. But they put this into a menu that is so difficult to find that you’ll never discover it, if you don’t know it is there.
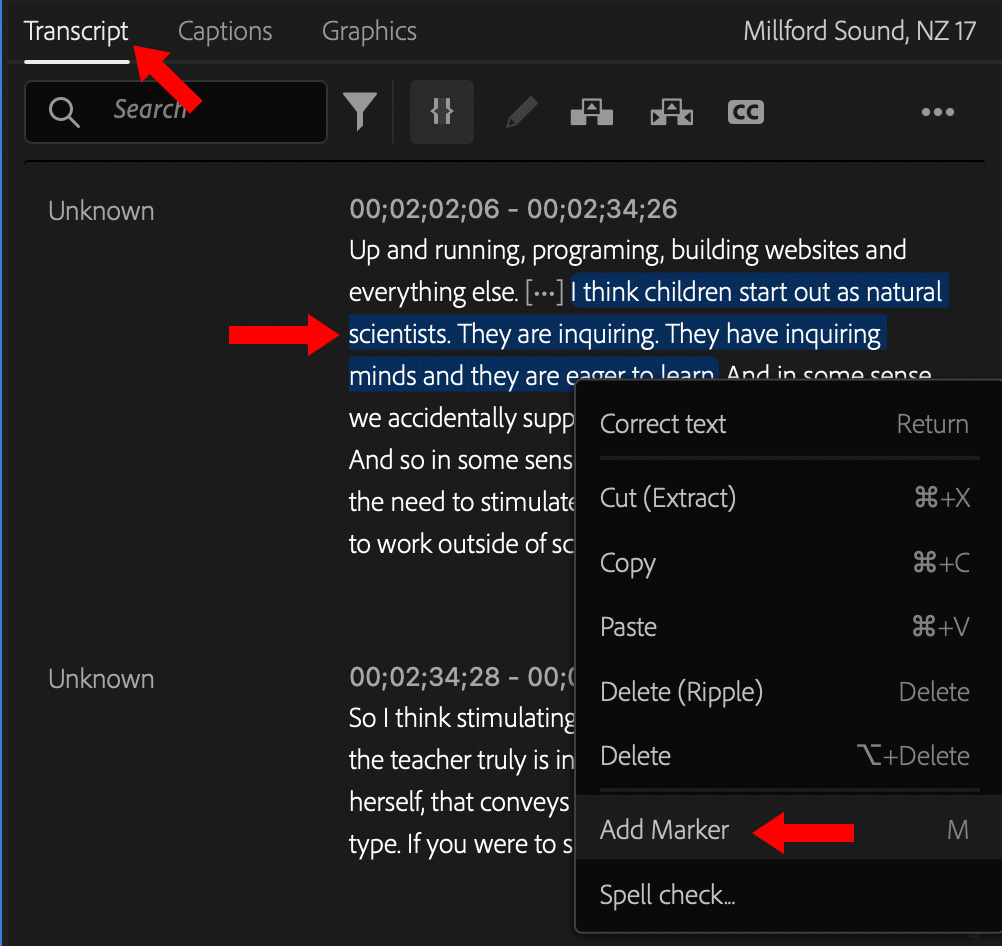
Open the Transcript panel (top red arrow) to display a text transcript for the selected clip in the timeline. Here, I highlighted the section that I want to flag with a marker (middle red arrow). Control-click the text to reveal this menu. Choose Add Marker or type M (lower red arrow) to add a marker to the selected text.
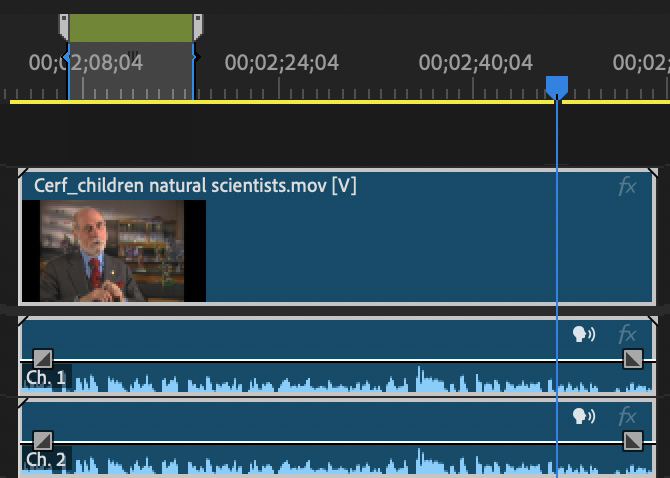
A marker with a duration is highlighted in the timeline and the clip.
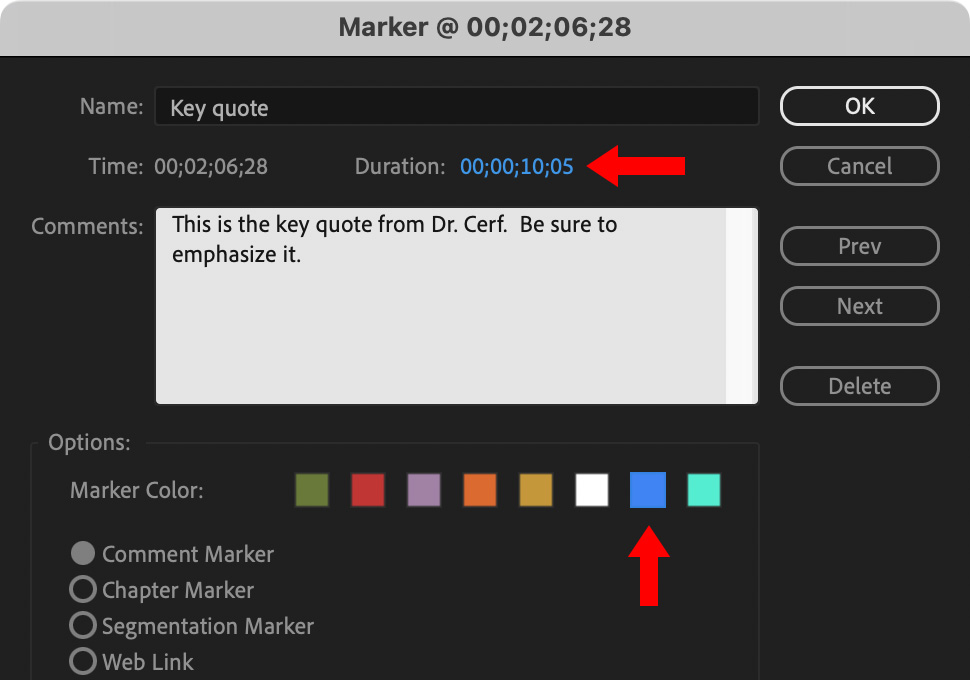
Double-click the marker to open it for editing and add whatever title, comment and color you want.
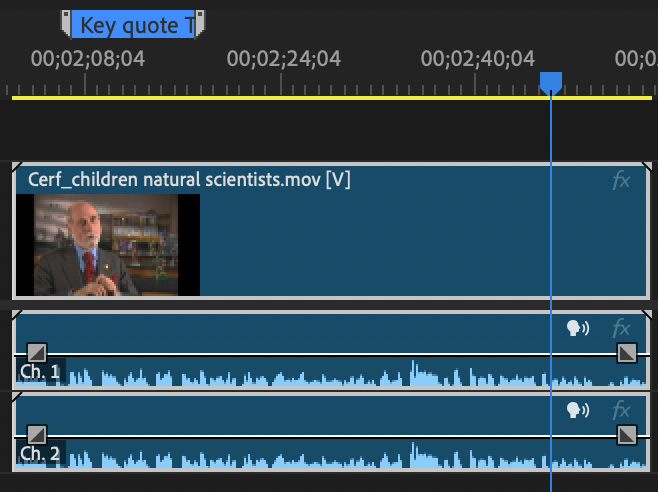
The results are updated and displayed in the timeline and the clip.
