
![]() Resolve has lots of titles available in its Effects panel. But, most times, you want something custom that matches the look of your project. In my Resolve Fusion webinar, I showed how to use Fusion to create custom animated titles in Resolve.
Resolve has lots of titles available in its Effects panel. But, most times, you want something custom that matches the look of your project. In my Resolve Fusion webinar, I showed how to use Fusion to create custom animated titles in Resolve.
However, I discovered as I started to use these custom titles in editing last week’s webinar, that custom titles in Resolve are project specific.
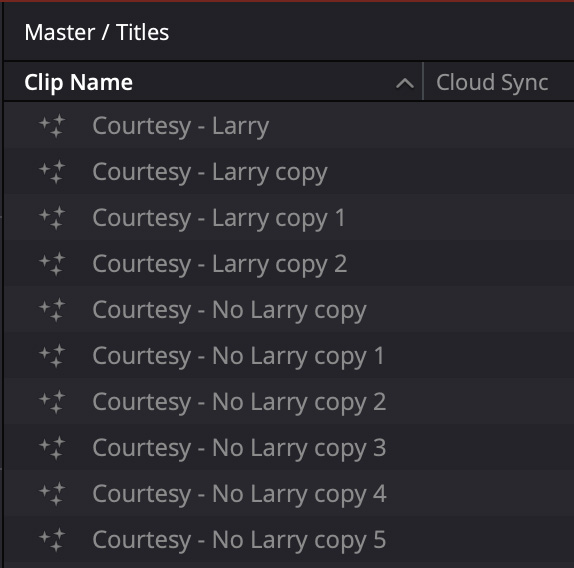
Also, if you simply copy/paste them within the timeline, each copy adds one more clip into the Media Pool. Adding lots of titles quickly becomes overwhelming.
Worse, there’s no easy way to share a title from one project to another. Well, OK, you could do what I did – copy / paste the Fusion nodes from one project to another, but that was a major pain. Surely there’s an easier way???
Ta-DAH!
There IS – but it is buried in the User Guide under a totally different name with an inscrutable interface. Still, having used this technique on my latest webinar, it works great and solves problems I didn’t even know I had.
This magic process is called a Fusion Template.
NOTE: Fusion Templates ONLY apply to custom titles that you created. Titles in the Effects panel are already templates and can’t be tweaked further.
SECOND NOTE: This process seems scary, and, truthfully, it is, but it is also worth learning, because it unlocks our ability to easily customize Fusion titles without needing to use Fusion each time.
HERE’S HOW
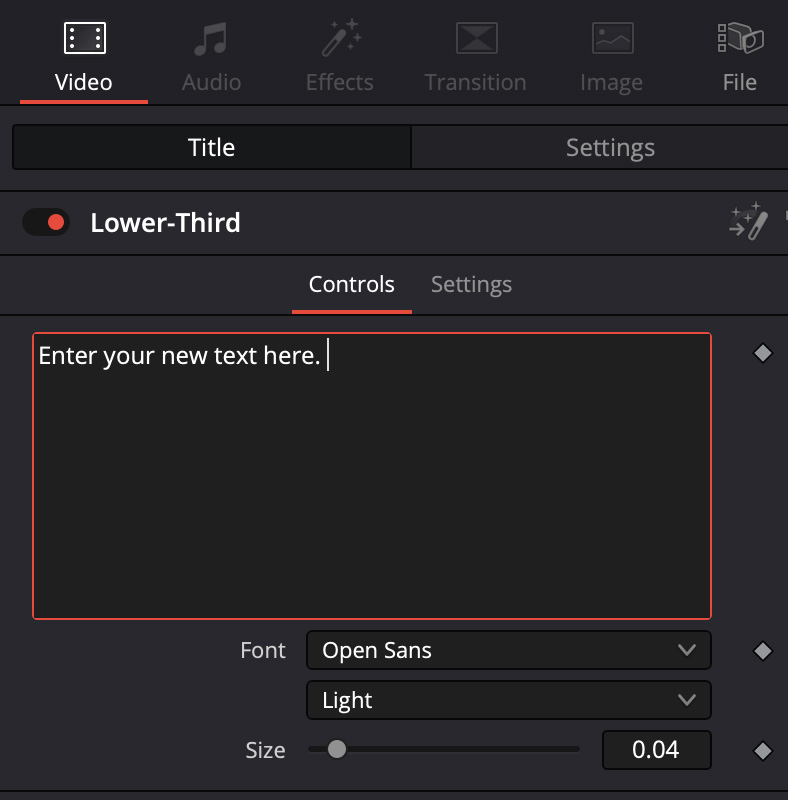
Here’s the animated lower third that I demoed in my training.
Click to see larger image.
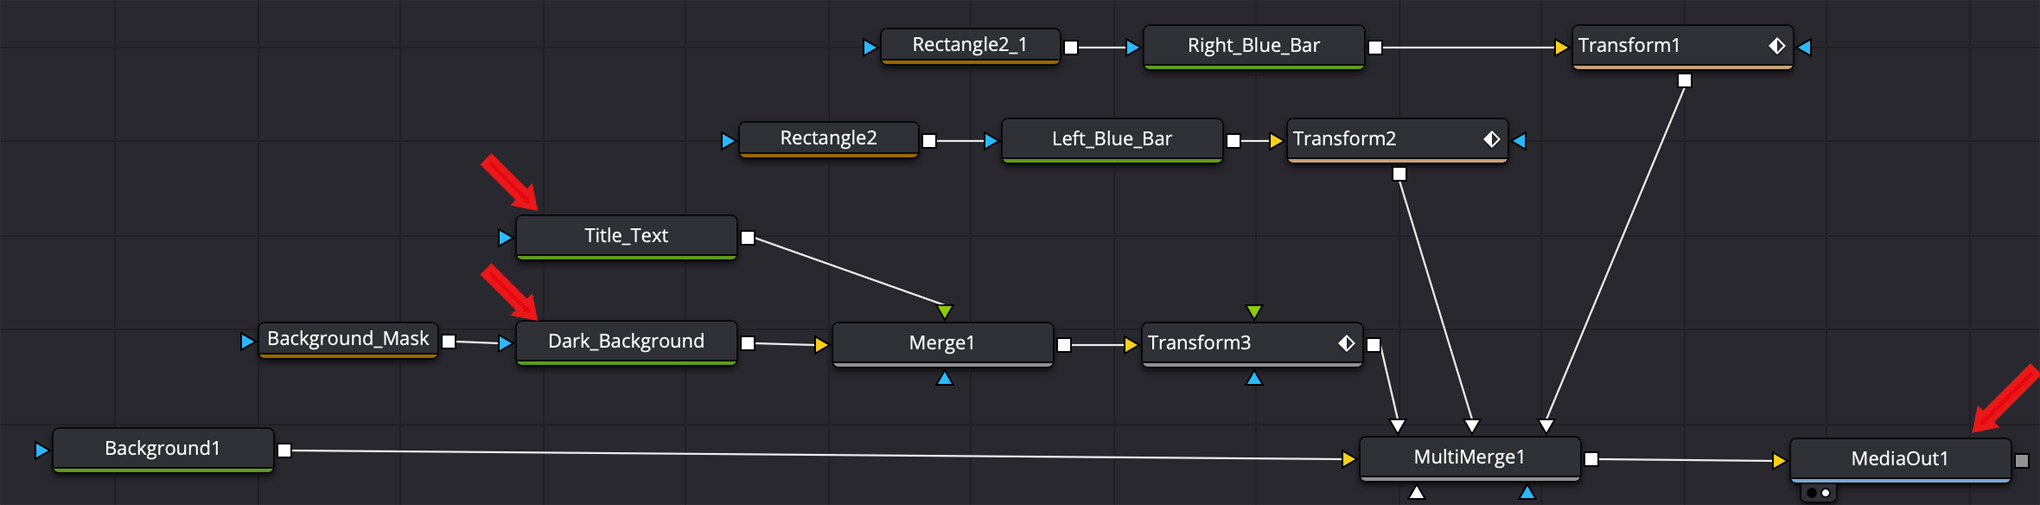
Here’s the Fusion project that created it. There are two key variables:
NOTE: The most reliable way to begin is to edit the Fusion title you want to convert into a template into the timeline in either the Cut or Edit pages. Then, select the title and switch to the Fusion page. This opens the Fusion comp in Fusion. Once converted to a template, you will not be able to make changes to its internal nodes.
Click to see larger image.
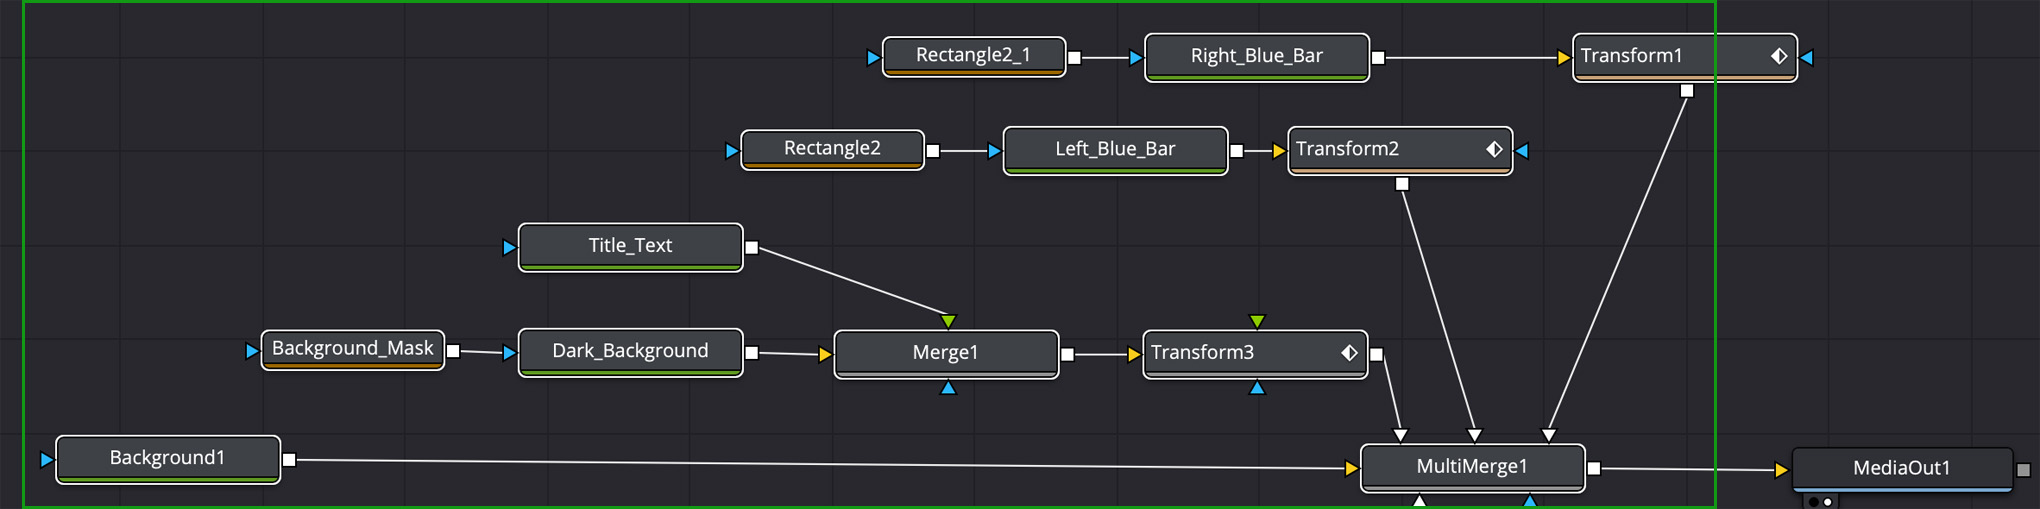
To create the template, select the entire Fusion comp EXCEPT!! MediaIn and MediaOut. In my example, I don’t have a MediaIn, because this is a stand-alone title created from an empty Fusion comp; but I do have a MediaOut.
NOTE: The easiest way to select Fusion nodes is to drag a selection rectangle around them, indicated by the green rectangle.
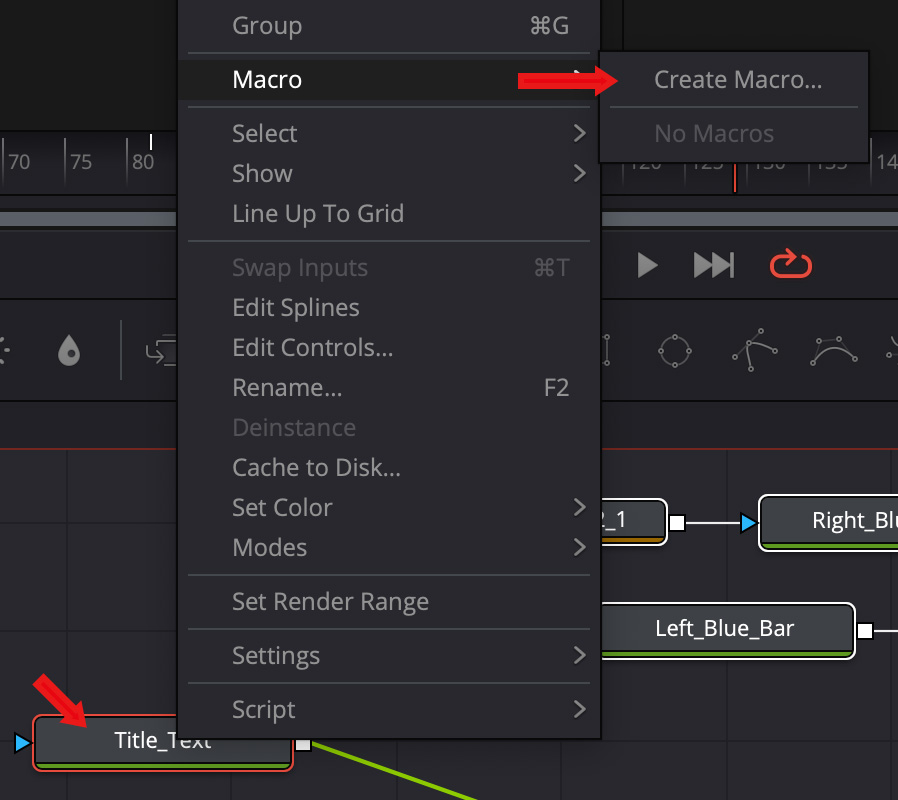
Right-click any selected node and choose Macro > Create Macro.
NOTE: Yes, a Fusion template of a Fusion comp is called a “Macro.” I don’t know, don’t ask.
Click to see larger image.
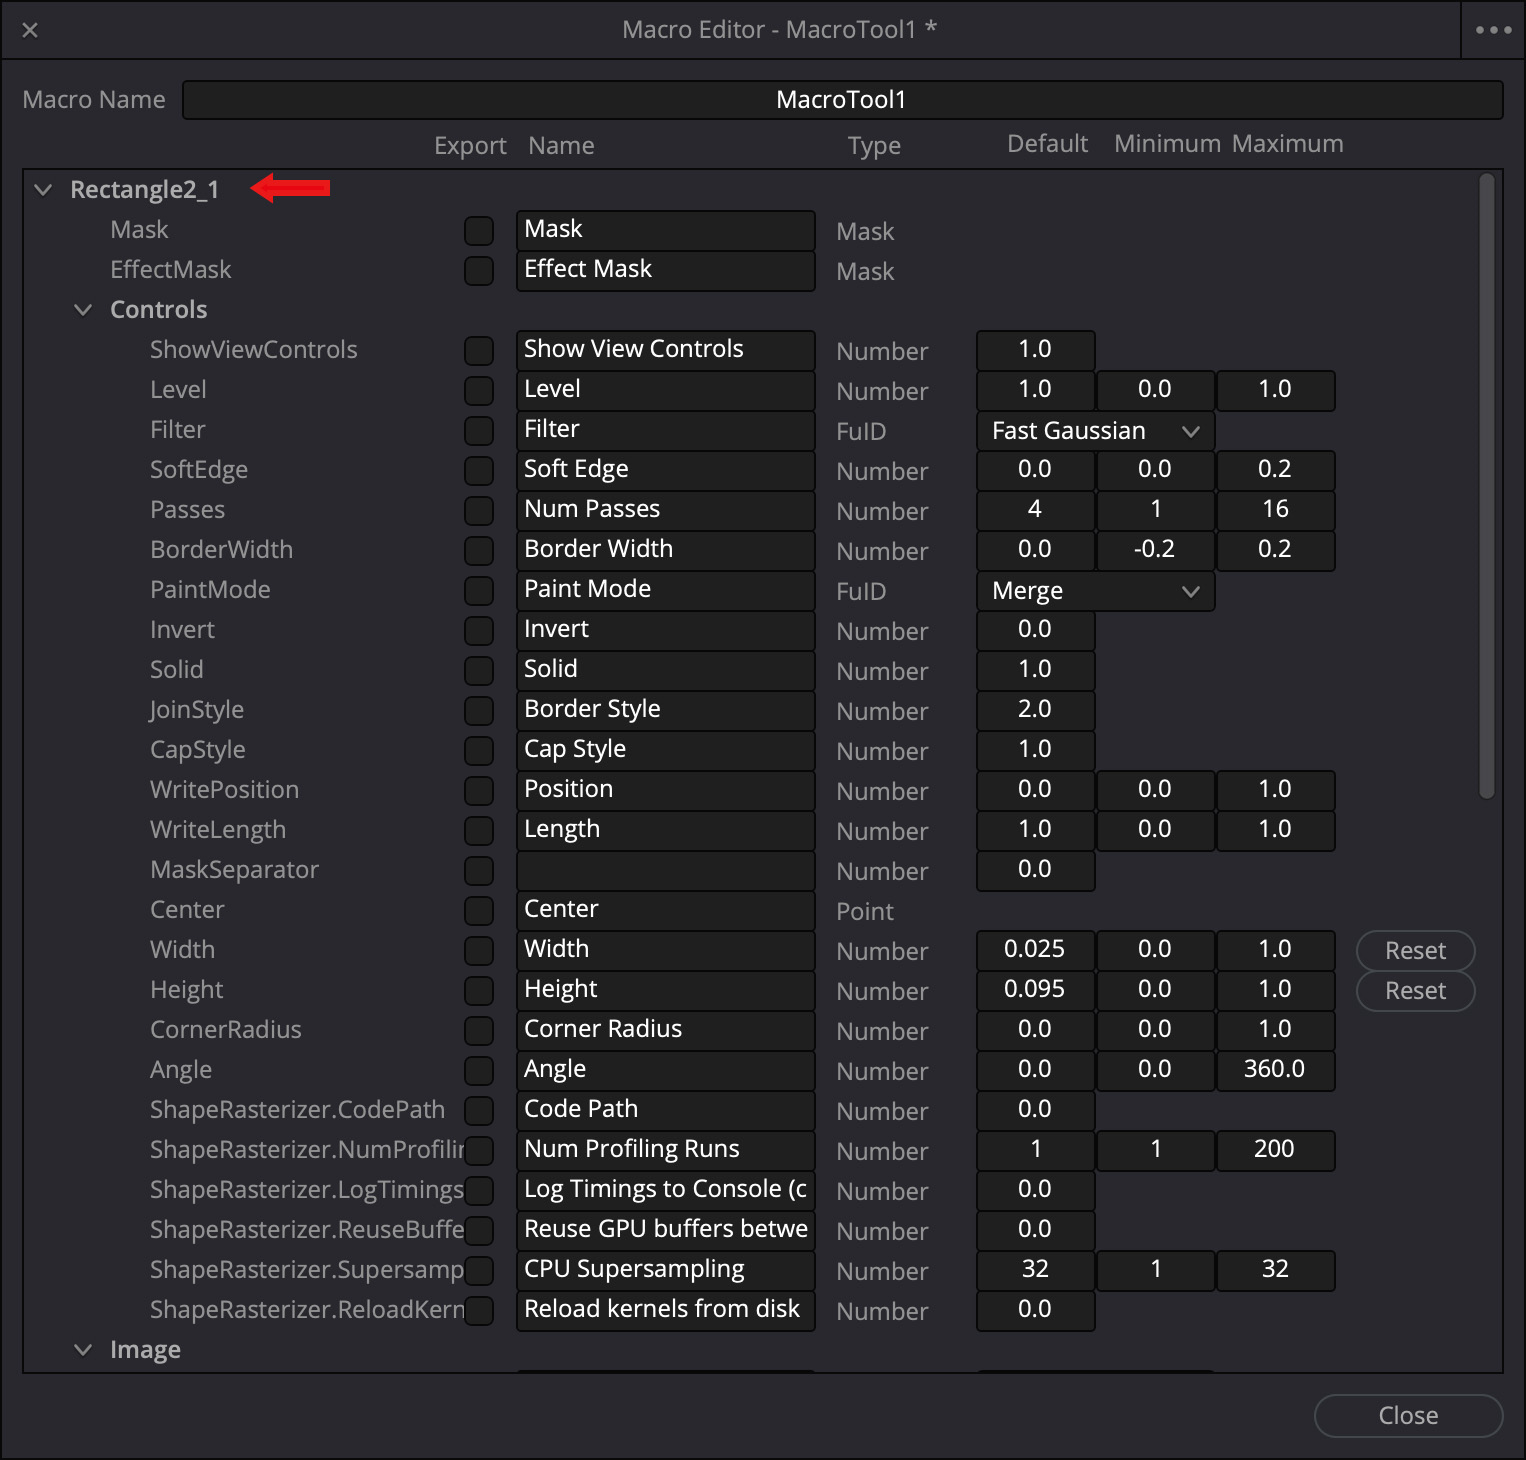
A window opens that is terrifying in its complexity. Don’t panic. This contains every possible setting associated with this element in your Fusion comp. We will only need to adjust a few of these.
Immediately, without even looking at this, twirl up whatever element is open at the top. Rectangle2-1 in my earlier screen shot.
A key piece of magic in a Fusion template is that you can specify which values you want to display in the Cut/Edit Page interface. In other words, all element controls are hidden EXCEPT for the ones you specify.
Click to see larger image.
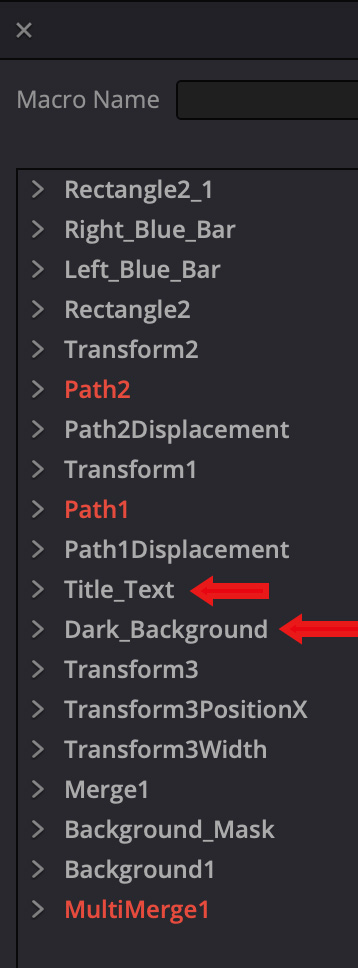
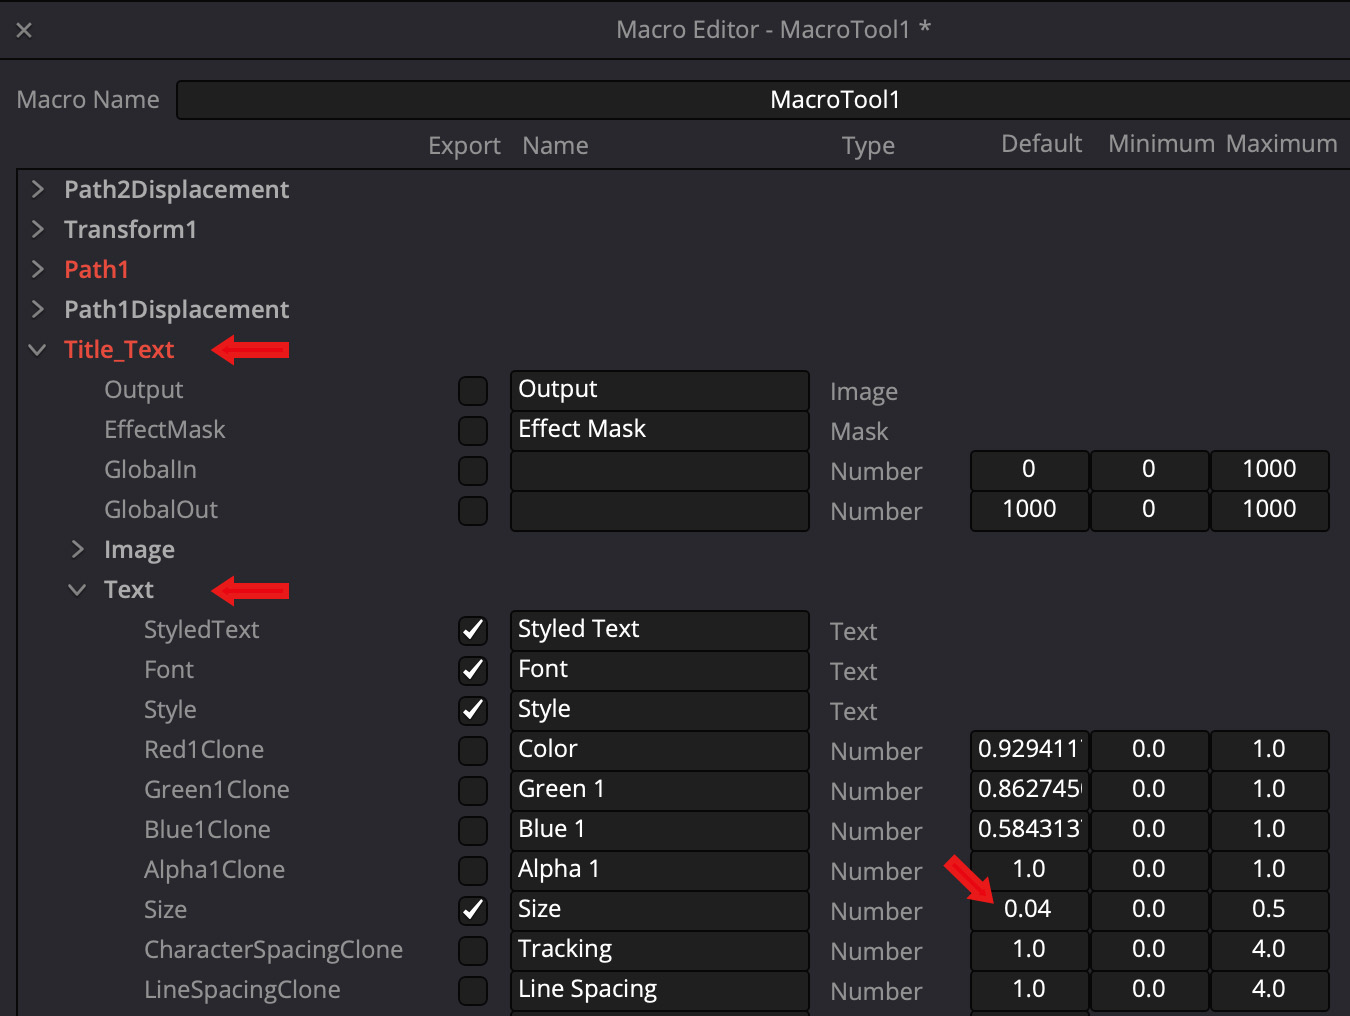
Twirl down Title_Text (or whatever your text clip is named). After the panic passes, look at this screen.
Since we want to enter different text for each title:
Any element you check will be visible or adjustable from the Cut/Edit Page. So:
If you want to set a new default, change the value in the Default column (right red arrow). While the initial setting inherits whatever values you used in creating the original title, if you want to change the default setting for the template, you can do so here.
DON’T CLICK THIS CLOSED YET!
When you are done enabling text settings, twirl up Text, then twirl down Dark-Background, or any other setting you want to adjust.
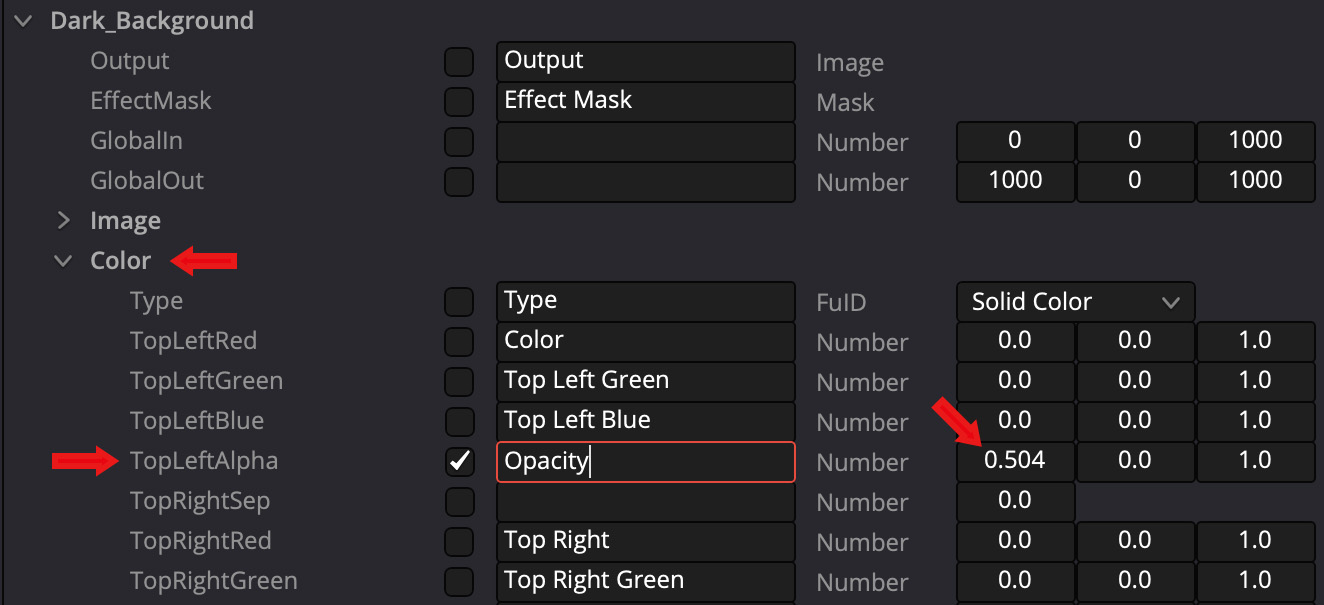
If you want to adjust the opacity of an element, twirl down Color, then adjust TopLeftAlpha. (Yeah, I know, this doesn’t say “Opacity” to me, either.)
To keep things simple when editing, I renamed TopLeftAlpha to Opacity.
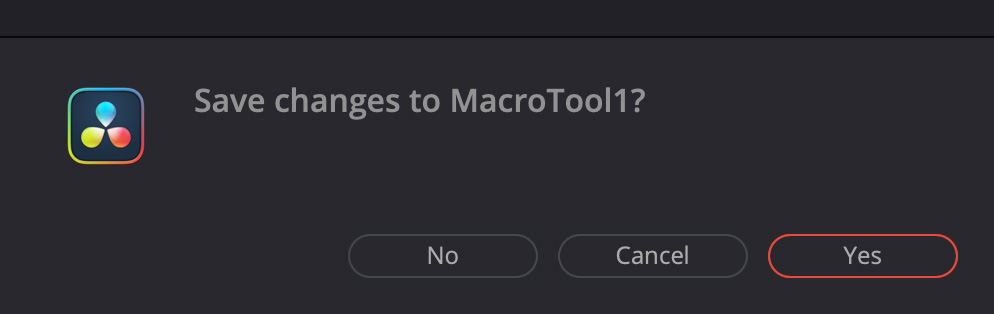
When you are done making changes, click Close.
A window pops up asking if you want to save the Macro. Click Yes.
THIS NEXT STEP IS CRITICAL
In the Save dialog that appears, give the title a name (I used “Lower-Third”) but be sure to keep the .setting extension.
BUT! Don’t save this yet.
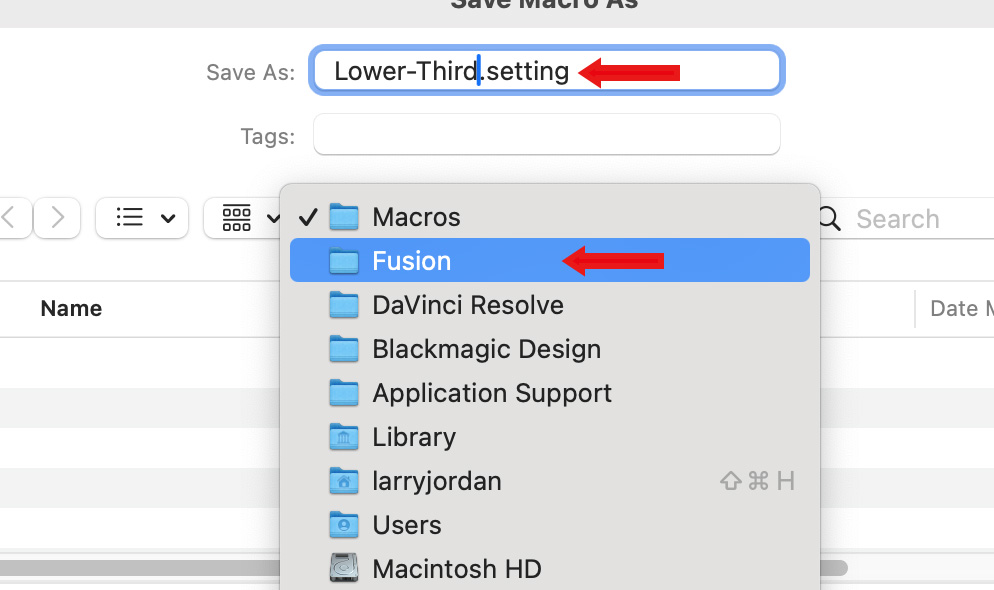
Click the word “Macro” in the Finder popup menu and switch to the Fusion folder. (If this menu does not appear, press Cmd and click again.)
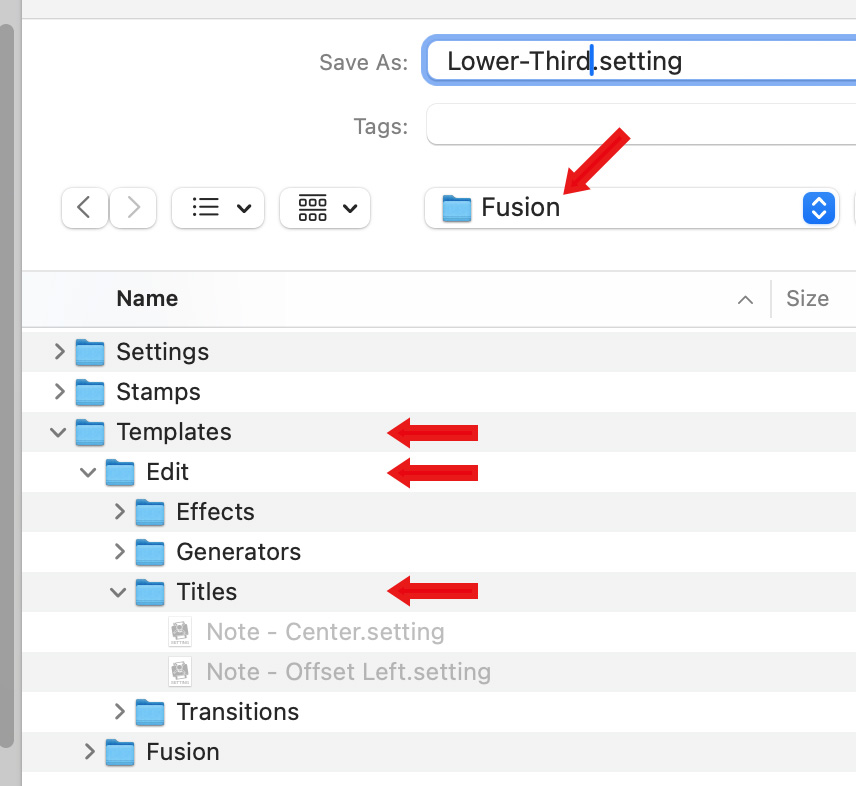
Then, open: Templates > Edit > Titles. Once that folder is open, click Save.
Finally, quit Resolve.
NOTE: Quitting is necessary because Resolve only reads the contents of the Template folders when it launches.
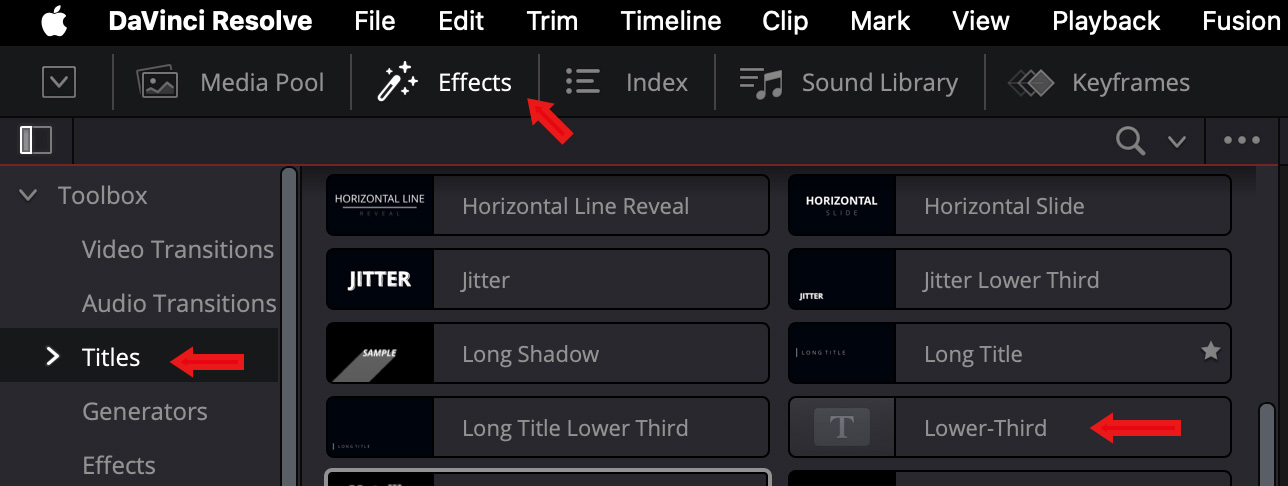
When you restart Resolve, open the Effects menu, click Titles in the left sidebar, scroll down to Fusion Titles and there you will find your new Fusion template. Use this as you would any other title,
Best of all, when you enter this into the timeline, only those settings which you checked appear in the Video Inspector and it doesn’t generate extra clips in the Media Pool.
Once you create a template, that Fusion title will show up in every project, not just the project in which they were created.
YAY! You made it.
SUMMARY
No, this process is not obvious. The terminology is inconsistent and the default storage location is wrong. But, once you figure this out and create your first title, you are well on your way to creating as many custom Fusion projects as you will ever want.
Whew…
