
![]() Davinci Resolve began as a color grading tool. To say that it has a deep color toolset is an understatement. The Resolve manual spends 505 pages describing how to use the Color Page.
Davinci Resolve began as a color grading tool. To say that it has a deep color toolset is an understatement. The Resolve manual spends 505 pages describing how to use the Color Page.
In this tutorial, I want to share some of the automated ways we can improve and match color between clips. (For those wanting more detail, this material is covered in Chapters 129 and 141 in the Resolve manual.)

(Image taken from DaVinci Resolve 20 manual.)
In an ideal world, before every shot and as part of the slate, the production crew will shoot a color chart using on-set lighting. Resolve provides a number of tools to automatically grade the shot based upon the color chart.
But, sadly, I have yet to work on a shoot that uses those charts. So, time to look elsewhere for help.
KEYBOARD SHORTCUTS:
AUTOMATIC WHITE BALANCE
An easy way to remove a color cast is to use the automatic white balance tool.
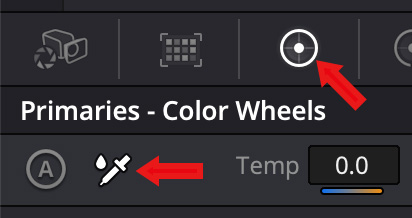
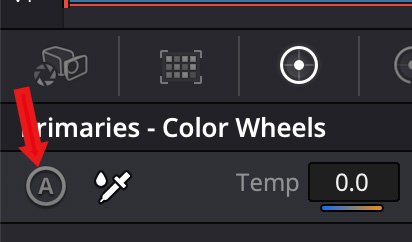
On the Color page, to select the automatic white balance tool, switch to the Primaries – Color Wheels (right red arrow) then click the eyedropper tool (left red arrow) at the top left of the Color Wheels.
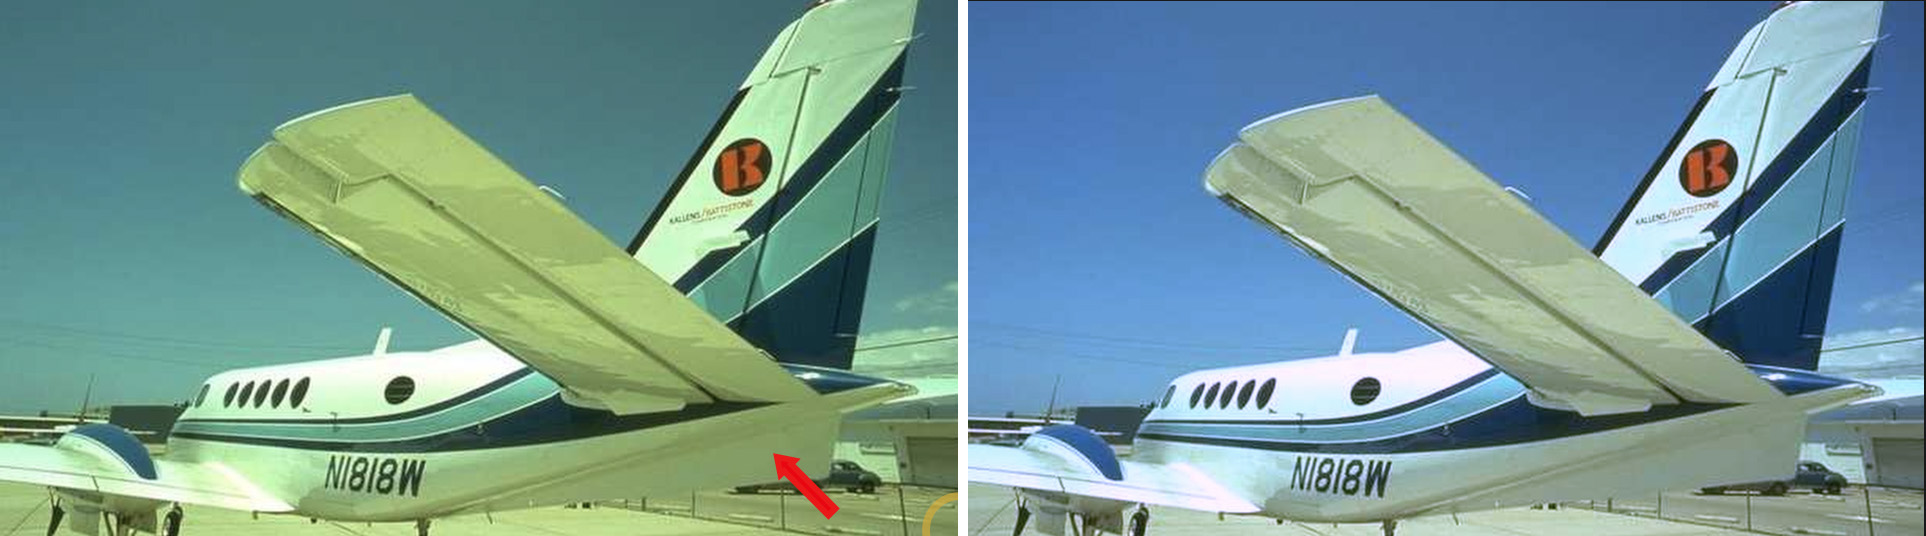
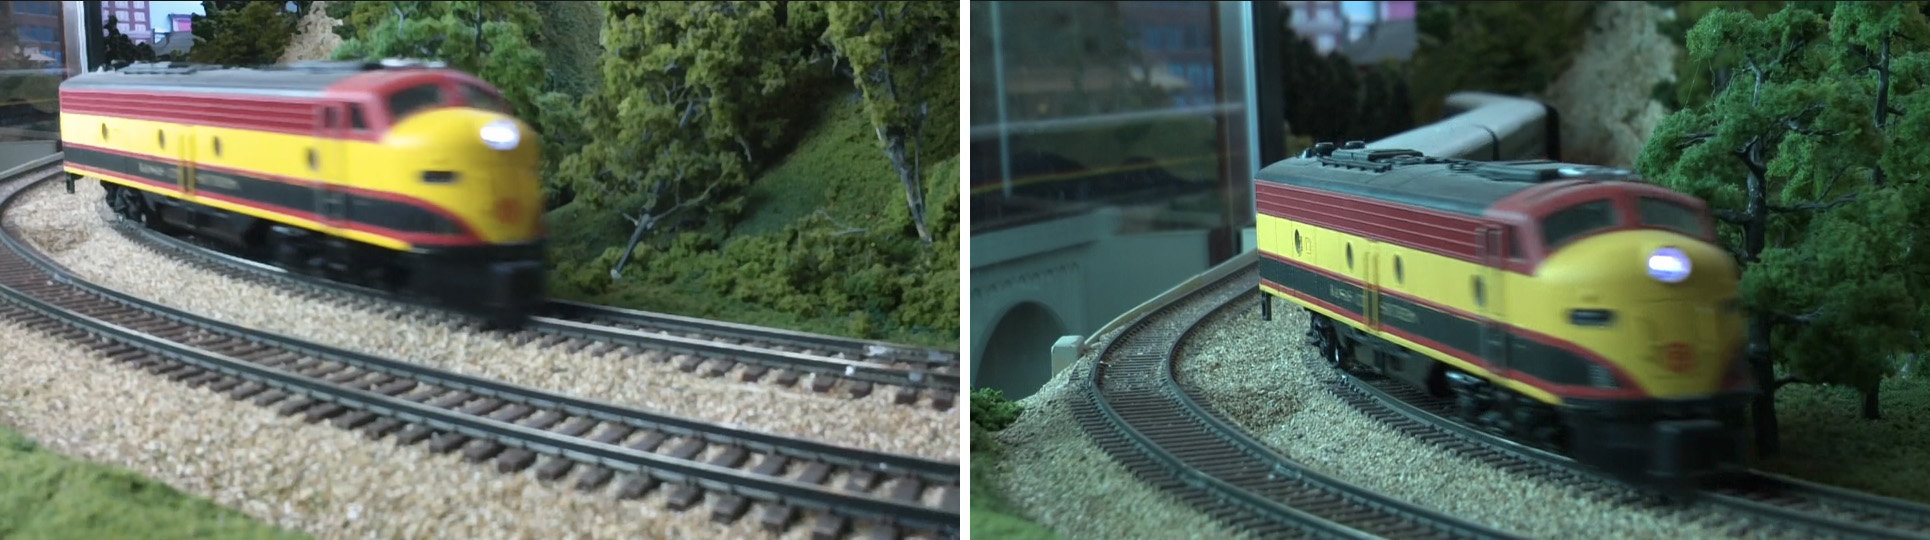
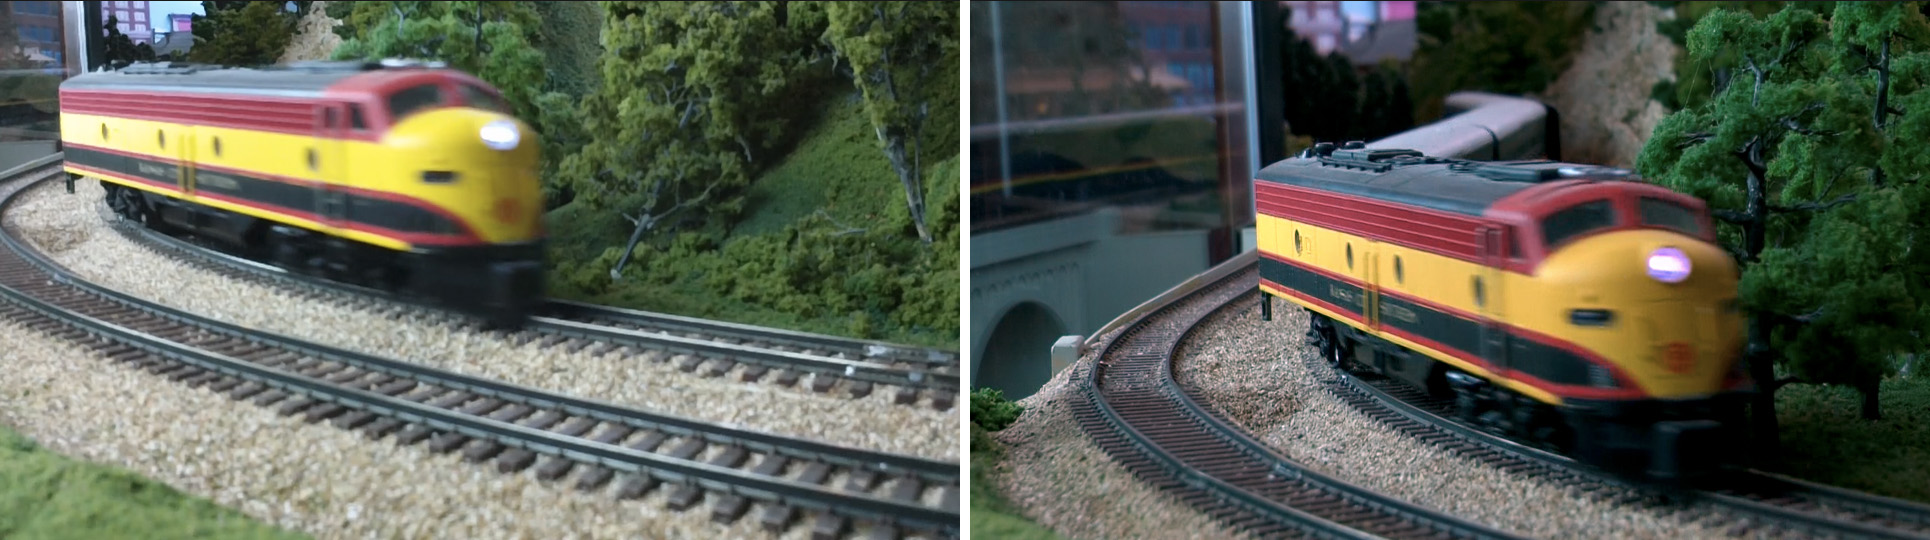
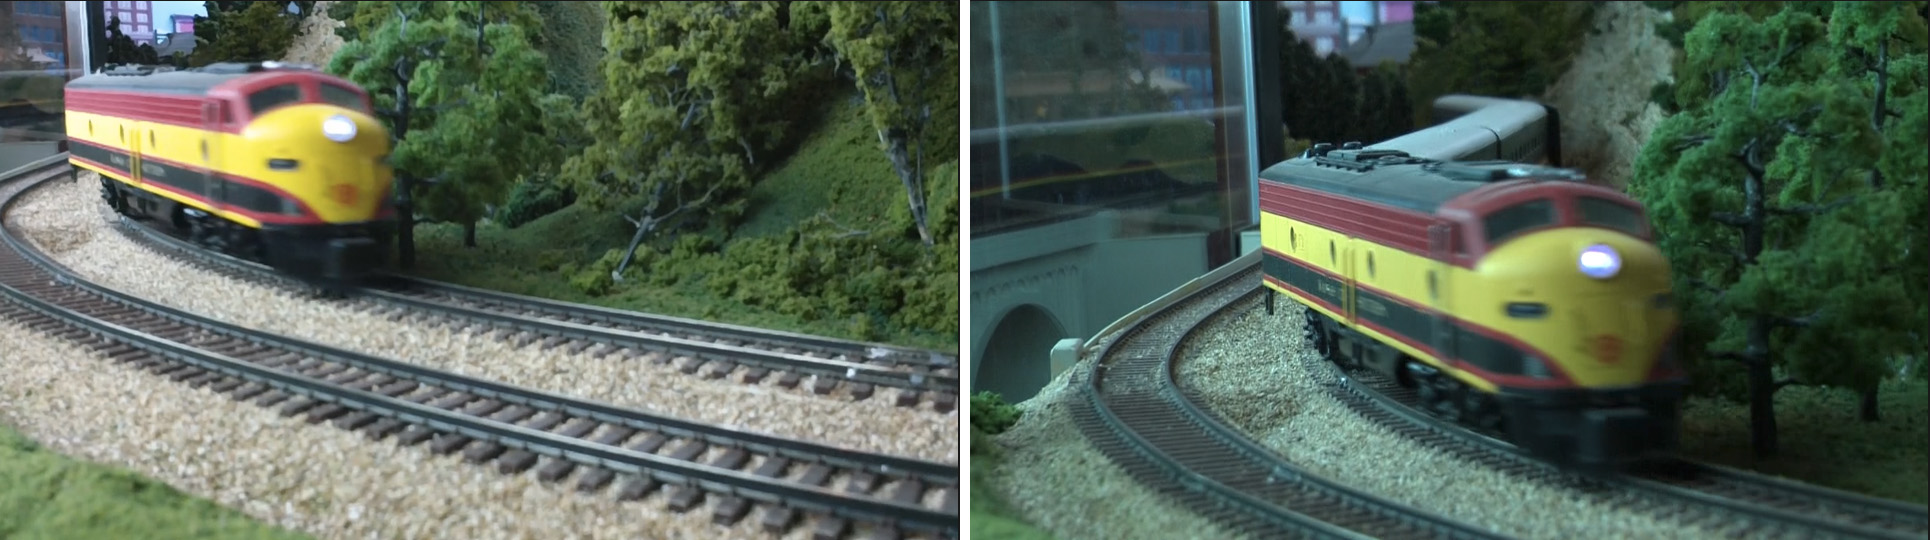
Source image on left, corrected image on right. Click to see larger image.
Then, click the eyedropper on an area of the image in the Viewer that’s supposed to be gray or white – but NOT over-exposed (red arrow). Instantly, as shown in the right image, the color cast is removed.
CAUTION ON USING AUTOMATIC BLACK & WHITE LEVEL SETTINGS.
While Resolve allows automatically setting black and white levels, if you don’t select the darkest or lightest portion of an image, it may artificially crush black or white levels. As well, if you click something that isn’t black or white, this technique will create a color cast. Use this carefully. If the results don’t look good, undo them.
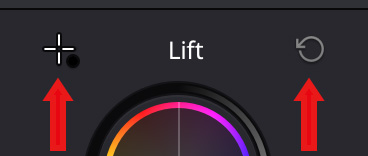
To set the black level, click the cross-hair above the Lift color wheel (left red arrow), then click the darkest part of the image. To reset your change, click the curved arrow next to Lift. (right red arrow).
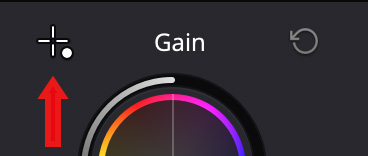
To set the white level, click the cross-hair above the Gain color wheel (red arrow), then click the lightest part of the image. To reset your change, click the curved arrow next to Gain.
AUTOMATIC COLOR
The Auto Color command provides a quick way to automatically balance the blacks and whites of a clip based on the current frame at the position of the playhead. To make an automatic correction, do one of the following:
“The advantage of Auto Color is that it gives you an immediate result for any clip without the requirement for sampling the image or having a specific test pattern to analyze, but the disadvantage is that this lack of guidance makes the usefulness of this command somewhat hit-or-miss. When it works, it can work very well to give you a neutral starting point for further grading. When it fails, you’re better off resetting the resulting adjustment and grading the old fashioned way.” (Resolve manual)
Preferred source image on left, uncorrected image on right. Click to see larger image.
Here’s what two images look like before applying Auto Color – the preferred image is on the left.
Preferred source image on left, auto color corrected image on right. Click to see larger image.
Here’s what happened when I used auto color on a shot without people. The left image is the original preferred image, the right image is after auto color correction. It is too dark, too red and too saturated.
NOTE:One way to reset an auto color corrected image is to choose Color > Reset > All Grades and Nodes.
SHOT MATCH
So far, we’ve looked at matching shots where we haven’t made any changes. Now, let’s look at how to do this after we’ve made manual color changes. One way is Shot Match.
“Keep in mind that Shot Match isn’t supposed to make your clips look good, it’s supposed to make them look the same as the clip you choose to match to, or to at least get as close as possible without creating a color correction that will do harm to the image. The purpose of Shot Match is to make it easier for you to match a scene’s worth of clips together so you have a starting point for building the rest of the look you want for that scene, on top of this initial match.” (Resolve manual)
Shot Match doesn’t change any manual settings, Shot Match is more like using a LUT – you either like it, or you don’t.
Here’s an example.
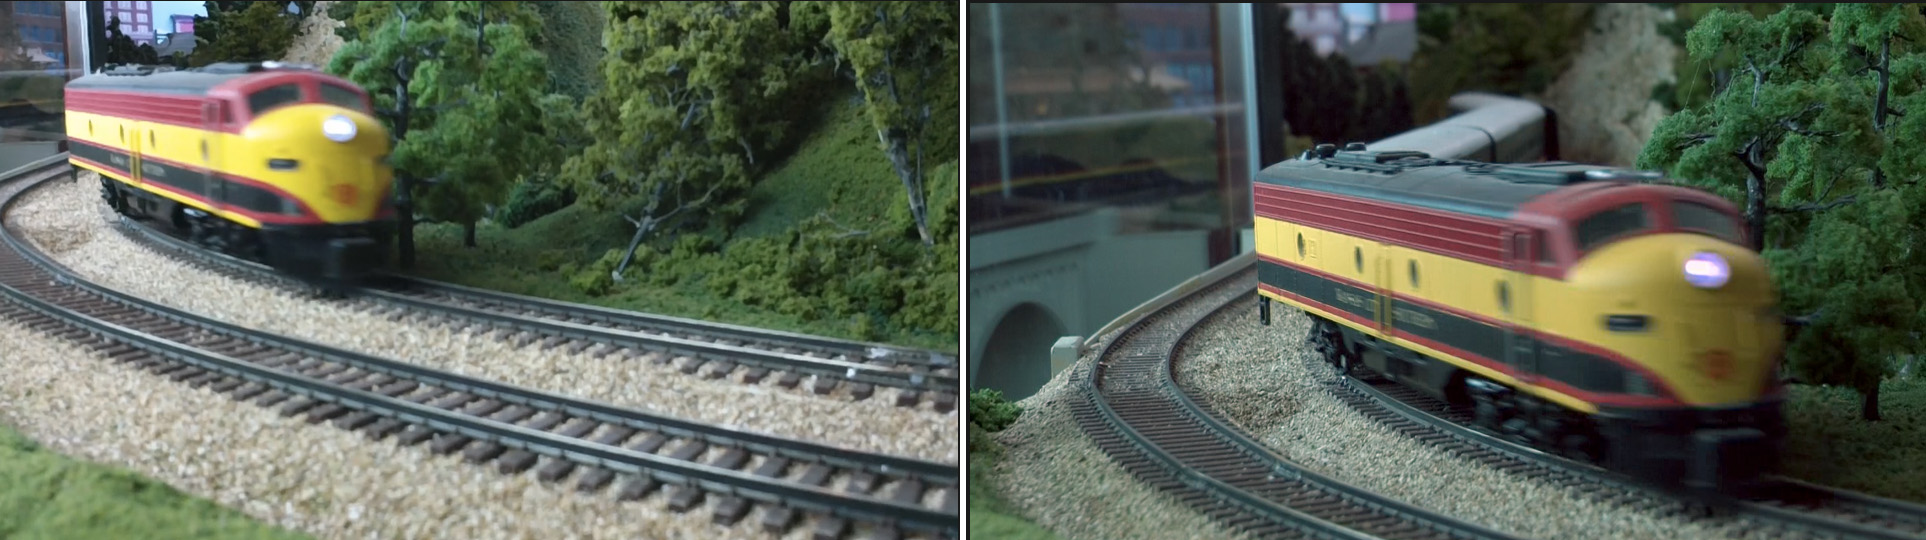
Preferred source image on left, uncorrected image on right. Click to see larger image.
The shot on the left we like. The shot on the right is blue/green.
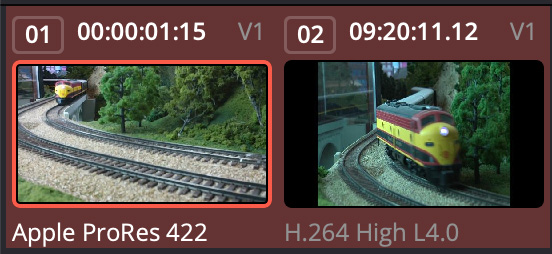
In the Clips menu, select the clips you want to match. This can either include or exclude the shot you like.
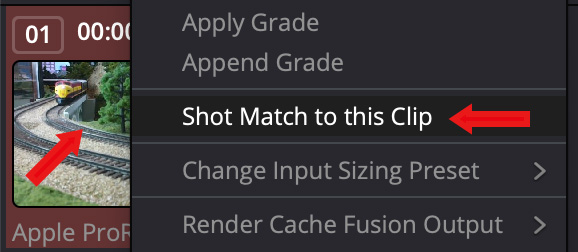
Then, right click the clip you like and choose Shot Match to this Clip.
Click to see larger image.
It may take a few seconds, but the shots will match a lot more closely. Remember, this is a color match, not a luminance match.
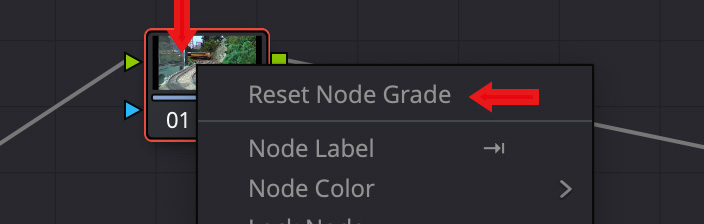
NOTE: To reset a clip after this change, select the clip you want to change, then right-click its node in the Nodes panel and choose Reset Node Grade. This is actually the preferred way to reset any clip after a color change you don’t like.
TWO BETTER WAYS TO MATCH SHOTS AFTER MAKING ADJUSTMENTS
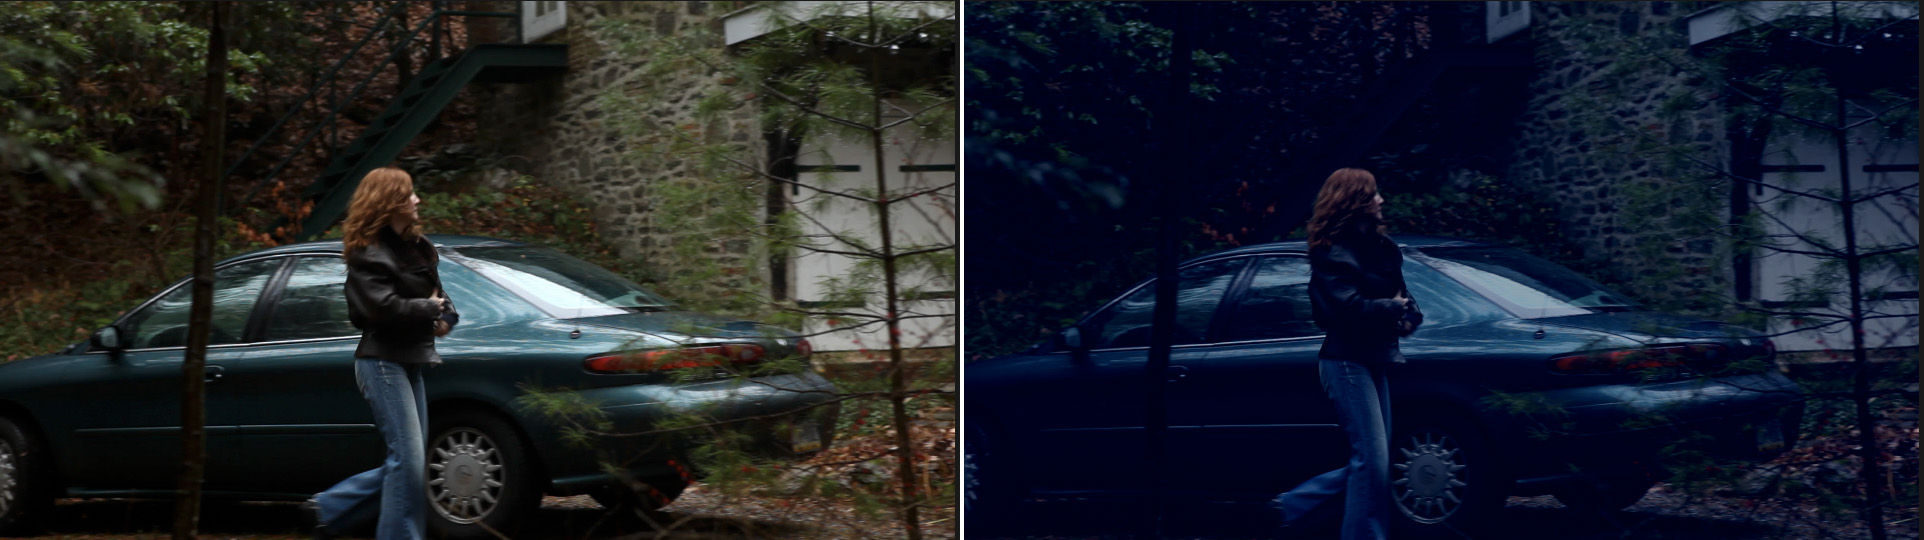
Source image on left, color graded image on right. Click to see larger image.
Here’s my original shot, left, then, on the right, I manually gave it a day-for-night look. (Footage courtesy of John Putch, “Route 30, Too!” (PutchFilms.com))
The EASIEST way to match shots is copy/paste:

Then, in the panel that appears, choose the color settings you want to apply to the new clips. You may still need to tweak each clip, but this will get you in the ballpark. Click Apply to transfer the settings.
USE THE STILL IMAGE GALLERY
A better way, though, may be to use the Gallery. This is a collection of still images from your project that can be used for comparing shots and color matching. (Chapter 141 in the Resolve manual covers this in detail.)
To save a still, select the clip with the look you like then:
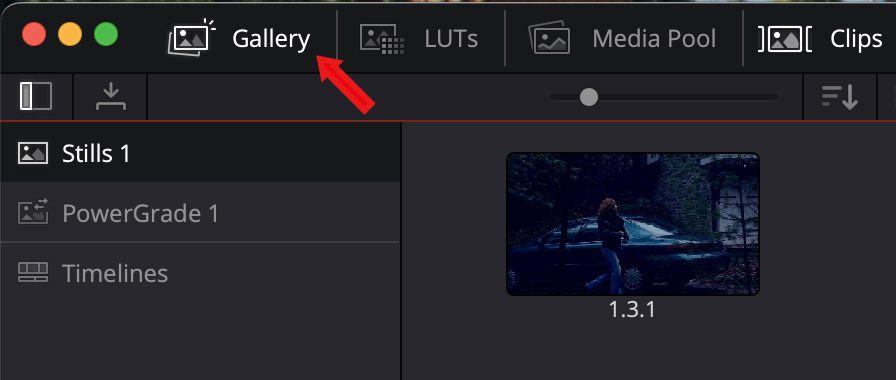
Click the Gallery text button in the top left corner of the Resolve interface. Your still appears there. (This holds up to 30 stills, so you can use this as a library to store looks for your project.)
Select a clip in the Clips timeline, then hover over a still in the Gallery to see a live preview of that color effect on the selected clip in the Viewer.
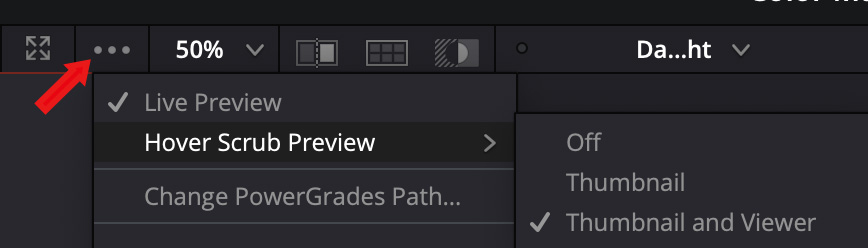
NOTE: If you don’t see the live preview, go to the three dots menu at the top of the Gallery and make sure both Live Preview and Hover Scrub Preview > Thumbnail and Viewer are checked.
To apply the look of a gallery still to a range of clips:

Select the clips in the Clips timeline to which you want to apply the color grade.
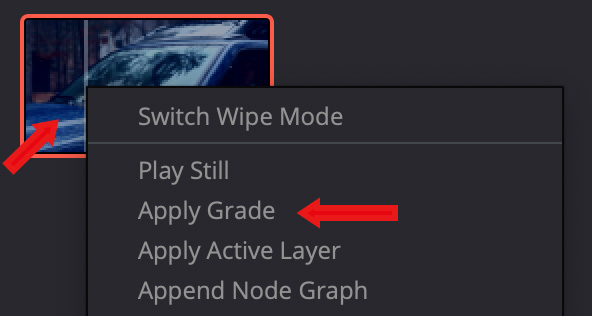
Right-click the Gallery thumbnail with the color grade you want and choose Apply Grade.
All your clips now have the same look. Even better, all your manual adjustments are transferred so you can still adjust each clip to get the exact look that you want.
SUMMARY
There are many ways to color correct and match shots using Resolve. Experiment with these and see which ones work the best for your projects. And, for more information, take a closer look at the manual.
