 I’m currently working on a project which requires syncing 10 audio tracks and 3 video clips in Premiere Pro. Multicam won’t work, because I need to see at least two images all the time. And audio syncing won’t work because I have three video tracks.
So, the only option is to sync them manually. While time-consuming, it isn’t hard to match waveforms and align the clips.
Except…
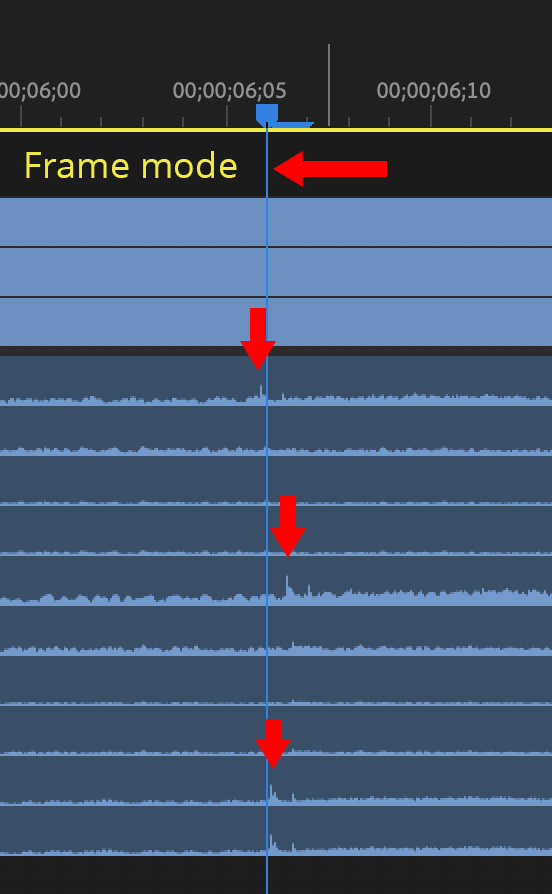
The audio pops don’t align (red arrows above). I can get them within a frame, but not closer.
Generally, audio that’s less than one frame out of sync is not noticeable on screen – though at slower frame rates it might become an issue. And, yes, slipping the audio could be fixed in the audio mix – if the mixing engineer is warned to watch for it and is given some reference to align it to.
Still, it’s the principle of the thing. I’d like the audio on all ten tracks to align.
SUB-FRAME AUDIO TO THE RESCUE
Fortunately, Premiere makes this an easy fix.
First, turn snapping off (Sequence > Snap in Timeline, shortcut: S).
Next, position the playhead to mark where you want the clips to sync. I generally align all the clips with my dominant audio. In other words, I don’t move the main clip, but move the supporting clips to match it.
BIG NOTE: Remember, you should only move the audio less than 1/2 a frame. This technique makes it EASY to move audio more than a frame, which would create a permanent out-of-sync condition.
Next, while you COULD unlink your media to disconnect audio/video sync, this is REALLY dangerous because it is easy to forget you’ve turned linking off. Then, several edits down the road you discover that all your media is out of sync. Oops.
Instead, press the Option key while clicking an audio clip. This temporarily (for as long as you press Option) disables audio/video linking, allowing you to select just the audio of a clip.
NOTE: If you need to select multiple tracks of audio, Shift + Option + click other tracks to select them. Or, press Option and drag a selection around the tracks you want.
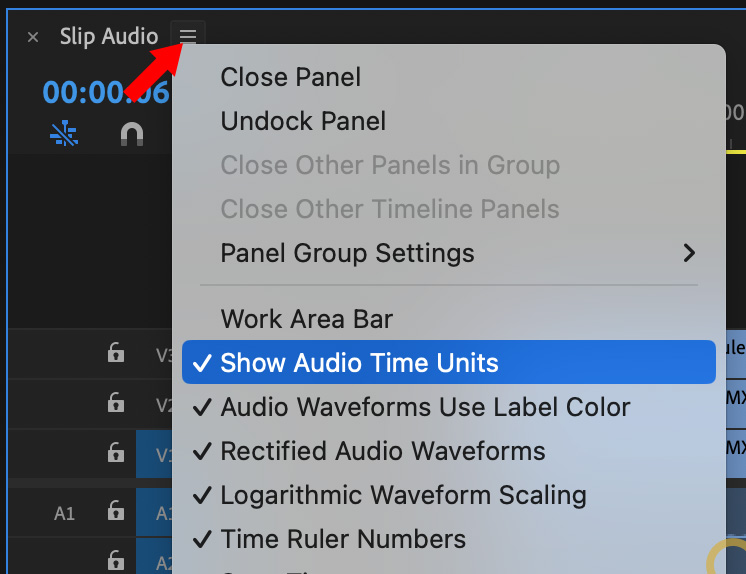
After you load and manually sync audio in the timeline, go to the pancake menu in the top left corner (red arrow) and choose Show Audio Time Units. This allows moving audio in milliseconds, rather than frames.
NOTE: While the minimum video adjustment is always and only a frame, audio can be moved in millisecond increments when in this mode.
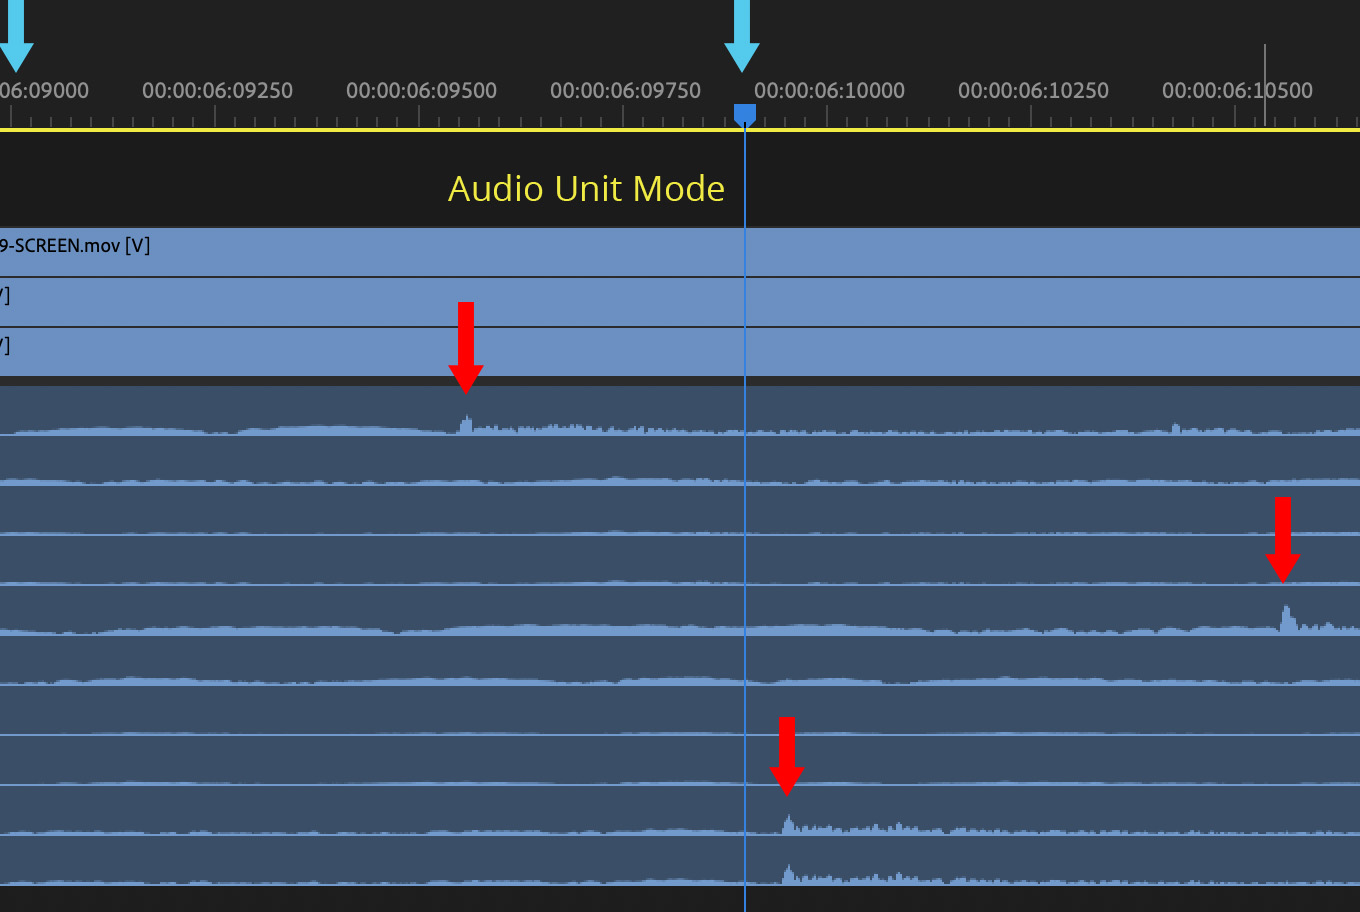
Now, when you zoom into the timeline, you get FAR closer than when the timeline only displays frames. (This is simply a zoomed in version of the first screen shot.) The red arrows show the timing difference for the same pop recorded by three different cameras.
The blue arrows indicate the duration of a single frame. So all the clips are synced within a frame, but still not close to the same position.
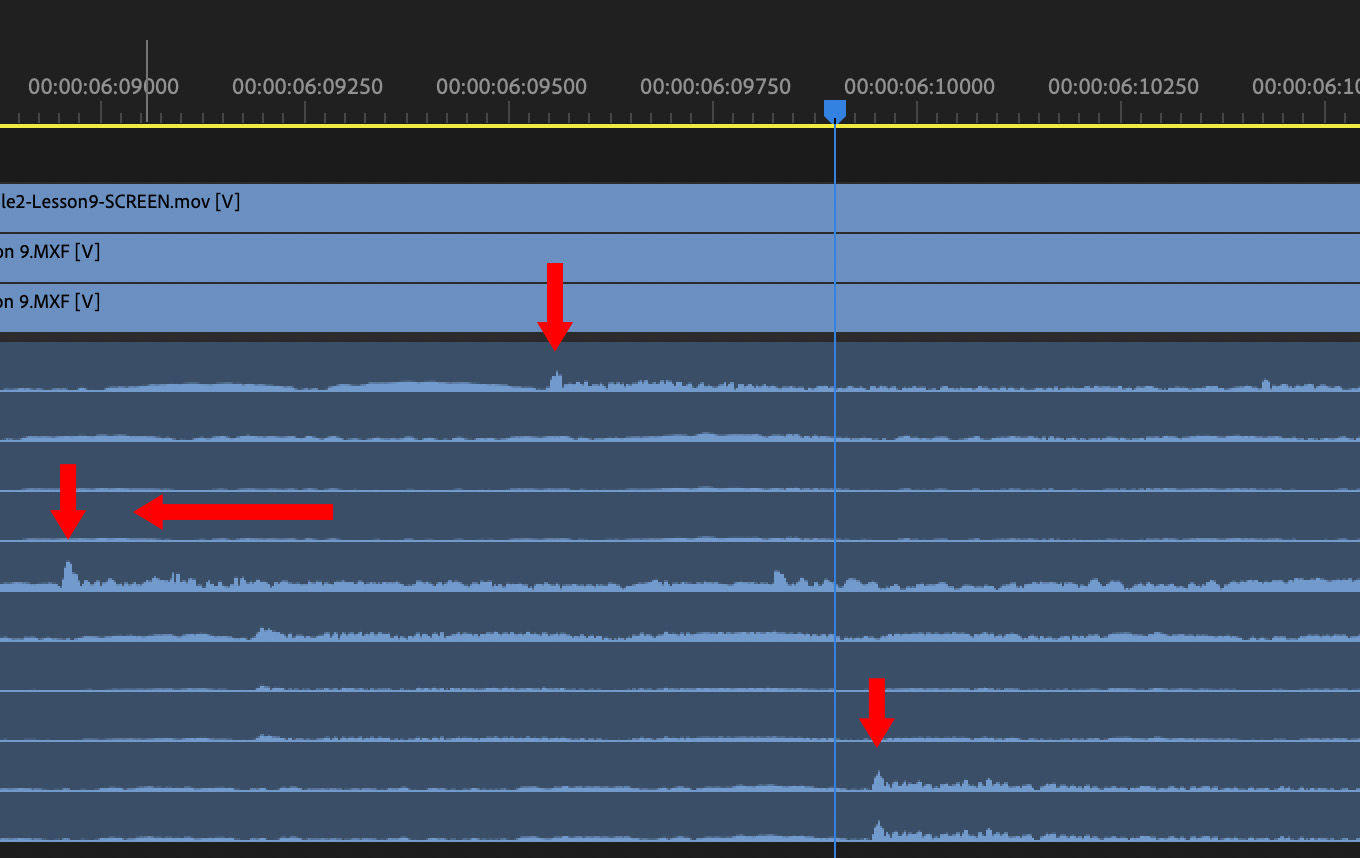
If I move the middle clip just one frame left, well, you see just how LONG a single frame can be for an audio clip.
GET THEM IN SYNC

With only the audio tracks selected in a single clip, drag them into sync by aligning them with the playhead or a visible sync point on the main clip. The interface won’t show the actual movement, so you have to do this by trial and error.
This newly-positioned audio now becomes permanent for this clip for the rest of the edit.
NOTE: This change affects just that clip in the timeline, not the master clip in the Project panel.
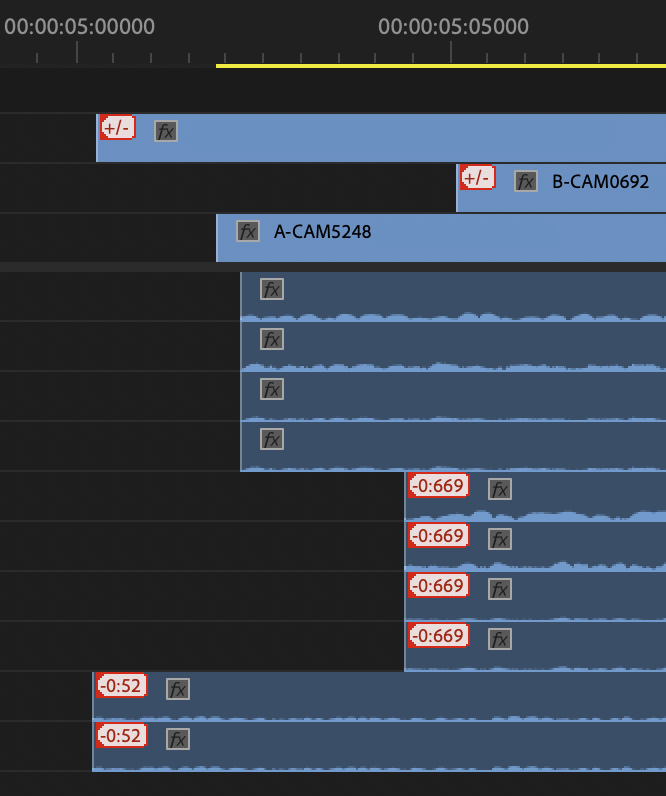
The leading edge of each clip shows how far the audio was shifted from its original sync.
Done.
IMPORTANT NOTE: For best results, audio should be shifted less than 0.500 milliseconds. In the screen shot above, the middle clip was shifted left 0.669 milliseconds. (Left shifts are negative, right shifts are positive.) This technique would have yielded better results if the middle clip was moved one frame left, then shifted right to keep the total change around 0.3 milliseconds.
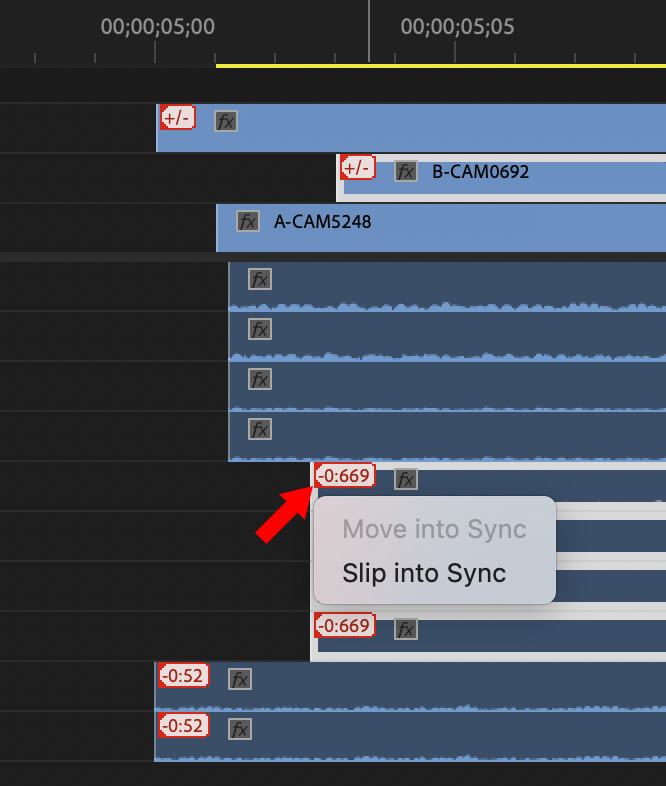
If you need to reset a clip back to its original sync, right-click on the red sync offset number and choose Slip into Sync to reset the clip.
EXTRA CREDIT
When you are in Show Audio Units mode, using the shortcut keys Cmd+ Left/Right Arrow and Shift+ Cmd+Left/Right Arrow moves the selected audio clips in millisecond increments, rather than frames.
3 Responses to Adjust Audio By Milliseconds in Adobe Premiere Pro
Hey Larry, thanks for this information. I wasn’t aware that Pr had a time unit mode for audio that allows you to sync under a frame. That is very helpful.
In regards to syncing in general, and I’m not at a computer right now to test, I believe I’ve used audio syncing in this type of situation by syncing cam 1 to the multiple sources of audio, then locking that audio/video as one clip, bringing into video 2 and syncing, then 3, etc. You wouldn’t be able to sync everything at once but I believe through those steps you could do this with Pr doing the work.
I would also add, once everything is synced, I label that as a master audio sync (that I often duplicate as a backup). I then edit off a copy of that so if anything happens down the line I always have my master sync to go back to.
Always appreciate your work,
Matt:
Thanks for your suggestion. I did not test this extensively, but Premiere seems to sync to the frame boundary not the actual audio sample. Mostly, I suspect, because video only locks to frames and shifting audio separately runs the risk of losing sync.
Larry
You can also use this mode to make sub-frame audio edits. Great for precise head and tail trimming. You can even “lift” a sub-frame portion of audio to remove a click.