I’m  Kayle asked: “Love to hear more about your post production process. FCP or Resolve? Did you record to camera SSD or to the MacBook or both? Software used during the recording and processing. Noise reduction? How did you name and manage your files for all the interviews? Geeky stuff like that.
All good questions. Here’s what I did.
NOTE: This article details the gear I used, what worked and what didn’t.
PRODUCTION
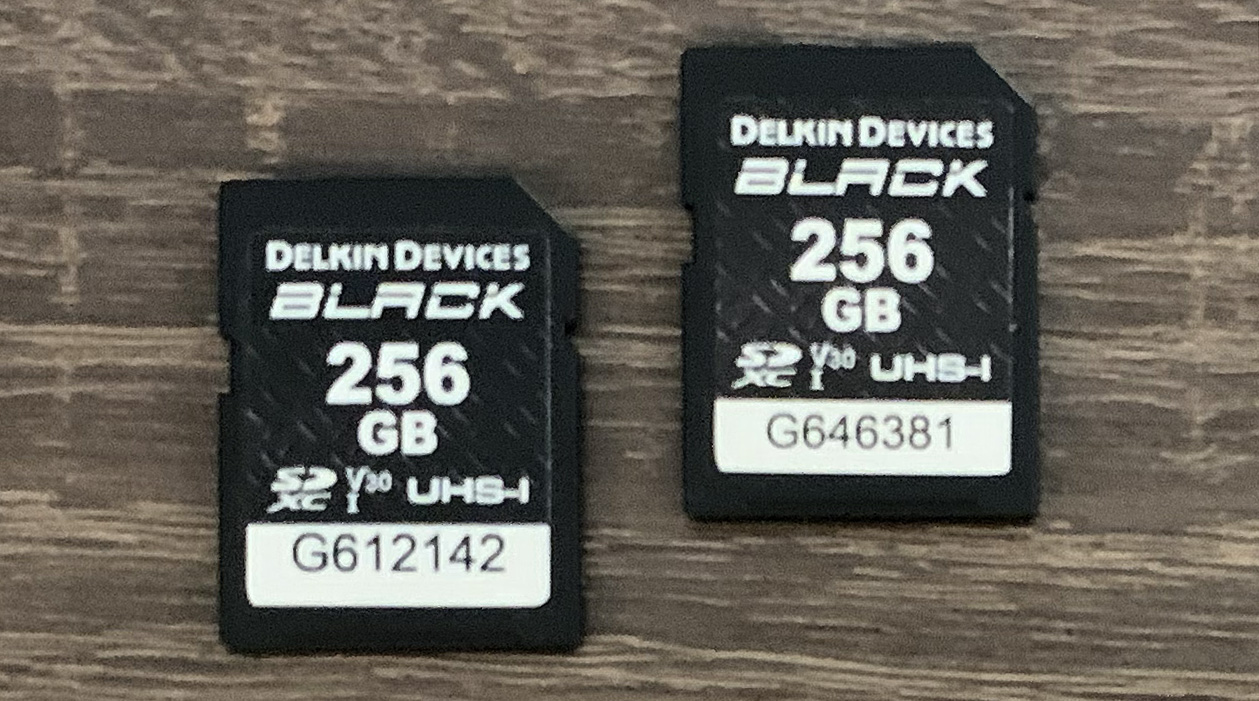
I recorded video on each camera using these SDXC cards. While their capacity was 256 GB, I only use about 90 GB for the two days of recording.
NOTE: I’m still leery of using SanDisk due to Western Digital’s manufacturing problems.
I recorded at the highest image quality supported by the camera: AVCHD, 1920 x 1080 at 59.94 FPS. (I didn’t need a frame that that high, but that was the only choice for this format provided by the cameras.)

AVCHD stores files in multiple folders during recording, so I didn’t change any file names on the card itself. Since both days shooting were stored in a single folder, I copied the “private” folder from the card to my editing system. Camera 1 went in one folder, Camera 2 went in another.
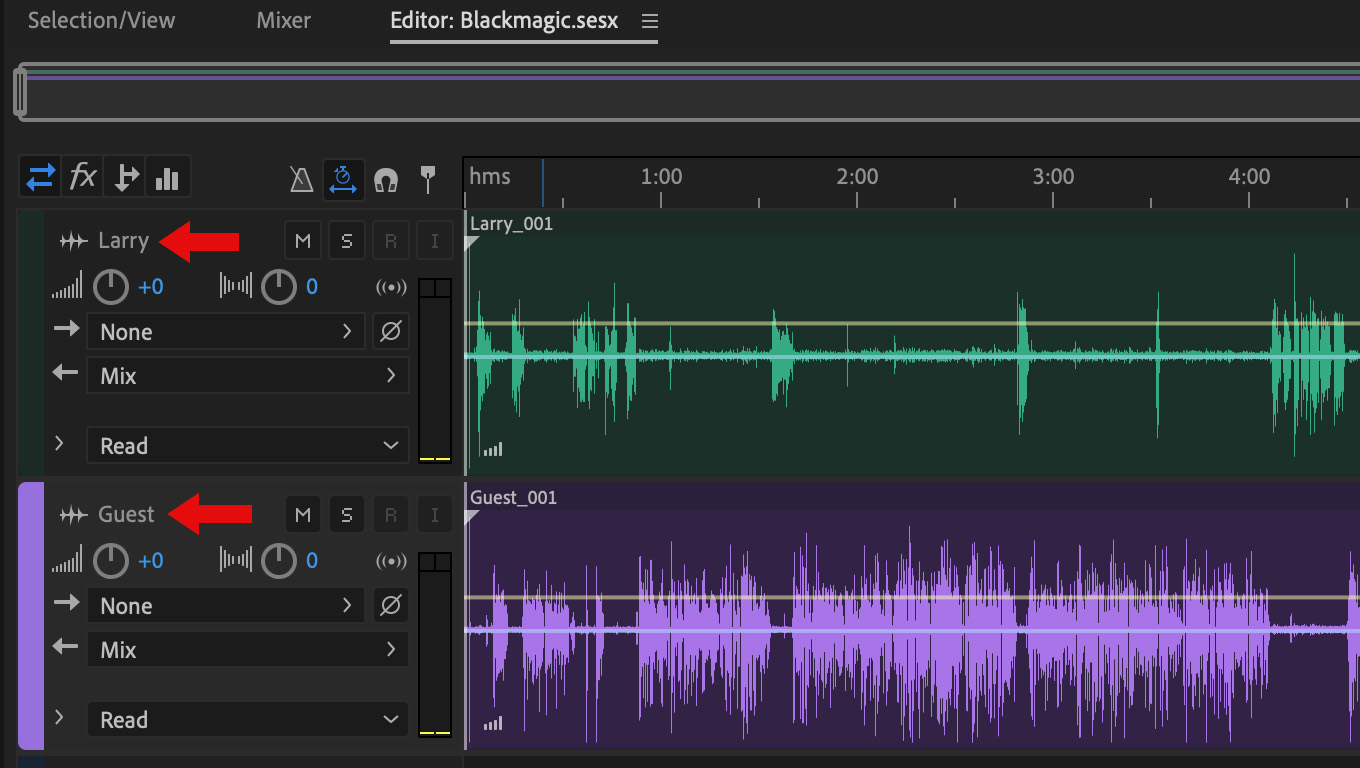
Because the Canon XA35 cameras could not record external audio, all audio was recorded on my MacBook Pro using Adobe Audition. The screen shot, above, was the original recording of the Blackmagic Design interview.
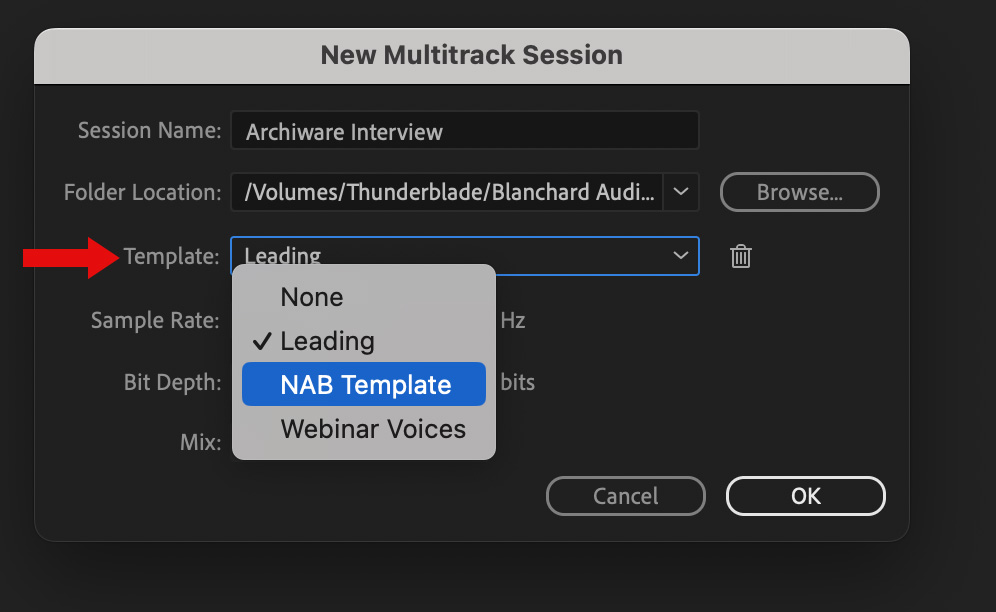
I used Audition’s Template function to create a recording template so that all interviews were formatted the same:
Given the extremely short time between the end of one interview and the start of the next, using this template I could save and close the old interview, create a new interview and start recording in less than a minute.
All interviews were recorded in a single take. This became important during editing because I only needed to sync one clip for each speaker.
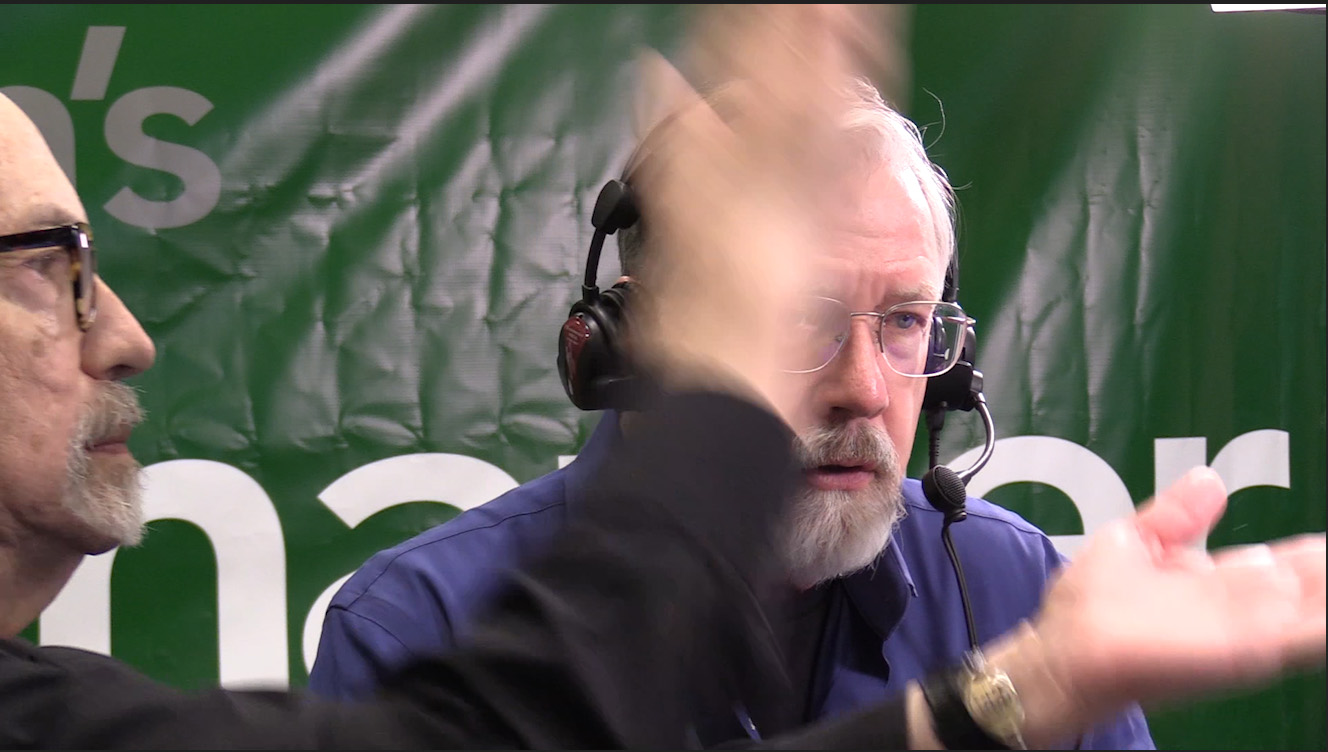
Because the cameras could not record audio, Bill Rabkin, our resourceful production factotum, had the brilliant idea of hand-slating each interview. (I was too frazzled to think clearly.) Without these hand-slates syncing audio to video would have taken forever. Maybe longer. THANK YOU BILL!
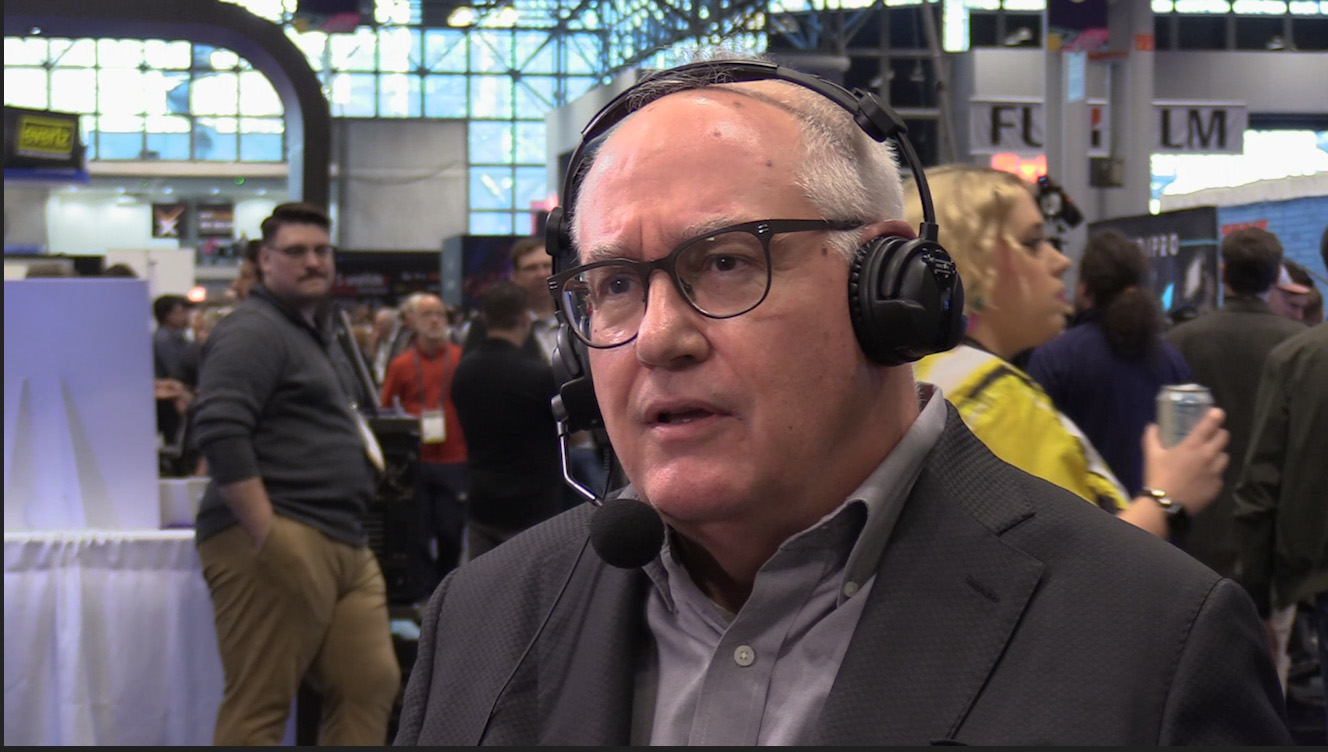
Fill lighting was provided by the two Lume Cube units. Trade show lighting is generically ugly, but these units did a nice job smoothing things out.
POST-PRODUCTION
All editing was done in Adobe Premiere Pro. There were several reasons for this – all situation specific.
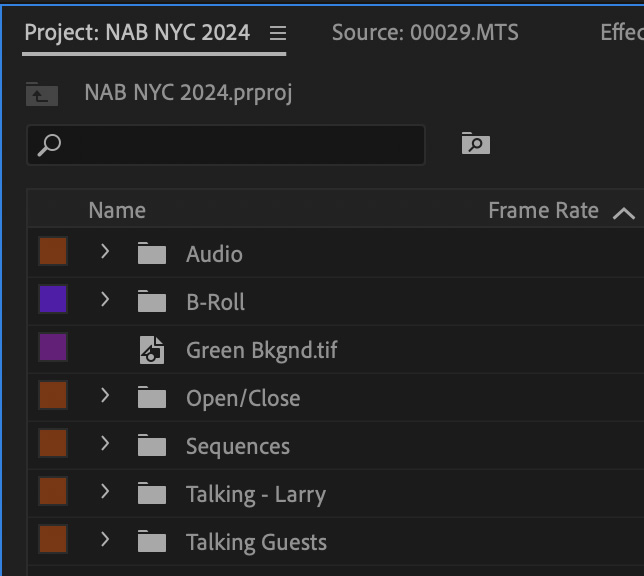
Here’s what Premiere looked like when all editing was complete.
NOTE: All sequences were shot and edited at 1920 x 1080 / 59.94 fps. However, the finished videos were exported at 29.97 fps to reduce file size. Cutting the frame rate in half made no difference to the image quality of the interview.
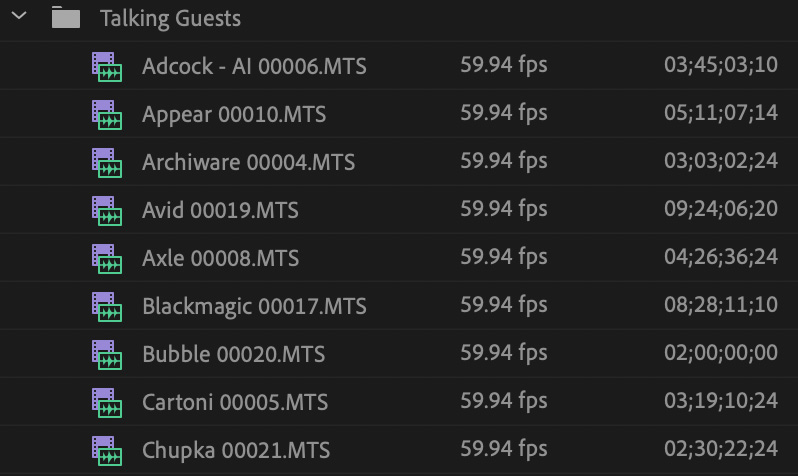
Premiere handles AVCHD files with ease. I imported each camera into its own bin. Clips appeared automatically. Since both cameras recorded the same interview at the same time, the clip numbers matched between cameras. So, I only need to label the guest. Finding my shot was simple – find the same clip number.
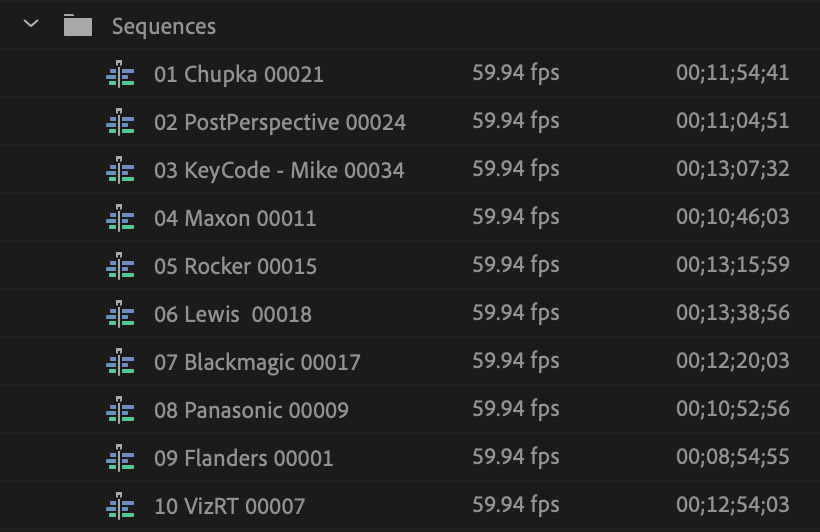
Sequences were numbered in the order in which I created them. The trailing number refers to the source clip of the interview guest.

I had two close-up angles to work with: me and the guest. Budget constraints prevented me from having a camera operator, so the framing of these shots was not as good as I would have liked.
However, in only one case was I forced to lower the sequence frame size from 1920 x 1080 to 1600 x 900 in order to frame a shot acceptably.
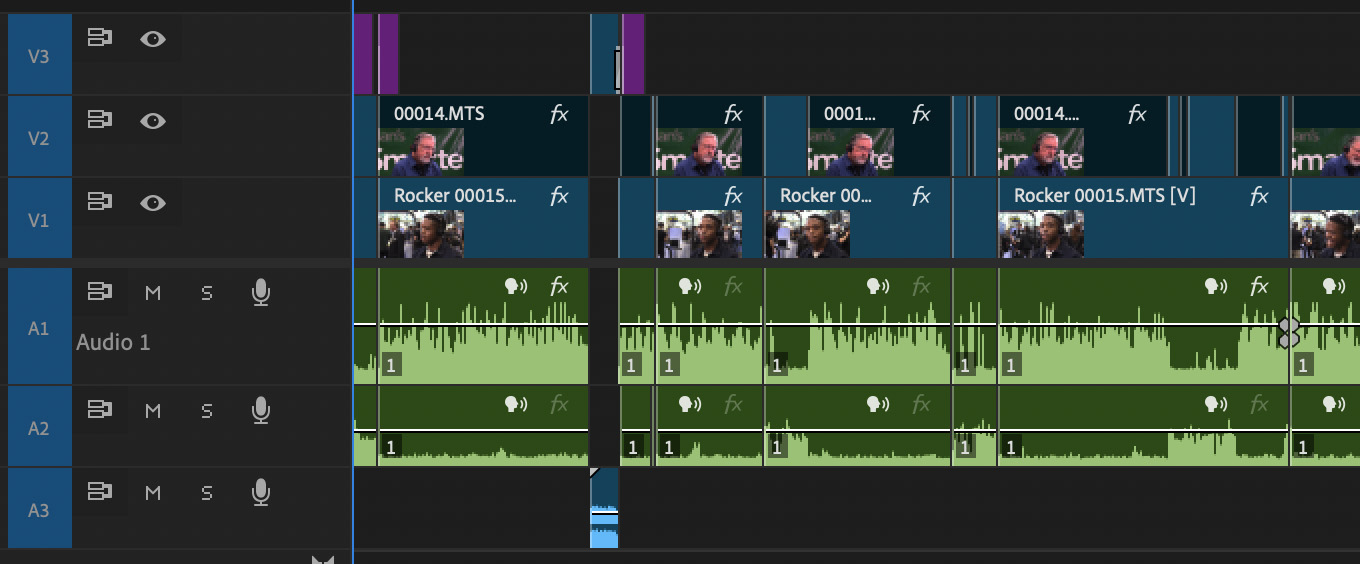
Here’s a portion of the Colin Rocker interview:
Because I needed access to both tracks of audio and lots of cutaways, I decided against editing this using multicam. Instead, I kept the guest video enabled all the time, but disabled my video whenever I wanted to see the guest.
NOTE: I created two custom keyboard shortcuts: one to cut the selected track at the position of the playhead and the other to toggle between enabling and disabling a clip. I used both constantly.
Clips were synced on Bill’s hand-clap. While time-consuming, the process worked great. Editing was the same as any other two-camera shoot. The real problem was audio.
AUDIO EDIT & MIX
Unlike Audition, Premiere does not support audio buses, which would have helped a LOT in this mix. Consequently, I needed to add more audio effects than I would have preferred.
This mix had a lot of challenges:
In the edit, I didn’t use any of the audio filters applied during recording. I simply copied the recorded clip into the new sequence and started the audio mix fresh with each edit. Because it was a single clip, once I synced it, all the audio from that speaker was synced for the entire interview.
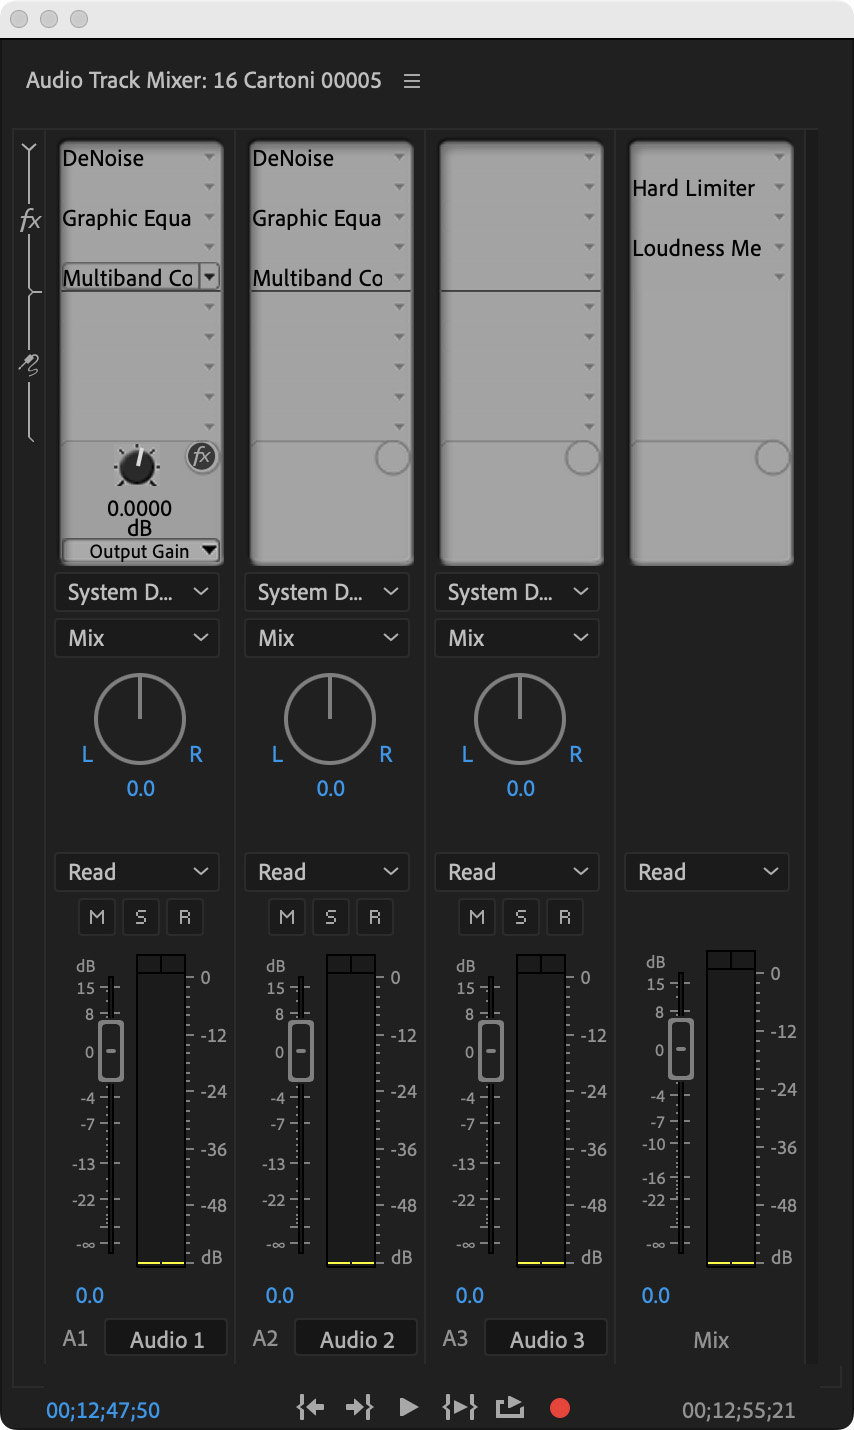
Here’s what the track mixer looked like for every interview.
NOTE: Social media likes audio levels around – 15 LKFS. This is easy to monitor in Premiere and Audition.
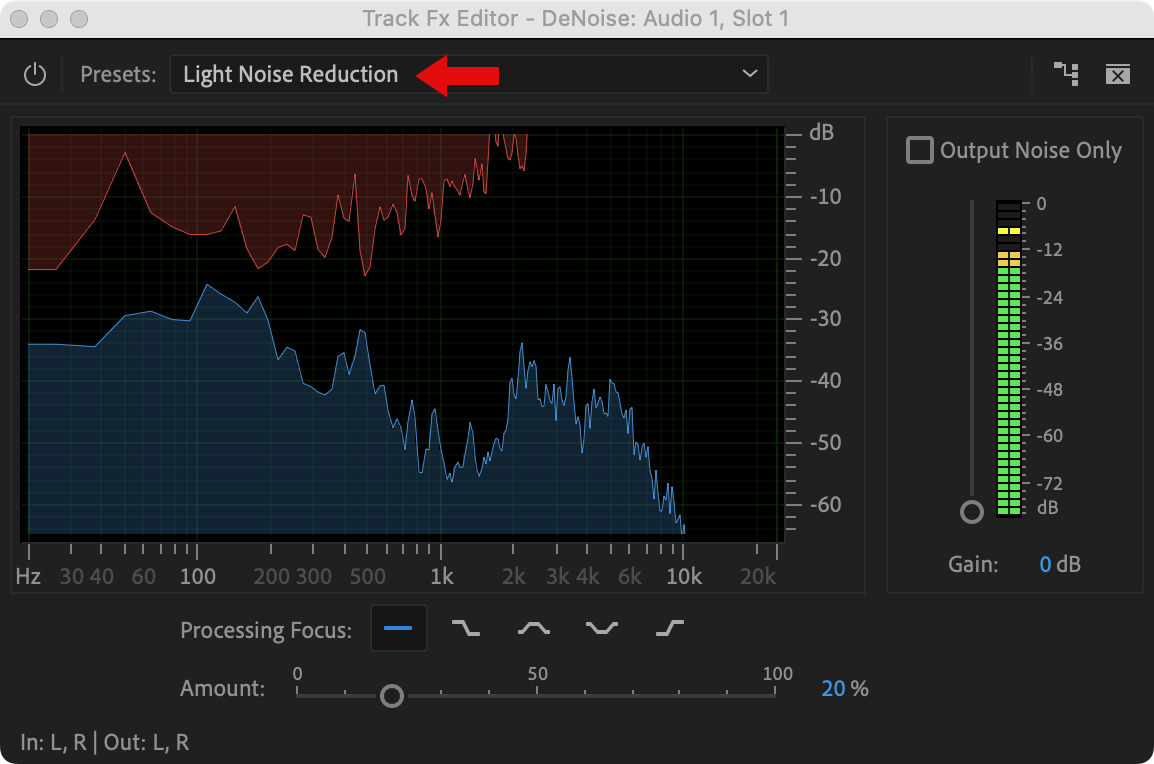
All I did with DeNoise was select the Light Noise Reduction preset. I left all other settings unchanged.
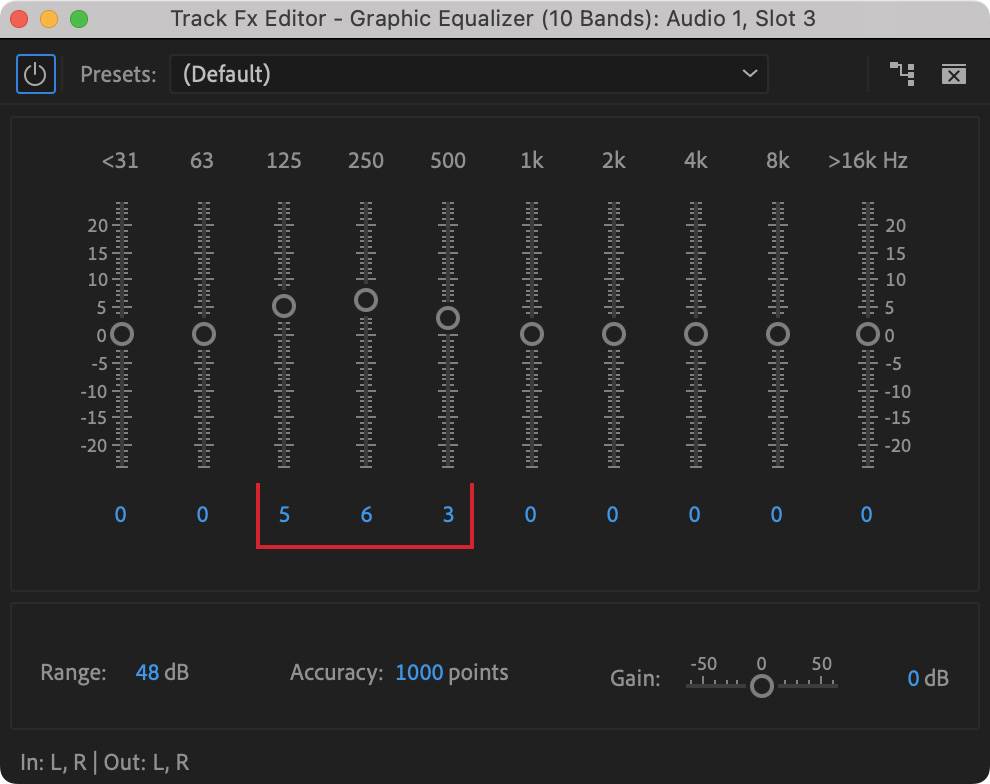
I added a 10-band Graphic EQ, then significantly boosted the low end (red bracket).
NOTE: For women, I used the same settings, just one slider up (250, 500, 1K)
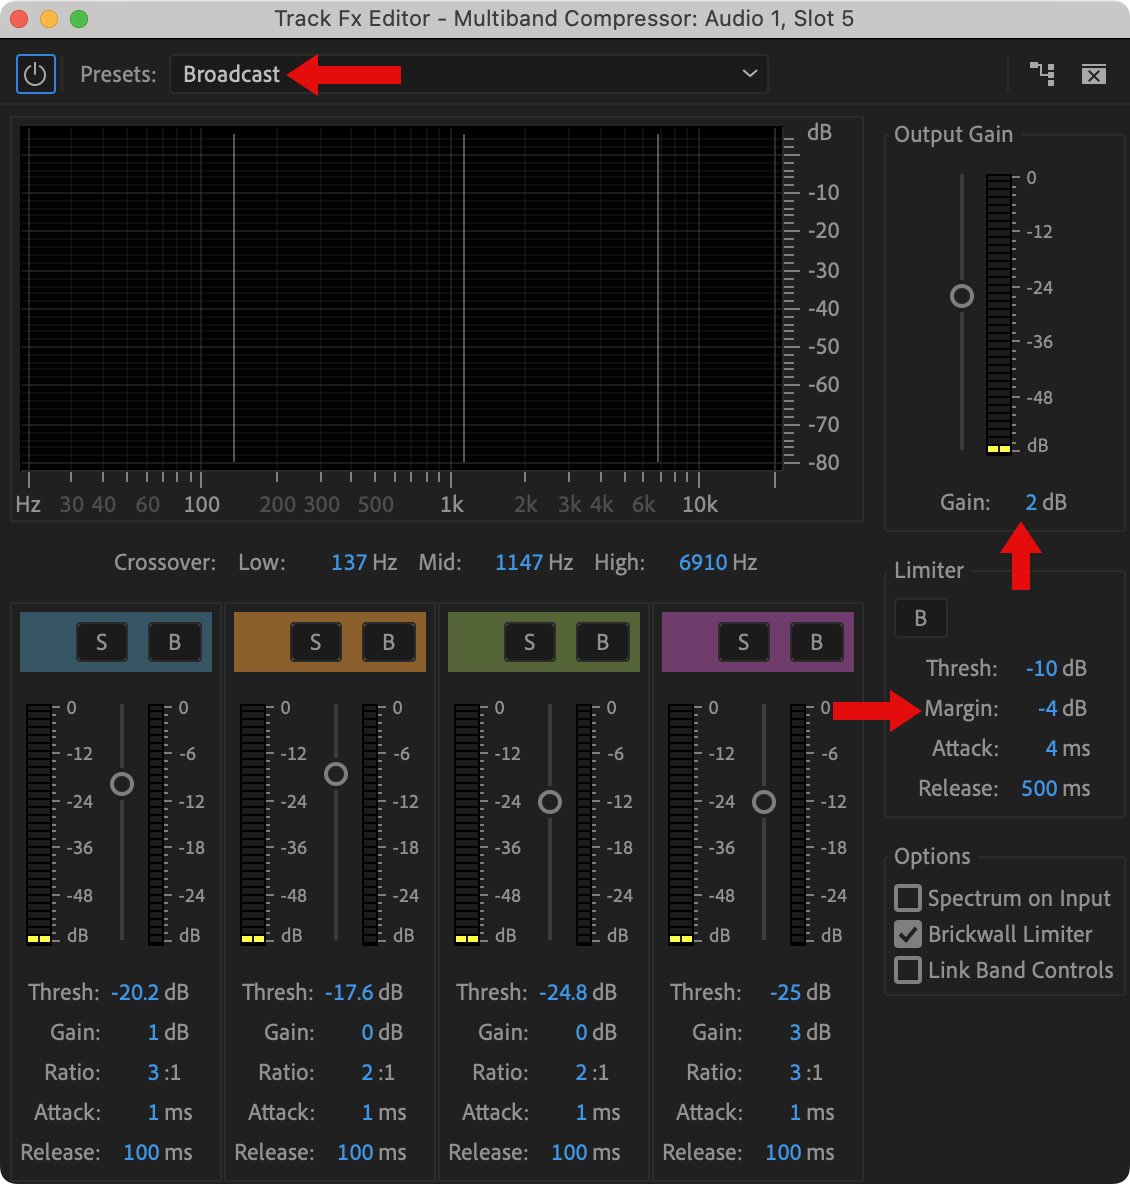
Multiband Compressor had four changes:
For general dialog, I disable the Brickwall Limiter. But, in this noisy environment, adding this feature made sure that all voices could be heard easily.
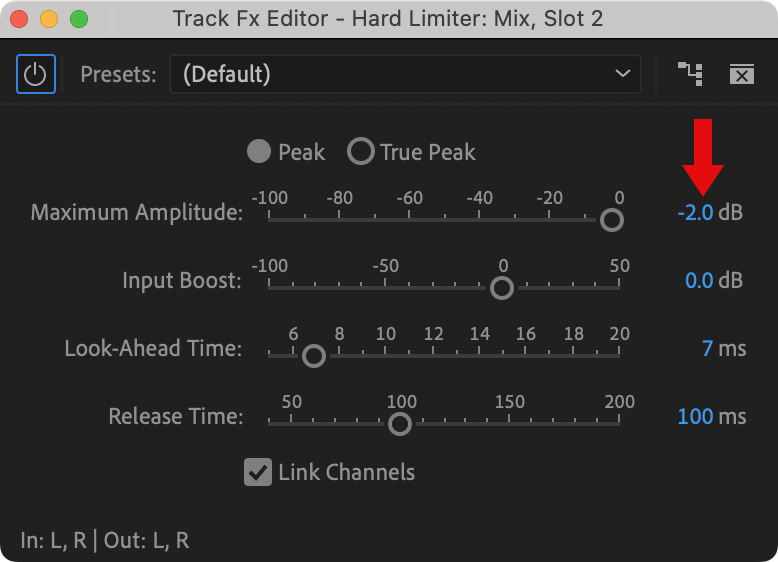
Hard limiter was placed on the main output and guarded against excessive audio levels. I changed the default from -0.1 dB to -2 dB, because that extra headroom wouldn’t hurt anything and provided additional protection.
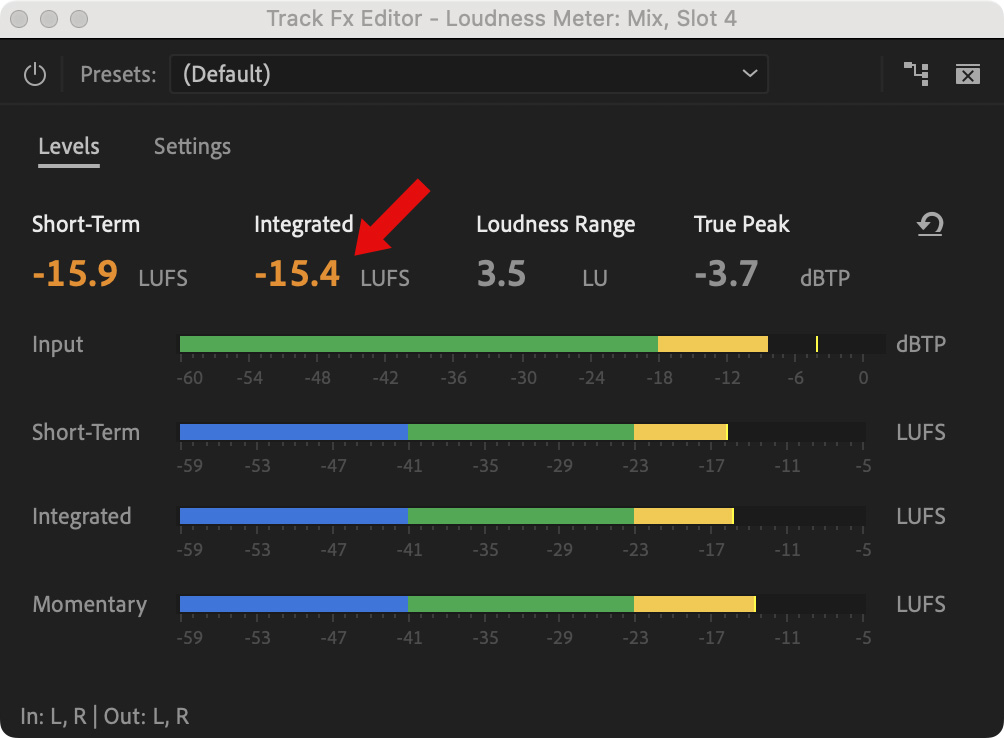
For the Loudness meter, I simply watched the Integrated level. As long as it was within shouting distance of -15 LUFS, I was happy. In the case of all interviews, I used this for reassurance.
SUMMARY
Every edit, every mix, is different. The audio EQ settings in this project are larger than I would typically use, but they solved the problem without causing distortion.
Syncing clips was not hard, but took time. Without the hand-claps, though, I’d still be editing.
While nothing about this project was “perfect,” perfection wasn’t my goal. I had guests with interesting and important things to say that I thought you would like to hear.
As always, we do the best we can with what we’ve got. And now you know how I did it.
10 Responses to How I Edited My NAB Show New York 2024 Interviews
Fantastic overview. Thanks Larry. Love seeing how others work. Your time and talents in both producing these interviews, and then taking the time to explain your methods in such detail are an incredible gift to the community. Thank you!!
What was the bug in the Fairlight audio editing?
KS:
There’s a selection bug such that if you try to select and remove a pop or breath, Fairlight does not select the area you drag the cursor across, but the nearest frame boundary. This bug means that you can only delete audio selections that start and end at a frame boundary, instead of the area you select. This makes it impossible to remove any audio artifacts which are shorter than a video frame. Blackmagic is aware of this, but hasn’t fixed it yet.
Larry
Thanks for the background on your process. I think your results were very good.
I shoot a lot of interviews with 2 or 3 cameras and find it’s extraordinarily helpful to be able to record the audio on the cameras. It makes it easier to edit and gives you backups, especially if you feed the mics to all cameras. And it makes it super fast to sync everything (most edit programs do it now). RE background noise, I find Final Cut’s voice isolation feature a quick and easy solution for most background noise.
I also shoot most interviews in 4K these days, especially if I have a lockdown camera somewhere in the mix. A looser shot allows me to adjust issues in post such as framing if the interview subject shifts position. Usually the final product is HD, so you don’t lose any resolution If I need to edit out a mistake, I can often do that with a change in focal length. I realize the file sizes are a lot bigger, but cards and drives these days can generally handle it.
Scott:
Excellent points. As I discussed here – https://larryjordan.com/articles/gear-report-recording-interviews-at-the-nab-show-new-york/ – I rented cameras specifically to record audio. However, for whatever reason, we were rented cameras that could not do so. Nor was the rental company able to willing to fix the problem. I am still furious about this.
And, while my original hope was to record in 4K, budget constraints required renting cheaper cameras that only recorded 1080; for us to be able to afford to do this at all.
Larry
Wonderful walk through your process Larry – going over to check out the results now 🙂
Thanks for sharing your’s Scott as well. Pretty invaluable hearing these real life war stories. Good luck to you both on the next battles!
Graham:
Smile… Every “battle” starts with the best of intentions. Then… reality intervenes.
Larry
Hello Scott:
Thank you for your comments to Larry’s post regarding his editing process. I just wanted to note that DaVinci Resolve’s Fairlight also has a voice isolation feature. Beginning in DaVinci Resolve 18.1, Blackmagic introduced Voice Isolation and Dialogue Leveler tools within Fairlight, designed specifically to isolate spoken words and reduce background noise—very similar to Final Cut Pro’s voice isolation.
Thanks again, Scott.
Jay Creighton
Fascinating. I find it interesting that you didn’t use multi-cam editing. To be clear,
you stacked your synced video and audio clips above the guests and simply removed or deleted anything you didn’t want to use. Basically, you were working off the entire interview as your timeline. I used to edit focus group discussions that way. I would laydown the entire discussion as my timeline and delete what was unnecessary.
Philip:
Correct. I needed to manually sync audio to video for both cameras. Then I needed to hear both audio tracks, each of which needed a lot of audio processing due to the tinniness of the mics.
Then, I needed to cut small sections out and cover the gap with reaction shots.
I’d have spent more time working around a multicam edit than working with it.
Larry