 IMPORTANT: Before you start, please read this tutorial on The Critical Importance of Project Settings in DaVinci Resolve. It will save you pain.
Over the last two weeks, I’ve discussed in my weekly newsletter that I could not get multicam editing to work in DaVinci Resolve. Ultimately, this was traced to multicam playback creating dropped frame errors. Dropped frames are never a good thing in any NLE, so I consider this to be a bug that I hope Resolve’s engineers fix in the near future. I share the workaround in this tutorial.
Having worked with multicam editing in Apple Final Cut Pro, Adobe Premiere Pro and DaVinci Resolve, multicam editing in Resolve is the weakest of the three. If your editing revolves around multicam, Final Cut Pro is the best choice, with Premiere a solid second. However, if you are working with Blackmagic native files, Resolve may be your only option.
NOTE: Here’s a tutorial on single-camera editing in Resolve.
BEFORE YOU START
Dropped frames indicate that the editing software or your storage is not fast enough to play one or more video clips in real-time. Given the power of today’s computers, you should only see dropped frames when you are editing dozens of multicam angles, applying excessive effects, or working with slow storage.
But not when playing three 720p/29.97 clips in a multicam edit; which is what I use here.
Apparently, from what Resolve support found on my system, whenever Resolve starts a multicam playback it flags the start of playback as a dropped frame. Which meant that on my system, playback immediately stopped. Why? Because that’s how I set my preferences.
To prevent this problem, go to DaVinci Resolve > Preferences > User > UI Settings and UNCHECK Stop playback when dropped frame is detected. Then, click Save to save this setting.
The good news is that multicam playback will now work. The bad news is that if, at any other time during your edit, you drop a frame – which could cause a loss of sync – you will not be notified.
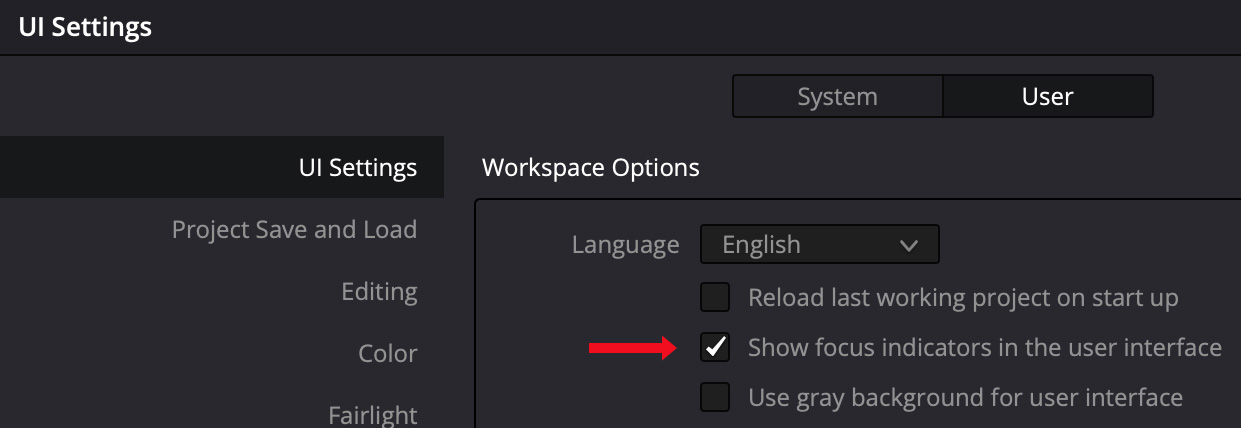
As long as you are changing preferences, there’s one more in this same panel you should turn on: Show focus indicators in the user interface.

This displays a thin red rule at the top of whichever panel is selected (“in focus” or “active”).
OVERVIEW
Multicam editing in DaVinci Resolve is very similar to that in Apple Final Cut Pro or Adobe Premiere Pro. As an overview, here are the steps:
Once flattened, a multicam clip acts just like any other group of clips. Let’s take a look at each of these steps in detail.
CREATE A NEW PROJECT
Start Resolve, then, from the Project panel, either open an existing project or create a new one.
We’ll create a new project by double-clicking the Untitled Project icon.
IMPORT MEDIA
Type Cmd + I (File > Import > Media) and select the clips you want to use from storage.
Although timelines are not yet created, if the frame rate of the imported clips don’t match the default frame rate of the project, this message appears. Click Change to change frame rate.
In general, you should edit the frame rate you shot and you should shoot the frame rate you need to deliver. In those situations where this isn’t possible, you should edit the frame rate you need to deliver, then conform non-matching clips during the edit.
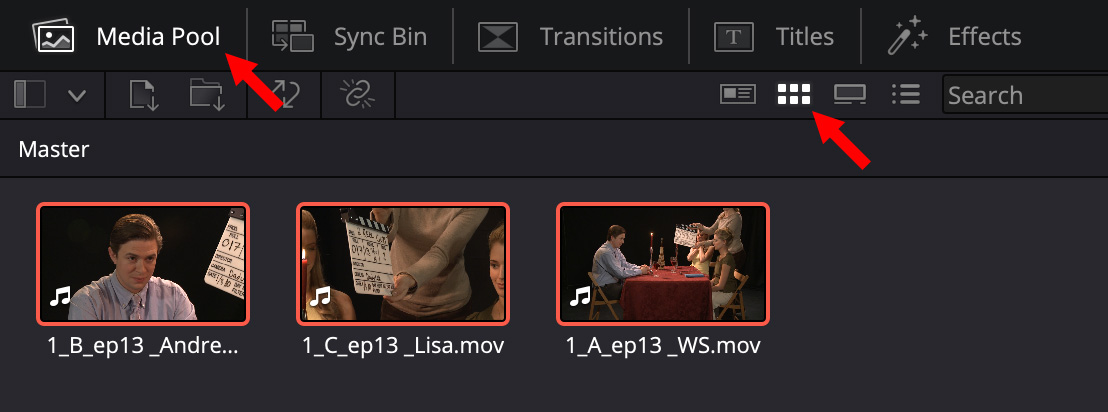
All imported source clips are displayed in the Media Pool (left red arrow).

You can change the Media Pool display by clicking one of these four icons at the top center of the Media Pool (right red arrow above).

While multicams can be edited on the Cut page, there are more tools available when editing on the Edit page. This tutorial illustrates editing on the Edit page.
CREATE A MULTICAM CLIP
There are two principle ways to create a multicam clip: using the Sync bin or a menu choice. While the Sync bin provides more ways to sync clips, it is also more complex. I’m reserving discussion of that for another tutorial. The menu choice is easier.
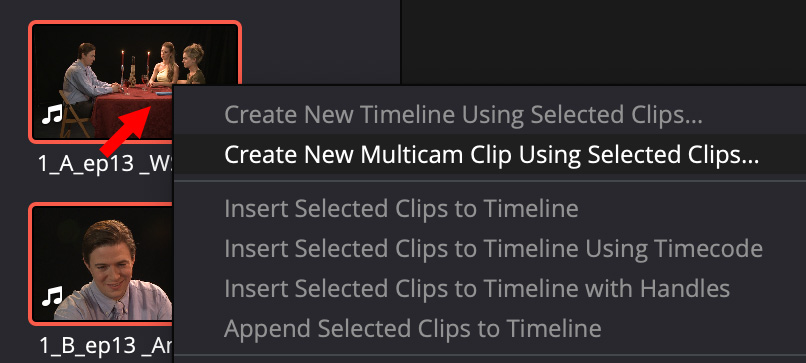
Select all the clips you want to bundle into a single multicam clip, then right-click one of the selected clips and choose Create Multicam Clip Using Selected Clips.
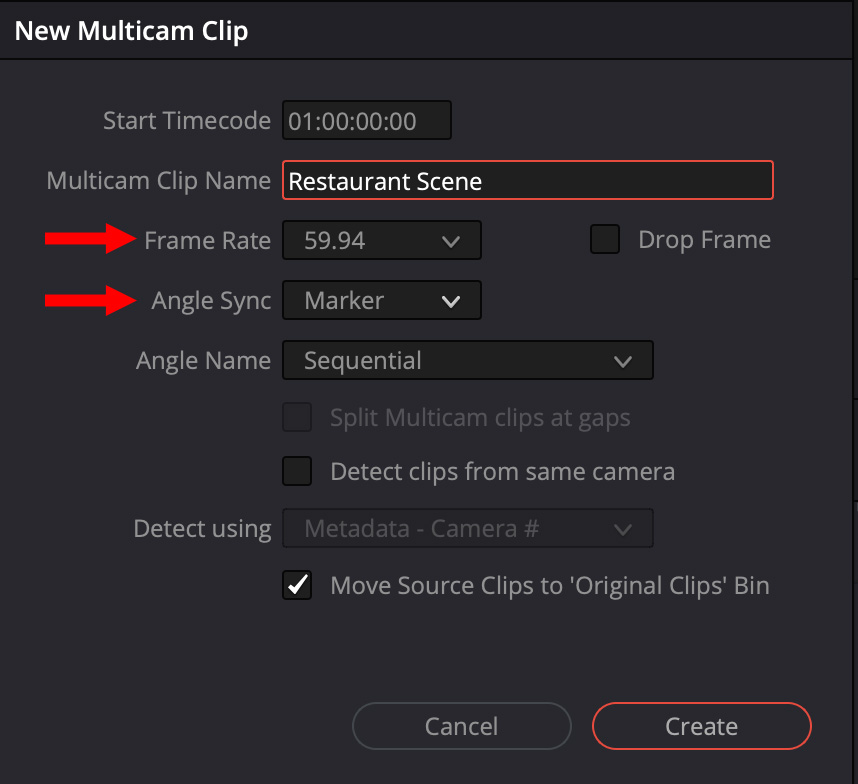
In the popup menu, give the multicam clip a name, specify the frame rate, then determine how clips should be synced. Generally, the frame rate should match the clips you are editing.
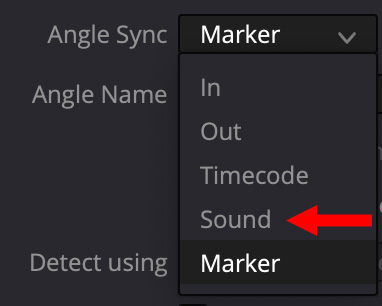
Resolve supports syncing on the In, Out, matching timecode, common audio or markers. If all clips have the same audio, syncing on matching audio is the easiest, though slowest. But, I can’t always count on audio recorded to all clips. Since I use clapper slates, I tend to use markers.
NOTE: To create a marker, position the playhead on the correct frame and type M. To delete a marker, double-click the marker icon, then choose Remove marker.
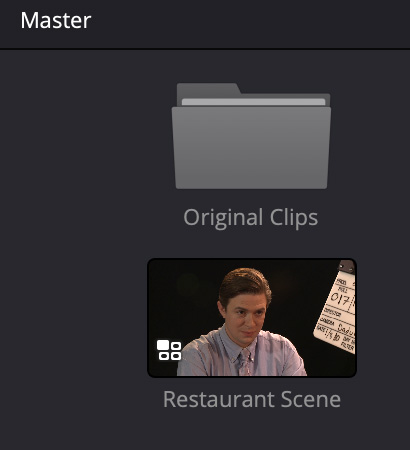
By default, the source clips move into a bin called “Original Clips” and the multicam clip is displayed in the Media Pool with a multicam badge in the lower left corner.
Place the multicam clip into the timeline by dragging, or typing Shift + F12.
ADJUSTING A MULTICAM CLIP
When I set the markers for sync, I was off by a bit. So, I need to tweak the placement of the angles in the multicam clip. To do so, select the multicam clip in the timeline and choose Clip > Open in Timeline from the menu bar at the top.
This opens all the angles in the timeline.

While I found clicking the timeline icon more reliable, DaVinci Resolve Support also told me: “It may be easier to navigate between the source Multicam clip and Multicam edited timeline using the bread-crumb trail found at the lower left area of the Edit timeline. Double clicking here will bring the user back to the enclosing ‘edit’ timeline, exiting the expanded multicam “sync map” timeline view.”
Larry adds: This ‘bread-crumb trail” is displayed only when a multicam clip is open in the timeline.
To make horizontal (sync) adjustments:
Using these keys I moved each clip horizontally until it was in sync.
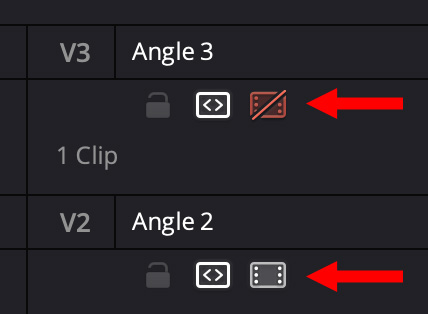
Click the video icon in the track header on the left to make all the clips in a track visible (white) or invisible (red). (There are similar visibility icons for audio clips.)
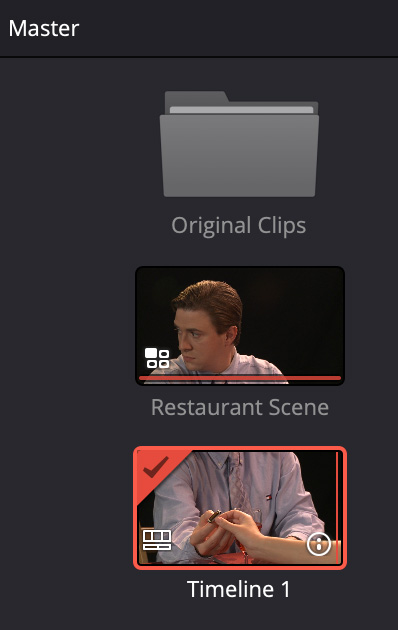
To close a clip that is opened in the timeline, double-click the name of the timeline in the Media Pool.
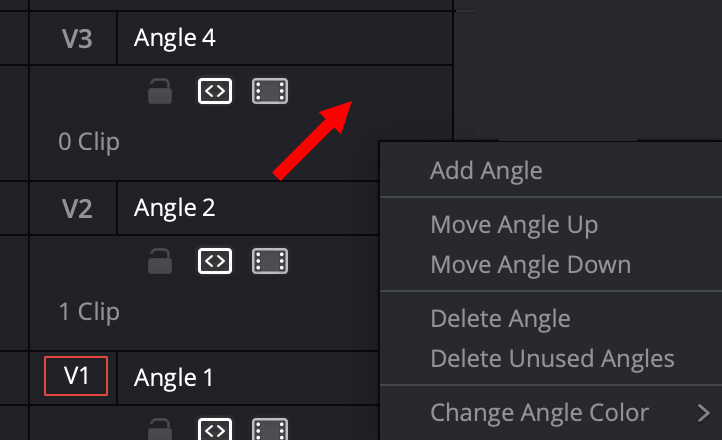
NOTE: When in Open in Timeline, right-click a track header to:
You can also drag individual clips up or down, dragging a clip into an empty area automatically creates a track.
Once the clips inside a multicam clip are aligned the way you want, you can trim the clip in the timeline as you would any other clip. In my example, I trimmed the In and Out to precisely match the start of the scene.
EDIT A MULTICAM CLIP

To view the angles in a multicam clip, select Multicam from the small menu in the lower left corner of the left-side monitor (top red arrow).
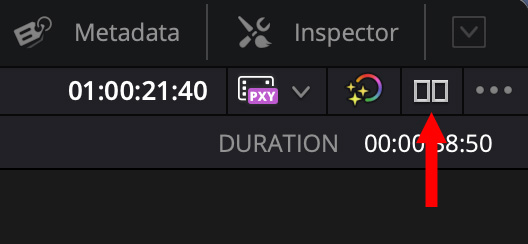
If two monitors are not showing, go to the top right corner of the Resolve interface and click this icon to switch from single to dual monitor view.
BIG CAUTION!
Some YouTube videos recommend detaching audio from video so that you can make video-only cuts. This is a serious mistake, because it runs the risk of losing sync between audio and video. Never detach audio, unless you want to delete it.

Instead, select one of these icons at the bottom of the multicam viewer to determine what gets switched in the timeline:
NOTE: I have not found an easy way to change the default angle displayed in the timeline before editing starts.
There are two ways to edit a multicam clip:
To edit a multicam clip manually, move the playhead to the point you want to change cameras then either:
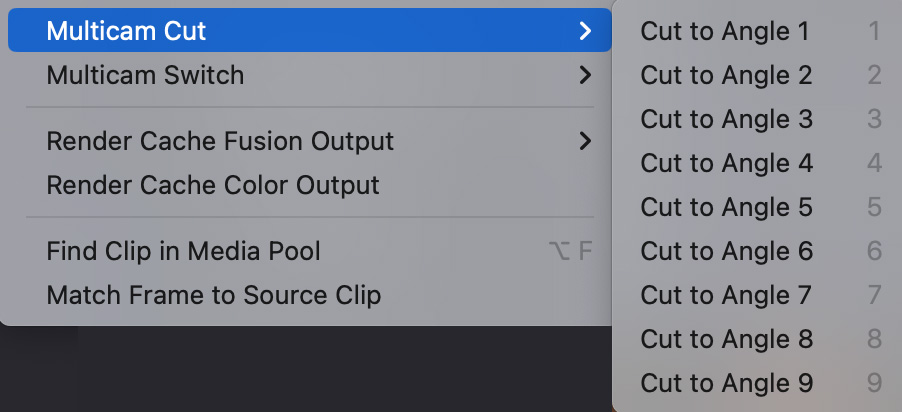
To change a shot without adding a cut:

To edit a multicam clip in real-time, play the timeline then:
To adjust an edit point, select the Trim Edit tool (shortcut: T), then drag the edit point left or right. This is the same as any other trim.
NOTE: To avoid breaking sync, edit points can only be roll-trimmed, not a rippled.
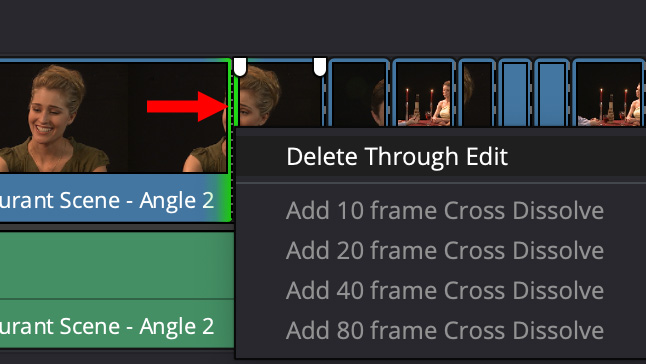
To delete an edit, right-click the edit point and choose Delete Through Edit.
LAST STEP
During a multicam edit, your storage is working extra hard because Resolve is playing all these sources at the same time. To save wear and tear on your system, when the edit is complete, you should flatten each multicam clip. This disconnects all clips from the timeline, while retaining only the shots you want to use.

To flatten a multicam clip:
NOTE: Most of the time, choose Retaining Grades from Angles to preserve any color grading already applied to the clips prior to the edit.
Choosing only one segment in a multicam clip, flattens only that segment. This is different from both Premiere and Final Cut.
EDITOR COMMENTS
At the beginning of this tutorial I mentioned that Multicam editing in Resolve is an evolving feature. Two editors provided comments that I want to share with you.
Jeff Orig
Multicam “works” in Resolve. But it is just pretty bad and pretty buggy. Sometimes it will let you use keyboard shortcuts to change angles and sometimes it won’t.
I end up just making a cut on the timeline, then right clicking either the video or the audio and then click switch angle in the right click context menu. I have found this to be the most consistent. FCPX still has the best multicam. All the years of multicam from Final Cut Studio still pays off.
Plus they have no equivalent keyboard shortcut to cmd+shift+7 to pull up the multicam viewer. So if you change views for whatever reason, you have to manually click to show the multicam viewer in the drop down under the preview window. Pretty frustrating. And there is no multicam view within the multicam timeline itself.
And I can’t find a good way to manipulate in and out points in the preview monitor on multicam. This is hard to explain in email.
But I can see Blackmagic and Davinci listens for the most part and also they have so much invested on multicam capture hardware (cameras and switchers) that I am hopeful that they get this right.
After this article was published, DaVinci Resolve Support responded to Jeff’s comments:
There are many default key shortcut options available to switch or cut multicam angles and one could even add a key shortcut to engage the source viewer to display the multicam mode as I have done—adding the shortcut Option+CMD+M when the Source viewer on the Edit page is in focus. One other change I make to this new shortcut set is to add the 10-key number pad area to the multicam switch and cut angle shortcuts, which are otherwise set to engage the Color page printer lights. As you can set shortcuts that are either enabled globally, or specifically on a particular workflow page or panel, there is no conflict created by doing so here in the Edit page. When you add or modify the default keyboard configuration, Resolve prompts you to save the change as a new name, which I call “DaVinci Resolve_MCAM”
Adam PW Smith
I edit in FCP, but I’ve been trying to learn Resolve for a number of reasons, not the least of which is that I have five BMD cameras that I love and Resolve is the best solution for editing that footage (as well as its excellent color timing tools and hardware, and various other nice features). But I have been struggling with getting up to speed with Resolve because I keep getting stonewalled by baffling problems. When I ask people I know who use Resolve the answer is frequently “I don’t know what’s going on with you – it works fine at my end.”
The technology and capabilities under the hood are undeniably impressive, but Resolve’s UI shows a disappointing focus on the engineering behind the scenes, rather than the real world use in front of the screen. They are so far down the road that making the kind of large scale changes to usability and workflow that are necessary will be a daunting challenge, but to keep bolting on features without considering the lives of editors will just raise the barrier of entry for new users. I hope BMD starts to take this seriously so that Resolve can be something we truly love, rather than a tool we begrudgingly adapt ourselves to.
SUMMARY
Multicam editing in Resolve is a powerful feature, but with quirks you currently need to work around. However, when you need it, it can save a ton of time in an edit.
22 Responses to Get Started: Multicam Editing in DaVinci Resolve 18
I found a big problem in Davinci Resolve multicam.
I cannot have the multicam viewer in full screen. I try to edit a 12 angles multicam and the window is too small. I have 2 monitors and I would love to have the viewer full screen on the second monitor. Do you have a fix for that.?
thanks for your help.
Serge
Serge:
This is a great question. But I don’t, yet, know the answer. I recommend you contact Resolve support.
Then, let us know what you find out.
Larry
Double click on a shot in the timeline, the multicam will appear in the clean feed viewer.
Good to know!
Thanks,
Larry
Talking about multicam editing I love using the Speed Editor with Davinci Resolve. It has dedicated keys for 9 angles and I don’t want to miss the jog wheel at all. This little wheel was the first game changer for me.
Olaf:
Thanks for letting us know.
Larry
You lost me at the point you put the Multicam clip on a timeline and seem to be carrying audio for all three cameras. Wouldn’t you usually want your shots synced to one master audio or, if a music scene, to a playback track? My need for multi-cam pops up mostly when editing dialogue scenes where one character’s coverage is, say, a close up on camera A and an over the shoulder on camera B. Then both cameras are turned around and I have complementary angles on a second character. I want to cross cut the dialogue between the two sets of multi-clips (and for each may have more than one take) gradually shifting to the closer cameras as the drama builds. It seems to me putting all these clips on a timeline before I’ve built the scene is cumbersome. Is that an essential part of the process or is there a different workflow for working with dialogue? Can I just keep a Multicam clip in my source folder and only put the bits I want into my edits? I did once try using Resolve to edit a short film and mysteries like this led me to give up.
Steven:
Thanks for your comment. MOST of the time, you are editing multiple streams of video to a single master audio track. But, not always. Once you open a multicam clip into the timeline, you can disable any audio tracks you don’t want.
And, yes, you can easily cut between multiple multicam clips, but multicam – regardless of which NLE you use to create it – is really designed for live performance, instead of multiple setups for dialog. As you noted, it will work, but it’s awkward.
Larry
There is a workflow where you put different takes on the timeline and consolidate from there into a final multicam edit.
This tutorial shows you different ways of doing multicam in Davinci Resolve (including working with takes) and how to solve problems like different frame-rates and using a master audio track:
https://www.youtube.com/watch?v=iLCy6tckbAg
Hans:
Thanks for this helpful link!
Larry
Thanks for your responses. I’ve certainly used multi cam for “live” (although still scripted) performances. But I’m surprised you say that’s what it’s really designed for. On most scripted programming I’ve edited, especially in recent years, almost all shots are covered with two or more cameras and I need to be able to draw upon each setup and each take depending on which I want for which moment of the scene. Perhaps “Multicam” has become a term of art for the kind of thing you’re demonstrating or that is shown in Hans’ video link (thank you, Hans). So maybe what I need is called something else. What workflow do you think would be best for editing a dialogue scene where all setups and takes have been shot with two or more cameras. If that’s isn’t what “Multicam” is for, what is that process called in Resolve (or Premiere, for that matter)?
Stephen:
I guess that would be called “multicam” as well. But, combining multiple setups with multiple cameras is not one I have any experience with.
Larry
Hey Larry,
I renewed my subscription on your site to go through your Davinci Resolve explorations. I appreciate your workflow and technical style. Good stuff!
Are you planning on releasing a Fusion session anytime soon? 😁
Marc:
Thanks for your comment.
The color page is next. Once I stop being intimidated by Fusion I’ll cover it.
Larry
Hello Larry. I did a workshop with you years (10?) ago.
I bought Avid system #84 in 1993. I still edit in Avid.
I’m looking at Resolve. I use Avid’s (black magic design) I/O box. I’m designing a new Mac Studio system with NO spinners! What do you recommend as an I/O box? mainly for feeding my scopes and monitors for color correction and final output QC. Thanks. It’s nice being a fellow old guy in the biz.
Randy
Great question. However, this is an area where I don’t have any expertise. Since you are looking at Resolve with BMD hardware, I recommend you talk to the support team at Blackmagic and ask their advice. I have no doubt they’ll have exactly what you need.
Larry
Thank you sir!
If anything I may buy the DNxIQ for my updated system, stay with avid and pray that they update both the title tool and the color correction modules.
1994 to 2024, they’ve had time!
R
Dream on…
Every time I have to go into the multicam clip to edit the footage (Color Grade, Etc) the playhead isn’t at the same location as when I’m viewing the Edit timeline with the multicam clip. Is there a way to sync the two?
Thank you for your tutorials they are extremely helpful and your delivery is easy to follow. Please may I ask, how does one “unflatten” a Multicam clip? For example, the multi cams have been edited, and then graded, and then the client says, “oh please can we now cut to the wide on that shot instead of the close up!” Is there a way to get the clip back into a Multicam to make that change?
Andrew:
You can’t. By definition, flattening disconnects the sync between all clips, deletes all unused media from the timeline – but not the Media Pool, and moves all clips down to V1.
If you need to go back and change a shot, you would need to align it manually.
Larry
I’ve been using resolve for 5 years and every time I need to do some multicam editing I have issues. I’m considering switching to Edius because resolve is convoluted and unintuitive, and they don’t listen to feedback. Just search multicam on blackmagic forums. It’s them.