Final Cut Pro X: Fun With Titles
 One of the fun benefits to creating titles in FCP X is that so many of them are already created. In the current (10.4.3) version of Final Cut there are seemingly hundreds to choose from, with a vibrant 3rd-party community creating hundreds more.
Still, this last weekend, I was wandering around inside the app, looking for something to write about and discovered a few tricks you might like. Let me show you.
INK ON A SUMMER’S DAY

This is the Ink effect, but with its background missing.
Here’s how to create this:

- Sometimes, it’s just easier to search for something. Go to the Titles browser and select the text “Titles” at the top of the list on the left. Then, in the search box in the top right corner enter “Ink” – this displays all titles in the Titles browser that have “Ink” in the file name.
- As usual, edit the Ink title above a clip in the Timeline.
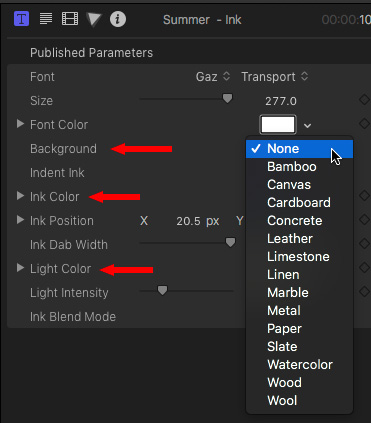
- In Inspector > Title, set the background to None.
- Whenever you use a blend mode, you’ll get different results by changing the color or gray-scale of the Ink Color (Inspector > Title). We will play with the Light Color in a minute.
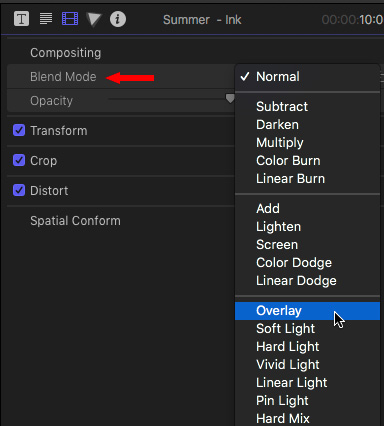
- In Inspector > Video, change the blend mode to Overlay.
- Then, in Inspector > Video, alter Transform > Position so that the title text is located where you want it in the frame.
- Double-click on the text in the Viewer and change it to whatever you want.
SURREAL SUMMER

This takes blend modes to an entirely different level.
- Edit the Ink title above a clip.
- Change the background from Bamboo to Watercolor. (Inspector > Title)
- Change the blend mode from Normal to Difference. (Inspector > Video)
- Tweak the Light Color (Inspector > Title) and watch what happens to the effect.
3D IN THE SKY
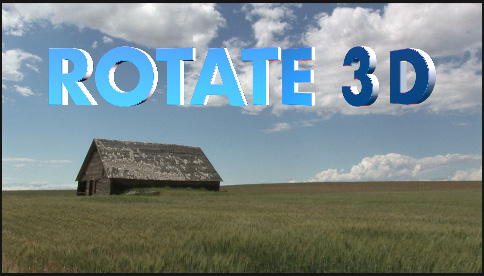
Apply the Rotate 3D title to your clip. Now, let’s get each letter to rotate and change color as it does.
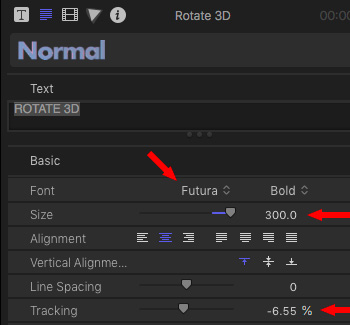
In Inspector > Text:
- Change the font to Future Bold, or something much less boring than Helvetica.
- Increase the Size to something big (I’m using 300 point)
- Tighten the Tracking to make the letters move closer together
Then, in Inspector > Title:
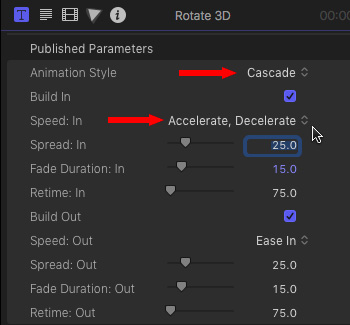
- Change Animation Style to Cascade. This rotates each letter on its own axis.
- Change Speed In to Accelerate, Decelerate
Finally, in Inspector > Text:
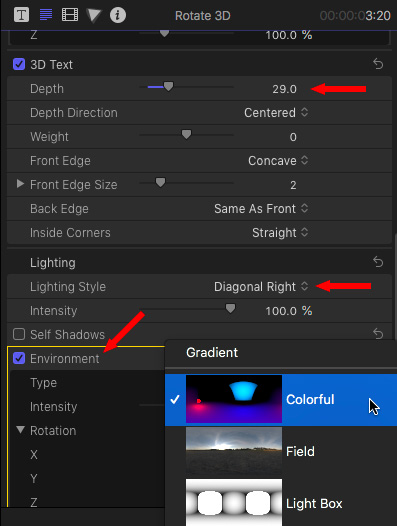
- Change 3D Text > Depth to 30, or so, to make the letters thicker
- Change Lighting > Lighting Style to change the direction of the light
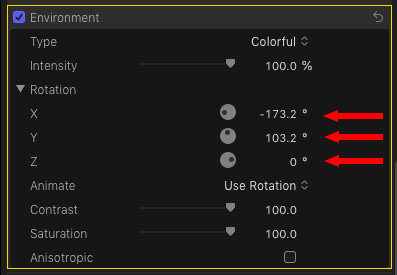
- Set Environment to Colorful
- Drag the three Rotation wheels and watch what happens to your text
LET’S GET GRAINY
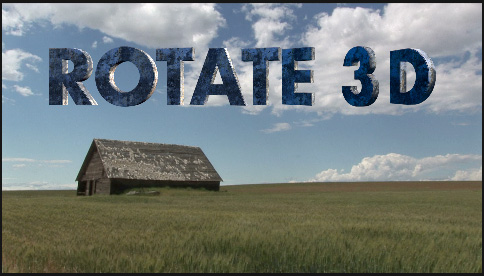
Here’s what happens when we change the texture of the letters in 3D text.
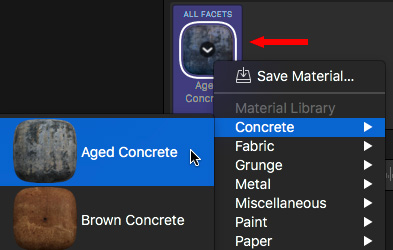
Using the same 3D text, click Material > All Facets and set it to Concrete > Aged Concrete.
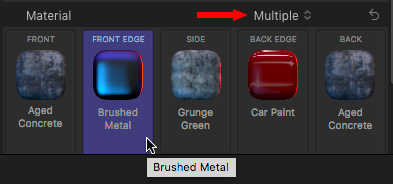
If that isn’t over the top enough, change Material to Multiple, and apply a texture to each face of your text.
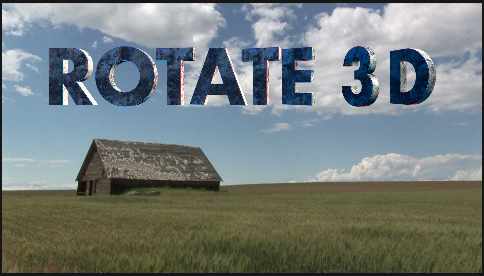
This is one place you could end up – different colors and different textures on each edge of the text.
OH! ONE MORE THING…

Search in Titles for Speech Bubbles.
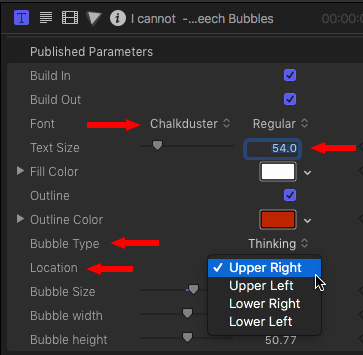
In Inspector > Title:
- Change the font to something interesting, I used Chalkduster
- Change the font size to be big enough to read
- Play with the Bubble Type
- Play with Location

Then, in Inspector > Text:
- * Adjust Baseline so that the text fits inside the bubble.
SUMMARY
Titles, in Final Cut Pro X, are an extremely flexible – and fun – playground for your imagination.
Not every project needs to use serious titles – sometimes, something fun is more… um, fun.
Bookmark the
permalink.
2,000 Video Training Titles
- Apple Final Cut Pro
- Adobe Premiere Pro
- DaVinci Resolve
Edit smarter with Larry Jordan. Available in our store.
Subscribe to Larry's FREE weekly "Edit Smarter" newsletter and
save 10%
on your first store purchase.
Read the latest Media Industry News, curated by Larry Jordan
Media News

 One of the fun benefits to creating titles in FCP X is that so many of them are already created. In the current (10.4.3) version of Final Cut there are seemingly hundreds to choose from, with a vibrant 3rd-party community creating hundreds more.


5 Responses to Final Cut Pro X: Fun With Titles
Wow! For $300 I can get LiveType X!
Hey Mike – How do you change the background color for the default black in th Basic Title. I have FCP 10.4.8 and can’t figure this small thing out!
I only have simple white titles, in basic and then scrolling. No options show up in the Published Parameters. Thanks!
Nina:
Remember the “black” displayed behind a title in the Titles Browser is not black but transparency. To change the background, simply drag something different under the title in the Timeline.
Larry
Hi, do you know how to insert a video into a speech bubble title? I have Final Cut Pro 10
Olga:
I just did a quick test. The easiest way is to open the Speech Bubble in Motion.
* Replace the background with blue
* Replace the white inside the bubble with green
Then, create a compound clip with the speech bubble and the video you want to put inside it. Apply Keying > Keyer to the green to make it transparent and allow the background video to show through.
Next, apply Keying > Keyer to the compound clip and replace the blue background with the background you want to see behind the speech bubble.
Stacking order:
* Speech bubble
* Video inside the speech bubble
* Background video.
Larry