 Shooting log video is a great way to preserve highlight and shadow detail in an image. However, it requires color grading to make the image look its best. (Native log footage looks washed out and gray.)
The easiest way to start color grading is to apply a LUT. However, in some cases, LUTs may not be known or available.
The good news is that log video is, in almost all cases, shot with accurate color, but inaccurate grayscale – and fixing gray scale values is easy.
EXTRA READING
To display the video scopes, open Final Cut and type Cmd + 7. This toggles the video scopes on or off.
NOTE: If you need more screen room, type Control + Cmd + 1 to toggle the Browser on or off.
UNDERSTANDING THE WAVEFORM MONITOR
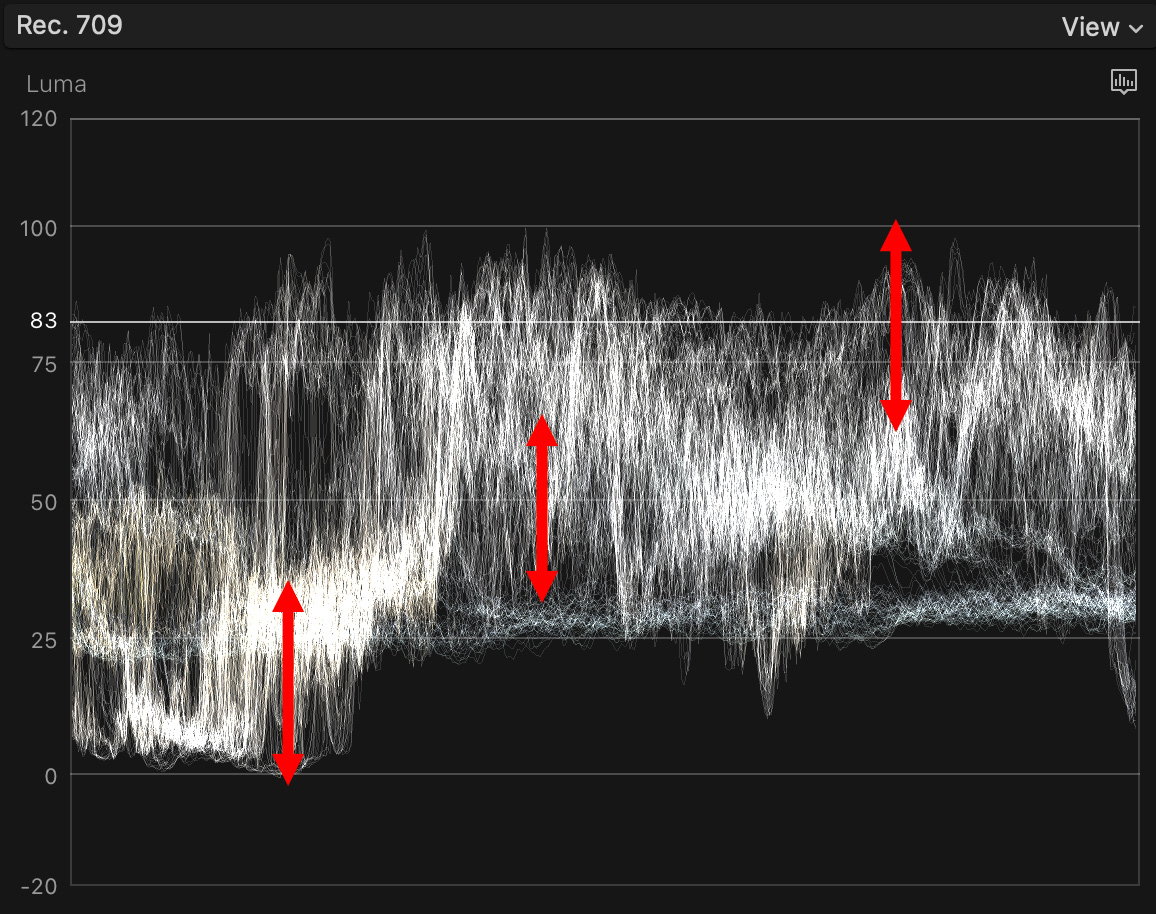
The Waveform Monitor is the key video scope to making Log video look good. The Waveform Monitor tells us everything we need to know about the grayscale values in an image. (The Vectorscope tells us everything we need to know about color.)
Grayscale values are divided into three sections:
IMPORTANT: For SDR video, shadow levels MUST NOT go below 0%. Highlight levels MUST NOT go above 100%. Mid-tones can go anywhere that looks good to you.
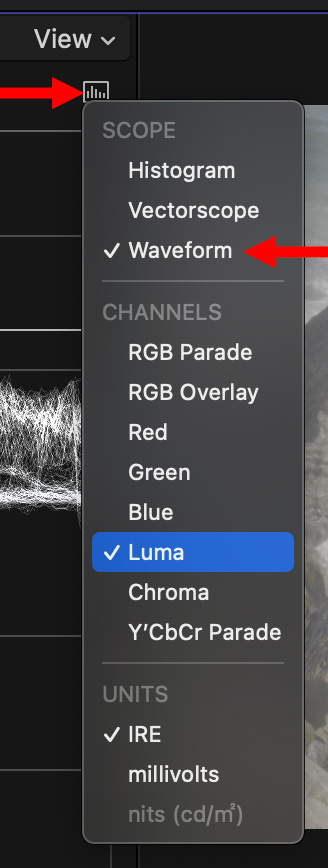
If your Waveform monitor does not look like the image above, click the small icon in the top right corner of the scope (top red arrow), choose Waveform (bottom red arrow), then choose Luma.
GET STARTED
Here’s a video clip shot in Log. Let’s pretend we don’t know what camera shot this. As you can see from the Waveform Monitor (the scope on the right), all the grayscale values are concentrated in the middle.
NOTE: When adjusting Log video, you can ignore the Vectorscope, displayed on the left.
Since we don’t need to worry about color – as the Log footage is color-accurate – we can concentrate our attention on the Waveform Monitor.
TO ADJUST A CLIP

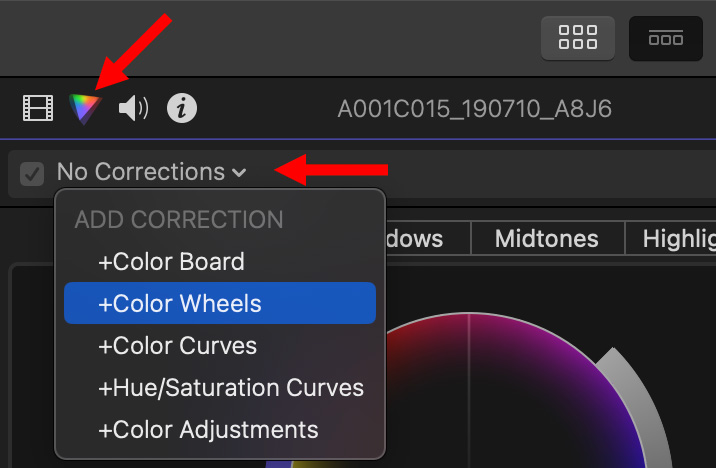
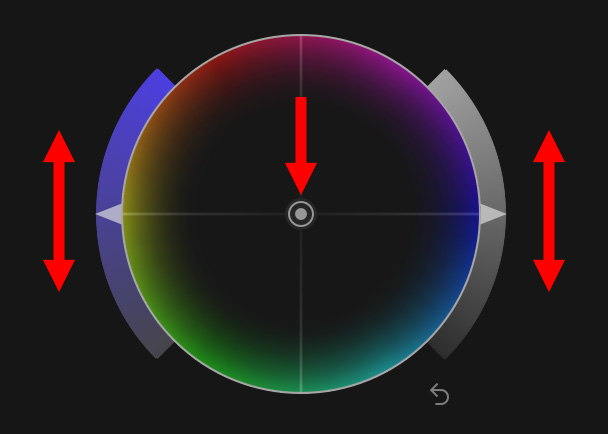
A color wheel has three controls:
To color grade LUTs we only need to adjust the grayscale slider. Raising the slider makes a specific grayscale range brighter. Lowering it makes the range darker.
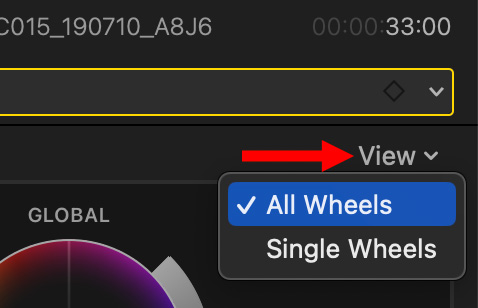
NOTE: If you don’t see all four color wheels, click the View menu in the top right corner of the video scopes and select All Wheels.
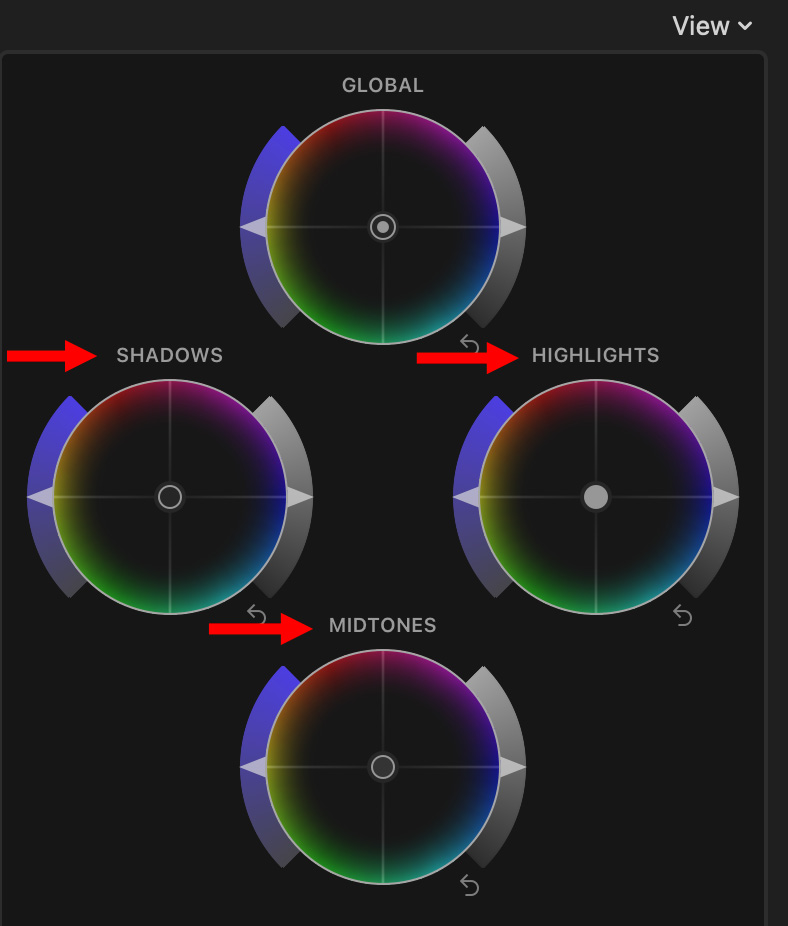
THE CORRECTION PROCESS
Adjusting grayscale values for SDR (Standard Dynamic Range) media is a four step process:
To show you how this works, this is the starting image. Notice that the waveform monitor displays a thin range of pixel values, the image is very gray, and the grayscale sliders for all four wheels are set in the middle.
Making the adjustments outlined above – which takes about ten seconds – we have the grayscale-corrected clip.
REPLICATING THE EFFECT
Once you understand how the color wheels work, color grading Log video is easy. After the first clip looks the way you want:
Done.
6 Responses to Final Cut Pro: Color Grade Log Video Without Using a LUT
Larry is this workflow the same in HDR except that you are working with IRE in the waveform. If not can you explain the workflow for HDR please.
Kind regards
Stephen
Stephen:
HDR has two major versions: HLG and PQ. The brightness values are significantly different between the two. With the addition of Color Conform in FCP 10.6.6, all my older HDR tutorials are out of date. But, it isn’t as easy as this article presents for SDR.
In other words, I’ll need to go back and write something new.
Larry
Thank you Larry.
I am very grateful for all that you do.
Kind regards
Stephen
Thanks!
Larry
Larry, thank you so much for this concise and readable guide. I clicked through I don’t know how many articles endlessly explaining the Log format before finishing with “use a LUT” until I found yours with exactly the information I was seeking and in my preferred software to boot. I am working mostly with high definition scans of color 16mm film, and simply understanding the concept is going to save me endless amounts of small cash that I would otherwise pay the lab to do exactly this process. I’ve bookmarked your page and look forward to reading more of your work.
Tim:
Yay! Happy to help.
Larry