 A typical problem when I record Zoom calls or screen captures is that the audio and video are out of sync. In my case, by three frames.
Here are three ways to re-sync a clip.
OPTION 1 – Detach Audio

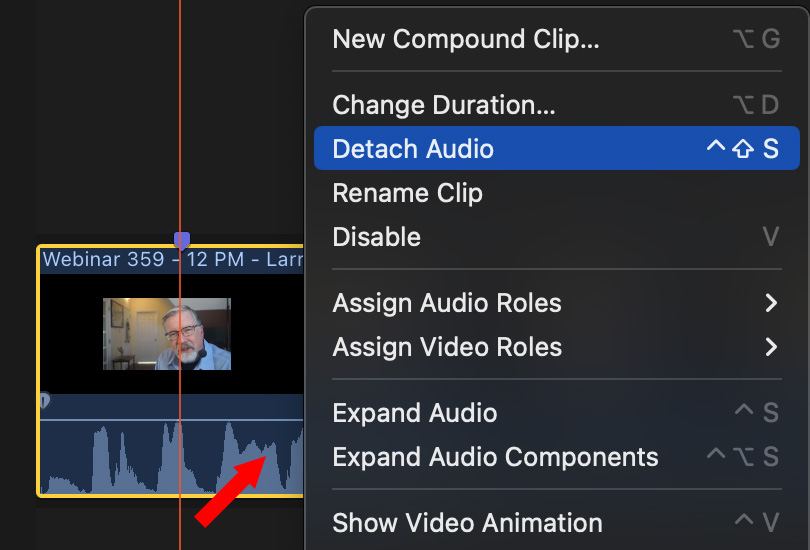
The easiest – but NOT the best – is to edit a clip into the timeline, then Control-click it and select Detach Audio.

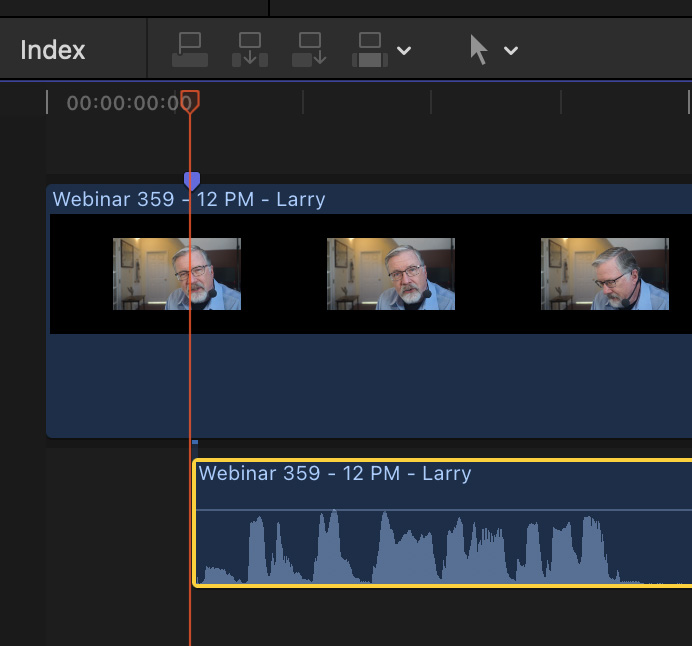
This separates the audio and video into two independent clips. You can then manually move the audio – using comma and period – until it syncs with the video.
NOTE: An easy way to find sync is to watch for the speaker saying a word that begins with “P”. The instant their lips open matches the first “P” sound.
The big disadvantage to detaching audio is that it is easy – VERY easy – to accidentally jostle the audio in the timeline so it is no longer in sync.
Another disadvantage is that this clip is only in sync in the timeline. The source clip in the Browser is still out-of-sync, which means you’ll need to repeat this process each time you edit this clip into the timeline.
AN EASY WAY TO MONITOR SYNC
When you create independent audio and video clips, FCP provides an easy way to make sure they remain in sync.

Choose Window > Source Timecode. This floating window displays timecode for all clips under the playhead. Whichever clip you select in the timeline has a gold box around it in this window. In this example, I selected the audio clip.
In this example, the audio occurs six frames later than video. As long as that offset remains the same throughout your edit, the two clips will be in sync.
OPTION 2 – Create a Compound Clip

A better option, once you’ve detached the audio and synced it, is to select the now-in-sync audio and video clips in the timeline and choose File > New > Compound Clip.
This “merges” the two clips into a single new clip, thus preventing the audio and video from accidentally slipping out of sync during an edit.

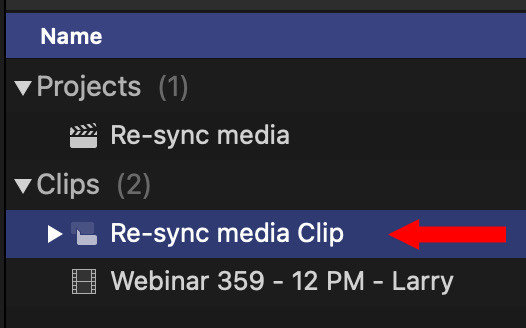
This compound clip also appears in the Browser, which means you can access it at anytime during your project to edit different portions into the timeline. A compound clip keeps all clip elements in sync.
Compound clips are much safer than simply detaching audio, but causes problems if you need to move a project from Final Cut to, say, Adobe Audition for audio mixing, or Premiere for color grading. Adobe applications don’t support FCP compound clips.

As well, even though the timecode of the video and audio elements in the Compound clip no longer match, the Source timecode window shows them as a single clip with one timecode
OPTION 3 – Open and Resync a clip
For me, the best option is to select an out-of-sync clip in the Browser and choose Clip > Open clip. This opens all the elements of a clip – audio and video – into a special area of the timeline.

Select the audio (not the video) and, using the comma and period keys, shift the audio earlier or later until it is in sync. Again, the Source timecode window shows the amount of movement. However, because the audio and video are still contained in a single clip, only one clip name is displayed.
NOTE: Press Shift while typing to move the selected clip in 10-frame increments.
When the clip is in sync, open any other project into the timeline to close the clip.
The benefit to using Open Clip is that the clip acts like any other audio/video clip, all elements stay in sync, without the risk of moving a detached audio track or the special construct of a compound clip.
SUMMARY
Any of these three techniques can be used to sync audio with video. But the safest over the long-term of an edit is the third option: Open Clip.
5 Responses to Final Cut Pro: 3 Ways to Sync an Out-of-Sync Clip
Have a multiclip consisting of 2 video clips, (a main & an aux & a digital audio file). They are of diff lengths & somehow the different camera tracks are no longer in perfect sync to one another. Can I re-sync those easily?
I don’t know how they came undone. I was trying to normalize/color correct 2 clips in the timeline as a test (neither shot under best lighting conditions & didn’t notice 1 camera was not set to record under incandescent lighting).
Just to clarify, I have 1 full main video feed, 1 aux video feed, & a separate higher quality recorded audio track. The audio per its respective track is still in sync. The tracks are no longer synced perfectly to each other.
I included mention of test color correcting only because that’s what I was doing before discovering the tracks were out of sync. I suppose I could re-sync the multiclip (uncertain of exact process) since I am early in editing process, but not knowing how it happened leaves me prone to it happening again.
Esperanto:
You can’t knock a clip out of sync while editing a multicam unless you really work at it. The only way I can think of us using the Slip tool to slip the video in a clip. Or, to open the master multicam clip and drag angles around inside it. But, normally, not. Apply color corrections to a multicam clip would not drag it out of sync.
The easiest way to get them back in sync is to double-click the multicam clip in the timeline, which opens it for editing. When it is opened that way you can drag the out-of-sync clip back into sync.
Larry
Hey Larry, I have a scenario where I recorded two video clips, with audio, from two different cameras at the same time. I was not able to hit record at the same time so they’re out of sync with each other. I recorded 3 hand claps in hopes that I can sync up the two clips manually in FCP. Unfortunately, I cannot move clips less than 1 frame so I cannot line up the clips with each other. I’m very new to all of this! I’m wondering if there’s anything I can do to sync these clips up. I tried the sync option but the results the same as what I was able to do manually.
Thanks
Eric:
Easy to do. First, edit your principle audio into the Primary storyline. Then, sync your other clips to that as closely as possible. You need to do this so the audio is within a frame of sync, otherwise, as you slip the audio it will obviously look out of sync. You are correct, that you can only move video in one-frame increments. But this does not hold true for audio.
Most of the time, audio that’s synced with video within a frame will look and sound in sync during playback. So, most of the time, this will be good enough.
BUT, if you need it to be perfect. Select each clip outside the primary storyline and choose Clip > Detach audio. Once audio is detached, you can slip it perfectly in sync simply by dragging the audio clip. Remember, to avoid sync problems, your audio needs to be less than a frame out of sync.
Larry
Hey Larry thank you so much for responding! Been busy and haven’t checked back in until now. Ok I will just simply slip the audio then. Thank you so much!