FCP X: How and When to Use the Custom LUT Effect
 A LUT (LookUp Table) is a conversion table that instantly changes pixel values from one setting to the next.
Final Cut provides two different ways to apply LUTs to your footage: the Inspector and the Custom LUT effect. This article describes how to use the Custom LUT effect.
NOTE: Here’s a tutorial on the differences between Raw, Log and LUT files.
BACKGROUND
Typical uses of LUTs are:
- To convert Log or raw footage – which tends to look gray – into something more visually pleasing.
- To stylize video clips to reinforce the story you are telling (for example, the green cast of Matrix footage, or the golden brown of most westerns).
Apple’s Help files explain that Final Cut Pro supports two categories of LUTs:
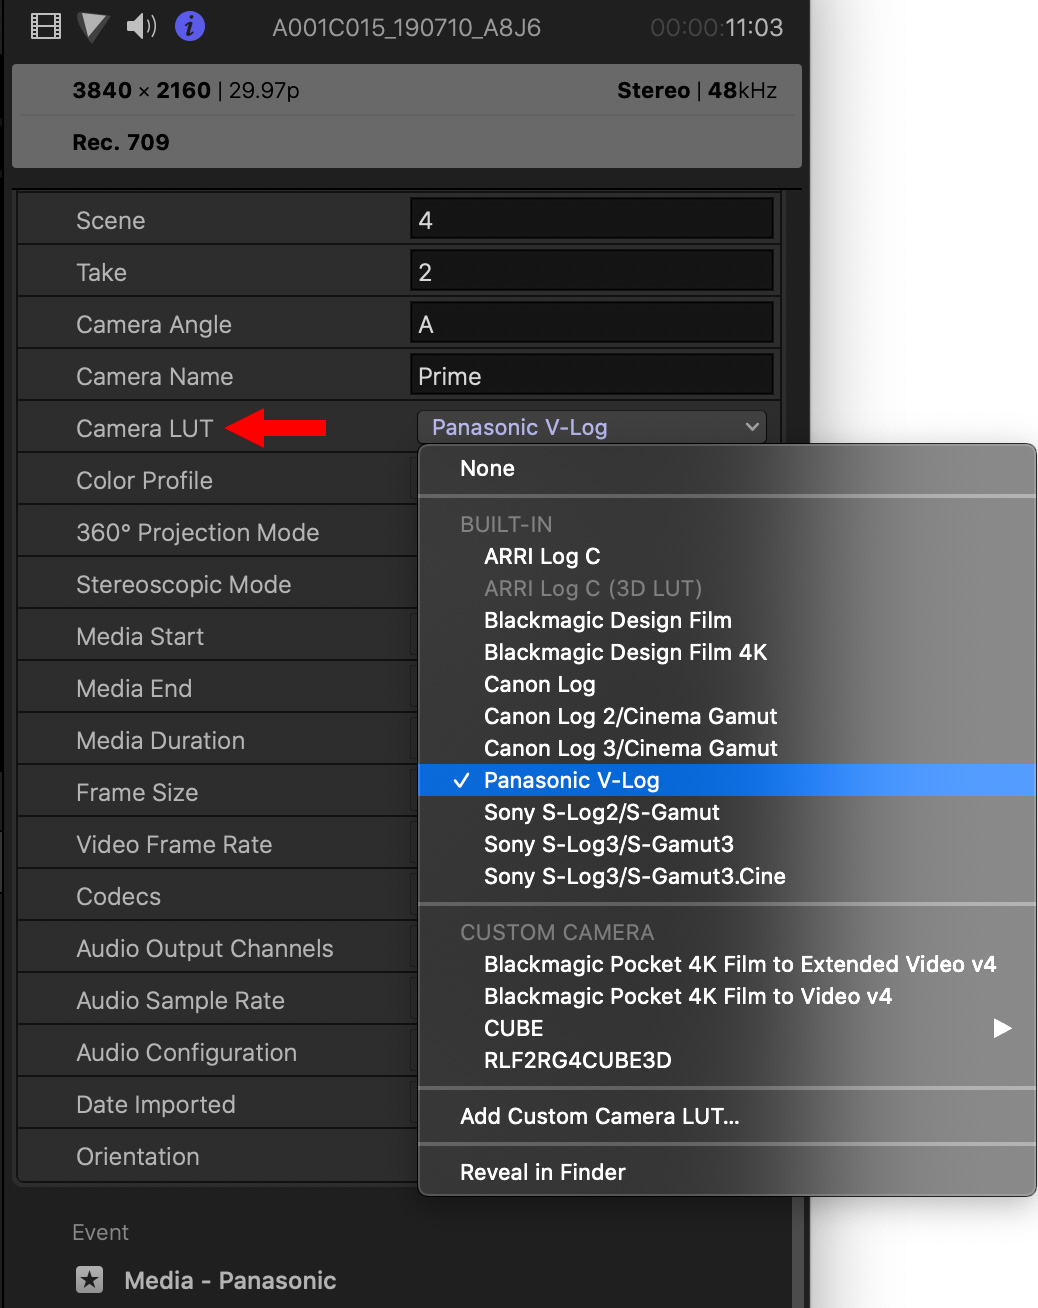
- Camera LUTs (also known as camera log conversion LUTs) provide log processing for media from modern video cameras that have a log recording option. When applied to log media from a supported camera, camera LUTs built into Final Cut Pro convert the media to the working space of the current library. If the library is set to Wide Gamut HDR, camera LUTs preserve the full dynamic range of the log media. Depending on the source camera, these built-in camera LUTs also take into account metadata such as camera exposure index, ISO setting, and white balance.When you import media, Final Cut Pro detects metadata in the media identifying the log format and automatically applies the appropriate built-in camera LUT. Camera LUTs are applied at the media level (across the library) and are applied before any clip effects. In contrast, Custom LUT effects (described below) are clip effects that can be applied at any position in the effect order.
- Custom LUT effects allow you to easily create, import, or share custom looks for video clips and projects according to your creative needs. Custom LUT effects are clip effects that you apply to timeline clips from the Effects browser. You can also use Custom LUT effects to apply tone mapping, allowing for a custom conversion to the project’s output color space.
Before we move on, I want to stress that Final Cut supports the full dynamic (grayscale) range of your media as long as you are working in a Rec. 2020 HLG or PQ project. You can use Log media in a Rec. 709 project, but the dynamic range will need to be reduced to fit within the limitations of that color space.
All LUTs are applied non-destructively. You can add, change or remove them at any time without damaging the quality of your media.
APPLY A CUSTOM LUT
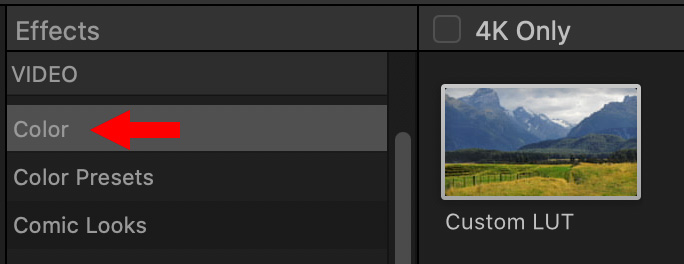
Generally, camera LUTs are applied using the Inspector. Custom LUTs are applied using the Custom LUT effect.
NOTE: This effect is stored in: Effects browser > Color > Custom LUT
- Select one or more clips in the Timeline
- Double-click the Custom LUT effect to apply it to the selected clips
- Select a Timeline clip (if you select multiple clips, the change will only be applied to the clip the playhead is in)
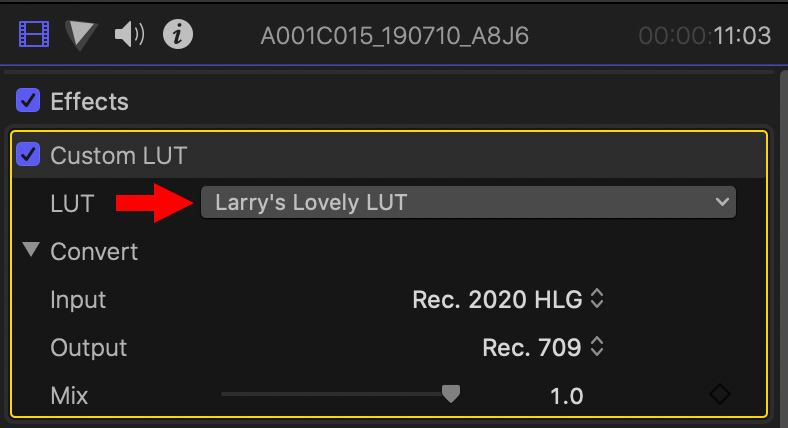
- Go to Video Inspector > Custom LUT and choose the LUT you want to apply.
NOTE: You can import one or more 3D LUT files with the filename extensions .cube and .mga. If you imported a folder of LUT files, it appears as a submenu in the LUT pop-up menu. (In this case, choose a LUT from the submenu so that it appears as the selected LUT at the top of the Custom LUT section.)
- Set Input to match the color space of the source video.
- Set Output to match the color space the LUT was created for. This should match the color space of the project.
BENEFITS OF CUSTOM LUT EFFECT

There are several differences between using the Custom LUT effect compared to applying LUTs using the Inspector:
- Inspector LUTs are applied before any other effects while Custom LUTs can be placed anywhere within the effects stack to alter when they are processed.
- Inspector LUTs only allow one LUT to be applied to a clip, while you can apply more than one Custom LUT effect to the same footage
- Custom LUTs allow you to adjust both the Input and Output color space
- Selecting Edit > Remove Effects will remove the Custom LUT effect, but not a LUT applied in the Inspector.
SUMMARY
Most of the time, I recommend using Inspector LUTs. While these are traditionally used to apply a camera LUT, this option works equally well for custom LUTs.
Be careful applying multiple LUTs to the same footage. It is generally good practice to apply one camera LUT to get the footage “in the ball park,” then, if needed, add a second, custom, LUT to create the look you need. Finally, tweak using the color grading tools to get your clips looking exactly right.
While you can apply multiple custom LUTs to the same clip, you would be better served by creating a single custom LUT that gets exactly the look you want.
EXTRA CREDIT
Here two additional tutorials about LUTS you might find helpful:
Bookmark the
permalink.
2,000 Video Training Titles
- Apple Final Cut Pro
- Adobe Premiere Pro
- DaVinci Resolve
Edit smarter with Larry Jordan. Available in our store.
Subscribe to Larry's FREE weekly "Edit Smarter" newsletter and
save 10%
on your first store purchase.
Read the latest Media Industry News, curated by Larry Jordan
Media News

 A LUT (LookUp Table) is a conversion table that instantly changes pixel values from one setting to the next.


4 Responses to FCP X: How and When to Use the Custom LUT Effect
Good Afternoon Mr. Jordan.
First let say thank you for the all the tutorials that you have contributed to the community. I like to say that I’m a dedicated student of your FCPX lessons.
Anyway… in respects to Custom LUTS, I’m trying to understand Input and Output Color space. When working with Pro Res Raw in a Wide Gamut Color Space, I convert to log via inspector. From the log footage I apply a Custom LUT in the timeline, which Rec 2020 PQ.
In the Custom LUT, do I set the input for both Rec 2020 PQ? Or do I set it to something different? When I apply the LUT and change the input and output to match the source video and timeline color space, the image comes out darker. I usually have to lighten the video by bringing up the mid tones or highlights. However, I notice it doesn’t do this when i change the INPUT and OUTPUT to Rec 2020 (non PQ).
Adrian:
These are great questions. However, I’m away from all my gear for the next couple of weeks due to my move to New England and don’t have the ability to research an answer. Perhaps another reader can help – or try contacting a developer the specializes in LUTs.
Larry
Sounds good. Safe and travel and best wishes with the move.
Adrian:
Thanks for your kind words. The move is a mess – but, then, what move isn’t?
Larry