 Many projects use the same effects – and effect settings – over and over. Creating these each time we need them is a waste of time. Why? Because Apple Final Cut Pro makes it easy to create custom effects, reuse them as often as you need, even share them with other editors.
For example, in my webinar edits I frequently insert a quarter-screen video of myself superimposed over either Keynote slides or a software demo.
This video is always scaled, positioned, and cropped the same for each webinar. In the past, I’d create this effect each time for each video. But, using video effect presets, it’s now a single click and I’m done.
Here’s how this works.
CREATE AN EFFECT – SAVE A PRESET
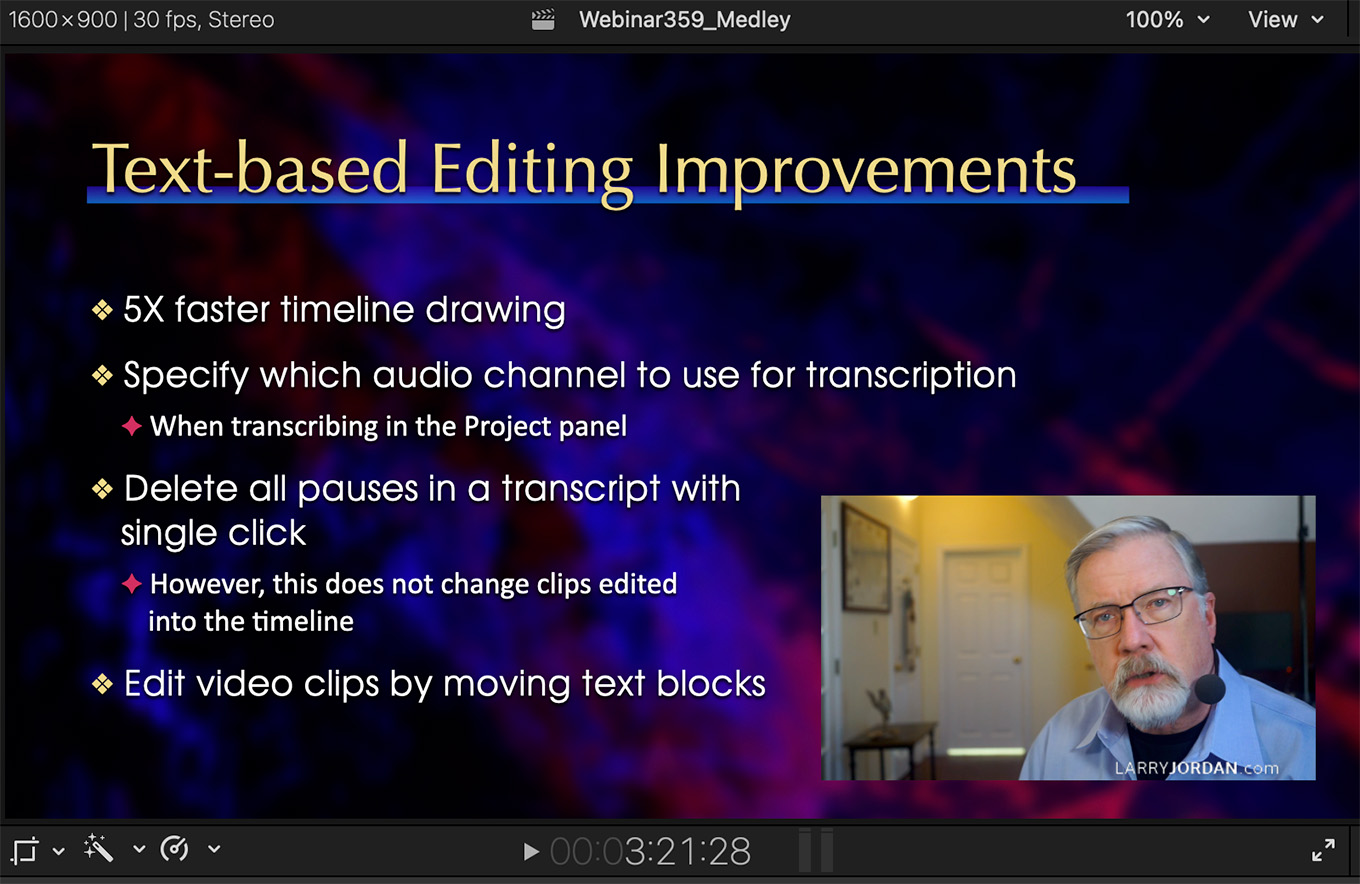
To start, select a timeline clip and create whatever effects you plan to reuse. In my example, this involves changing settings for Position, Scale, and Cropping, plus adjusting the color grade.
NOTE: You can even include keyframes to animate an effect.
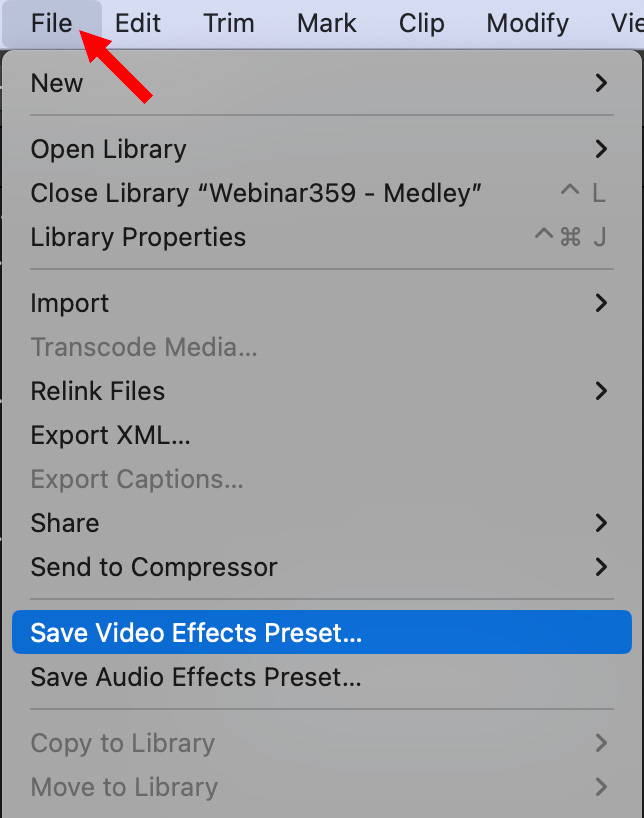
Once your effect is created, select the timeline clip and choose File > Save Video Effects Preset. (Or, select the timeline clip, then scroll to the bottom of the Video Inspector and click Save Effects Preset
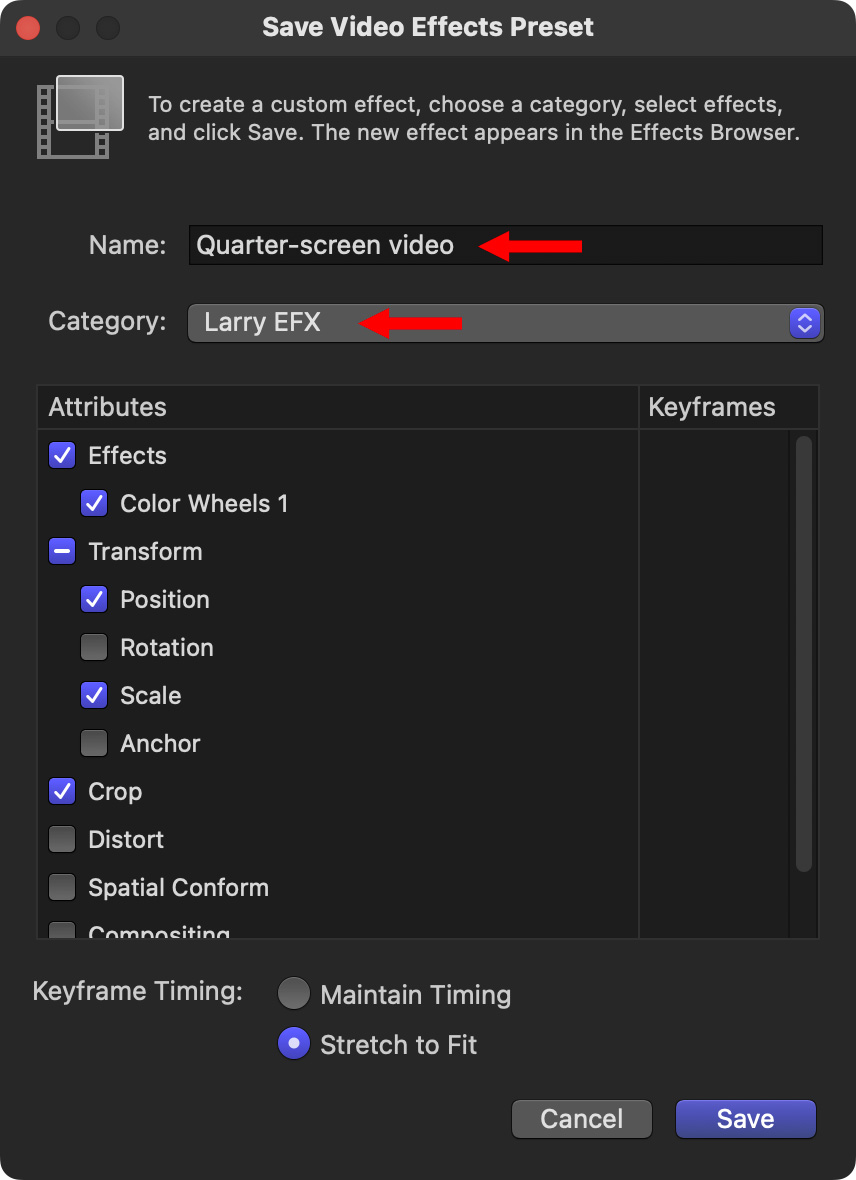
This opens a dialog that flags – with a blue checkbox – all the effects applied to that clip.
NOTE: The bottom of the Category menu allows you to create a new category, should that be needed.

Finally, if there are keyframes as part of the effect you have two choices:
If you don’t have keyframes you can ignore the setting of these radio buttons. When you finish with these settings, click Save to save the preset.
ACCESSING THE PRESET
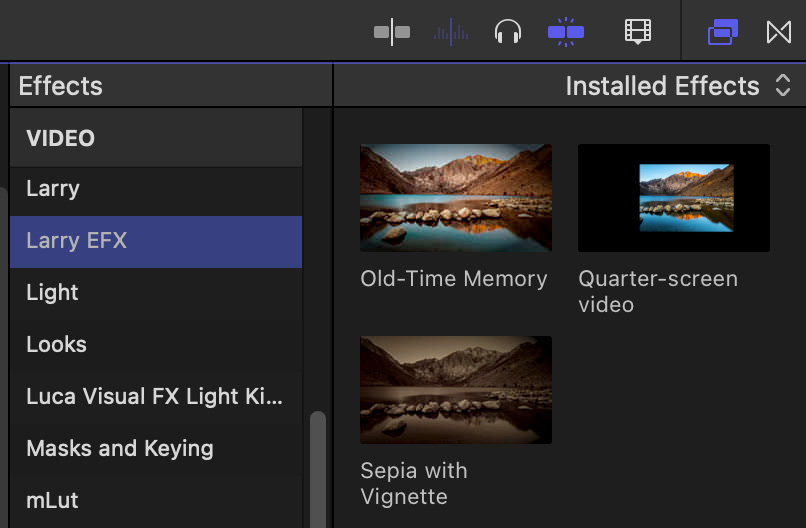
To access a preset, open the Effects browser, select the category to which you assigned the preset, then click the preset on the right to assign it to one or more selected clips in the timeline.
NOTE: Because presets are just settings, not effects “objects,” if you need to remove a preset, you need to manually reset any settings applied to that clip. For example, manually reset Transform Position, Scale and Crop in my example.
SHARE A PRESET
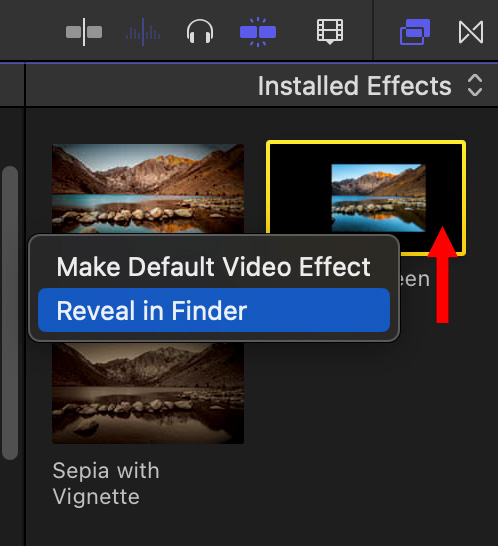
To share a preset, Control-click (right-click) a preset in the Effects browser and choose Reveal in Finder (red arrow).
Select the effect in the Finder and choose File > Compress. This zips the file to prevent any changes while it is transferred between computers.
Send this zip file to another editor. They then unzip the file, and drag it into: [Users/username]/Library/Application Support/ProApps/Effects Presets/
NOTE: A file must be unzipped for Final Cut to use it.
To display the new effects preset in Final Cut, quit FCP and relaunch. (You don’t need to restart your computer.)
SUMMARY
This is one of those shortcuts that’s easy to forget, but a huge time-saver once you start using it regularly.
EXTRA CREDIT
You can do the same thing with audio effects using File > Save Audio Effects Preset. This works the same way as saving a video effects preset except, ah, it’s audio.