 Most of the time, we work with media in Final Cut Pro X with no problems. But, every so often, we need or want to work with a shorter range from within a longer video clip.
This can be useful when you need to share media between editors and want to minimize storage space, or when you recorded an hour but only need to work with about a minute. Or, well, just because…
Compressor makes this easy. Here’s how.
GET STARTED
Open Apple Compressor.

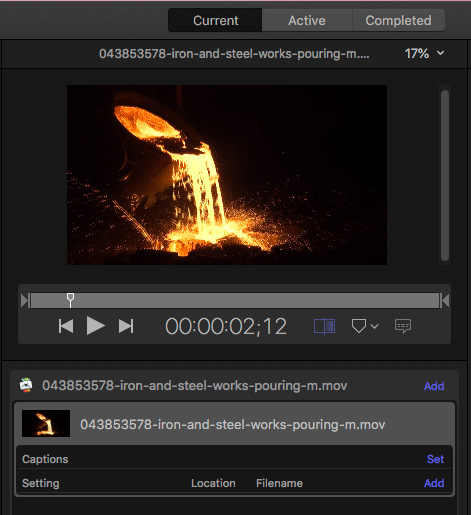
Choose File > Import Media (shortcut: Cmd + I ). Here, for example, is a clip of molten steel pouring into a form. I want to extract a short section where the steel just starts to flow.

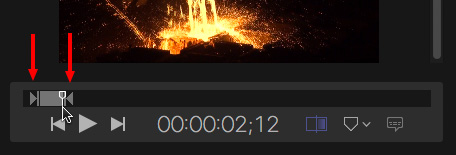
Drag the playhead under the image to the point where you want the extract to start and type I. This becomes the new In.
Then, drag the playhead to the frame where you want the extract to end and type O. This becomes the new Out.

NOTE: There is no keyboard shortcut that resets either the In or the Out.
At this point, you have two options:
OUTPUT OPTIONS
Option One

To transcode the clip into a new codec – I generally recommend ProRes422 for all footage shot on a camera, ProRes 4444 for all footage that was first created on a computer:


Done
Option Two
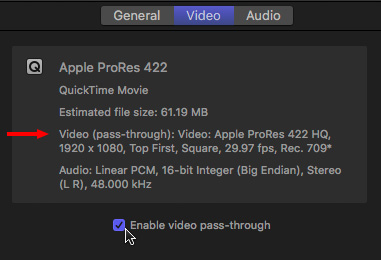
To extract a clip without changing the source codec, follow the same three steps as above:

NOTE: Even though we’ve applied the ProRes 422 compression setting, the Info section at the top shows that the exported clip will match the source file, which is ProRes 422 HQ.

NOTE: Again, this checkbox overrides the audio settings in the ProRes setting and matches the format of the extracted clip to the source clip.
Done
SUMMARY

What makes this feature especially powerful is the ability to either match the format of the source clip precisely or transcode the clip to the setting of our choice.
Very cool.