Adobe Premiere Pro: How to Burn Timecode Into Video
 Recently, a reader requested help in creating a video with burned-in timecode so he could send clips to a client for review.
NOTE: “Burned-in” means that the timecode for a video clip is permanently displayed in the video. This is frequently used for producers and clients to review clips prior to editing or sequences during editing.
Premiere has supported this feature for a long time. Here’s what you need to know.
TO START
This requires applying an effect to clip(s) in the timeline. You can’t add effects to clips in the Project panel.
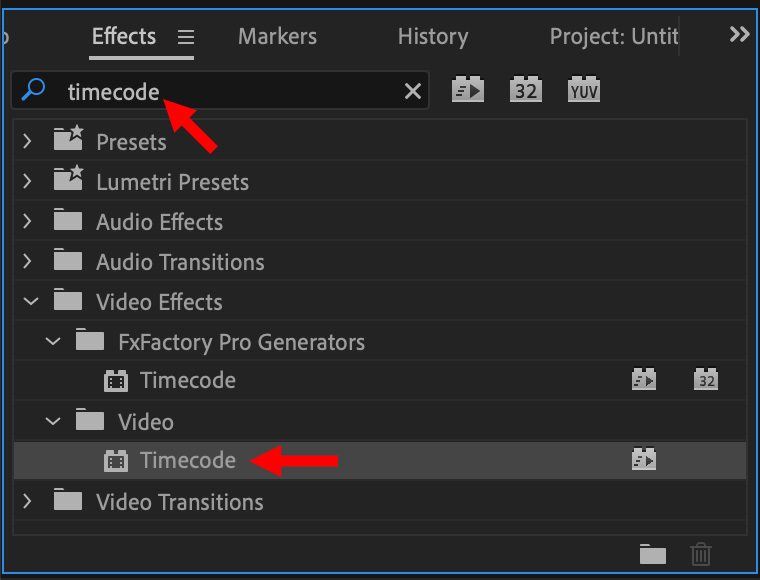
In the Effects panel, search for “timecode”. It’s located in the Video bin (folder).
Select the timeline clip(s) to which you want to apply this effect, then double-click the timecode effect in the Effects panel.
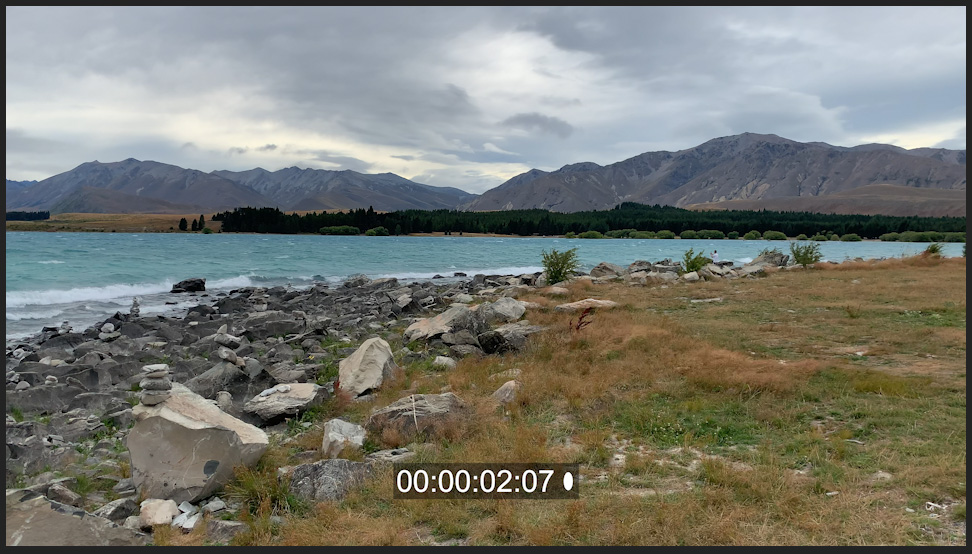
Instantly, timecode appears superimposed over the clip in the Program Monitor.
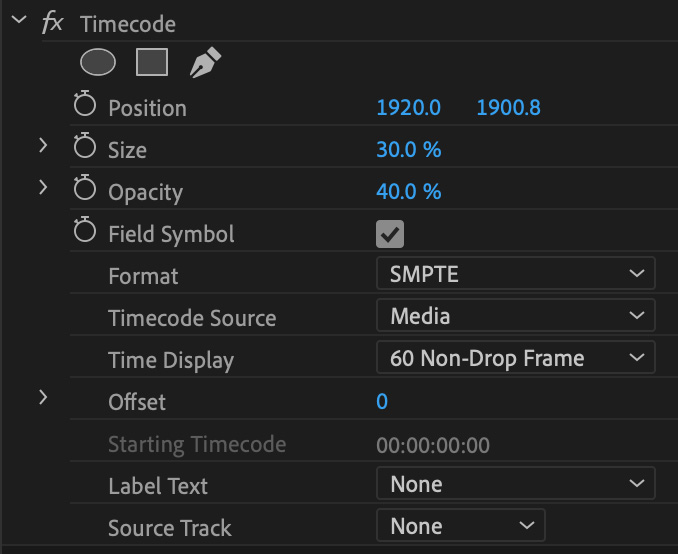
In the Effect Controls panel, scroll down to see the formatting options available for the Timecode effect.
- Position. Controls where the timecode information is displayed on the screen.
- Size. Controls the size of the font and gray background.
- Opacity. Determines opacity of the background rectangle.
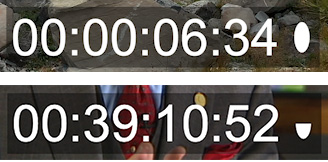
- Field symbol. A solid oval indicates progressive media, a half-oval indicates interlaced video. This checkbox toggles that indicator on or off.
- Format. Switches between displaying timecode or frames
- Timecode source. Switches which timecode is displayed. Generate allows creating custom timecode.
- Time display. This displays a variety of frame rates. This should always match the frame rate of the sequence.
- Offset. Add an offset, say to compensate for sync variations, to the displayed timecode.
- Starting timecode. Only selectable when Timecode Source > Generate is selected.
- Label Text. A preset menu of text labels. This does not allow custom text entry, though it should.
- Source track. Selects between different timeline tracks. Most of the time, None is the correct choice.
A BETTER WAY TO APPLY THIS EFFECT
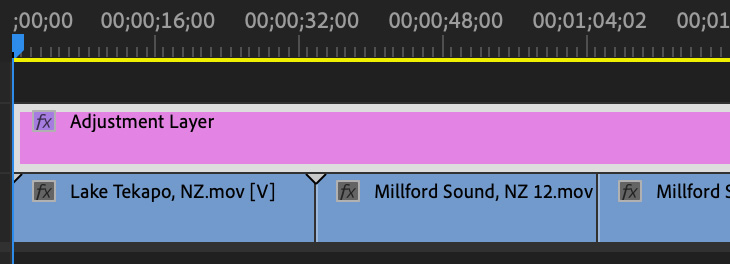
A better way to apply this effect is using an adjustment layer.
- Choose File > New > Adjustment Layer
- Add the layer to the highest track in the sequence, above all other clips.
- Stretch the adjustment layer so it covers all clips for which you want to display timecode. Most of the time, that will be the entire sequence.
- Apply the timecode filter to the adjustment layer.
- Adjust the effect as described earlier.
TO REMOVE THIS EFFECT
- If you applied the effect using an adjustment layer, either remove or disable the layer.
- If you applied the effect to individual clips, select all the clips with the effect applied, then choose Edit > Remove Attributes.
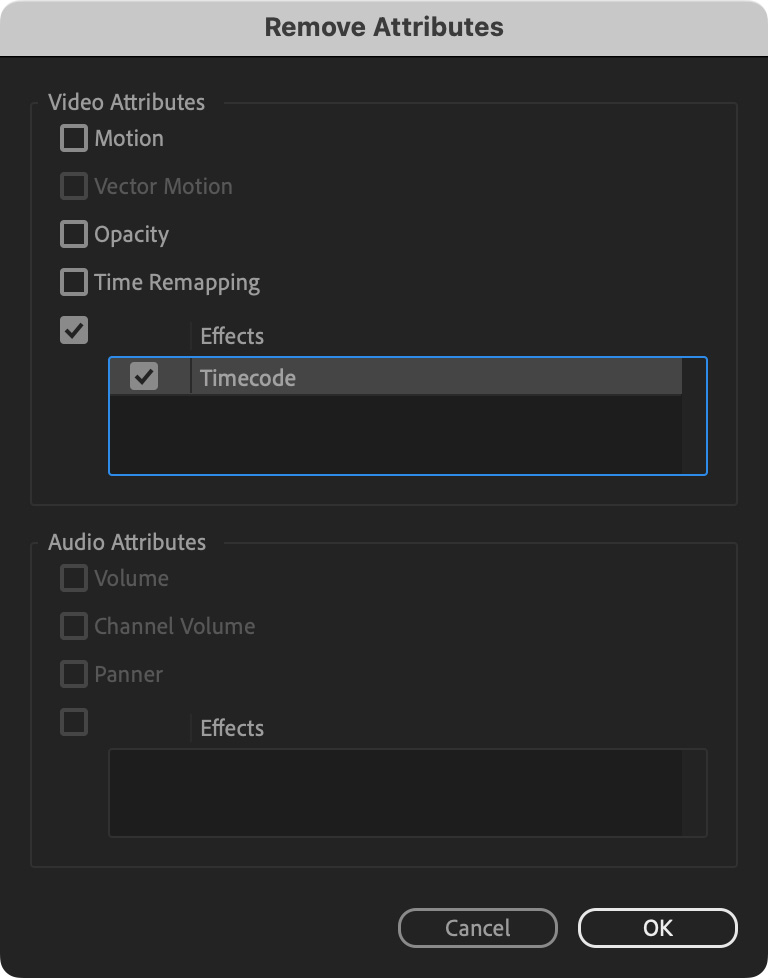
- In this panel, uncheck all options EXCEPT timecode. This will delete the timecode effect without changing anything else in the selected clips.
TO OUTPUT THE MOVIE
Like all media in Premiere, choose File > Export > Media to create a media file with burned in timecode.
SUMMARY
Once timecode is burned into video, it can’t be removed. This is why this procedure is most often used just for reviews and approvals. Once the project is approved, remove the effect and output the finished movie.
Bookmark the
permalink.
2,000 Video Training Titles
- Apple Final Cut Pro
- Adobe Premiere Pro
- DaVinci Resolve
Edit smarter with Larry Jordan. Available in our store.
Subscribe to Larry's FREE weekly "Edit Smarter" newsletter and
save 10%
on your first store purchase.
Read the latest Media Industry News, curated by Larry Jordan
Media News

 Recently, a reader requested help in creating a video with burned-in timecode so he could send clips to a client for review.


3 Responses to Adobe Premiere Pro: How to Burn Timecode Into Video
What exactly is the field symbol used for?
Thank you!
Karen:
The field symbol only applies to interlaced media and indicates whether this is an even or odd field.
Larry
Wow, thanks for the quick response!
We were racking out brains! 🙂
Thx again, Larry!
Have a great day!