 Adobe Media Encoder makes it easy to add “burned-in” timecode to any video you are compressing. Timecode can be added “one-time-only” to a single setting or included with the compression preset. We also have size and positioning control over the timecode display.
Here’s how to do it.
NOTE: This procedure works the same in both Adobe Media Encoder 2014 and 2015.
ADD TIMECODE “ONE-TIME-ONLY”

After you’ve applied a compression setting to a clip, double-click the compression setting name in the Queue. (In this example, I’m modifying the YouTube 720p HD setting applied to a single clip.)
This opens the Settings window.

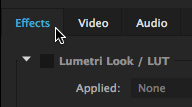
Scroll half-way down the Settings panel on the right side and click the Effects tab.

Scroll down and check Timecode Overlay.

Timecode is instantly displayed in the Source window on the left.

Change the Position of the timecode display from the popup menu.

Adjust the Size so you can actually read the numbers, shift the position of the display on the screen using Offset (the left number adjusts the horizontal position while the right adjusts the vertical position of the display).
I tend to make the timecode display a bit darker to improve readability, which is done by changing the Opacity setting.

If you want to display the timecode of the source video – which is most often the case – check Media File. Offset in Frames allows you to shift the starting timecode by a few frames; for example, to start on an even second.

However, sometimes you want to totally reset the timecode of the source media; for example, most DVDs prefer timecode that starts at 00:00:00:00. Check Generate Timecode, pick the frame rate of the source video and type in the Starting time code.
When you are done, click OK at the bottom of the Settings panel to accept your changes.
CHANGING A PRESET
The process of changing a preset is the same, EXCEPT that you can’t change an Adobe-supplied preset, you need to make a copy of it instead.

To change an existing user preset, select the name of the Preset in User Presets and Groups, then click the Preset Settings icon at the top of the panel.
From there, follow the procedure outlined above.

To change an existing Adobe preset, select the same of the preset in System Presets, then click the Preset Settings icon at the top of the panel.

When you are done making changes, notice that the OK button at the bottom was replaced by Save A Copy.” This creates a copy of the preset that now includes your changes and adds it to the User Presets and Groups section at the top.
Done.