 I’m currently working on a project which requires syncing 10 audio tracks and 3 video clips. Multicam won’t work, because I need to see at least two images all the time. And audio syncing won’t work because I have three video tracks.
So, the only option is to sync them manually. While time-consuming, it isn’t hard to match waveforms and align the clips.
Except…
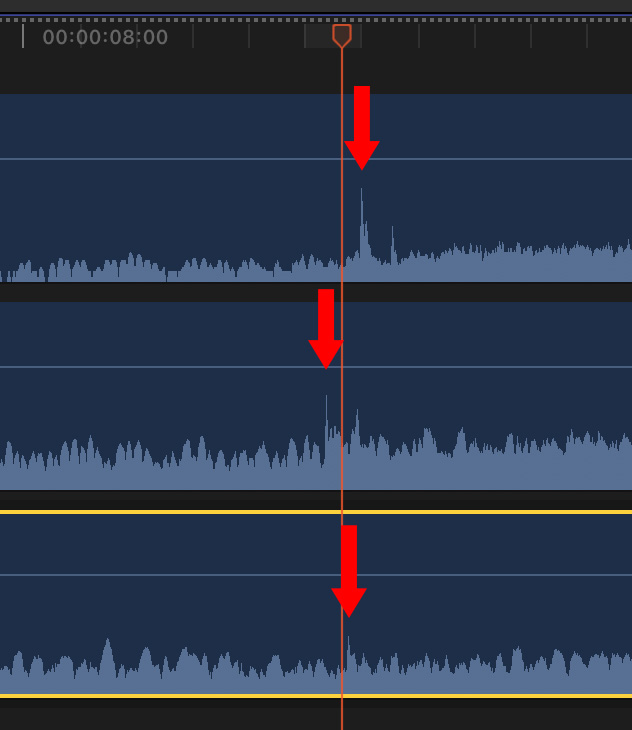
The audio pops don’t align (red arrows above). I can get them within a frame, but not closer.
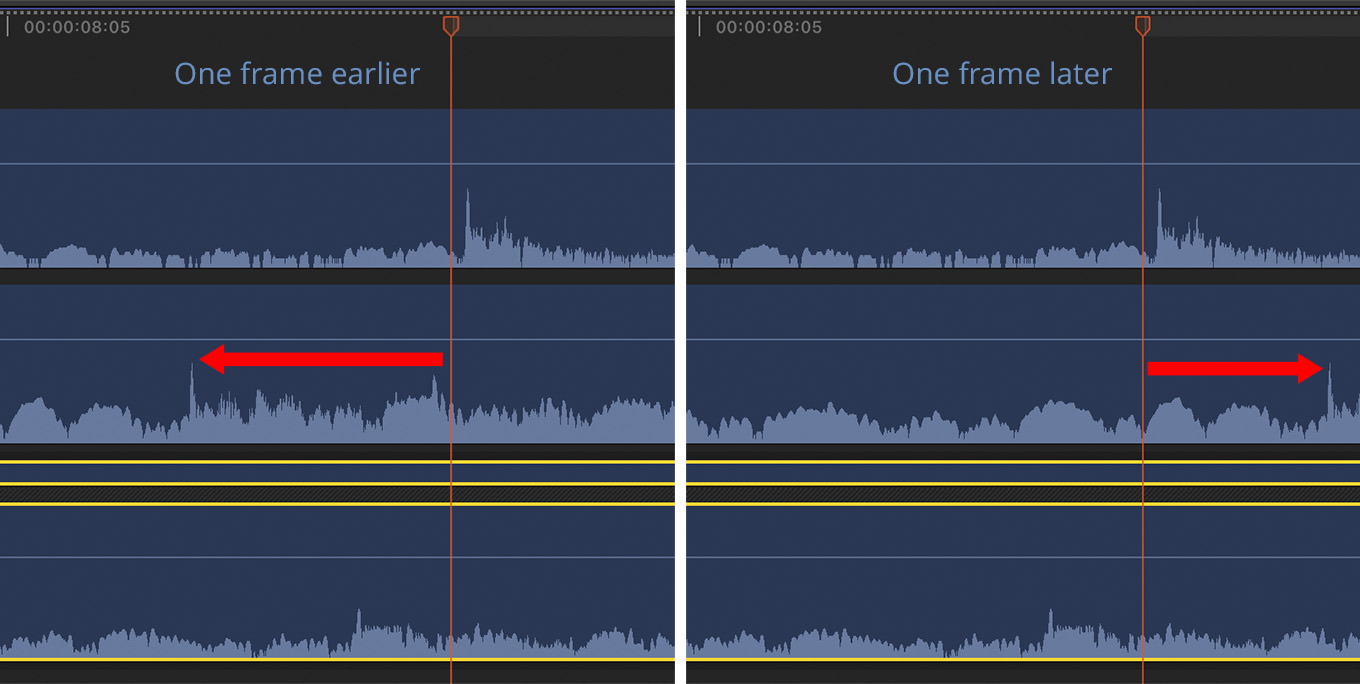
If I move the middle clip one frame earlier or later, see how far that moves the reference peak (red arrows).
Generally, audio that’s less than one frame out of sync is not noticeable on screen – though at slower frame rates it might become an issue. And, yes, slipping the audio could be fixed in the audio mix – if the mixing engineer is warned to watch for it and is given some reference to align it to.
Still, it’s the principle of the thing – and, if I’m playing all these clips at the same time, they’ll create an echoey/hollow sound.
I’d prefer the audio on all ten tracks to align. This can be done, but there’s a risk.
OTHER OPTIONS
If you need to re-sync audio in a single clip, the easiest and safest method is to select the clip, then choose Clip > Open in Timeline. This opens all the elements of a clip and allows you to manipulate them, including adding effects or adjusting the sync within a clip.
But this doesn’t allow opening multiple clips at the same time and adjusting the sync by referencing between them.
NOTE: Nor does adding a marker (which is only frame accurate) nor a keyframe. Neither of these appear when a clip is opened into the timeline.
You could also create a multicam clip, but this only sync clips within a frame, it doesn’t adjust for audio timing to compensation for differences within the frame.
SUB-FRAME AUDIO TO THE RESCUE
Fortunately, Final Cut provides a fix.
First, turn snapping off (View > Snapping, shortcut: N).
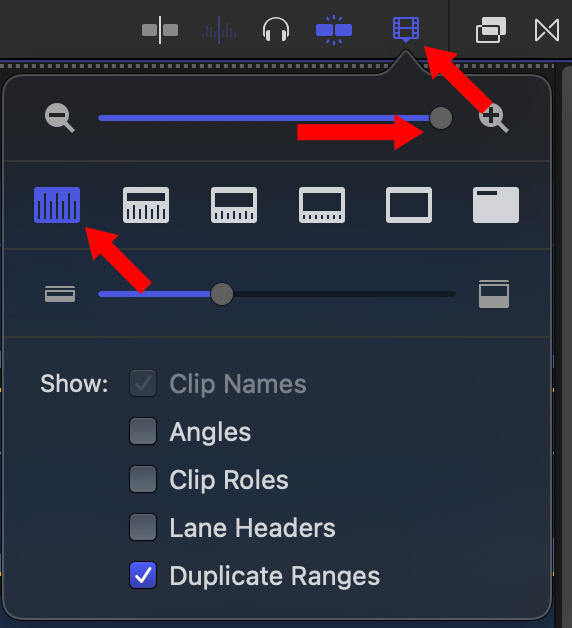
Next, click the Timeline Display icon (top red arrow) in the top right corner of the timeline and switch the display to all audio (left red arrow), then slide the slider all the way to the right (right red arrow).
NOTE: You can also zoom in using Cmd + plus. (Cmd + minus to zoom out.)
Position the playhead to mark where you want the clips to sync. If snapping is turned off, the playhead can be positioned inside a frame boundary.
Linked audio needs to align to the clip in the Primary Storyline. In other words, I put my principal audio in the Primary Storyline and move the supporting clips to match it.
BIG NOTE: Remember, you should only slip the audio less than 1/2 a frame. This technique makes it EASY to move audio more than a frame, which would create a permanent out-of-sync condition.
THE PROCESS
Here’s the “dangerous” part – we need to temporarily detach the audio from each connected clip (those that are not in the Primary Storyline) to shift the audio.
Add your clips to the timeline, then adjust their sync manually, by dragging, so they are as closely synced as possible. That is, the audio is within a frame of sync.
NOTE: You may need to trim the start of a clip to move it earlier in the timeline.
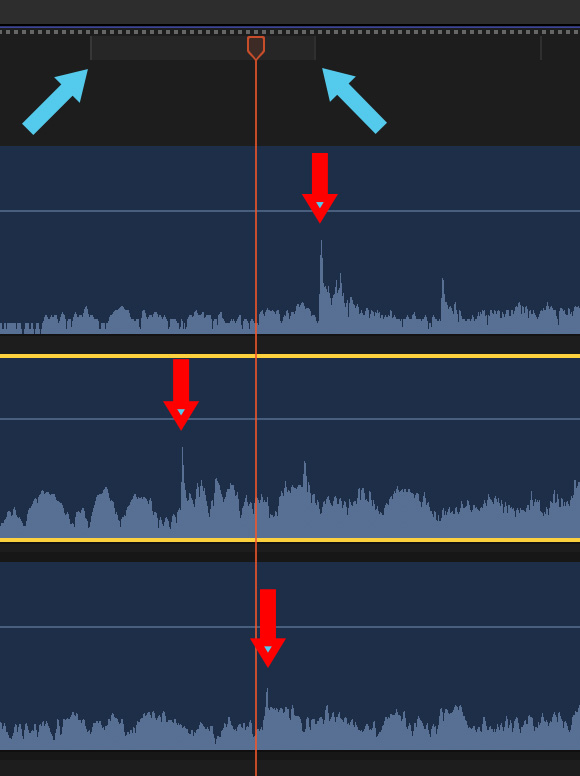
Find a clearly defined sync point. For example, a clapper slate, hand clap or other short, sharp sound (red arrows).
NOTE: The blue arrows indicate the width of a frame, indicated by a very, VERY faint lighter gray bar in the timeline.
Using the Primary Storyline clip as a reference, select a connected clip and choose Clip > Detach Audio.
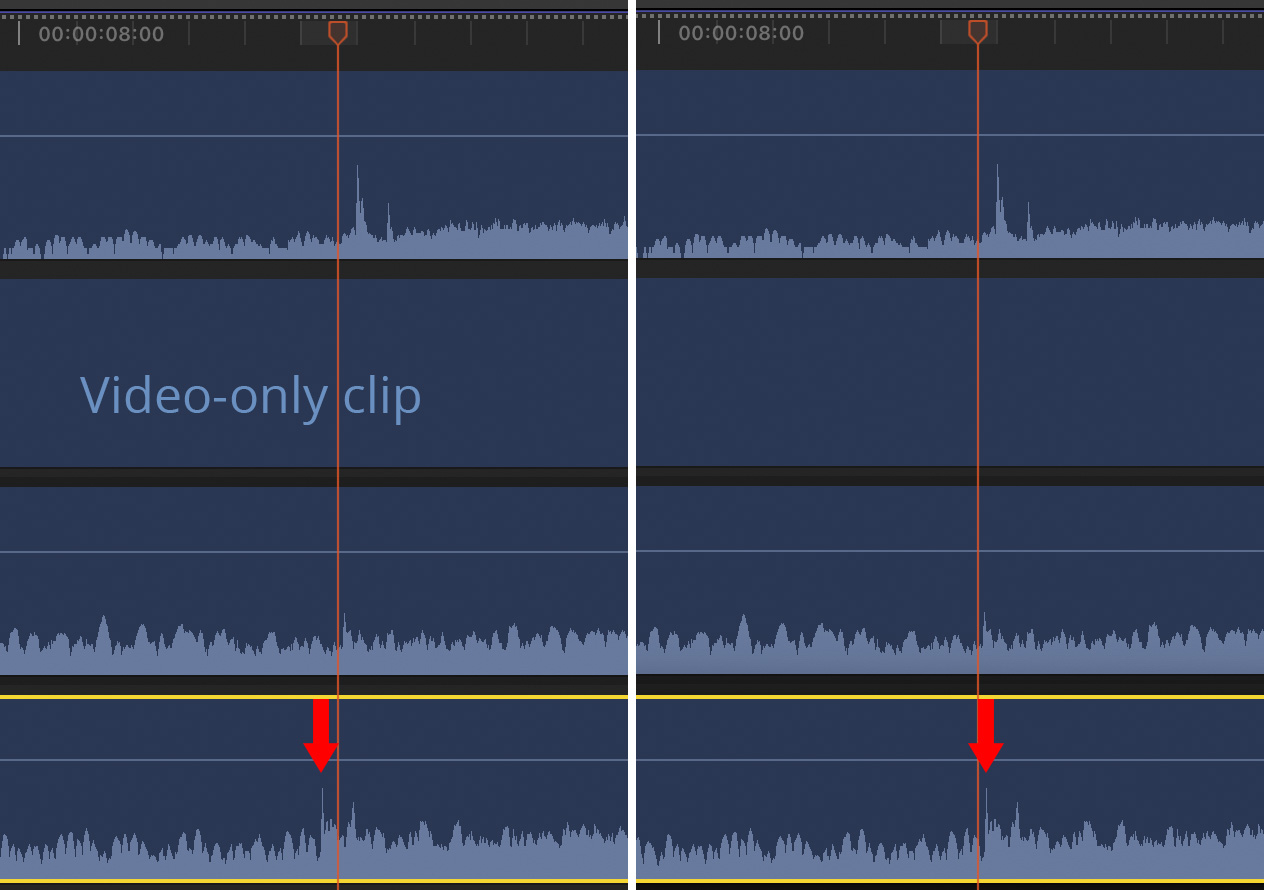
Left: Original clip position. Right: New audio clip position after dragging the clip.
The audio is now a separate clip, positioned below the primary storyline but still in its original position for sync. Using the cursor drag the audio clip so the sync points align.
Then, to prevent the clip from moving out of sync, choose both the video and audio elements of that clip and choose File > New > Compound Clip (shortcut: Option + G).

Give the compound clip a name that makes sense to you. Then, repeat this process for all clips that need to be re-synced.
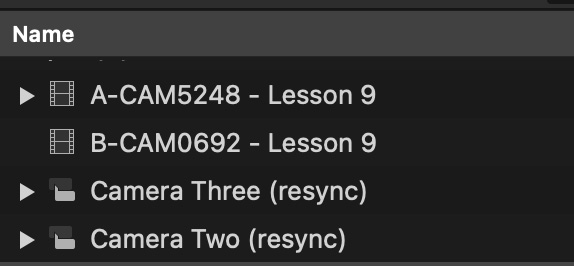
Compound clips, like “normal” clips, appear in the Browser. You then edit this compound clip as if it were the camera original.
SUMMARY
The benefit to this process is that the changes are only in the compound clip. The camera source file is not touched.
The only limitation is that compound clips are not supported if you move your project from Final Cut to Adobe Premiere for later editing or effects.