 I have a very specific workflow when editing with Final Cut Pro X:
While this works great for the projects that I create, it means that I can lose sight of other shortcuts built into Final Cut that are designed to simplify other workflows.
This article covers one of those.

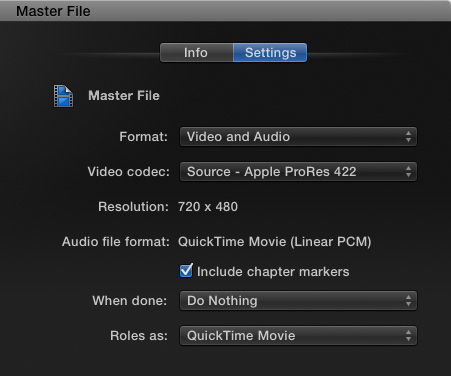
These are the default settings I use when I export a master file. These settings mean I’m creating a single master file with high-quality audio and video. When the export is done, nothing else happens. And, as I don’t use Roles in my mixes, I output the mix of all Roles as part of the QuickTime movie to generate a stereo pair of my master audio.

But, there are many other options. Here, in this screen shot, I’m outputting a multitrack QuickTime movie which contains a single video track containing both video and titles, plus four audio stems (sub-mixes):
These discrete audio channels are often used for projects which are going into international distribution where the dialog will be replaced with a local language, or a trailer house that needs all the dialog and effects, but without the music.

Final Cut gives us an easy way to retain these export settings and quickly access them whenever we want.
Click the Roles pop-up menu and select Save-as under Presets.

Give the preset a name and click Save.

Now, whenever you need to access those settings, select it from the Roles pop-up menu.
Fast and easy – if you know where to look. Explore the options for yourself and see which of these can save you time.
EXTRA CREDIT
One Response to FCP X: Save Export (Share) Presets
Great tip. Thank you.