
![]() This tutorial sprang from a question from Jan De Bloois.
This tutorial sprang from a question from Jan De Bloois.
I have a friend who is an FCP power user and learning Resolve. Final Cut makes it very easy to color grade the source videos in a multicam clip. But my friend cannot find how to do the color grading of the angles in DaVinci. Maybe it just is not possible!
At least: it is not as logical as it is in Final Cut Pro. Can you ‘dive’ in DVR to sort this out? He watched some tutorials, and all are wrong!
Larry replies: It IS possible. And you are right, it is not intuitive.
Start by creating a multicam clip in Resolve.
NOTE: Here’s a tutorial that explains how to create and edit multicam in Resolve.
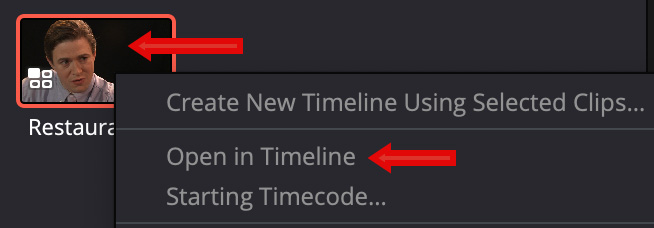
Right-click the multicam clip in the Media Pool (top red arrow) and choose Open in Timeline (bottom red arrow).
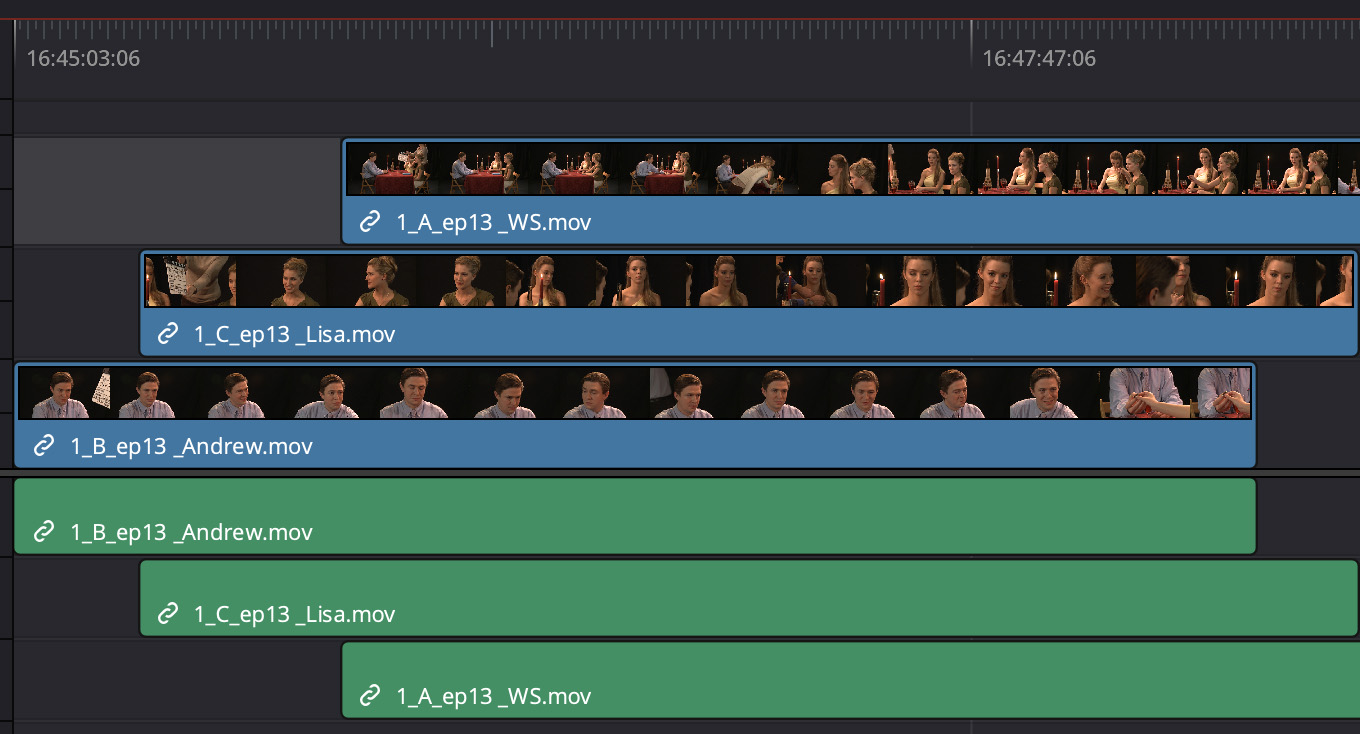
This opens the multicam clip as separate clips in the timeline. In my example, there are three clips that each start at different times.
Click to see larger clip.
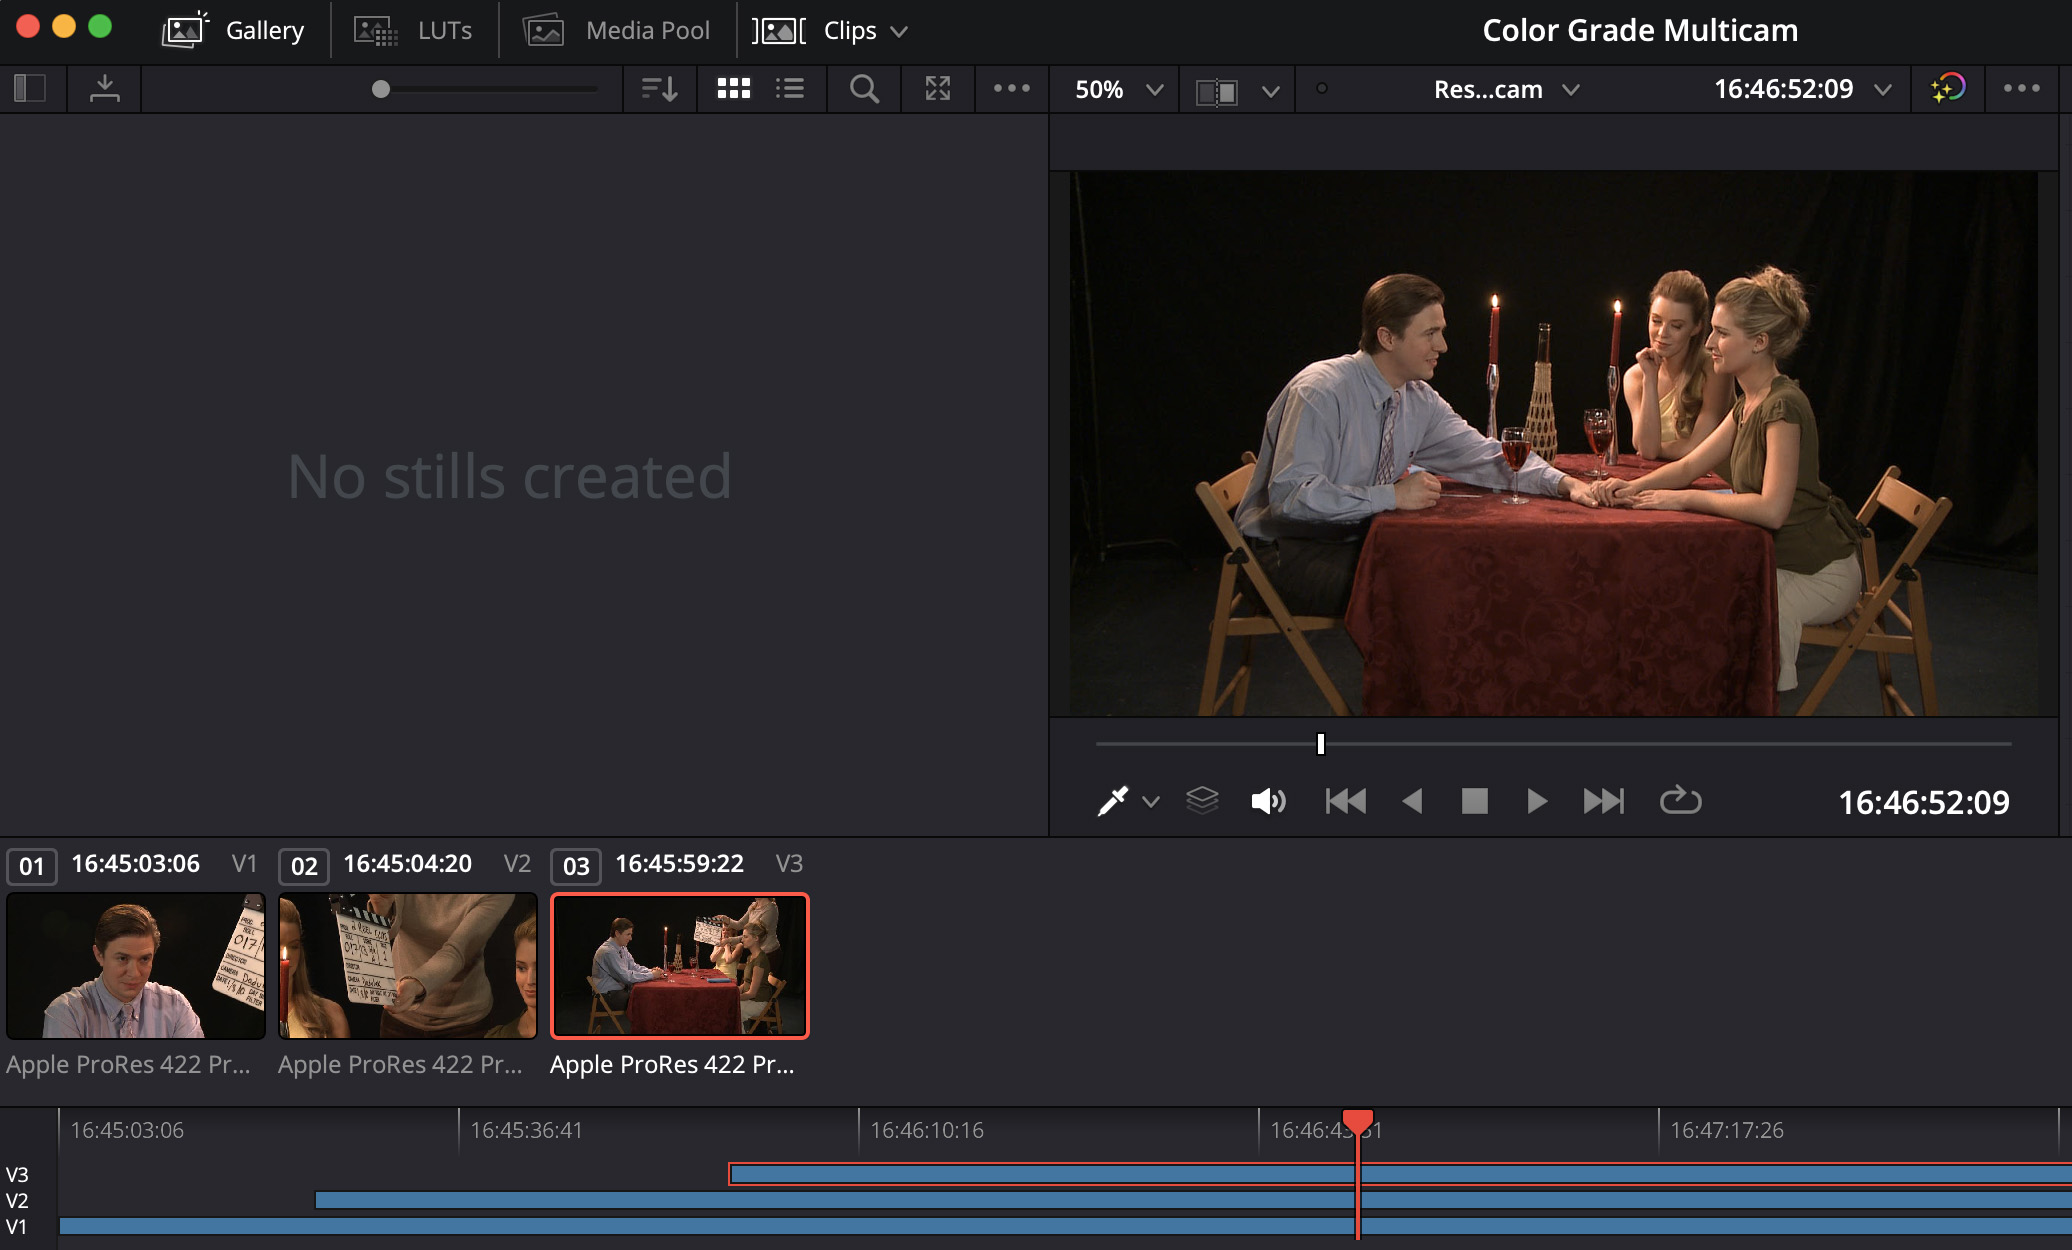
With the multicam clip still open in the timeline, switch to the Color page (shortcut: Shift+4, or choose Workspace > Switch to Page > Color).
In the screenshot above, showing the Color page, I’ve enabled both Clips and Timeline. Clips shows each of the three multicam angles. Timeline displays blue lines that represent the location and duration of each clip in the timeline.
Selected clips are indicated by a red border in both Clips and Timeline.
When you color grade a clip, anytime there’s a clip above it in the timeline, the higher clip blocks the display in the Viewer of any clips below it. This will drive your colorist nuts because it is very, very hard to color grade a clip when you can’t see it.
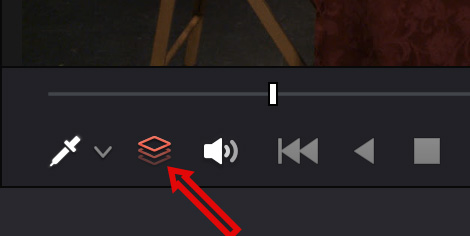
Here’s the secret: In the lower left corner of the Viewer, click this icon. It’s called “Unmix.” This means that you will see whatever clip is selected in the Clips panel, regardless of whether there’s a clip above it or not. Orange means this button is enabled, gray means it is off. The default is off.
You can now proceed with your color grade as normal.
SUMMARY
The BIG benefit to color grading a multicam clip before editing is that you only need to grade the master shots, rather than each individual shot after the edit. You can then go back, after the edit is complete, and tweak any shots as necessary.
But many times, this “pre-edit color grade” will be all you need.
