
![]() OTHER REFERENCES
OTHER REFERENCES
This began with a request from Barton asking: “I would like to create an even, constant rate of speed where I am panning across an image but also zooming in. For example, after adding keyframes, as the pan/zoom travels leftwards and up becomes increasingly fast, starting out quite gradually.”
What you are seeing is an artifact of how digital media zooms. When starting with a wide shot, the zoom is moving across a large number of pixels, which makes the move feel “slow.” Then, as it gets closer, it is moving across a smaller and smaller number of pixels, making the move feel faster.

Speeds vary due to changing the number of pixels being manipulated.
Here’s an example. Starting with the red box, the image contains 90,000 original pixels. As Final Cut zooms in, the number of pixels rapidly reduces to 2,500 original pixels in the blue box.
In terms of actual magnification, the speed is constant. But, in terms of numbers of original pixels in the shot, the speed of the zoom changes as the number of original frames contained in the frame changes.
NOTE: What the zoom also does is increase the size of each original pixel so that the remaining image still fills the frame, even though there are fewer original pixels in the shot. (This is why zooming in makes images look blurry.)
CAN THIS BE FIXED?
Yes. We can manually add acceleration or deceleration to each keyframe to change the speed leaving (“ease out”) or arriving (“ease in”) at a keyframe.
NOTE: The amount of acceleration varies depending upon how far into the image you are zooming, the speed of the zoom, and the number of pixels in the original image.
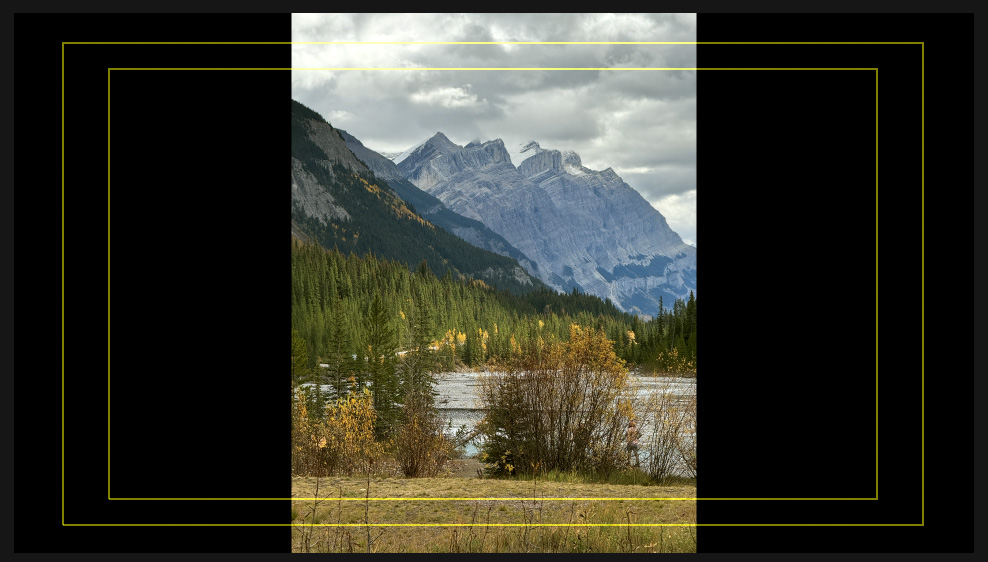
Here’s my source image – a 12 megapixel vertical photo of Mt. Columbia, along the Icefields Parkway near Jasper, Alberta, Canada.
NOTE: Why, yes! This is another photo from my recent Canadian vacation. How kind of you to ask.
I want to start at the bottom of the photo, then move up, over and zoom in.
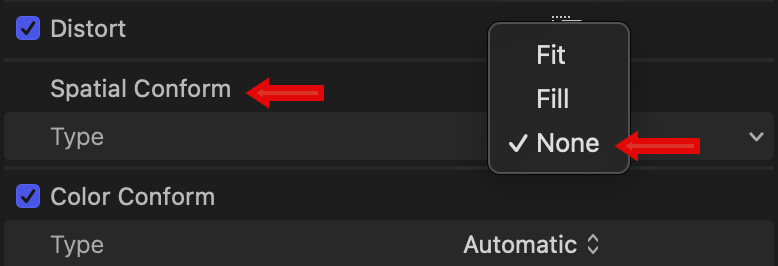
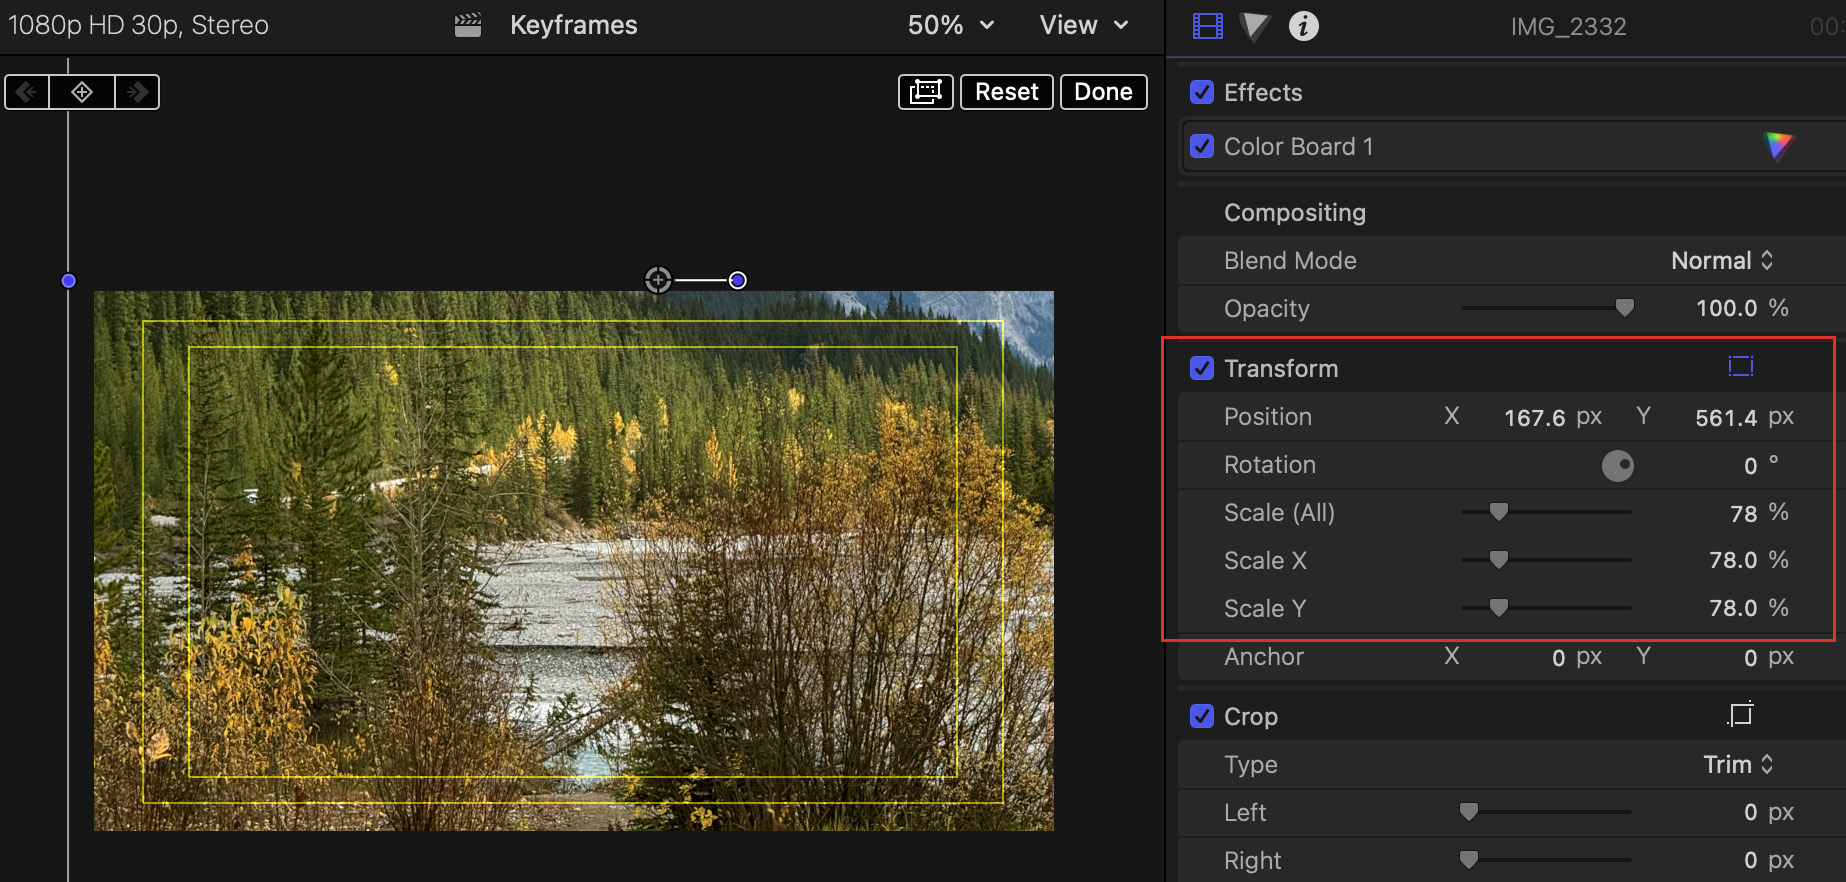
First, select the clip, then set Video Inspector > Spatial Conform to None. This displays the image at full resolution, allowing you to reposition as you see fit.
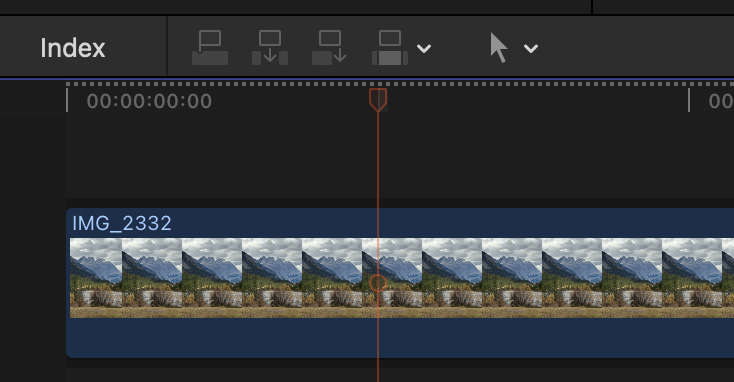
Next, put the timeline playhead on the frame where you want movement to start. This could be the first frame of the clip or any frame thereafter. In this example, I’m starting the movement one second in.
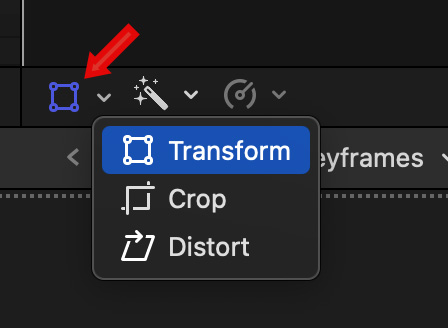
In the lower-left corner of the Viewer, click this icon (red arrow) and choose Transform. This enables the on-screen controls to change the position, rotation and scale of the image; though I generally prefer, with very large images, to use the sliders in Video Inspector > Transform to change scale. It’s just easier.
Click to see larger image.
Using the controls in the Viewer, or the settings in Transform, drag the image into the starting position you want. Notice that Position and Scale settings change as you adjuste the image.
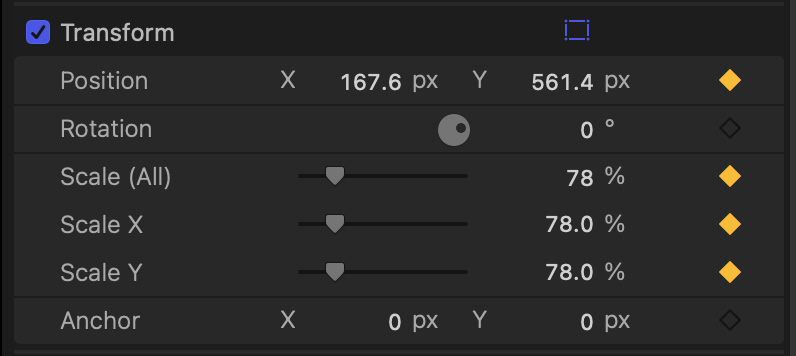
In the Transform section of the Video Inspector, click a dark gray diamond to set keyframes for Position and Scale. (Any other settings were not changed as you repositioned this image.) And, yeah, this dark gray diamond is REALLY hard to see.
DEFINITION: A keyframe is a specific setting of a specific parameter for a specific frame of video. A gold diamond indicates a keyframe exists for that setting on that frame. There is no limit to the number of keyframes you can create in a clip. Almost all parameters can be keyframed.
If you play the clip, you’ll see the entire clip holds at that first position. Why? Because in order to create movement, you need to set at least one more set of keyframes. We always use keyframes in pairs (or more): a starting position and an ending position.
NOTE: If you want movement to change in the middle of a move, you would set additional keyframes on the frame where you want a setting to change.
SIDEBAR: POSITION SETTINGS
Position settings determine the placement of the center of the image within the frame. Position 0,0 places the center of the image at the center of the Viewer. For a 1080 image, positioning the center of the image in the upper left corner of the program monitor would create Position settings of -960,540. For the lower-right corner, Position settings would be 960,-540.
Moving the image up or to the right increases Position settings. Moving down or to the left decreases them. Images larger than the project frame size will have correspondingly larger Position setting values.
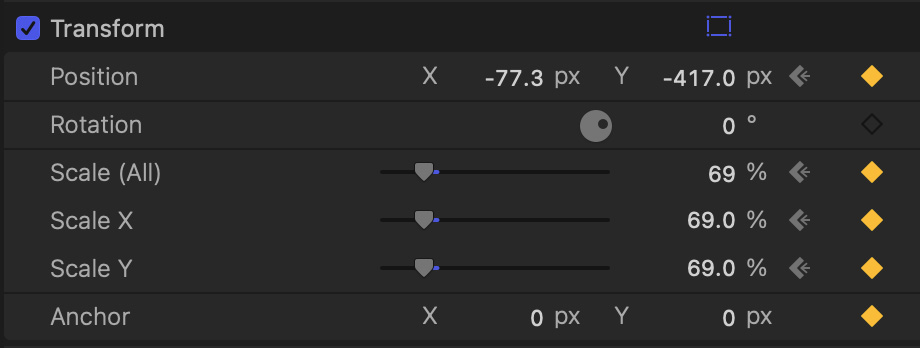
Move the timeline playhead where you want the movement to stop. Then, reposition the clip in the Viewer to show the image you want the movement to end on. Notice, as you do, that both Position and Scale settings change AND new keyframes are automatically created for that frame.
SIDEBAR: MODIFY KEYFRAMES:
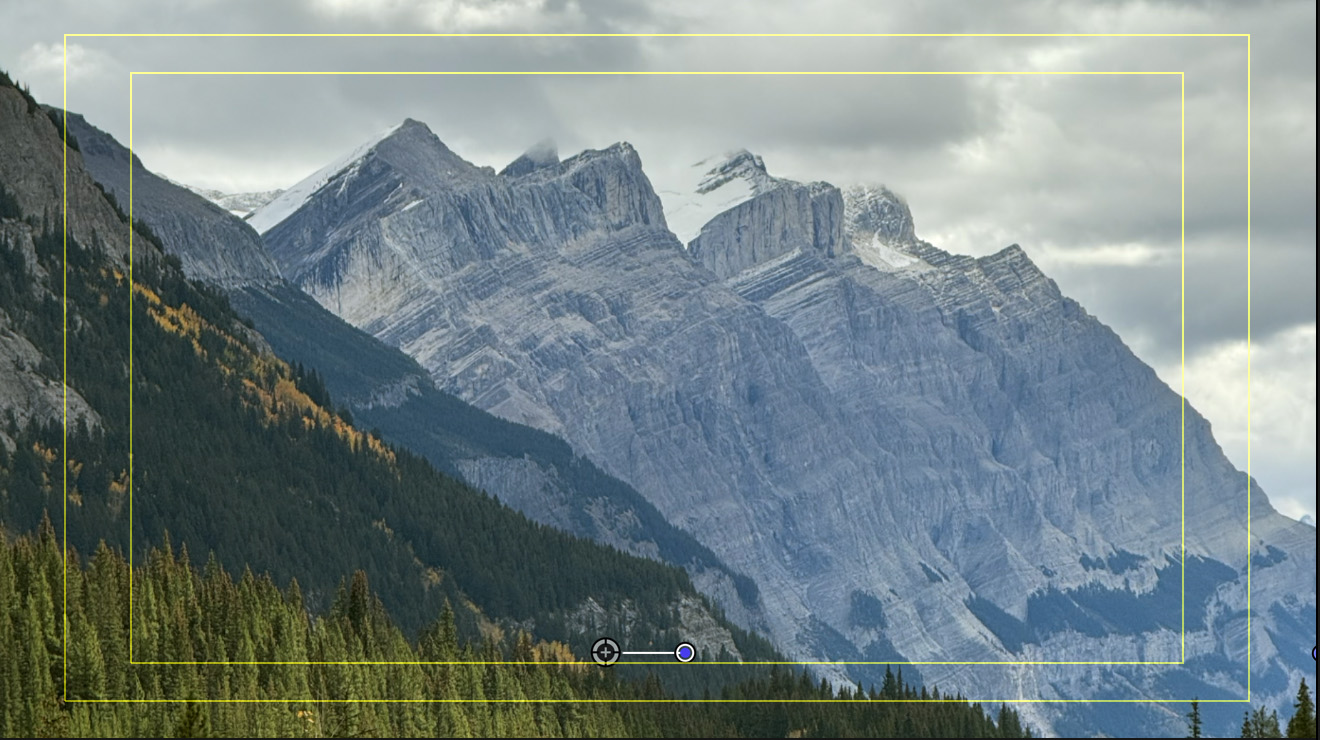
Here’s the ending image.
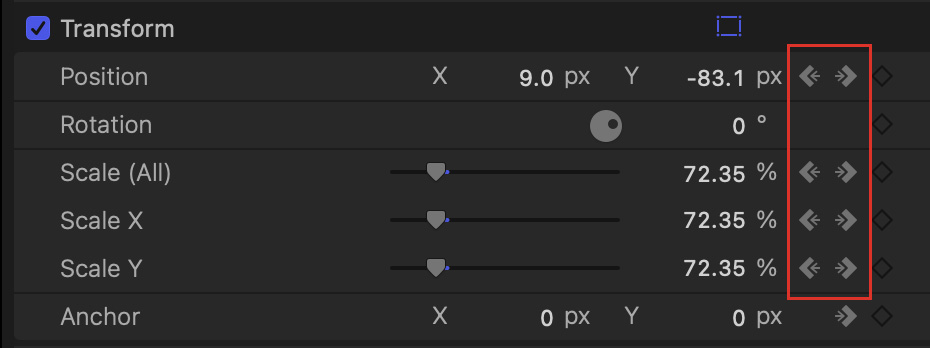
If you want to jump between keyframes, click the left/right arrows just to the left of the keyframe diamonds.
Play the clip and watch the movement. The speed of the move is determined by the time between keyframes.
Hmm. This move is too slow… or fast. Whatever.
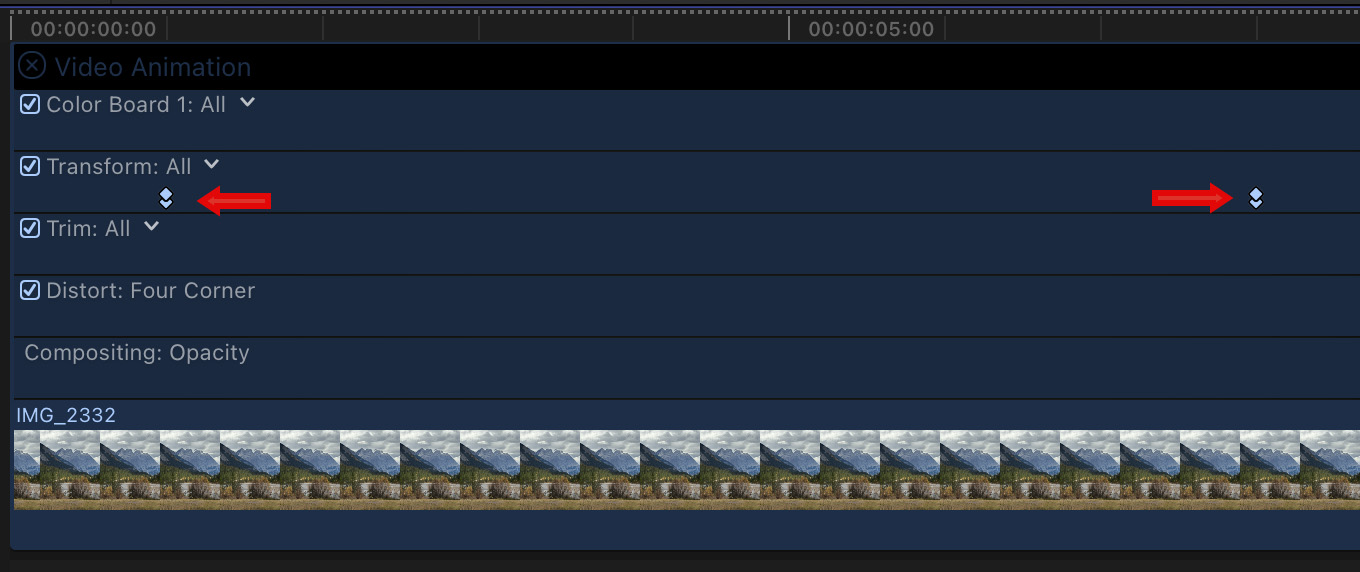
To quickly change the position of any keyframe, select the Timeline clip and type Control + V. (Or, choose Clip > Show Video Animation.) The red arrows indicate keyframes for the starting and ending position and scale values.
NOTE: This thingy above the clip is called the “Video Animation Bar.”
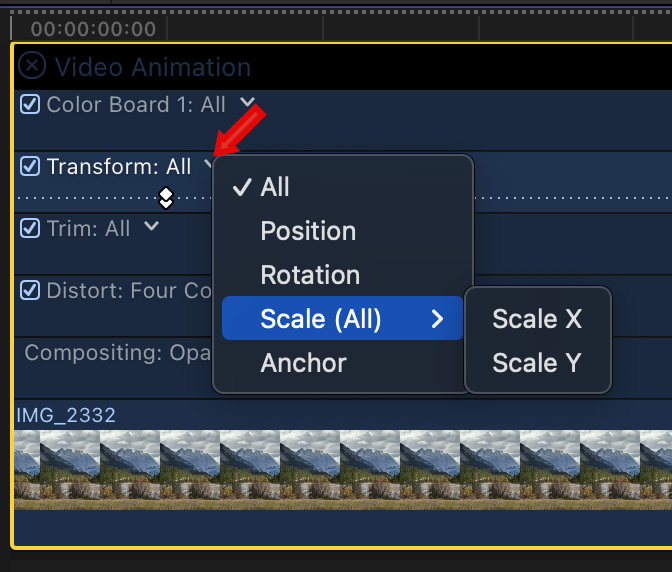
If you just want to change just one parameter, click the down-pointing chevron (red arrow) and select the setting you want to change.
To hide the Video Animation Bar, type Control + V again.
CHANGE ACCELERATION
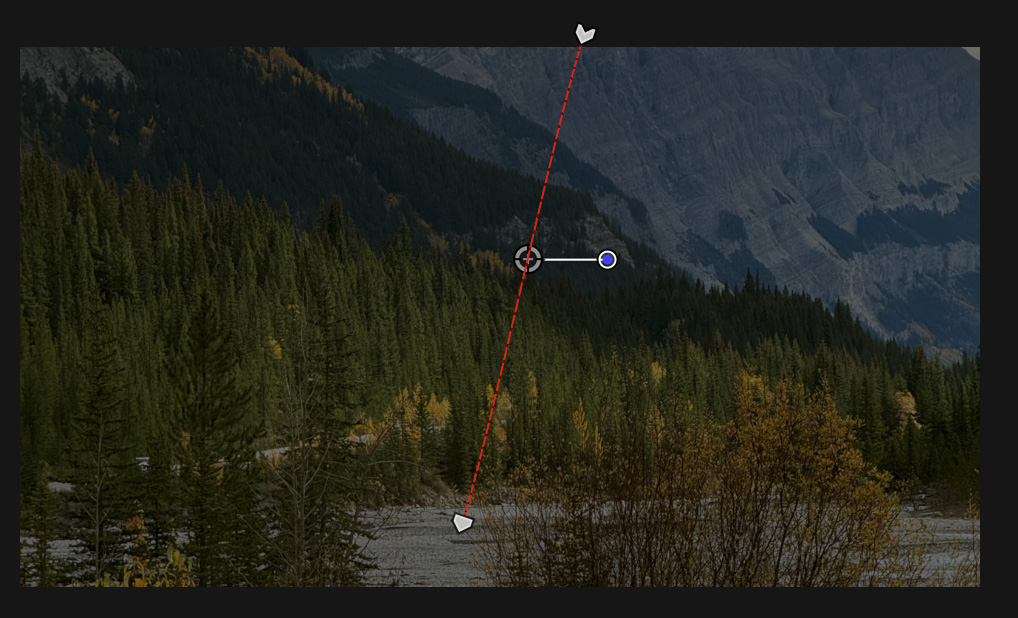
Select the timeline clip and look at the Viewer. The red line indicates the path of the animation. The chevron at the top shows the starting point. (This will move based upon your image and animation.) The bottom icon, that looks like home plate in baseball, is the ending position.
NOTE: I darkened the image to make the path and keyframes easier to see.
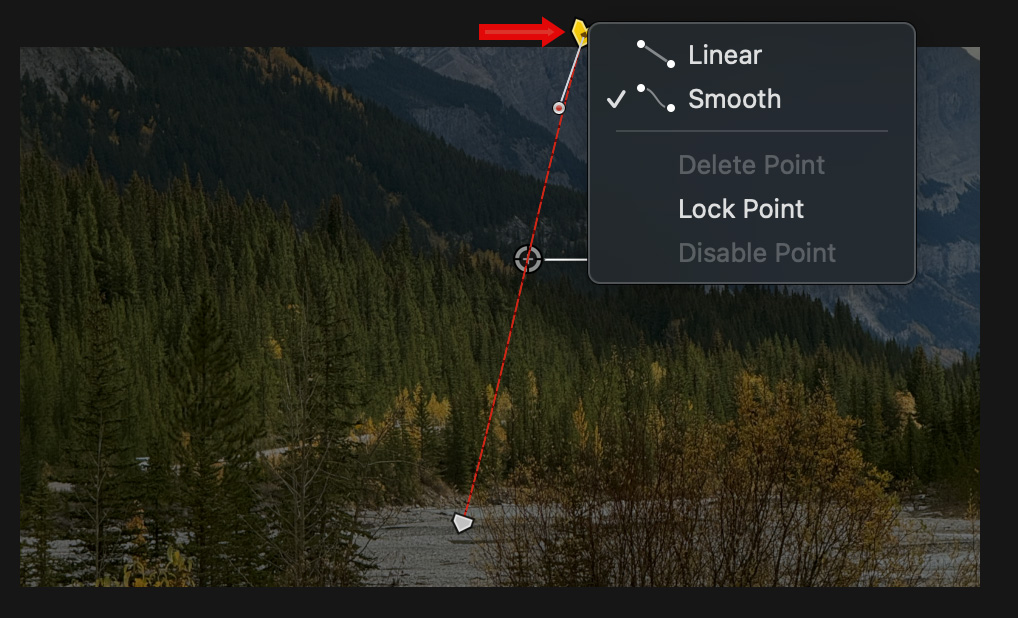
Right click either keyframe icon. Linear removes all acceleration for that keyframe. Smooth allows changing acceleration and the shape of the curve. Lock Point prevents any changes to that keyframe.
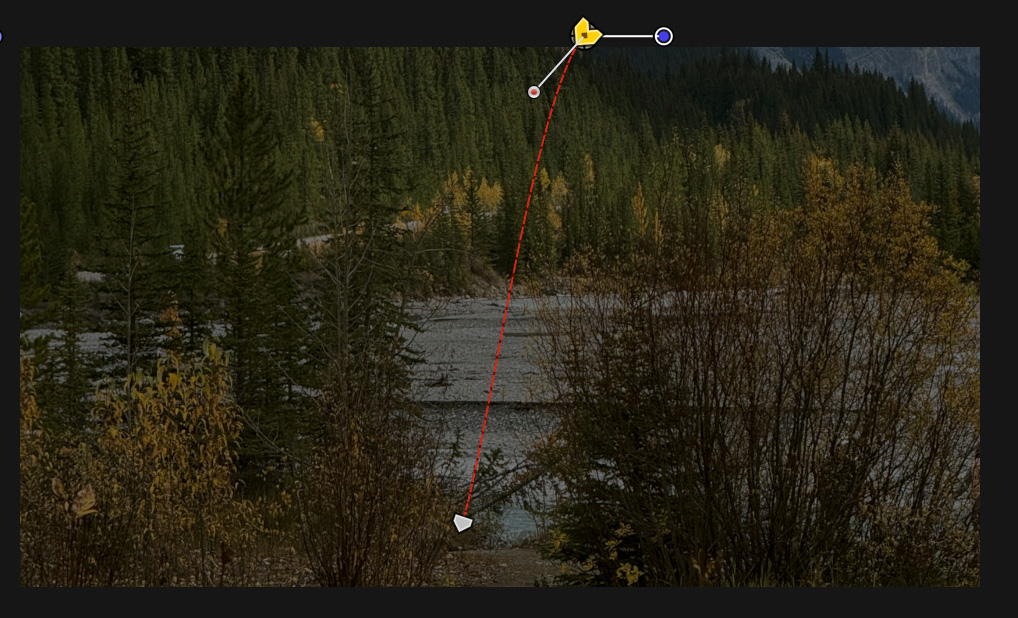
To change acceleration, or the curve of the red line, drag the white control dot (top). The longer the white control line, the greater the acceleration out of the keyframe (“ease out”).
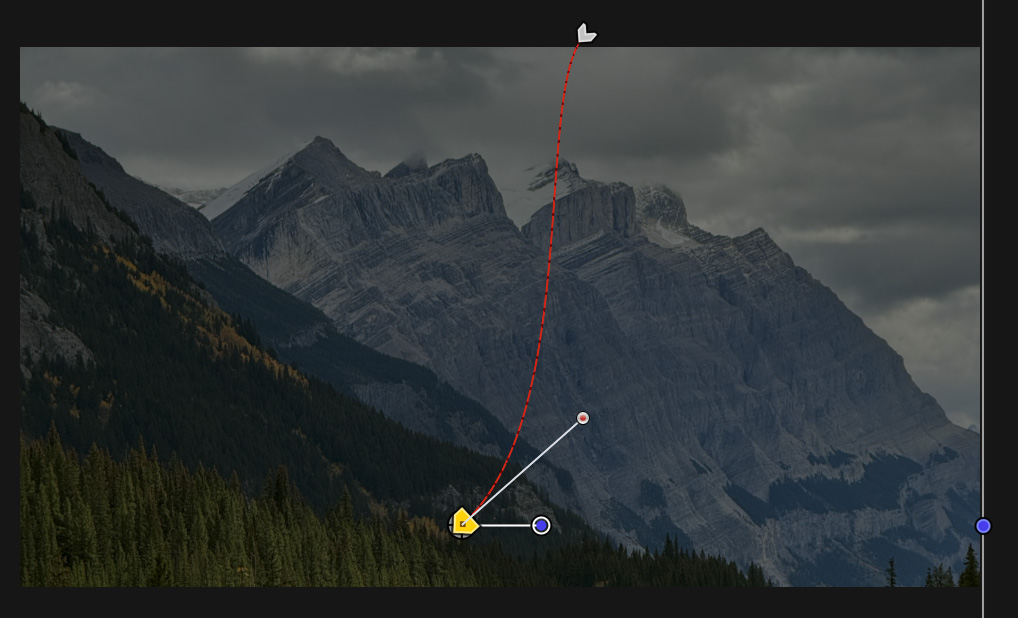
Click the ending keyframe to adjust it as well (“ease in”).
You can make these curves as straight or twisty as you like. Remember, to remove all acceleration, set the keyframe to linear.
SUMMARY
When doing moves on images it is important to have images larger than the frame size of your video. Otherwise, as you zoom in, the image will start to look blurry.
While there is no exact suggested image size, I generally recommend 2-3X the frame size as a general guideline. Experiment to see what image sizes work best for your projects. The closer you zoom in, the larger your source image needs to be.
