
![]() A couple of months ago, as I was editing dozens of video interviews from the 2025 NAB Show in Las Vegas, I discovered a strange quirk about batch exports in Resolve that was not what I expected. In fact, it cost me time. I wrote it up at the time, but it got lost when our server melted down.
A couple of months ago, as I was editing dozens of video interviews from the 2025 NAB Show in Las Vegas, I discovered a strange quirk about batch exports in Resolve that was not what I expected. In fact, it cost me time. I wrote it up at the time, but it got lost when our server melted down.
So, here it is again.
One of the benefits of the Deliver page in Resolve is that you can queue multiple projects for export, but delay exporting them until you have more time. This allows you to keep your focus on editing, then output when there’s a break in the action.
This works fine as long as you are editing multiple timelines in the same project. It does not work if you are editing multiple versions of the same timeline.
Let me illustrate.
Let’s pretend we are editing a project that has three different versions. When I first discovered this, I needed three different ending slides for the same interview. Another common example is a project with titles or voice over in three different languages, say English, Spanish and French.
While we COULD create three different timelines, you and I both know how hard it is to create three different timelines of the same thing and keep them all in sync as different ideas occur to you. Syncing multiple timelines of the same thing is an exercise in frustration.
It is much better to create a single timeline containing all the elements, then enable or disable the elements you don’t need for that particular export.
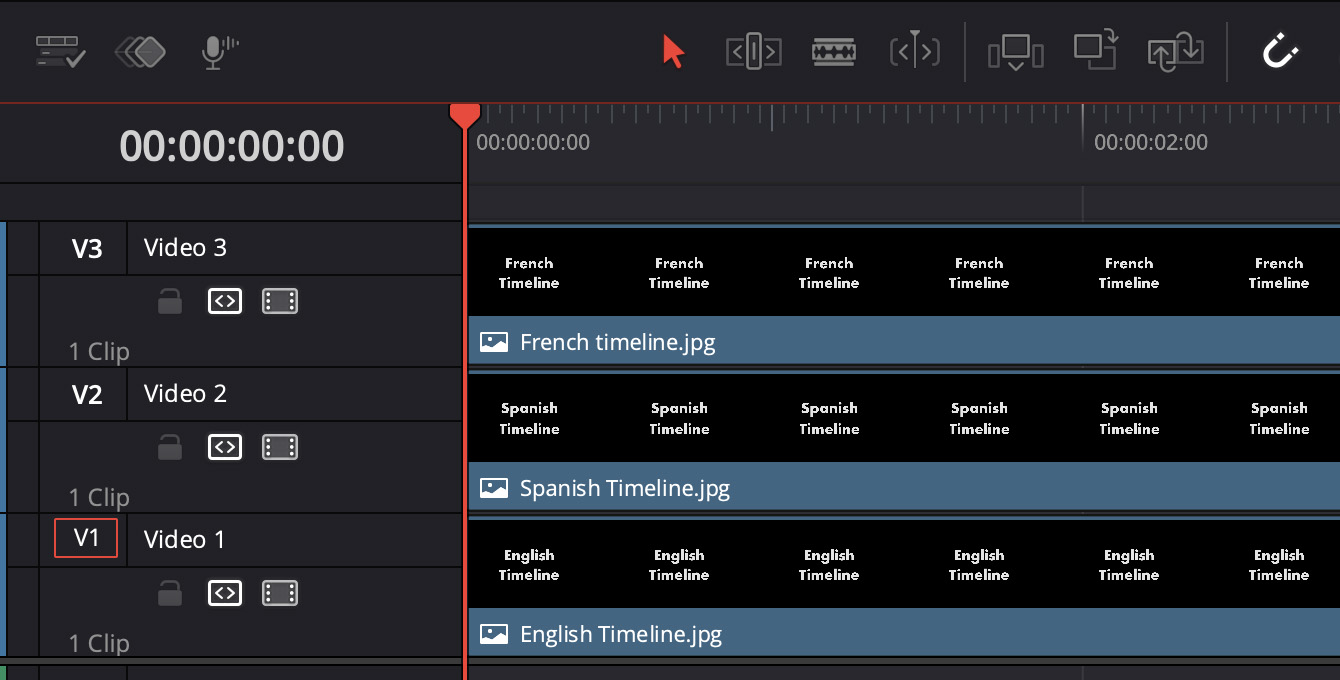
Here’s the simplest possible example. I have a project that consists of three layers. The bottom layer is English, the middle layer is Spanish, and the top layer is French. (You may freely substitute any variation that appeals to you.)
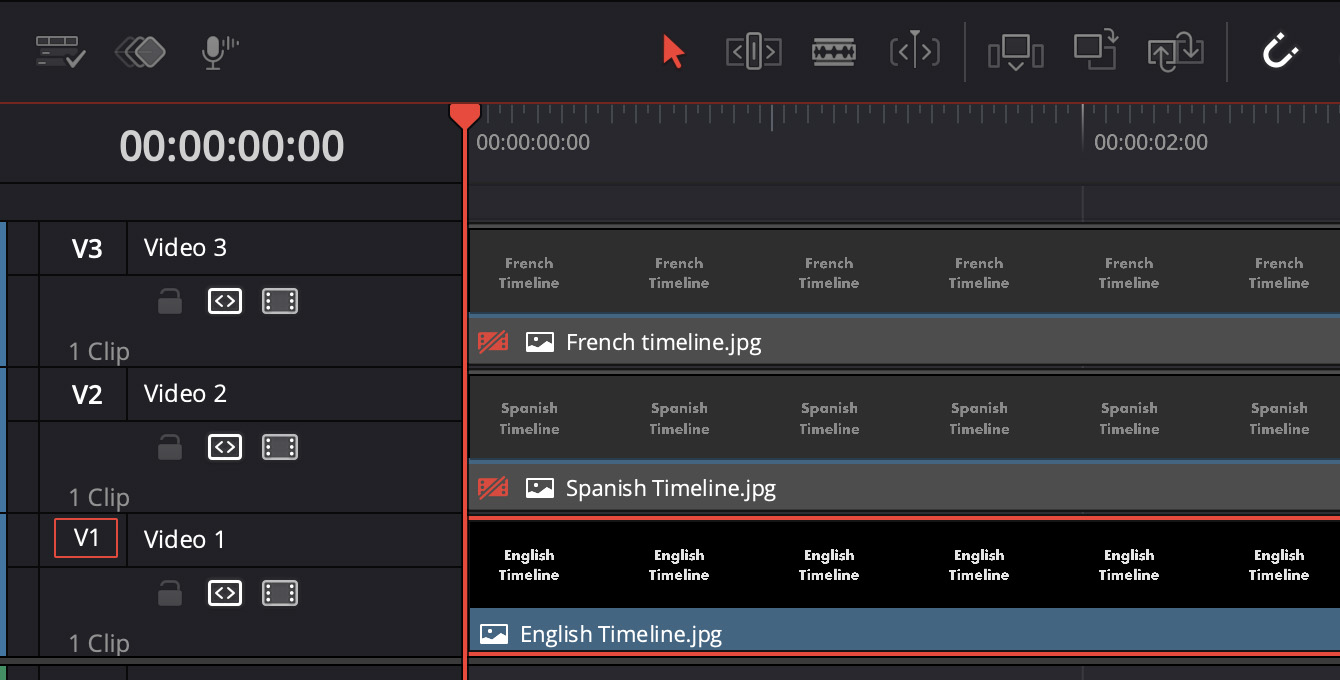
Let’s continue pretending that the project is ready for export. I turn off the languages I don’t need in the Edit (or Cut) page (shortcut: D).
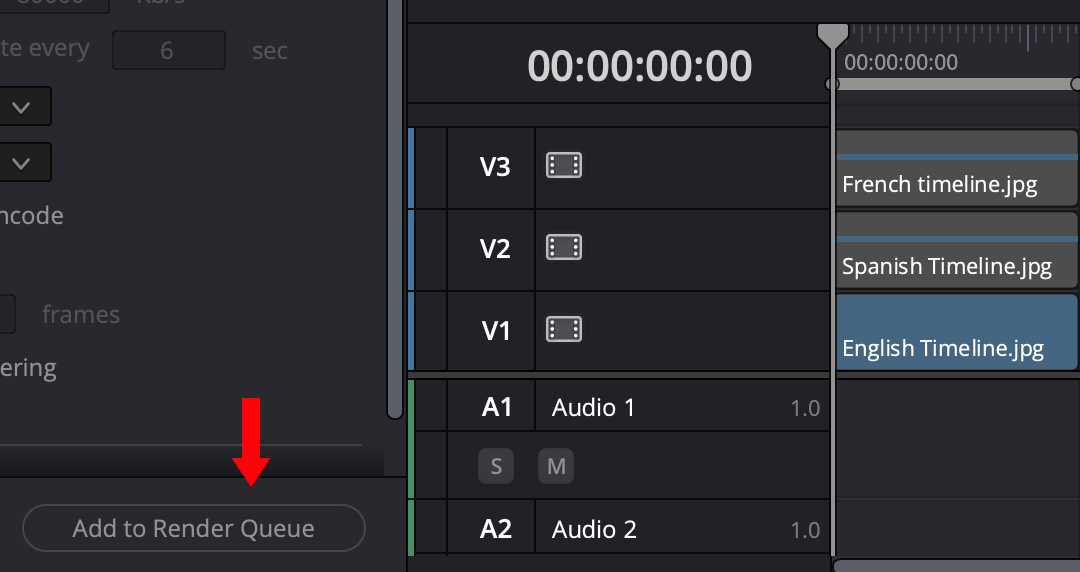
Go to the Deliver page, configure my export settings, then click Add to Render Queue. (In Resolve-speak, “render” means “export.”)
Go back to the Edit (or Cut) page and repeat for the other variations of the same timeline; in my case, Spanish and French.
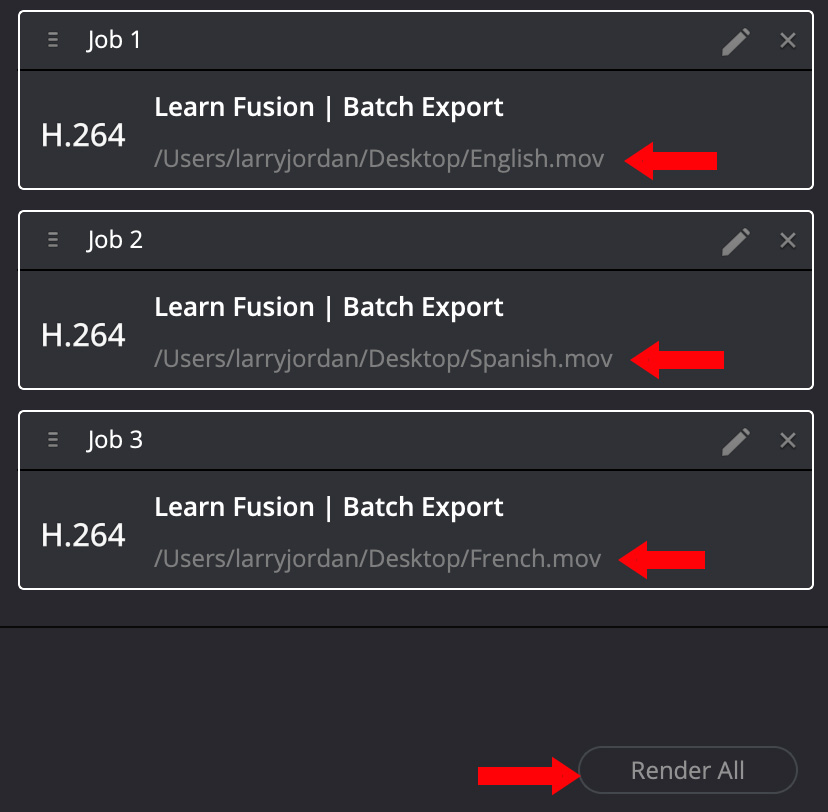
Select all the exports in the Render Queue by Shift– or Cmd-clicking the export name.
Then, click the Render All button.

All three versions used the settings from the last version. Click to see large file.
The problem appears when rendering is done. Though you exported three movies, they all have the content of the current version of the timeline!
DRAT!
Why? Because Resolve is not aware that the timeline changed. It always looks to the current version, even if the project was queued a while ago, and exports that.
So, if you are creating multiple versions of the same timeline – as I was – you can not use Batch Export because the latest version of the timeline will be used for ALL queued versions.
ADDITIONAL COMMENT
This behavior in Resolve is different from Apple Final Cut Pro. Final Cut exports an XML version of each project as a temporary file, then exports the final video from that XML file. This means you can immediately start changing the source timeline without affecting the project being exported.
This is a MUCH better way to handle batch exports because you always get the project you expect.

6 Responses to Caution: Batch Export in DaVinci Resolve 20 May Cause Problems
While what you’re saying is true. I disagree with your logic. I have been a professional producer/editor for close to 45 years. I started in non-linear systems when Avid was only 30 fields/ sec. Worked on Media 100’s etc. My work flow is always to have a separate timeline for variations. For me, it avoids confusion and makes subtle changes much easier. My workflow is to lock in the main edit. Get approval, and then do variations on separate timelines. For me it’s cleaner, more efficient, and much less confusing.
Alan:
This is a totally appropriate workflow and it perfectly works around the issue with batch exports in Resolve.
In my case, I had over 60 interviews to cut in about a week. The sheer number of separate timelines that would create felt overwhelming. Once I discovered this batch export behavior, either separate exports or multiple timelines became the only answer.
Thanks for writing.
Larry
if I remember correctly the mute/disable tracks on the AVID timeline is for monitoring only
if for example you edit with muted clean effects track (used to remove unwanted coms etc) when you export you must remember to ( copy timeline first for aseparate M&E version , unless using direct out) delete the (muted) tracks you dont want ( on A12 stereo output, or take them all to zero level ) or youll end up with more effects than you wanted on the stereo output, ( and hope their in phase!) despite being muted in your edit suite monitoring.
Steve:
Interesting. I don’t know Avid, so I don’t know if this has changed.
However, with Resolve (and FCP and Premiere), disabling a video track or muting an audio track prevents it from exporting. No new timeline needed.
Larry
I’m fine with the NLE doing either method. But it should be made OBVIOUS that this is what it will do.
Perhaps it’s because I’m a longtime (v1.0) FCP user, but to me it seems that the state of the project when you save it to export is the state that will export no matter what. At the least the NLE should offer you the option at export to export the current version or the state when tagged to export. That seems to me to make the most sense.
Logic X has a good versioning solution, and it easily allows you to save versions along the way. But as long as you handle your naming conventions well, in FCP or Resolve, you can save multiple versions as you go for various purposes and still tell a year later what it was.
Rick:
I agree with you. When I see the words “Batch Export,” I think that whatever I send to export WILL export, regardless of when I click render.
At a minimum, Resolve should warn us that if we queue the same timeline into the batch, the earlier version will be over-written with the new version.
Larry