
![]() [UPDATE – April 26, 2025. When I first wrote this, I missed two key steps. I also learned there’s a much easier way to do this. I updated this article throughout.]
[UPDATE – April 26, 2025. When I first wrote this, I missed two key steps. I also learned there’s a much easier way to do this. I updated this article throughout.]
To better learn DaVinci Resolve, I decided to edit my recent NAB Show interviews in the application. The challenge I now faced was that, once I finished the horizontal version of an interview, I needed to create a vertical version for some social media posts.
This, I discovered, is extremely easy, but not obvious.
NOTE: While you can easily convert a completed (exported) movie from horizontal to vertical, if you want to use automatic re-framing, you need to work with a timeline that consists of individual clips.
THE SHORT VERSION
While you can manually reframe a shot once the automatic reframing is done, for most talking heads, you won’t have to.
NOTE: Keep in mind that, after conversion, all titles and graphics will need to be redesigned for the new aspect ratio.
THE DETAILS
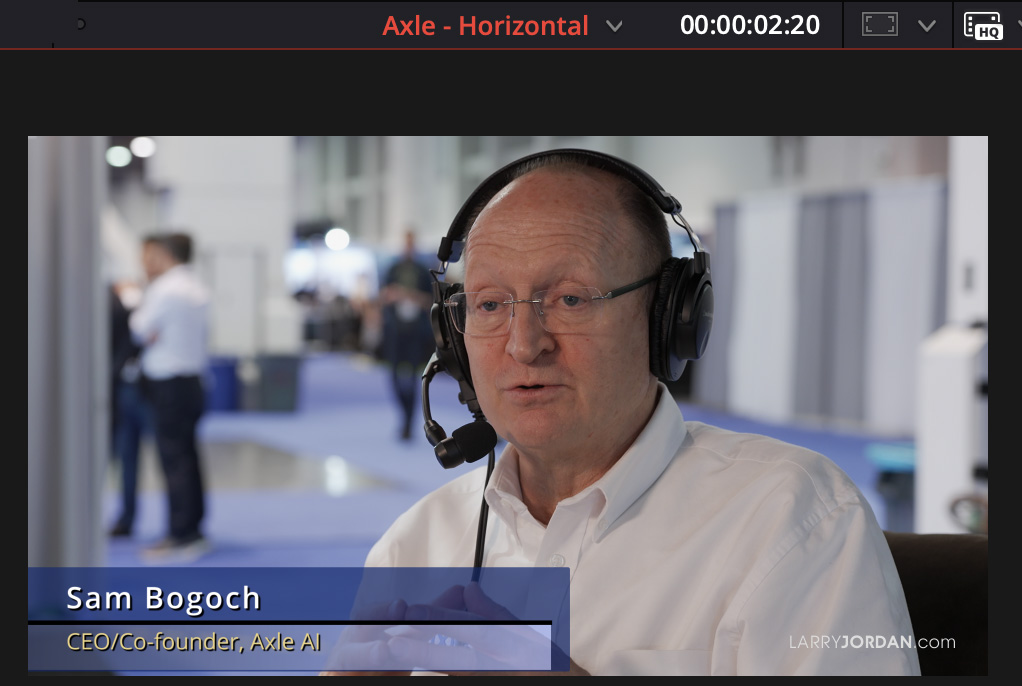
Sam Bogoch was interviewed at the 2025 NAB Show in Las Vegas.
Here’s my horizontal project. Note that this has a title and watermark.
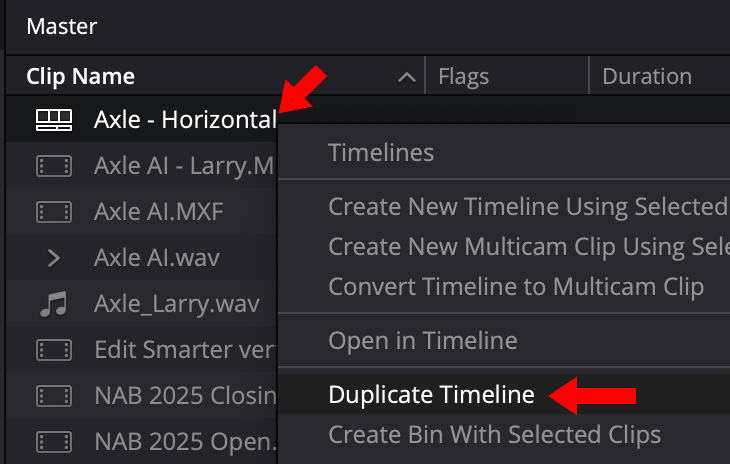
To change the aspect ratio, right-click the timeline name in the media pool and select Duplicate Timeline.
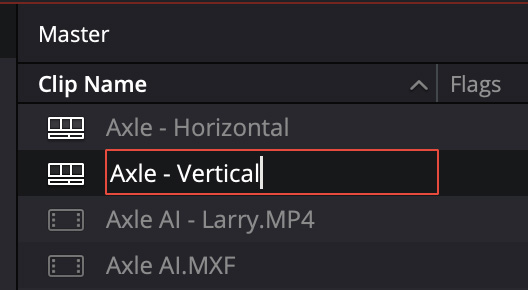
NOTE: It isn’t required, but, to maintain your sanity, rename the timeline into something obvious.
This next step is CRITICAL. If you change the timeline format using Project Settings, EVERY timeline in your project will change.
This is considered, um, sub-optimal.
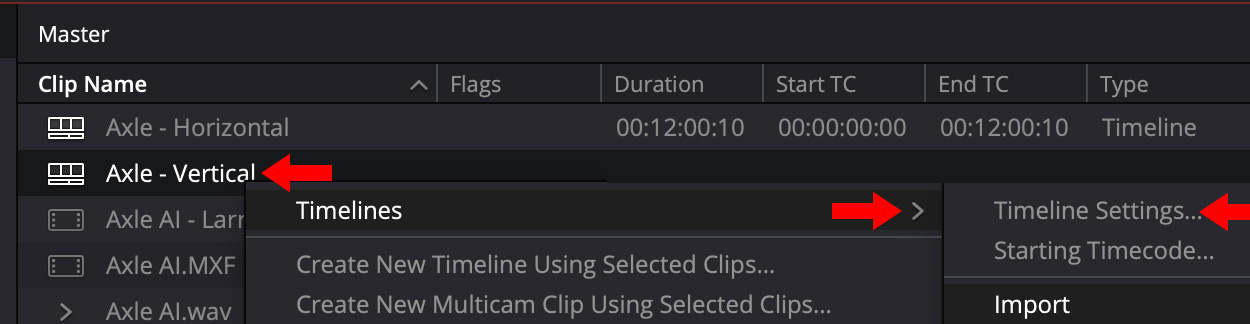
Instead, right-click the duplicated timeline name and select Timelines > Timeline Settings.
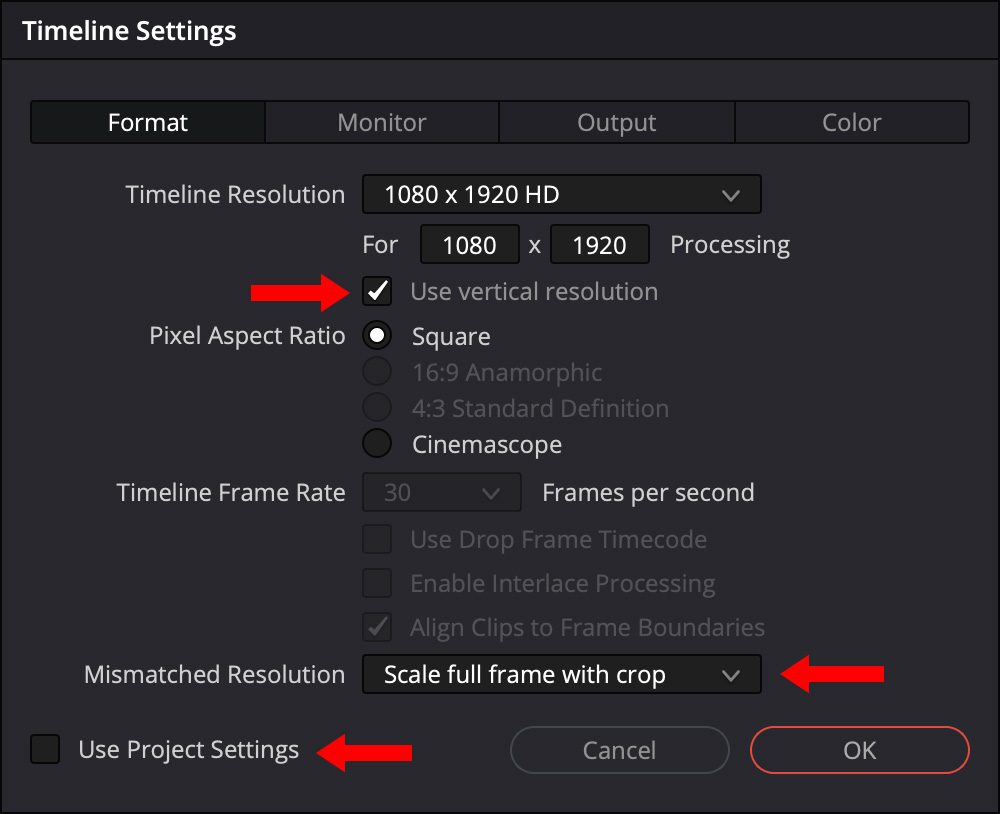
In this dialog:
Click to see larger image.
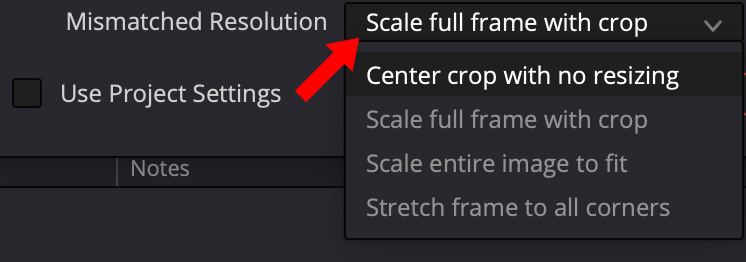
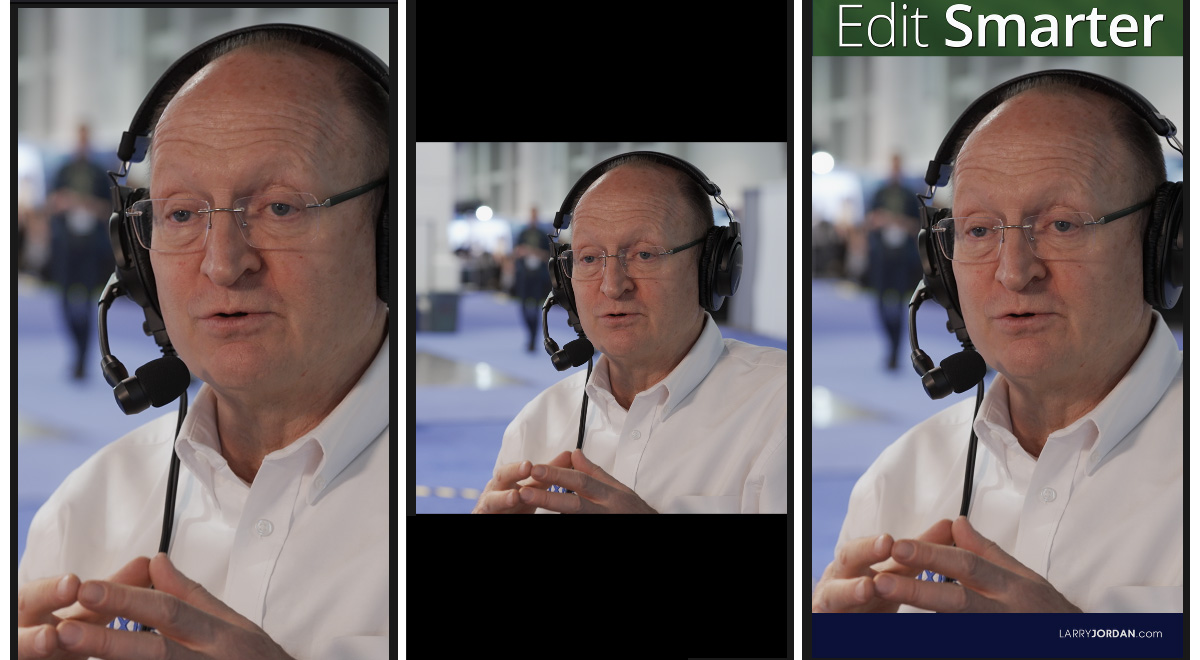
To illustrate the results of this menu, the left image shows Scale full frame with crop, the middle illustrates Center crop with no resizing, and the right image is manually scaled to 150% with background added.
The center image will be the most “in focus,” the left image will be the blurriest, while the right image is a compromise between the two.
For most vertical videos, selecting Scale full frame with crop will be the best choice. (It’s also the default setting.)
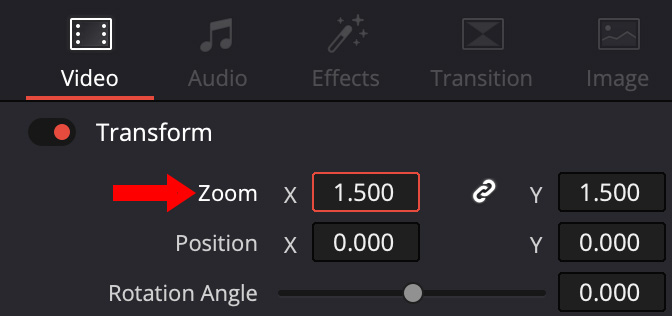
NOTE: To manually scale clips, select one or more clips in the timeline, scale it using Transform > Scale to the size you want.
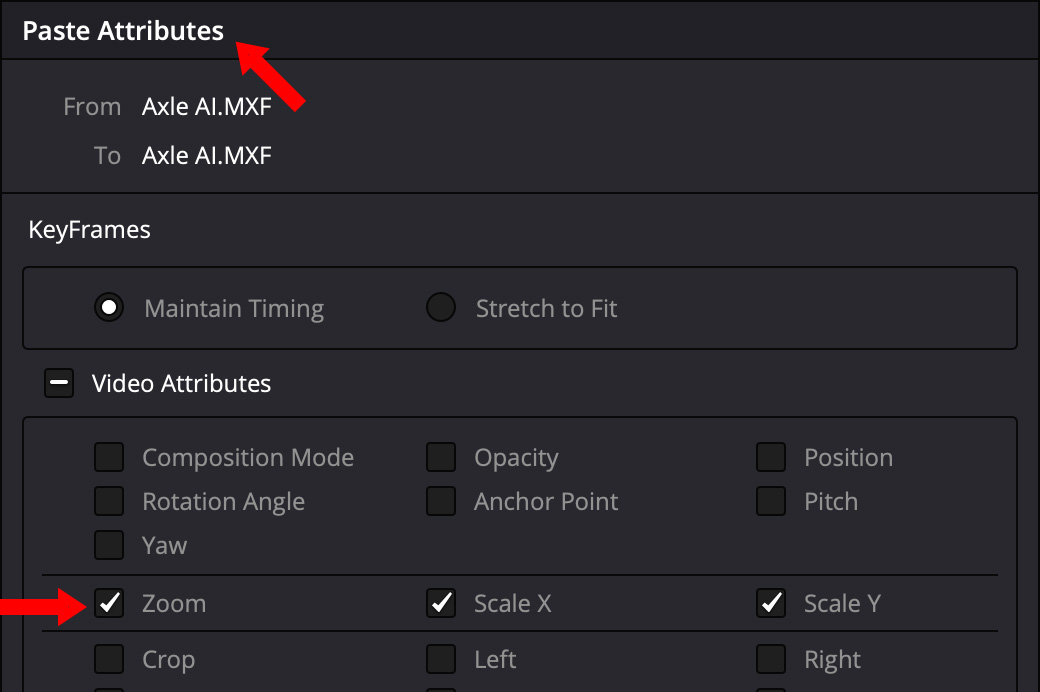
For manually scaled clips, use Edit > Copy (shortcut: Cmd + C) and Edit > Paste Attributes > Zoom to apply that setting to all selected clips.
There’s no perfect answer. Most folks will use the full frame option. Personally, I like scaling to 150%, then putting a dark blue background behind the image to allow room logos and titles outside the image.
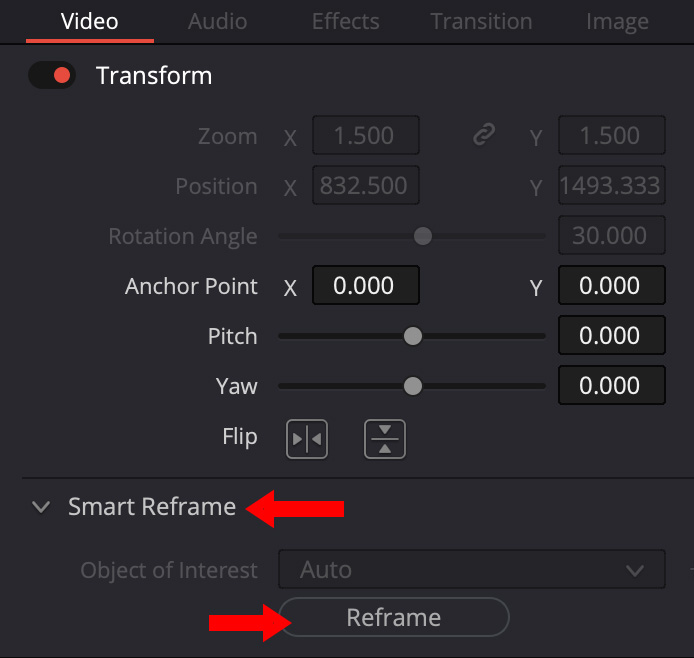
While changing the aspect ratio instantly creates a vertical format, most clips will need to be repositioned. While you can do this manually using the Position settings, there is a MUCH! better way: Smart Reframe. This is located immediately below Inspector > Video > Transform.
Select all your video clips, then click the Reframe button.
This uses AI-technology to adjust the horizontal position of each clip for maximum benefit. Best of all, these settings can be manually tweaked if needed.
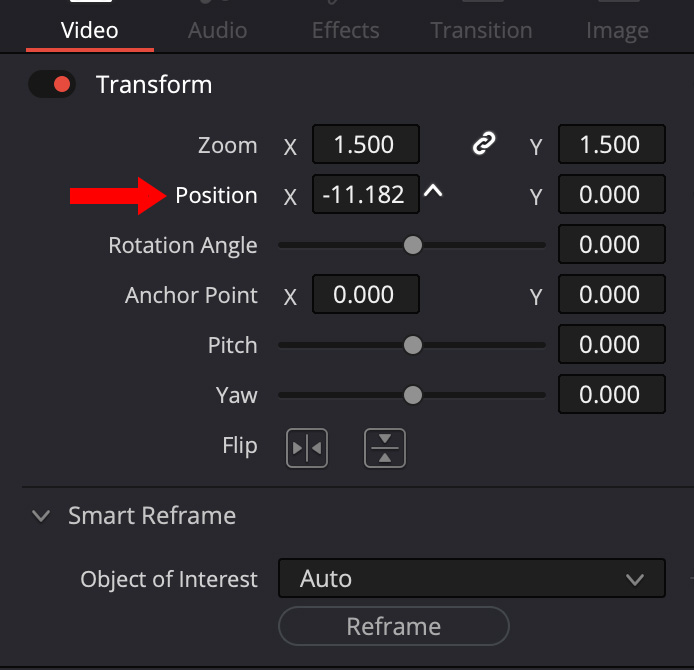
To manually adjust the horizontal position of a clip, select the clip and manually adjust Transform > Position > X until you are happy.
SUMMARY
This is a very efficient process that yields great results. Yes, I still need to convert all graphics and titles, but, if all you are doing is pulling short talking-head clips for social media, you won’t be using traditional titles in the first place.

One Response to Smart Reframe: Create Vertical Video from a Horizontal Timeline in DaVinci Resolve 19 [u]
in my opinion Smart Reframe will work best and smart…Thank you Larry.